Introduction
This manual provides essential information for the proper installation, operation, and maintenance of your Metra Installbay E-DLA Economy Door Lock Actuator. This device is designed to convert an electrical signal into mechanical movement, enabling remote locking and unlocking of vehicle doors. Please read these instructions carefully before proceeding with installation or use.
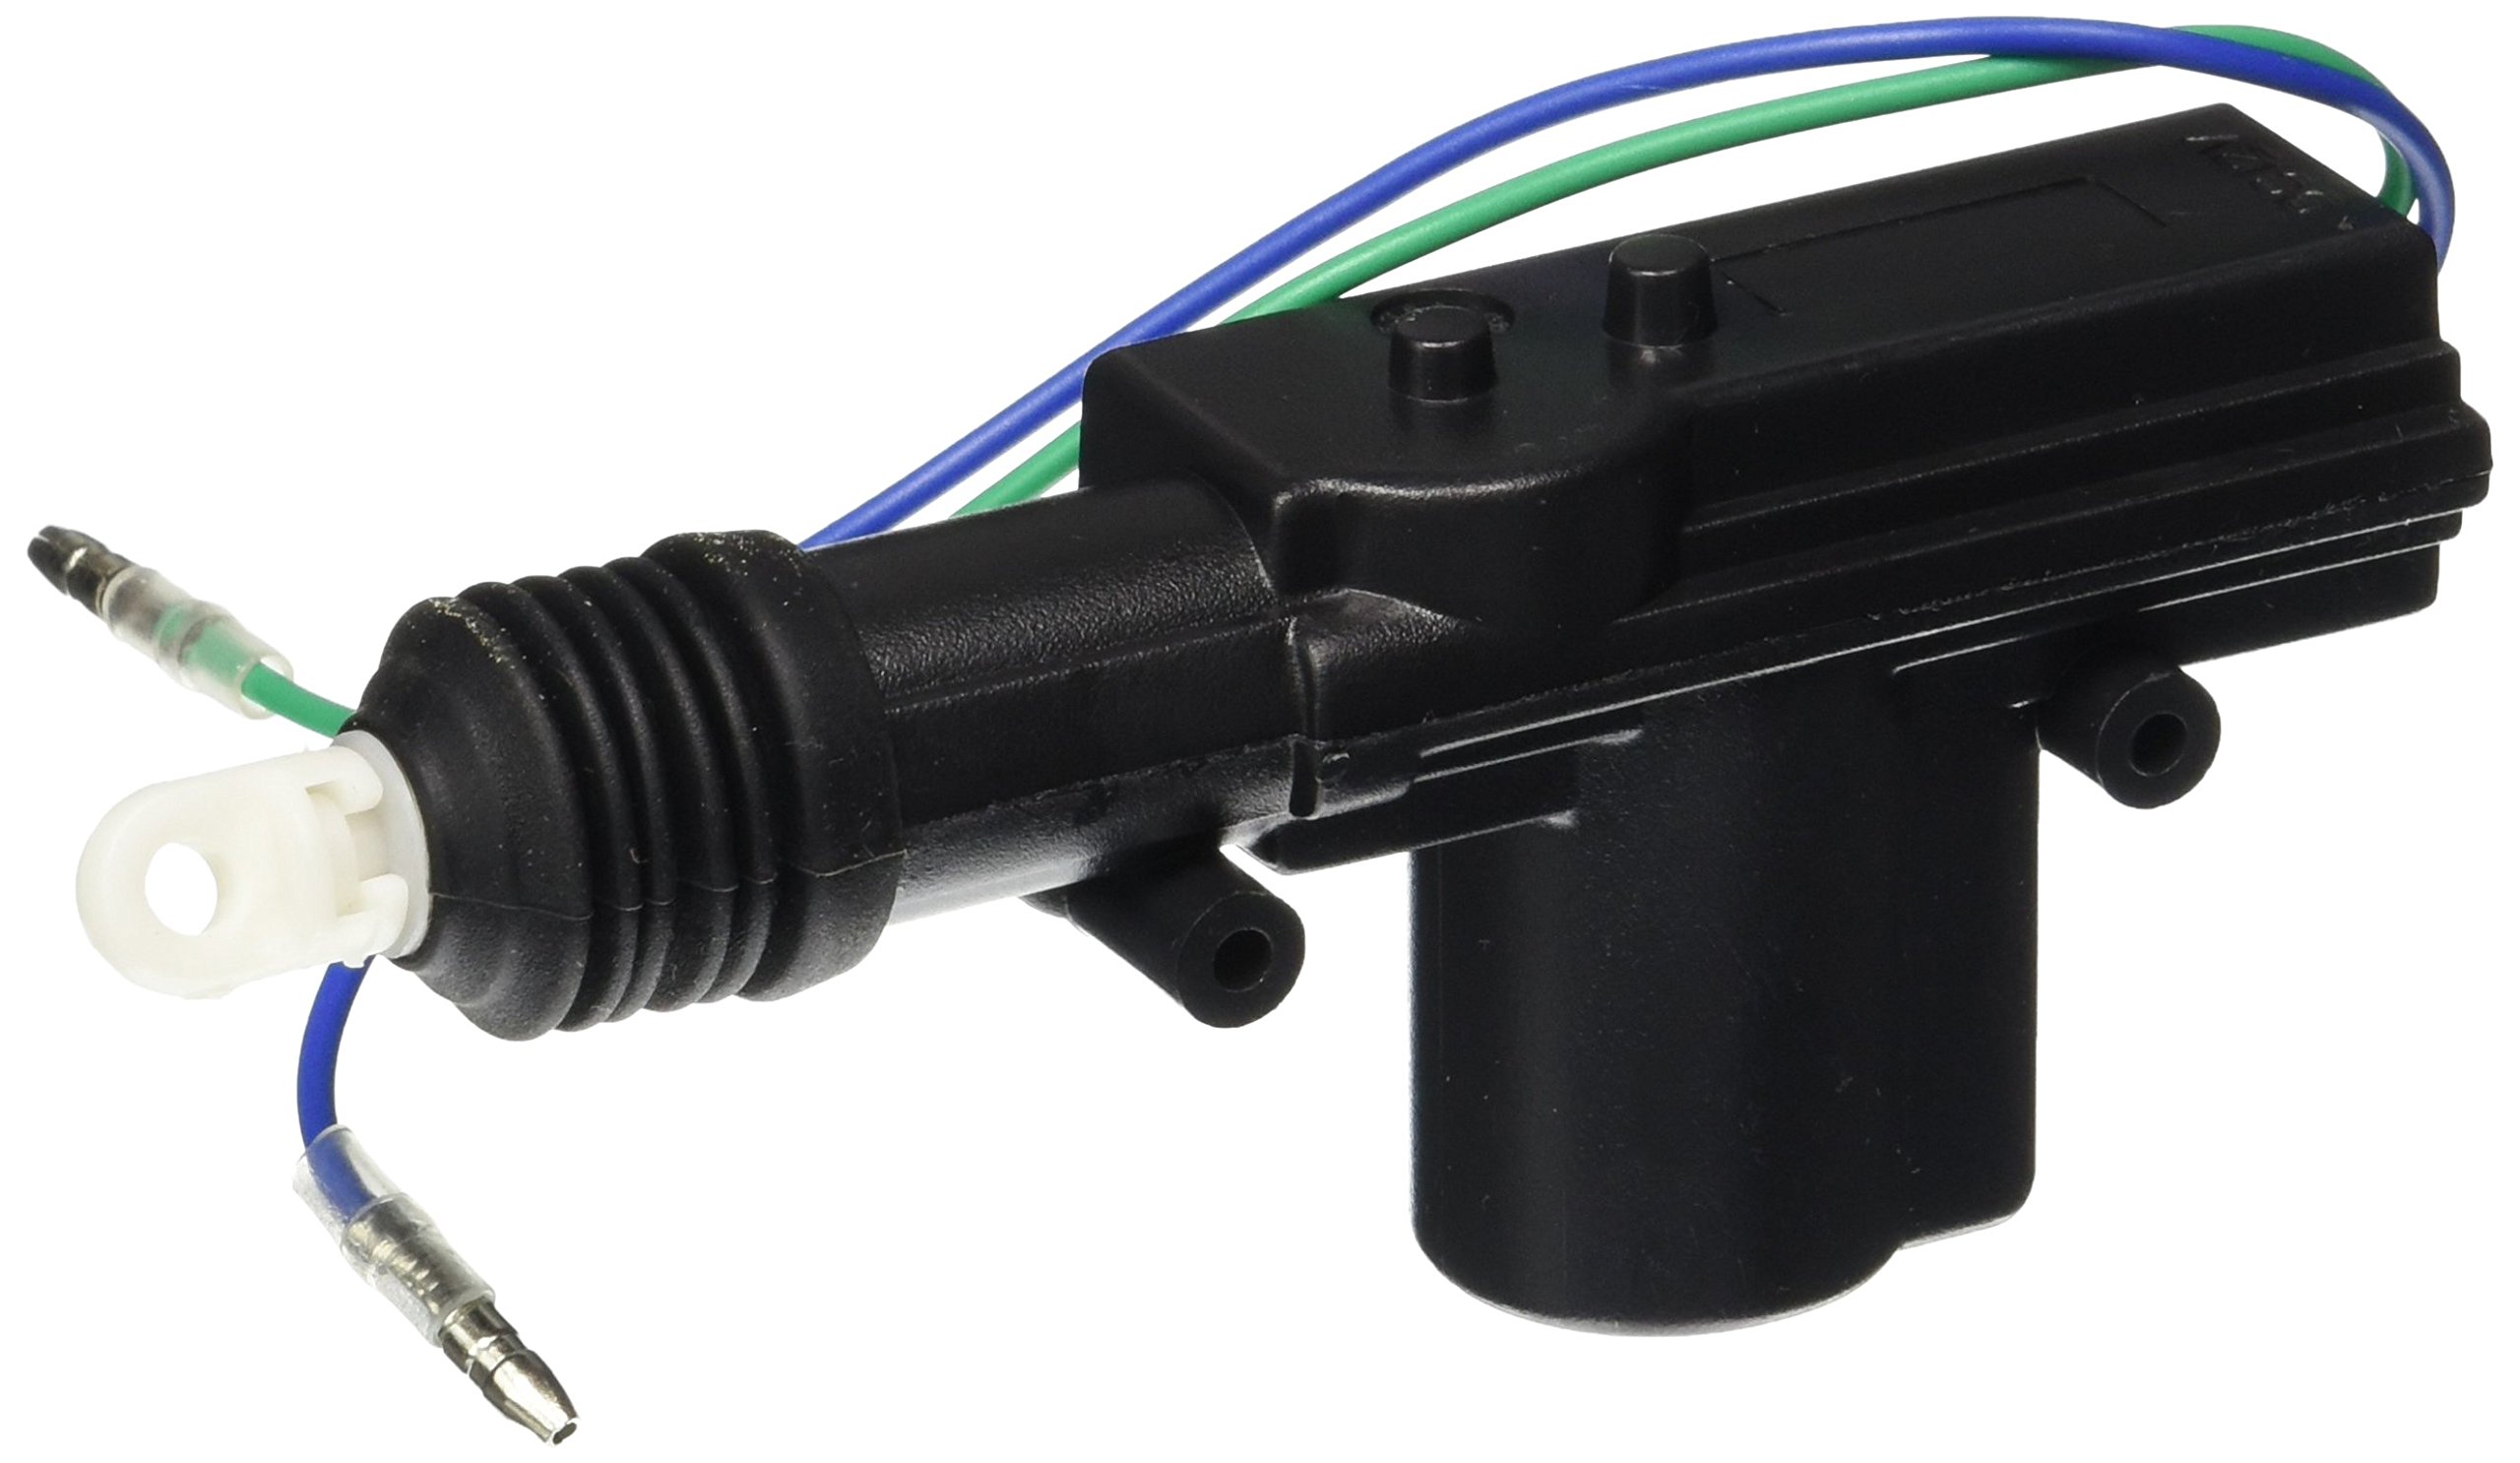
Figure 1: Metra Installbay E-DLA Economy Door Lock Actuator. This image displays the compact, rectangular black unit, which is the core component for converting electrical signals into mechanical door locking/unlocking actions.
Setup and Installation
Proper installation is crucial for the reliable operation of the door lock actuator. It is highly recommended that installation be performed by a qualified automotive technician.
- Preparation: Ensure the vehicle's battery is disconnected before beginning any electrical work. Gather all necessary tools, including wire strippers, crimpers, electrical tape, and mounting hardware.
- Identify Mounting Location: Determine a suitable location within the vehicle door panel that allows for free movement of the actuator rod and does not interfere with window mechanisms or other door components.
- Mount the Actuator: Securely mount the E-DLA actuator using appropriate screws or brackets. Ensure it is firmly attached to prevent vibration and ensure consistent operation.
- Connect to Door Lock Mechanism: Attach the actuator rod to the vehicle's existing door lock linkage. Adjust the rod length and position to ensure smooth and full travel for both lock and unlock positions.
- Wiring: Connect the actuator's wires to the vehicle's central locking system or alarm system output as per the wiring diagram provided with your specific vehicle or alarm system. Ensure all connections are secure and properly insulated to prevent short circuits.
- Testing: Reconnect the vehicle battery. Test the actuator's function by activating the lock/unlock command. Verify that the door locks and unlocks completely and smoothly.
- Reassemble: Once tested and confirmed operational, carefully reassemble the door panel.
Operating Instructions
The Metra Installbay E-DLA Economy Door Lock Actuator operates in conjunction with your vehicle's existing central locking system or an aftermarket alarm/keyless entry system. When an electrical signal is sent to the actuator, it mechanically moves the door lock linkage to either the locked or unlocked position.
- Locking: Activating the lock function (e.g., via remote, key, or interior switch) sends a signal to the actuator, causing it to move the door lock mechanism to the locked state.
- Unlocking: Activating the unlock function sends a signal to the actuator, causing it to move the door lock mechanism to the unlocked state.
Ensure that the door is properly closed before attempting to lock or unlock to prevent damage to the mechanism.
Maintenance
The Metra Installbay E-DLA Economy Door Lock Actuator is designed for long-term, maintenance-free operation. However, periodic checks can help ensure its longevity and performance.
- Visual Inspection: Periodically inspect the actuator and its connections for any signs of wear, corrosion, or loose wiring.
- Cleanliness: Keep the area around the actuator free from excessive dust or debris, which could impede its movement.
- Lubrication: The internal components are pre-lubricated. Avoid applying external lubricants unless specifically recommended by a professional, as this could attract dirt.
Troubleshooting
If you experience issues with your door lock actuator, consider the following troubleshooting steps:
- Actuator Not Responding:
- Check all electrical connections for looseness or corrosion.
- Verify that the power supply to the actuator is correct and consistent.
- Ensure the central locking or alarm system is functioning correctly and sending the appropriate signals.
- Actuator Moves Partially or Stiffly:
- Inspect the mechanical linkage between the actuator and the door lock mechanism for obstructions or misalignment.
- Ensure the actuator is securely mounted and not binding against any part of the door.
- Check for any physical damage to the actuator itself.
- Noise During Operation:
- A slight operational hum is normal. Excessive or grinding noises may indicate a mechanical obstruction or a faulty unit.
- Re-check mounting and linkage for proper alignment.
If these steps do not resolve the issue, it is recommended to consult a professional automotive technician.
Specifications
| Model Name | Installbay - Economy Door Lock Actuator - Each (E-DLA) |
| Brand | Metra |
| Part Number | E-DLA |
| Item Type | Door Lock Actuator |
| Product Type | Lock |
| Material | Metal |
| Color | Black |
| Item Shape | Rectangular |
| Lock Type | Manual |
| Controller Type | Hand Control (refers to the input signal type, e.g., from a switch or remote) |
| Special Feature | Alarm enabled |
| Product Dimensions (L x W x H) | 8 x 4 x 2 inches (approximate, may refer to package or overall unit) |
| Item Weight | 0.353 ounces |
| Number of Pieces | 1 |
| Batteries Required? | No |
| UPC | 086429216789 |
Warranty Information
This product is covered by a manufacturer's warranty. For specific details regarding warranty duration, coverage, and claims procedures, please refer to the documentation included with your purchase or contact Metra customer support directly. Keep your proof of purchase for warranty validation.
Customer Support
For technical assistance, installation questions, or warranty inquiries, please contact your authorized Metra dealer or visit the official Metra website for support resources.
- Metra Website: www.metraonline.com (Please note: This is a general example; verify the current official website for Metra.)
- Professional Installation: For complex installations or troubleshooting, it is always recommended to seek assistance from a certified automotive electronics installer.


