
RYOBI P102
Ryobi P102 18V ONE+ Lithium-Ion Compact Battery User Manual
Model: P102 | Brand: RYOBI
Introduction
This manual provides essential instructions for the safe and effective use, charging, and maintenance of your Ryobi P102 18V ONE+ Lithium-Ion Compact Battery. This battery is designed to provide reliable power for your Ryobi 18V ONE+ cordless power tools, offering improved runtime and lighter weight compared to older Ni-Cd models. Please read this manual thoroughly before first use and retain it for future reference.

Image: The Ryobi P102 18V ONE+ Lithium-Ion Compact Battery, showcasing its compact design and 2.0Ah capacity.
Important Safety Information
Always observe the following safety precautions to reduce the risk of fire, electric shock, personal injury, and material damage.
- Read all instructions: Before using the battery pack, charger, or product using the battery pack.
- Charge only with specified charger: Use only the charger specified by the manufacturer for recharging. A charger suitable for one type of battery pack may create a risk of fire when used with another battery pack.
- Do not expose to water: Do not immerse the battery pack in water or allow it to get wet.
- Avoid extreme conditions: Do not store or use the battery pack in temperatures exceeding 122°F (50°C).
- Proper disposal: Dispose of battery packs according to local regulations. Do not dispose of in fire.
- Do not short-circuit: Do not short-circuit the battery pack.
- Do not damage: Do not damage the battery pack. If damaged, do not use.
- Keep away from children: Store battery packs out of reach of children.
Setup
Initial Charging
Your Ryobi P102 battery may arrive with a partial charge. For optimal performance and battery longevity, it is recommended to fully charge the battery before its first use. Ensure you are using a compatible Ryobi 18V ONE+ charger designed for Lithium-Ion batteries.
- Connect your Ryobi 18V ONE+ charger to a standard power outlet.
- Slide the P102 battery pack onto the charger until it clicks into place.
- Observe the charger's indicator lights. Typically, a red light indicates charging, and a green light indicates a full charge. Refer to your specific charger's manual for detailed light indications.
- Once fully charged, remove the battery from the charger.
Compatibility
The P102 battery is part of the Ryobi 18V ONE+ system and is compatible with all Ryobi 18V ONE+ tools and chargers. It is important to use a charger designed for Lithium-Ion batteries. Older Ni-Cd chargers may not be compatible or could damage the battery.
Operating Instructions
Inserting the Battery into a Tool
- Ensure the tool is turned off and any safety switches are engaged.
- Align the battery pack with the battery port on the tool.
- Slide the battery into the tool until it clicks securely into place. Do not force the battery.
Removing the Battery from a Tool
- Ensure the tool is turned off.
- Locate the battery release latches on the tool (usually on the sides of the battery).
- Press the release latches and slide the battery pack out of the tool.
Battery Performance
The P102 Lithium-Ion battery provides consistent, fade-free power throughout its discharge cycle. This means your tool will operate at full power until the battery is depleted. It offers up to 4 times more runtime compared to older Ni-Cd models.

Image: A Ryobi P102 battery installed in a Ryobi AirStrike nail gun, demonstrating its use in a power tool application.
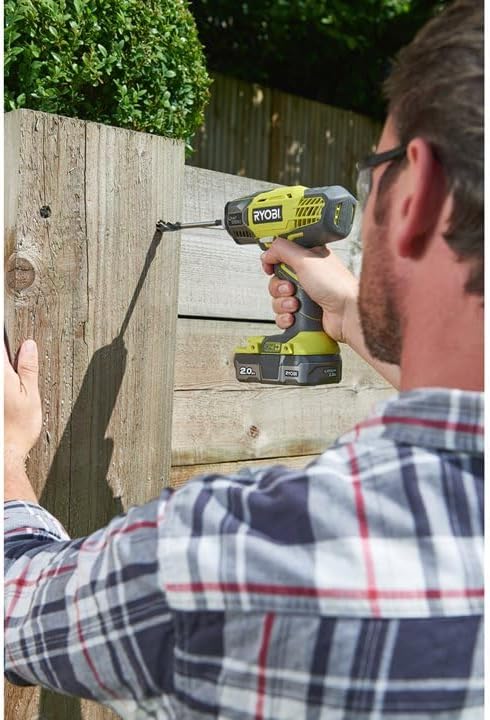
Image: A Ryobi P102 battery attached to a Ryobi drill, used for driving screws into wood.
Maintenance
Charging
Always charge your battery in a well-ventilated area, away from flammable materials. Do not charge the battery if it is wet or damaged. Allow a hot battery to cool down before charging.
Storage
For optimal battery life, store the P102 battery in a cool, dry place, away from direct sunlight and extreme temperatures. It is recommended to store Lithium-Ion batteries with a partial charge (around 50%) if they will not be used for an extended period. Avoid storing fully discharged batteries.
Cleaning
Keep the battery terminals clean and free of debris. Use a clean, dry cloth to wipe down the battery pack. Do not use liquids or solvents.
Troubleshooting
| Problem | Possible Cause | Solution |
|---|---|---|
| Battery not charging. |
|
|
| Tool not operating with battery. |
|
|
| Reduced runtime. |
|
|
Specifications
- Brand: RYOBI
- Model Number: P102
- Battery Type: Lithium-Ion
- Voltage: 18V
- Product Dimensions: 5 x 4 x 4 inches
- Item Weight: 15.8 ounces
- Number of Batteries Required: 1 (for operation in a tool)
- First Available Date: December 1, 2012
Warranty and Support
For warranty information and customer support, please refer to the documentation included with your original purchase or visit the official RYOBI website. You can also contact RYOBI customer service directly for assistance with your P102 battery or any other RYOBI products.
Official RYOBI Website: www.ryobitools.com
Related documentsP102


Ask a question about this manual
Ask about setup, troubleshooting, compatibility, parts, safety, or missing instructions. Manuals+ will review the question and use this page’s manual context to help answer it.