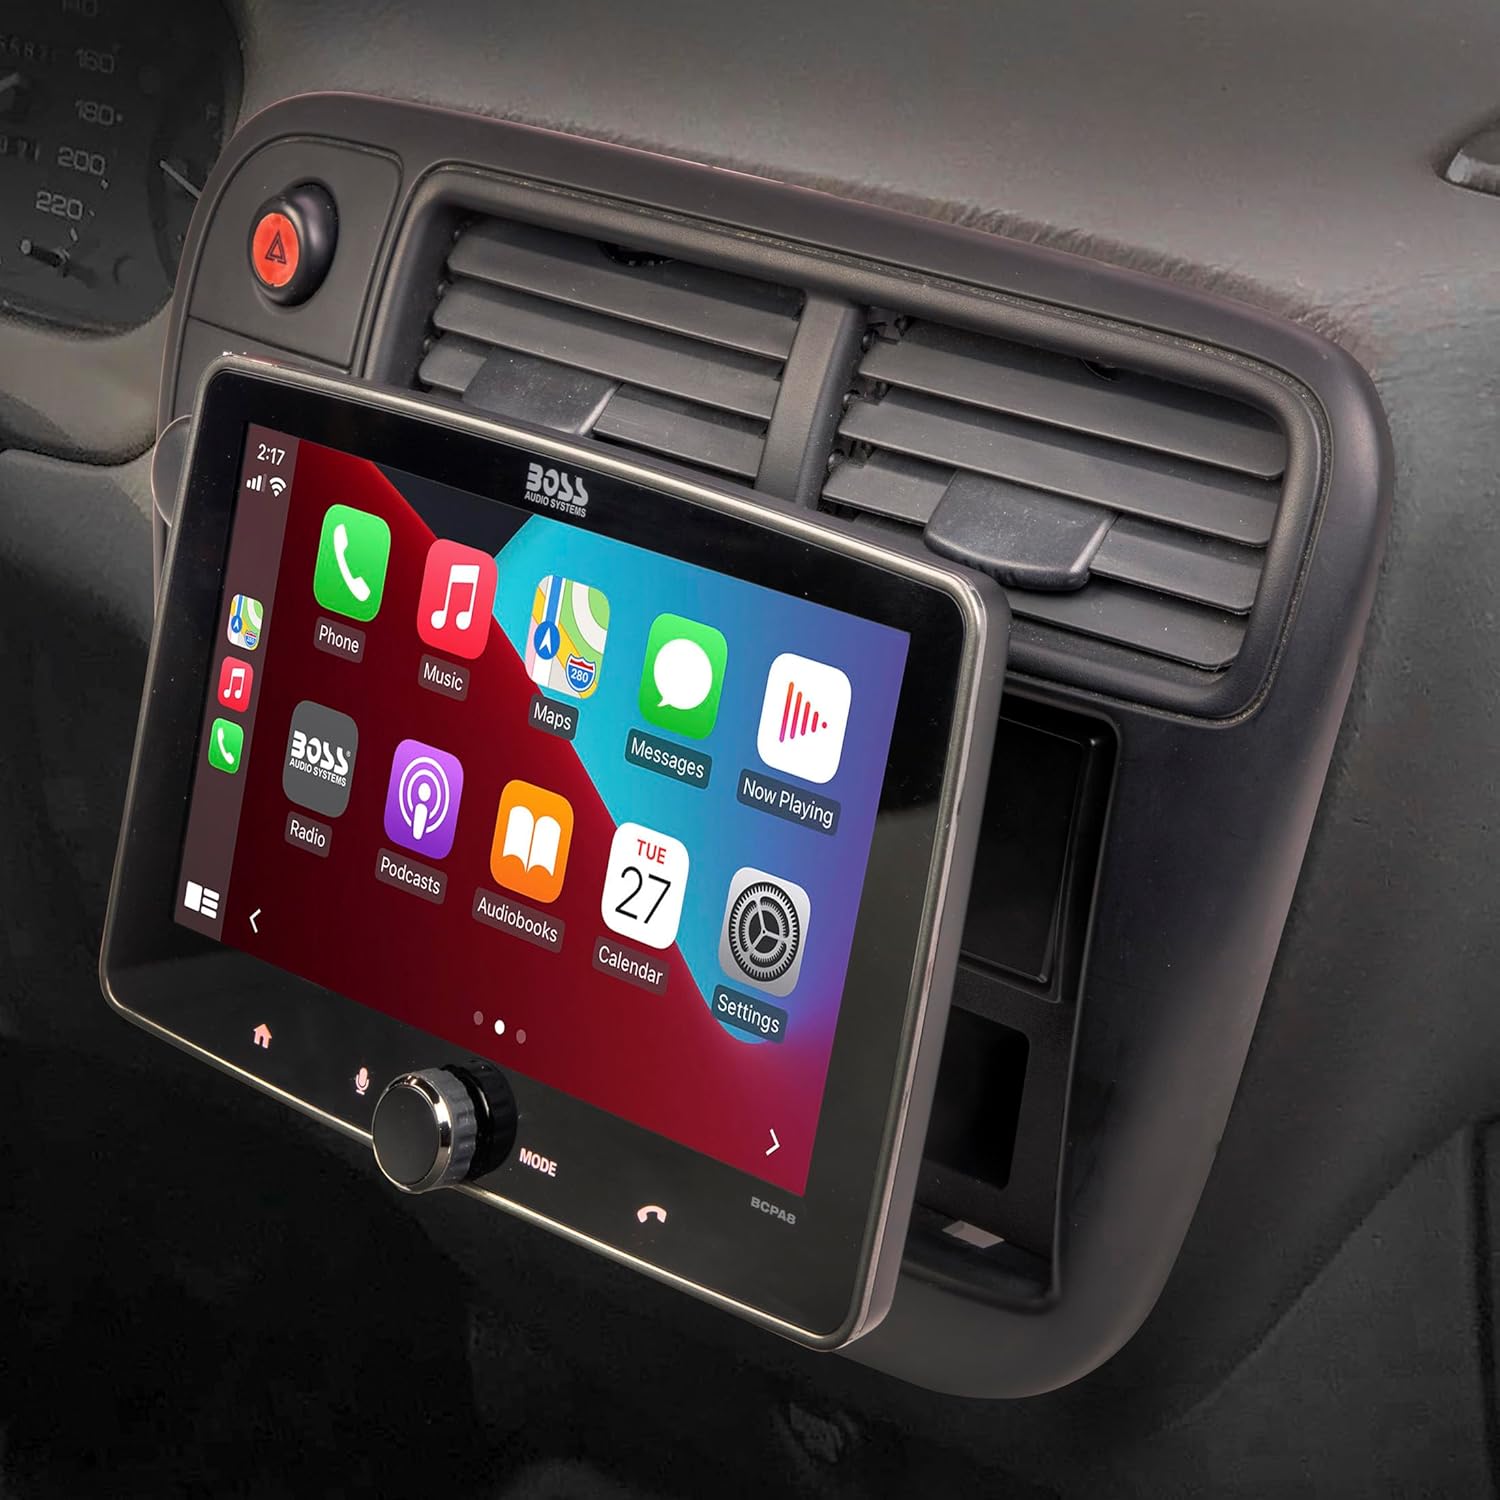
1. Introduction and Overview
This manual provides comprehensive instructions for installing the Scosche UI3050F Single DIN Radio Installation Kit. This kit is designed to facilitate the integration of an aftermarket car stereo into select 1980-2004 Acura, Honda, Infiniti, Isuzu, and Nissan vehicles. The kit ensures a secure and aesthetically integrated fit for your new audio unit, maintaining the vehicle's interior appearance.
2. Vehicle Compatibility
The Scosche UI3050F kit is compatible with various 1980-2004 Acura, Honda, Infiniti, Isuzu, and Nissan vehicle models. It is designed specifically for single DIN aftermarket radios and does not accommodate double DIN units. For precise vehicle fitment, please refer to the fit guide provided with the product or consult the manufacturer's resources.
The kit features an industry-standard 1-31/32″ x 7-3/32″ (50mm x 180mm) radio opening. Some large screen floating displays that utilize a single DIN chassis may fit; verify cutout requirements with the stereo manufacturer.
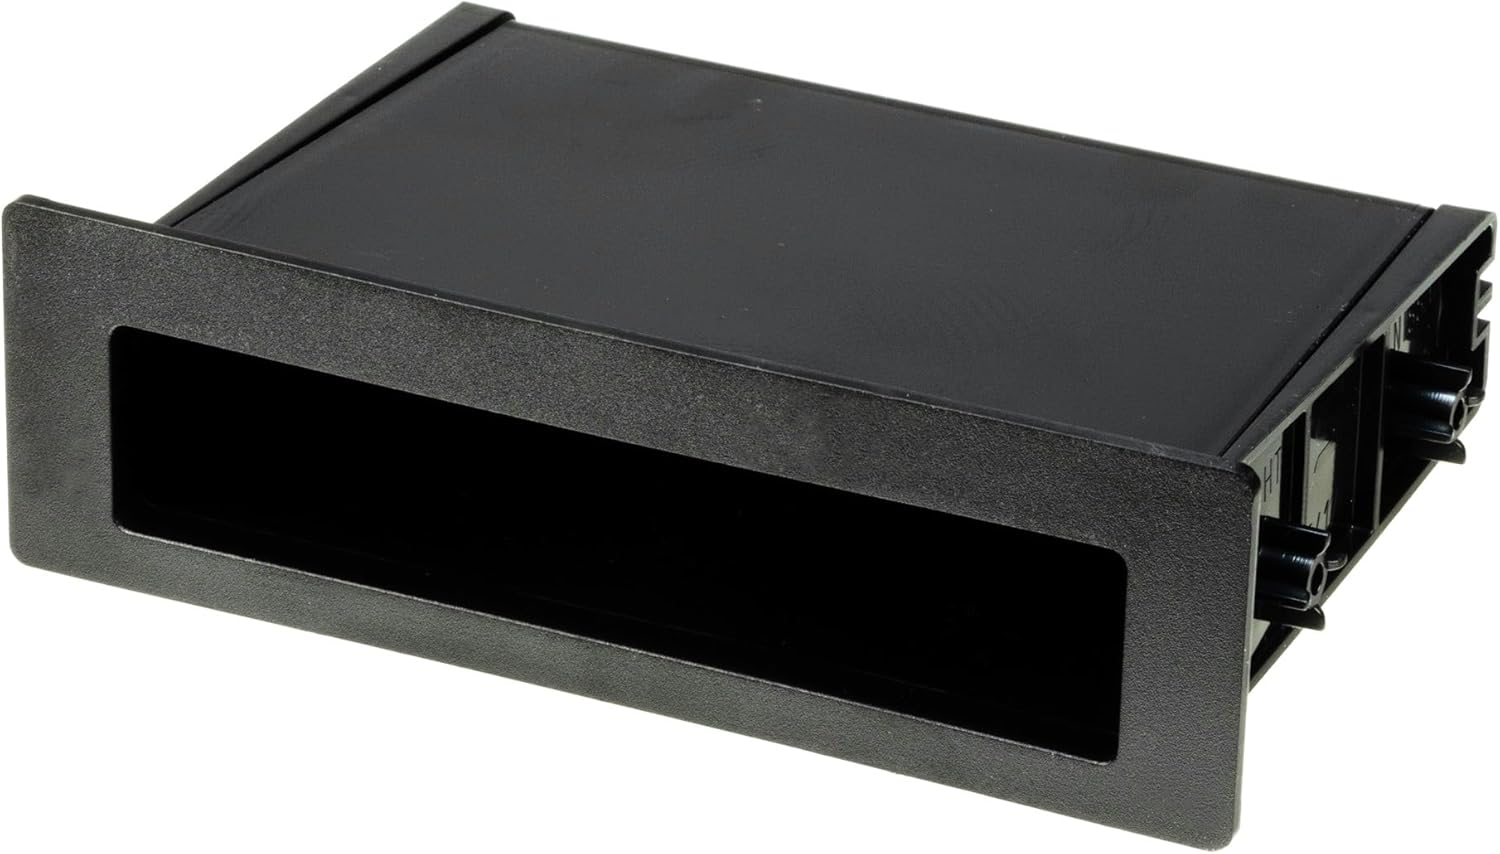
3. Package Contents
The Scosche UI3050F kit includes the following components:
- Single DIN Dash Kit Frame
- Storage Pocket
- Mounting Brackets
- Necessary Installation Hardware (screws, nuts)

4. Installation Instructions
Follow these steps for the proper installation of your Scosche UI3050F dash kit and aftermarket stereo. Always ensure the vehicle's battery is disconnected before beginning any electrical work.
4.1. Preparation and Kit Assembly
- Disconnect Battery: Before starting, disconnect the negative terminal of the vehicle's battery to prevent electrical shorts.
- Prepare Dash Kit: Review the specific instructions provided with your kit. Break off and remove any tabs from the dash kit components that are not required for your specific vehicle application.
- Mount Stereo to Dash Kit: Install your new aftermarket single DIN stereo into the Scosche dash kit using the screws provided with the stereo. Ensure it is securely fastened.
4.2. Factory Stereo Removal
Refer to your vehicle's service manual for specific instructions on removing the factory stereo. General steps include:
- Remove Trim Panels: Carefully remove any surrounding trim panels using a panel removal tool to avoid damage.
- Unscrew Factory Radio: Locate and unscrew the mounting screws holding the factory radio in place.
- Unplug Harnesses: Gently pull out the factory radio and unplug all electrical harnesses and antenna cables from the back.
4.3. Wiring Connections
Connect the aftermarket stereo's wiring harness to the vehicle's wiring harness. It is crucial to match wire colors correctly. Use appropriate splice connectors for secure and reliable connections.
- Match Colors: Connect wires from the aftermarket stereo harness to the vehicle harness adapter by matching corresponding colors.
- Special Connections: Some wires may not connect directly to the vehicle harness, such as an amplifier turn-on wire, parking sense wire, and Steering Wheel Control connections. Consult your aftermarket stereo's manual for these specific connections.
4.4. Final Installation and Testing
- Install New Stereo: Carefully slide the assembled aftermarket stereo and dash kit into the vehicle's dashboard opening. Secure it with screws as per your vehicle's requirements.
- Reconnect Battery: Reconnect the negative terminal of the vehicle's battery.
- Test Functions: Turn on the vehicle and the new radio to verify all functions (audio, balance, fader, radio presets, etc.) are working correctly.
4.5. Installation Videos
For visual guidance, refer to the following official Scosche installation videos:
Video 1: Scosche Stereo Installation. This video demonstrates the general process of installing an aftermarket stereo, including dash disassembly and reassembly.
Video 2: Full Stereo Harness Install. This video provides detailed instructions on connecting the wiring harnesses for an aftermarket stereo installation.
5. Specifications
- Item Weight: 15.2 ounces
- Package Dimensions: 10.2 x 6.1 x 2.8 inches
- Radio Opening: Industry standard 1-31/32″ x 7-3/32″ (50mm x 180mm) for Single DIN units.
- Material: Automotive-grade ABS plastic
6. Troubleshooting
If you encounter issues during or after installation, consider the following common troubleshooting steps:
- No Power to Stereo: Verify battery connections are secure. Check all wiring harness connections for proper seating and correct color matching. Inspect vehicle fuses related to the stereo and power.
- No Audio Output: Ensure speaker wires are correctly connected and not shorted. Check the stereo's fader and balance settings. Confirm any external amplifier (if used) is receiving power and a turn-on signal.
- Steering Wheel Controls Not Working: If your vehicle has steering wheel controls and you are using an adapter (sold separately), ensure the adapter is correctly wired and programmed according to its specific instructions.
- Loose Fitment: Double-check that all mounting screws are tightened and that the dash kit tabs are correctly aligned and secured within the vehicle's dashboard.
For further assistance, consult your aftermarket stereo's user manual or contact Scosche customer support.
7. Warranty and Support
For information regarding product warranty, returns, or technical support, please refer to the official Scosche website or contact their customer service department directly. Keep your proof of purchase for any warranty claims.


