
1. Product Overview
The JJC TM-M Multi-functional Timer Remote Control is designed for advanced photography techniques such as time-lapse, long exposure, and self-portraits. It functions as both a timer remote and a shutter release cable, offering precise control over various camera settings.
- Multi-functional: Operates as a self-timer, long exposure timer, interval timer, and controls the number of shots.
- Extended Control: Program exposures up to 99 hours, 59 minutes, and 59 seconds.
- Shot Count: Set up to 399 exposures or unlimited shots.
- LCD Display: Features a backlit LCD screen for clear visibility in low-light conditions.
- Shutter Release: Functions as a standard shutter release cable with half-press for focus and full-press for shutter activation. Includes a lock function for extended exposures.
- Camera Stability: Helps prevent camera shake, crucial for sharp images.
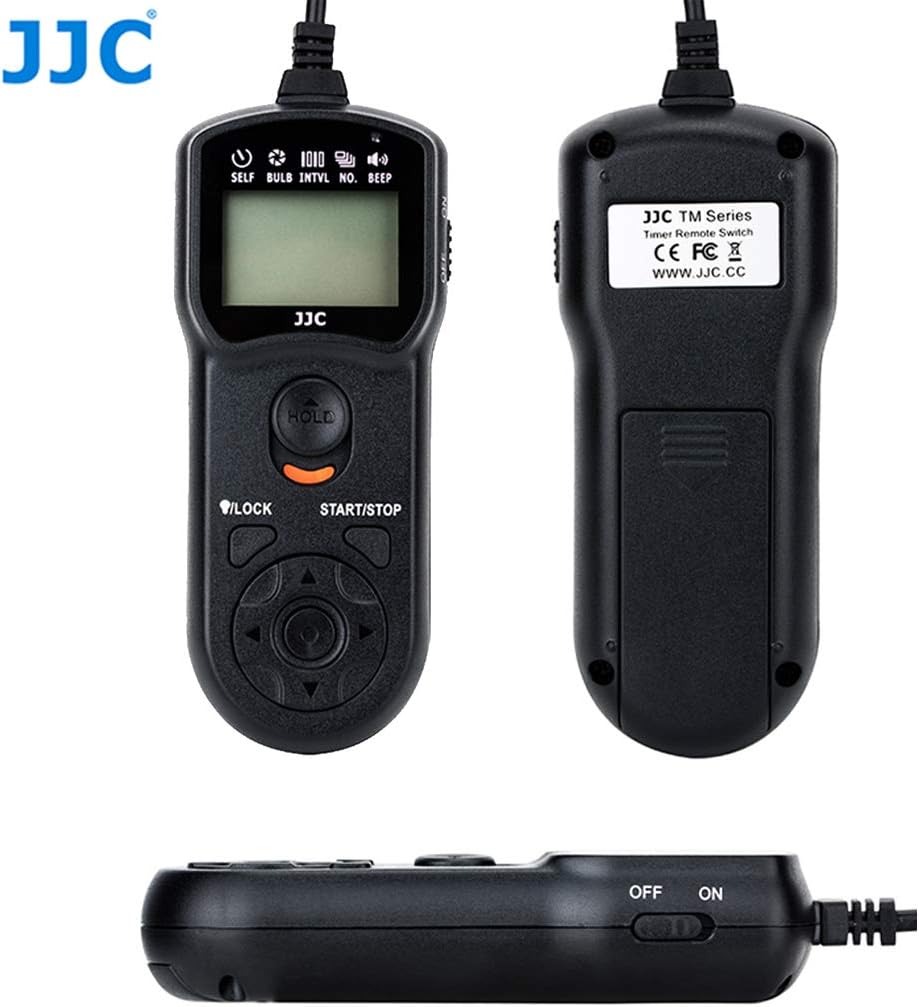
Figure 1: Front, back, and side views of the JJC TM-M Intervalometer Timer Remote.
2. Product Components
The JJC TM-M remote control consists of the main unit with an integrated cable for camera connection.

Figure 2: Labeled control panel of the JJC TM-M remote, highlighting the Shutter Release Button, LED Light/Lock Button, Arrow Buttons, Timer Start/Stop Button, and SET Button.

Figure 3: Labeled LCD display of the JJC TM-M remote, showing Selection Cursor, Timer Display, LOCK indicator, Low Power indicator, Timer Active indicator, Speaker ON/OFF, SET indicator, RELEASE indicator, and Number of Shots.
3. Setup
3.1. Battery Installation
The JJC TM-M remote requires 2 AAA batteries for operation. Open the battery compartment on the back of the remote, insert the batteries according to the polarity markings, and close the compartment securely.
3.2. Connecting to Your Camera
The remote connects to your camera via a dedicated port, typically the GPS port on compatible Nikon DSLR and Mirrorless cameras. Ensure the camera is turned off before connecting the remote.
- Locate the remote control port on your Nikon camera.
- Insert the remote's cable connector firmly into the camera's remote port.
- Turn on your camera and the remote control.
3.3. Camera Compatibility
This remote control is compatible with various Nikon camera models, replacing the Nikon MC-DC2 remote control. Compatible models include:
- Nikon P1000, P7700, P7800
- Nikon D3100, D3200, D3300
- Nikon D5000, D5100, D5200, D5300, D5500, D5600
- Nikon D7000, D7100, D7200, D7500
- Nikon D600, D610, D750, Df
- Nikon Z6, Z7

Figure 4: The JJC TM-M remote connected to a Nikon D7500 camera, ready for use.

Figure 5: The JJC TM-M remote connected to a Nikon D750 camera, showing the cable connection from a top-down perspective.
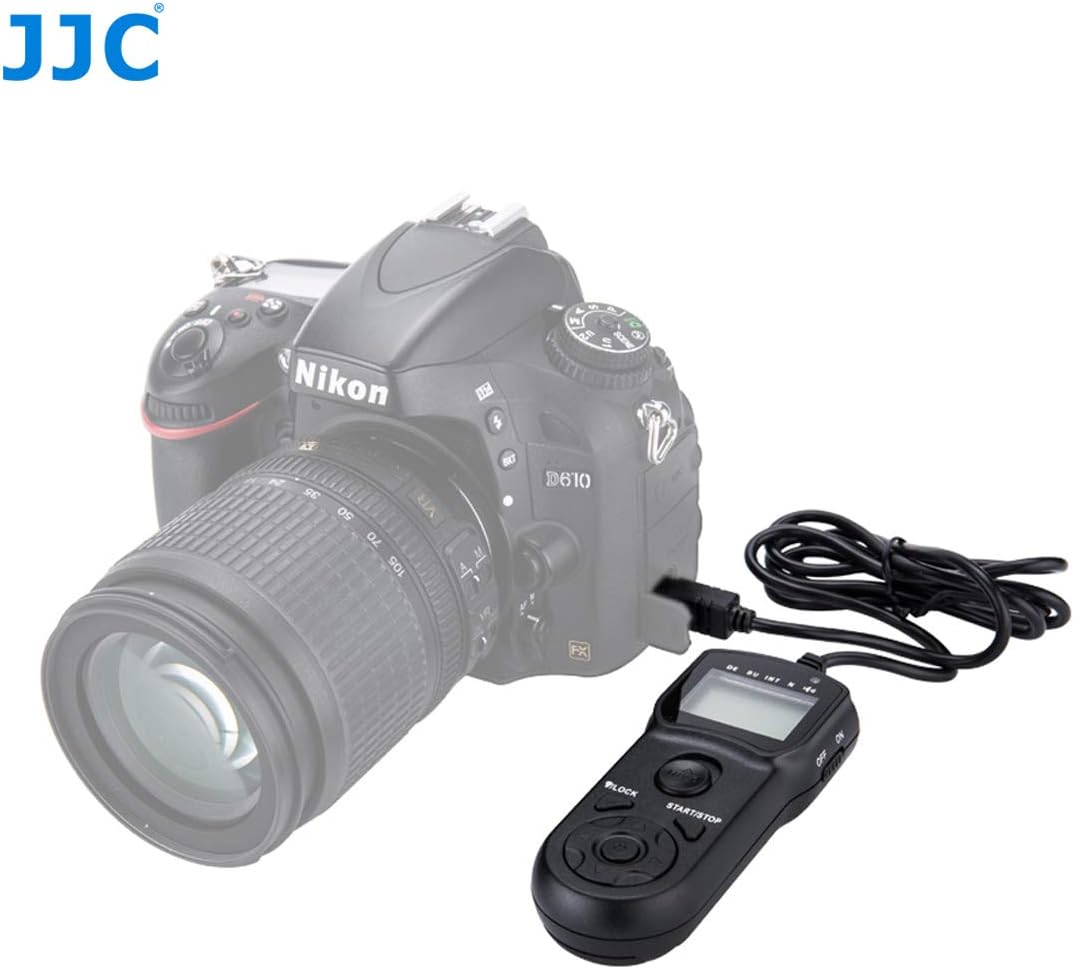
Figure 6: The JJC TM-M remote connected to a Nikon D610 camera, illustrating the setup with a different compatible model.
4. Operating Instructions
4.1. Basic Shutter Release Function
The remote can be used as a simple shutter release to avoid camera shake.
- Half-Press: Press the shutter release button halfway down to activate autofocus.
- Full-Press: Press the shutter release button completely down to trigger the shutter.
- Lock Function: For long exposure photography, push the shutter button up to lock it in the fully pressed position, keeping the camera shutter open for the desired duration.
4.2. Timer Functions
The JJC TM-M offers advanced timer programming for various photography scenarios. Use the arrow buttons to navigate through settings and the SET button to confirm.
- Self-Timer (DELAY): Set a delay before the first shot is taken (e.g., for self-portraits or to allow vibrations to settle).
- Long Exposure (LONG): Program the duration the shutter remains open for a single shot, up to 99 hours, 59 minutes, 59 seconds. Ideal for night photography or capturing light trails.
- Interval Timer (INTVL): Set the time interval between consecutive shots. This is essential for time-lapse photography.
- Number of Shots (N): Specify the total number of photos to be taken, from 1 to 399, or select '--' for unlimited shots.
- LCD Backlight: Press the LED Light button to illuminate the LCD screen for easy viewing in dark environments.
Video 1: Demonstration of the JJC Camera Wired Intervalometer Timer Remote Shutter Release in action, showcasing its features and usage.
Video 2: Overview of the JJC Wireless Intervalometer Timer Remote Shutter Release, demonstrating its various functions and applications.
5. Maintenance
To ensure the longevity and optimal performance of your JJC TM-M remote control, follow these maintenance guidelines:
- Cleaning: Use a soft, dry cloth to clean the remote. Avoid using liquid cleaners or solvents.
- Storage: Store the remote in a cool, dry place away from direct sunlight and extreme temperatures.
- Battery Care: Remove batteries if the remote will not be used for an extended period to prevent leakage.
- Cable Care: Avoid sharp bends or excessive pulling on the connection cable to prevent damage.
6. Troubleshooting
If you encounter any issues with your JJC TM-M remote control, please consider the following common solutions:
- Remote Not Responding: Check if the batteries are correctly installed and have sufficient charge. Ensure the remote is turned on.
- Camera Not Responding: Verify that the remote's cable is securely connected to the camera's remote port. Ensure the camera is set to the correct shooting mode (e.g., single shot, continuous, bulb) that allows external trigger.
- Settings Reset: Note that some settings on the remote may reset if it is turned off and then on again. Reconfigure desired settings after powering on.
If problems persist, please contact JJC customer support for further assistance.
7. Specifications
| Feature | Detail |
|---|---|
| Model Number | TM-M |
| Brand | JJC |
| Product Dimensions | 1 x 1 x 1 inches |
| Item Weight | 8 ounces |
| Batteries Required | 2 AAA batteries |
| Special Feature | Ergonomic |
| Max Supported Devices | 1 |
| Compatible Devices | Camera (Nikon P1000, P7700, P7800, D3100, D3200, D3300, D5000, D5100, D5200, D5300, D5500, D5600, D7000, D7100, D7200, D7500, D600, D610, D750, Df, Z6, Z7) |
8. Warranty and Support
JJC products typically come with a manufacturer's warranty. Please refer to the warranty card included with your product for specific terms and conditions. For technical support, product inquiries, or warranty claims, please visit the official JJC website or contact their customer service department.


