Introduction
This manual provides detailed instructions for the operation and maintenance of your QFX R-30U AM/FM/SW1-SW2 Radio. Please read this manual thoroughly before using the product to ensure proper function and to prevent damage.
Important Safety Information
Please refer to the official Safety Information PDF for critical safety guidelines before operating this device. You can access it here.
WARNING: Cancer and Reproductive Harm – www.P65Warnings.ca.gov.
Product Features
- Built-In Flashlight
- 4 Band Radio (AM/FM/SW1/SW2)
- USB/SD Slot for MP3 Playback
- High Power Sound
- Built-In Rechargeable Battery
- Full Dynamic Speaker
- Headphone Jack
- Telescopic Antenna
- Handle Bar
- AC/DC Dual Power (Requires 4 "D" Batteries, not included for DC operation)
Package Contents
- QFX R-30U Radio Unit
- AC Power Cord
- User Manual (this document)
Product Overview
Familiarize yourself with the various parts of your QFX R-30U radio.
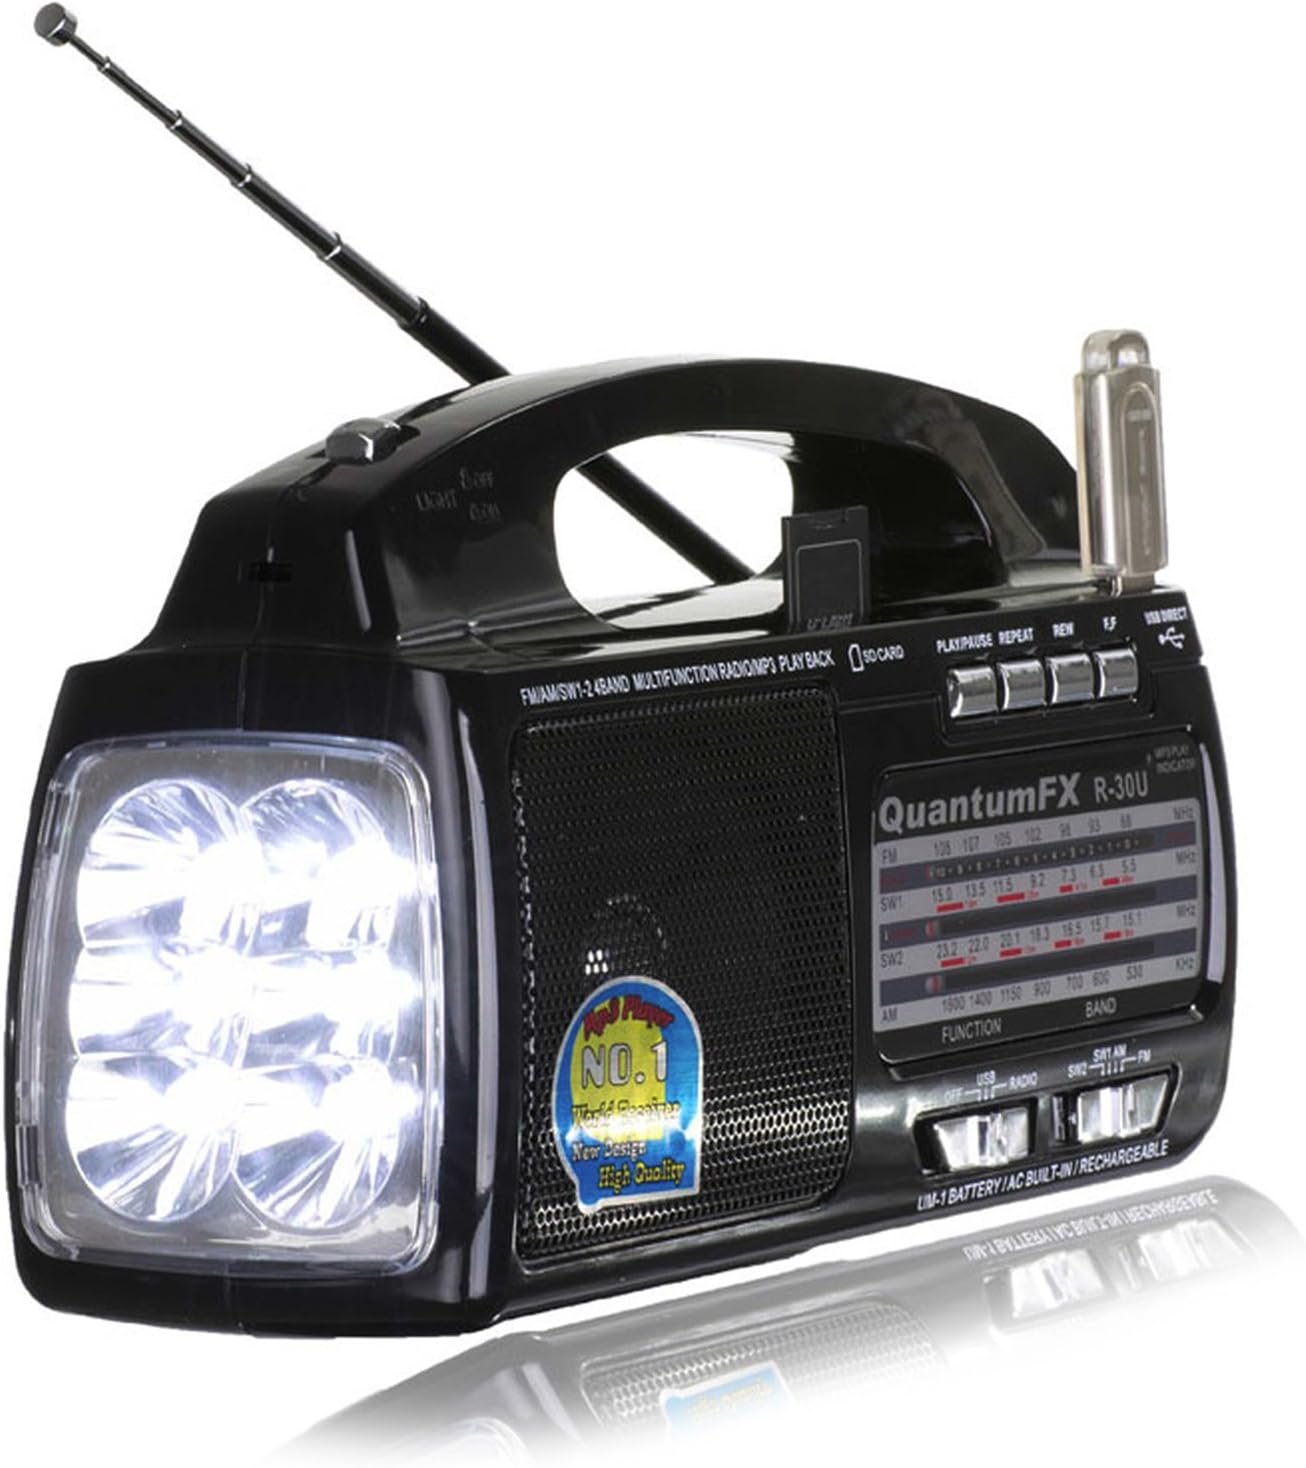
Figure 1: Front view of the QFX R-30U radio, showing the flashlight, speaker, tuning dial, and extended telescopic antenna. A USB drive is inserted into the top port.
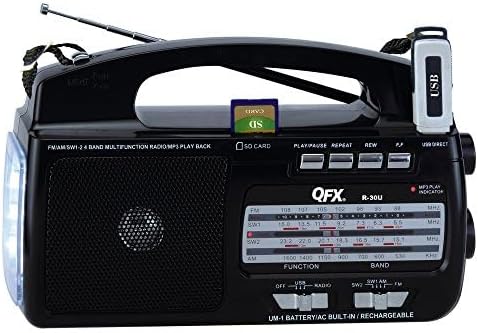
Figure 2: Top-down view of the QFX R-30U radio, highlighting the USB port with a drive inserted and the SD card slot with an SD card inserted. Control buttons for playback are visible.
Controls and Indicators:
- Telescopic Antenna: For improved radio reception.
- Flashlight: Integrated LED lights on the side.
- Speaker: Audio output.
- Tuning Dial: To select radio frequencies.
- Band Selector: Switch between AM, FM, SW1, SW2.
- Volume Control: Adjust audio level.
- USB Port: For USB flash drives (MP3 playback).
- SD Card Slot: For SD memory cards (MP3 playback).
- Playback Controls: Play/Pause, Repeat, Rewind, Forward for USB/SD.
- Power Switch: On/Off for the radio.
- AC Power Input: For connecting the AC power cord.
- Battery Compartment: For D-size batteries.
- Headphone Jack: For private listening.
Setup
Powering the Unit:
The QFX R-30U can be powered by AC current or D-size batteries.
- AC Power: Insert the included AC power cord into the AC input jack on the radio and plug the other end into a standard wall outlet. The internal rechargeable battery will charge when connected to AC power.
- DC Power (Batteries): Open the battery compartment cover on the back of the unit. Insert four (4) "D" size batteries (not included), ensuring correct polarity (+/-). Close the battery compartment cover securely.
Note: If using regular (non-rechargeable) D batteries, ensure the AC plug is disconnected to prevent damage to the batteries and the radio.
Antenna Setup:
For optimal radio reception, extend the telescopic antenna fully. For FM and Shortwave bands, adjust the angle and direction of the antenna to achieve the clearest signal. For AM reception, the unit has a built-in ferrite bar antenna, and rotating the entire unit may improve reception.
Operating Instructions
Radio Operation:
- Turn the Power Switch to the "ON" position.
- Select the desired band (AM, FM, SW1, or SW2) using the Band Selector switch.
- Rotate the Tuning Dial to find your desired station.
- Adjust the Volume Control to a comfortable listening level.
- For best reception, extend and adjust the Telescopic Antenna.
USB/SD MP3 Playback:
- Insert a USB flash drive into the USB Port or an SD card into the SD Card Slot. Ensure the media contains MP3 audio files.
- The unit should automatically switch to USB/SD playback mode. If not, ensure the function switch is set to "MP3" or similar.
- Use the Play/Pause, Repeat, Rewind, and Forward buttons to control playback.
Flashlight Operation:
The built-in flashlight can be activated by a dedicated switch, usually located near the flashlight LEDs. Turn the switch to "ON" to illuminate and "OFF" to turn off.
Headphone Use:
To listen privately, plug standard 3.5mm headphones (not included) into the Headphone Jack. The main speaker will automatically mute when headphones are connected.
Maintenance
Cleaning:
Wipe the exterior of the radio with a soft, dry cloth. Do not use abrasive cleaners or solvents, as they may damage the finish.
Battery Care:
If the unit will not be used for an extended period, remove the D-size batteries to prevent leakage and corrosion. Ensure the internal rechargeable battery is periodically charged to maintain its lifespan.
Troubleshooting
| Problem | Possible Cause | Solution |
|---|---|---|
| No power | AC cord not plugged in; Batteries dead or incorrectly inserted; Internal battery discharged. | Check AC connection; Replace batteries or check polarity; Charge internal battery via AC. |
| Poor radio reception | Antenna not extended; Weak signal; Interference. | Fully extend and adjust telescopic antenna; Try rotating the unit for AM; Move away from electronic devices. |
| USB/SD playback not working | Incorrect file format; Media not inserted correctly; Corrupted media. | Ensure files are MP3; Reinsert USB/SD card; Try different media. |
| Radio hums/buzzes when off and charging | Normal operation during charging or potential electrical interference. | Ensure unit is in a well-ventilated area. If excessive, contact support. |
Specifications
| Feature | Detail |
|---|---|
| Product Dimensions | 5.5 x 1.25 x 3.25 inches |
| Item Weight | 2.3 pounds |
| Manufacturer | QFX |
| Model Number | R-30U |
| Batteries Required | 4 D batteries (not included) |
| Color | BLACK |
| Special Features | Rechargeable, Built-In Flashlight |
| Connectivity Technology | USB |
| Tuner Technology | AM/FM |
| Power Source | AC |
| Radio Bands Supported | SW1, SW2, FM, AM |
| Hardware Interface | USB |
| Frequency | 60 Hz |
Warranty and Support
For warranty information or technical support, please contact QFX customer service. Details can typically be found on the manufacturer's official website or product packaging.
Visit the QFX Store on Amazon for more product information.


