1. Introduction
This manual provides essential information for the proper installation, operation, and maintenance of your ACI 82293 Power Window Motor and Regulator Assembly. ACI power window motors are engineered to meet or exceed original equipment performance standards, ensuring quality, durability, and reliability. This assembly includes original equipment style connectors for seamless integration.
Key features of this product include:
- Engineered to match original equipment regulator mounting points.
- Designed for advanced torque and speed performance.
- Integrated circuit breaker to prevent overheating.
- Constructed with hardened steel gears for enhanced durability.
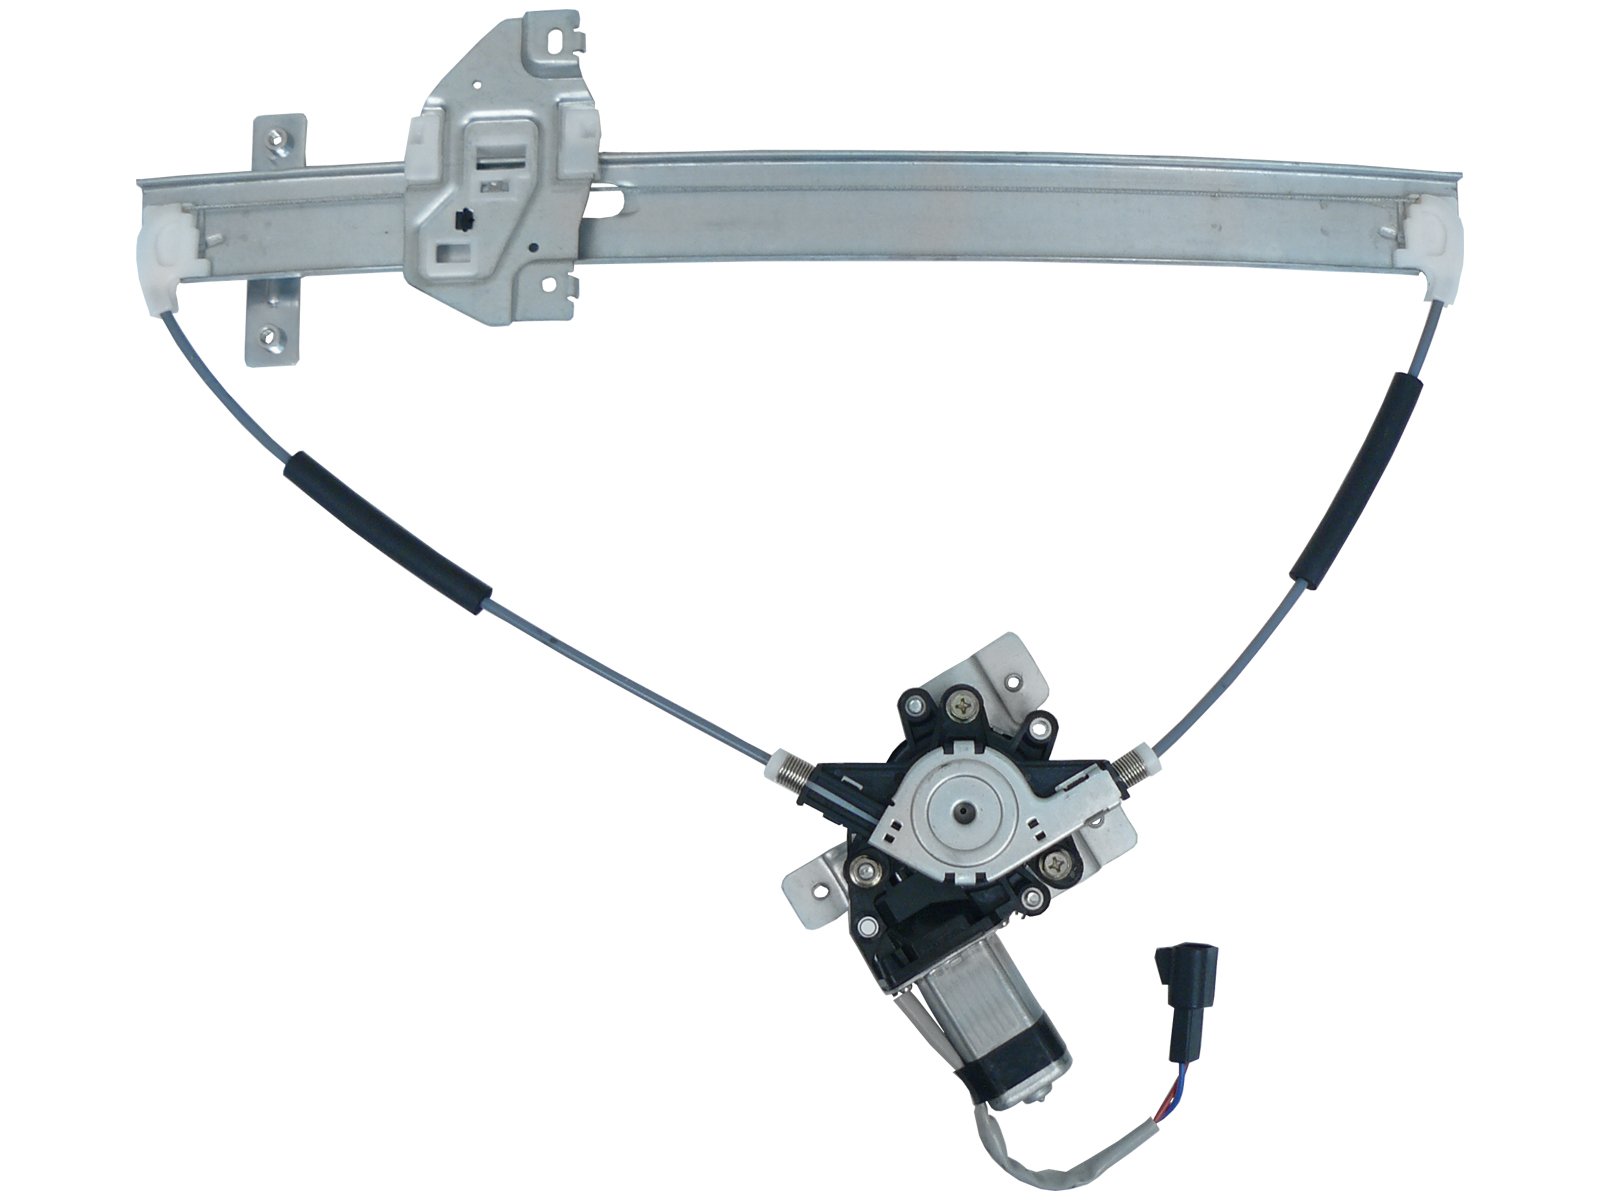
Figure 1: ACI 82293 Power Window Motor and Regulator Assembly. This image displays the complete assembly, including the metal track, cables, motor, and electrical connector, ready for installation.
2. Setup and Installation
Installation of the ACI 82293 Power Window Motor and Regulator Assembly requires mechanical aptitude and basic automotive tools. It is recommended that installation be performed by a qualified technician. Always refer to your vehicle's specific service manual for detailed instructions regarding panel removal and component access.
2.1 Safety Precautions
- Disconnect the vehicle's battery before beginning any electrical work to prevent accidental power surges or short circuits.
- Wear appropriate personal protective equipment, including safety glasses and gloves.
- Ensure the window glass is properly supported during removal and installation to prevent breakage or injury.
2.2 General Installation Steps
- Carefully remove the interior door panel and any other components obstructing access to the old window regulator.
- Disconnect the electrical connector from the old window motor.
- Unbolt and remove the old window regulator assembly from the door frame. Note the mounting points and orientation.
- Attach the window glass to the new ACI 82293 regulator assembly, ensuring it is securely fastened.
- Mount the new regulator assembly into the door frame, aligning it with the original mounting points. Secure all bolts.
- Connect the electrical connector of the new motor to the vehicle's wiring harness.
- Reconnect the vehicle's battery.
- Test the window's operation (up and down) to ensure smooth movement and proper alignment before reassembling the door panel.
- Reinstall the interior door panel and any other removed components.
3. Operating Instructions
Once installed, the ACI 82293 Power Window Motor and Regulator Assembly operates in conjunction with your vehicle's existing power window switch. Pressing the switch in the 'up' or 'down' direction will activate the motor, causing the window glass to move accordingly. Ensure no obstructions are present in the window path during operation.
4. Maintenance
The ACI 82293 Power Window Motor and Regulator Assembly is designed for long-term, maintenance-free operation. However, periodic checks can help ensure optimal performance:
- Inspect Window Seals: Ensure window seals are clean and free of debris. Worn or dirty seals can increase friction, putting strain on the motor.
- Lubrication: If the window movement becomes stiff, a silicone-based lubricant can be applied to the window tracks and rubber seals. Avoid petroleum-based lubricants as they can damage rubber components.
- Electrical Connections: Periodically check the electrical connector for corrosion or looseness.
5. Troubleshooting
If you experience issues with your power window, consider the following common troubleshooting steps:
- Window Does Not Move:
- Check the vehicle's fuse box for a blown fuse related to the power windows.
- Verify that the electrical connector to the motor is securely attached.
- Test the power window switch. A faulty switch can prevent the motor from receiving power.
- Window Moves Slowly or Jerkily:
- Inspect window tracks and seals for obstructions or excessive friction. Clean and lubricate as necessary.
- Check for any binding in the regulator mechanism.
- Grinding or Clicking Noises:
- This may indicate an issue with the gears in the motor or the regulator mechanism. Professional inspection is recommended.
If these steps do not resolve the issue, professional diagnosis and repair may be necessary.
6. Specifications
| Manufacturer | ACI |
| Brand | ACI |
| Model Number | 82293 |
| Item Weight | 3.7 pounds |
| Product Dimensions | 2.4 x 10.6 x 24 inches |
| Exterior Finish | Machined |
| Manufacturer Part Number | 82293 |
| ASIN | B006OVT8LQ |
| Date First Available | December 22, 2011 |
What's in the Box: Main component only (ACI 82293 Power Window Motor and Regulator Assembly).
7. Warranty Information
Specific warranty details for the ACI 82293 Power Window Motor and Regulator Assembly are not provided within this manual. Please refer to the product packaging, your purchase receipt, or contact ACI customer support for comprehensive warranty information.
8. Support
For technical assistance, installation questions, or further product information, please contact ACI customer support. Contact details are typically available on the product packaging or the official ACI website.


