Introduction
This manual provides detailed instructions for the setup, operation, and maintenance of your Casio DQ-541D-8RDF Digital Alarm Clock. Please read these instructions carefully to ensure proper use and to maximize the lifespan of your device. Keep this manual for future reference.
Product Overview
The Casio DQ-541D-8RDF is a compact digital alarm clock designed for reliability and ease of use. It features a clear digital display, a beeper alarm, a snooze function, and a backlight for visibility in low light conditions.
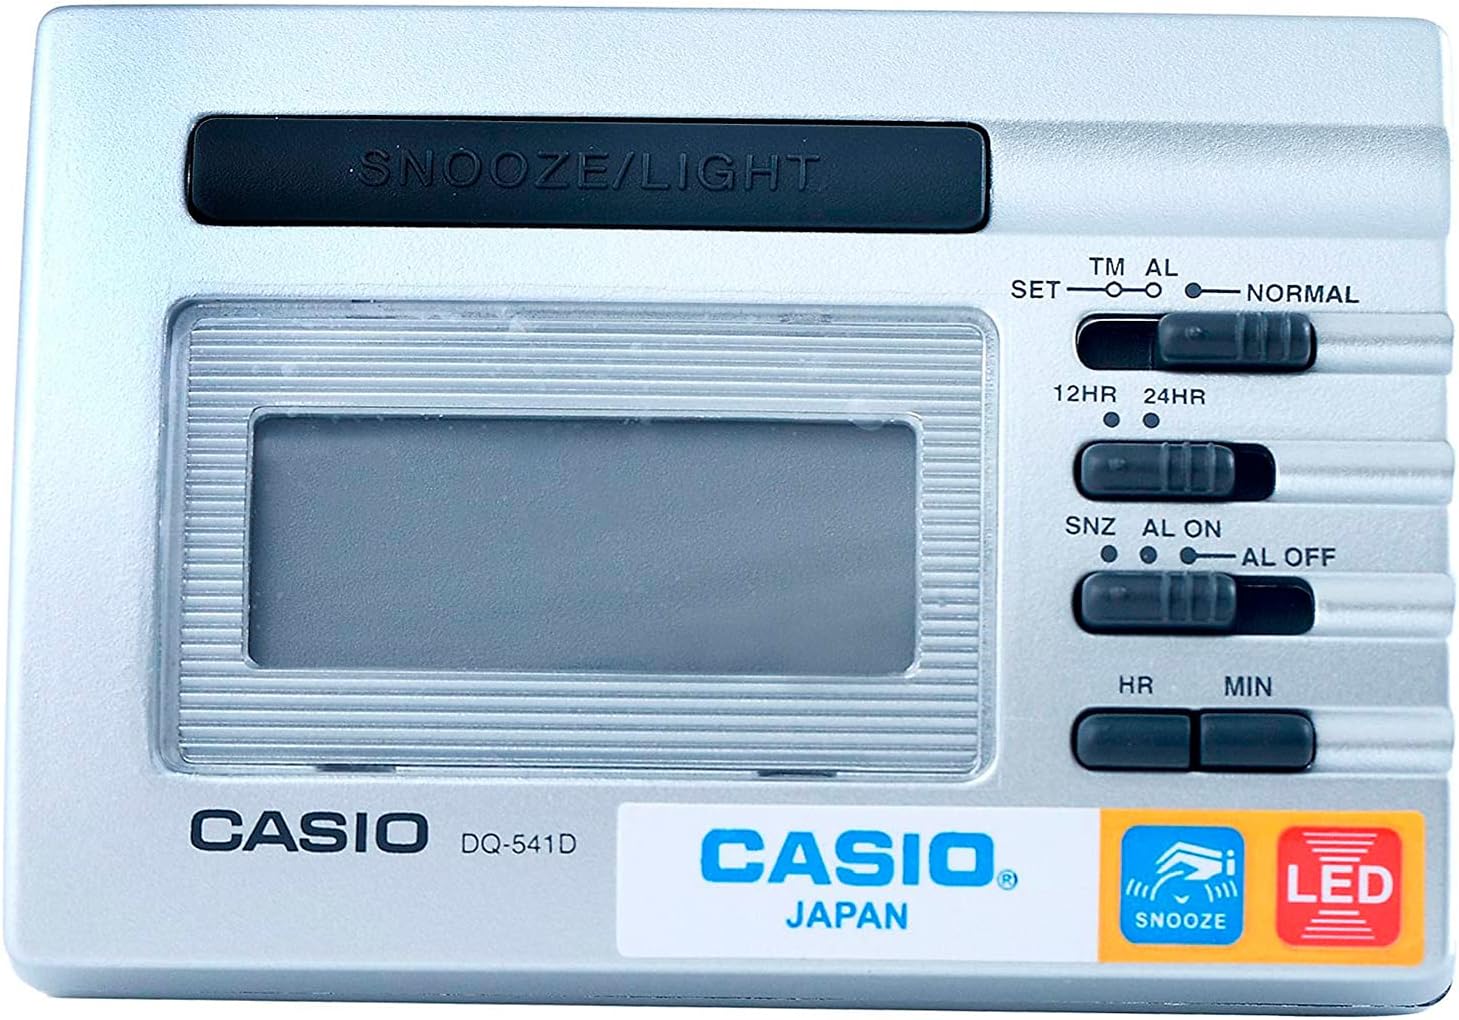
Image 1: Front View. This image displays the front of the Casio DQ-541D-8RDF digital alarm clock, showing the digital display, the large SNOOZE/LIGHT button at the top, and the control switches on the right side for time setting, alarm setting, and 12/24-hour format selection. The Casio logo and model number are visible below the display.

Image 2: Side View with Controls. This image provides a closer look at the right side of the alarm clock, highlighting the various slide switches and buttons used for configuration. These include switches for setting time (SET, TM AL, NORMAL), selecting 12-hour or 24-hour format (12HR, 24HR), and controlling the alarm (SNZ AL ON, AL ON, AL OFF). Hour (HR) and Minute (MIN) buttons are also visible for adjustments.

Image 3: Bottom View. This image shows the bottom of the Casio DQ-541D-8RDF alarm clock, featuring the battery compartment cover. An arrow indicates the direction to slide the cover for battery installation or replacement. The "MADE IN CHINA" text is also visible.
Setup
Battery Installation
- Locate the battery compartment on the bottom of the clock (refer to Image 3).
- Slide the battery compartment cover in the direction indicated by the arrow to open it.
- Insert one (1) AAA battery, ensuring the positive (+) and negative (-) terminals are aligned correctly according to the diagram inside the compartment. A fresh AAA battery is included with your purchase.
- Replace the battery compartment cover by sliding it back until it clicks securely into place.
- The display should now show a default time or begin flashing, indicating the clock is powered on and ready for time setting.
Operating Instructions
Setting the Current Time
- Locate the slide switch labeled SET TM AL NORMAL on the right side of the clock (refer to Image 2).
- Slide this switch to the SET position. The hour digits on the display will begin to flash.
- Press the HR button repeatedly to adjust the hour. Hold the button down for faster adjustment.
- Press the MIN button repeatedly to adjust the minute. Hold the button down for faster adjustment.
- Once the correct time is set, slide the SET TM AL NORMAL switch back to the NORMAL position to save the time.
Setting the Alarm Time
- Locate the slide switch labeled SET TM AL NORMAL.
- Slide this switch to the AL position. The alarm time will be displayed, and the hour digits will begin to flash.
- Press the HR button repeatedly to adjust the alarm hour.
- Press the MIN button repeatedly to adjust the alarm minute.
- Once the desired alarm time is set, slide the SET TM AL NORMAL switch back to the NORMAL position to save the alarm time.
Activating/Deactivating the Alarm and Snooze Function
- Locate the slide switch labeled SNZ AL ON AL OFF (refer to Image 2).
- To activate the alarm with snooze: Slide the switch to the SNZ AL ON position. An alarm icon will appear on the display, indicating the alarm is active and the snooze function is enabled.
- To activate the alarm without snooze: Slide the switch to the AL ON position. An alarm icon will appear on the display.
- To deactivate the alarm: Slide the switch to the AL OFF position. The alarm icon will disappear from the display.
Using the Snooze and Light Function
- When the alarm sounds, press the large SNOOZE/LIGHT button located at the top of the clock.
- Pressing this button will temporarily stop the alarm, and it will sound again after a few minutes (typically 5-8 minutes, depending on the model's pre-set interval).
- To illuminate the display in dark conditions, press the SNOOZE/LIGHT button. The LED backlight will activate for a few seconds.
12-Hour / 24-Hour Timekeeping
- Locate the slide switch labeled 12HR 24HR (refer to Image 2).
- Slide the switch to the 12HR position for 12-hour format (with AM/PM indicator).
- Slide the switch to the 24HR position for 24-hour format.
Maintenance
- Cleaning: Wipe the clock with a soft, dry cloth. Do not use abrasive cleaners or chemical solvents, as these may damage the casing or display.
- Battery Replacement: When the display becomes dim or the alarm sound weakens, it is time to replace the battery. Follow the "Battery Installation" steps in the Setup section. Always use a fresh AAA battery.
- Storage: If you do not plan to use the clock for an extended period, remove the battery to prevent leakage and potential damage to the device.
- Environment: Avoid exposing the clock to extreme temperatures, direct sunlight, high humidity, or strong magnetic fields.
Troubleshooting
| Problem | Solution |
|---|---|
| Display is blank or dim. | Check battery installation. Replace with a fresh AAA battery. |
| Alarm does not sound. | Ensure the SNZ AL ON AL OFF switch is set to AL ON or SNZ AL ON. Verify the alarm time is set correctly. Replace battery if weak. |
| Time is incorrect. | Re-set the current time following the "Setting the Current Time" instructions. Check the 12HR/24HR setting. |
| Snooze function not working. | Ensure the SNZ AL ON AL OFF switch is set to SNZ AL ON. |
Specifications
- Model Number: DQ-541D-8RDF
- Brand: Casio
- Dimensions: 25 x 3.81 x 25 cm (approximate)
- Item Weight: 140.61 Grams
- Power Source: 1 x AAA Battery (included)
- Features: LED backlight, Beeper alarm, Snooze function, 12/24-hour timekeeping
Warranty and Support
For warranty information and customer support, please refer to the warranty card included with your product or visit the official Casio website. Casio provides reliable products, and their support resources can assist with any further inquiries or service needs.
You can often find additional support and product information on the official Casio website: www.casio.com


