
1. Introduction
The Bosch Lambda Oxygen Sensor 0258003644 is a critical component of your vehicle's engine management system. It measures the oxygen content in the exhaust gases, providing essential data to the engine control unit (ECU) to optimize the air-fuel mixture. This optimization ensures efficient combustion, reduced emissions, and improved fuel economy. This manual provides important information regarding the installation, operation, maintenance, and troubleshooting of your Bosch Lambda Oxygen Sensor.
2. Safety Information
Always prioritize safety when working on your vehicle. Improper installation or handling can lead to injury or damage to the vehicle. It is recommended that installation be performed by a qualified automotive technician.
- Ensure the vehicle's engine is cool before beginning any work.
- Disconnect the vehicle's battery to prevent electrical hazards.
- Wear appropriate personal protective equipment, including gloves and eye protection.
- Refer to your vehicle's service manual for specific instructions and torque specifications.
- Avoid touching the sensor tip, as contaminants can affect its performance.
3. Package Contents
Verify that all components are present and undamaged upon opening the package.
- 1 x Bosch Lambda Oxygen Sensor 0258003644
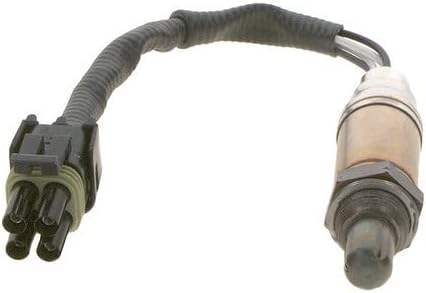
Image 1: The Bosch Lambda Oxygen Sensor 0258003644, showing the sensor body and electrical connector.
4. Installation
This section provides general guidelines for installing the Bosch Lambda Oxygen Sensor. Always consult your vehicle's specific repair manual for detailed, model-specific instructions.
- Locate the Old Sensor: Identify the faulty lambda sensor on your vehicle's exhaust system. There may be multiple sensors (upstream and downstream).
- Disconnect Electrical Connector: Carefully disconnect the electrical connector from the old sensor.
- Remove Old Sensor: Use a specialized oxygen sensor socket or wrench to remove the old sensor from the exhaust pipe. It may be tight due to heat and corrosion.
- Prepare New Sensor: Apply a small amount of anti-seize compound to the threads of the new Bosch sensor (if not pre-applied). Avoid getting anti-seize on the sensor tip.
- Install New Sensor: Thread the new sensor into the exhaust bung by hand to prevent cross-threading. Tighten it to the manufacturer's specified torque using the oxygen sensor socket.
- Connect Electrical Connector: Reconnect the electrical connector securely. Ensure it clicks into place.
- Clear Diagnostic Trouble Codes (DTCs): After installation, use an OBD-II scanner to clear any stored diagnostic trouble codes from the ECU.
- Test Drive: Perform a short test drive to ensure proper operation and that no new fault codes appear.
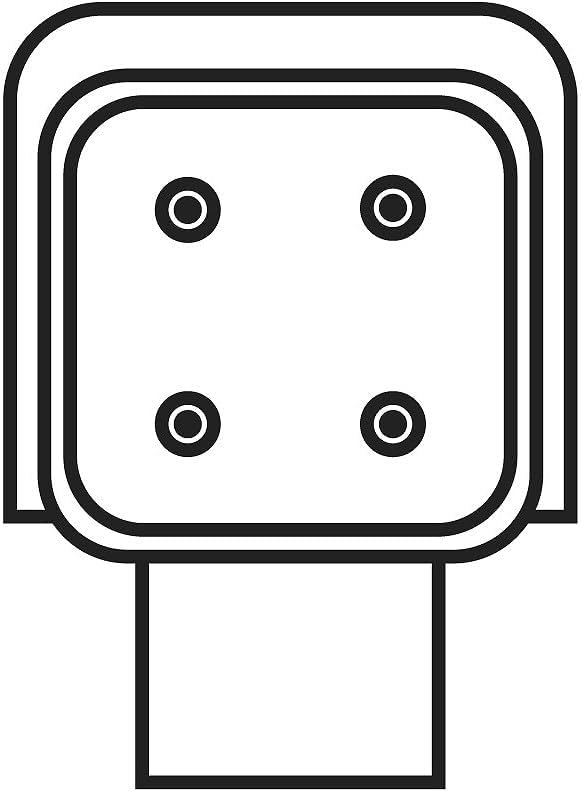
Image 2: A diagram illustrating the typical electrical connector for a lambda oxygen sensor, showing the pin configuration.
5. Operating Principles
The Bosch Lambda Oxygen Sensor continuously monitors the residual oxygen in the exhaust gases. Based on this measurement, it generates a voltage signal that is sent to the vehicle's ECU. The ECU uses this signal to adjust the fuel injection duration, maintaining the optimal air-fuel ratio (stoichiometric ratio) for efficient combustion and catalytic converter operation. A properly functioning lambda sensor is crucial for meeting emission standards and ensuring optimal engine performance.
6. Maintenance
Bosch Lambda Oxygen Sensors are designed for long-term reliability and typically do not require routine maintenance. However, they are wear-and-tear parts and their performance can degrade over time due to exposure to extreme temperatures, exhaust contaminants, and vibrations. It is recommended to check the sensor's performance as part of regular vehicle diagnostics, especially if a "Check Engine" light illuminates.
Replacement Interval: While there isn't a fixed replacement schedule for all vehicles, many manufacturers recommend inspection or replacement between 100,000 to 160,000 kilometers (60,000 to 100,000 miles) for heated sensors, or sooner if symptoms of failure occur.
7. Troubleshooting
A faulty lambda oxygen sensor can lead to various engine performance issues. Common symptoms include:
- Illuminated "Check Engine" Light: This is the most common indicator. Diagnostic Trouble Codes (DTCs) related to oxygen sensor circuits or performance will typically be stored (e.g., P0130-P0167).
- Reduced Fuel Economy: An inaccurate sensor signal can cause the ECU to inject too much or too little fuel.
- Increased Emissions: Improper air-fuel mixture directly impacts exhaust emissions.
- Rough Idling or Stalling: Inconsistent fuel delivery can lead to unstable engine operation.
- Engine Hesitation or Misfires: Poor combustion due to incorrect air-fuel ratio.
- Failed Emissions Test: High levels of pollutants in the exhaust.
If you experience any of these symptoms, it is advisable to have your vehicle diagnosed by a professional technician using an OBD-II scanner to confirm the lambda sensor as the cause.
8. Specifications
| Feature | Detail |
|---|---|
| Brand | Bosch |
| Model Number | 0258003644 |
| Item Dimensions (L x W x H) | 10 x 4 x 13 centimeters |
| Material | Metal |
| Mounting Type | Flange Mount |
| Specific Uses for Product | Exhaust Gas Monitoring |
| Number of Items | 1 |
| International Article Number (EAN) | 03165142393193 |
| Compatible Vehicles | RENAULT ESPACE III, LAGUNA I, LAGUNA I Grandtour, MEGANE I, MEGANE I Cabriolet, MEGANE I Classic, MEGANE I Coach, MEGANE Scénic, SAFRANE II |
9. Warranty and Support
Warranty: This Bosch Lambda Oxygen Sensor comes with a 2-year legal warranty, covering manufacturing defects under normal use. Please retain your proof of purchase for warranty claims.
Support: For technical assistance, troubleshooting, or warranty inquiries, please contact Bosch Automotive customer service or visit the official Bosch Automotive website. You can find contact information on the product packaging or through the Bosch official channels.
For more information and to explore other Bosch automotive products, visit the Bosch Automotive Store.


