
Intermatic EI200W
Intermatic EI200W Electronic Auto-Off Timer User Manual
Model: EI200W | Brand: Intermatic
Introduction
This manual provides comprehensive instructions for the installation, operation, and maintenance of your Intermatic EI200W Electronic Auto-Off Timer. This device is designed to provide silent, automatic shut-off for various electrical loads, enhancing convenience and energy efficiency.
Safety Information
WARNING: Risk of electric shock. Installation should be performed by a qualified electrician or trained personnel. Disconnect power at the circuit breaker or fuse box before installing or servicing. Ensure all wiring connections are secure and comply with local electrical codes.
- Always turn off power at the circuit breaker before installation.
- This device is for indoor use only.
- Do not exceed the specified electrical ratings (120 Volts).
- Requires a neutral wire for proper operation.
Specifications
| Brand | Intermatic |
| Model Number | EI200W |
| Voltage | 120 Volts |
| Timer Settings | 5, 10, 15, 30 Minutes |
| Material | Plastic |
| Color | White |
| Dimensions (H x W x D) | 4.13 x 1.69 x 1.44 inches |
| Item Weight | 4.8 ounces |
| Mounting Type | Wall Mount |
| Certification | UL |
Setup and Installation
The Intermatic EI200W timer is designed for in-wall installation, replacing a standard single-pole light switch. A decorator-style wall plate (not included) is required for a finished appearance.
- Turn Off Power: Locate the circuit breaker controlling the switch you intend to replace and turn off the power. Verify power is off using a voltage tester.
- Remove Existing Switch: Carefully remove the existing wall plate and switch from the electrical box. Disconnect the wires from the old switch.
- Identify Wires:
- Line Wire (Hot): Typically black, brings power from the circuit breaker.
- Load Wire: Typically black, goes to the light fixture or appliance.
- Neutral Wire: Typically white, required for this timer. If no neutral wire is present in your electrical box, this timer cannot be installed.
- Ground Wire: Typically bare copper or green.
- Wire the Timer: Connect the wires from the electrical box to the corresponding wires on the EI200W timer. Use wire nuts to secure connections.
- Connect the timer's black wire to the Line (Hot) wire.
- Connect the timer's red wire to the Load wire.
- Connect the timer's white wire to the Neutral wire.
- Connect the timer's green wire to the Ground wire.
- Mount the Timer: Carefully push the wired timer into the electrical box. Secure it with the provided screws.
- Install Wall Plate: Attach a decorator-style wall plate (not included) over the timer.
- Restore Power: Turn the power back on at the circuit breaker.
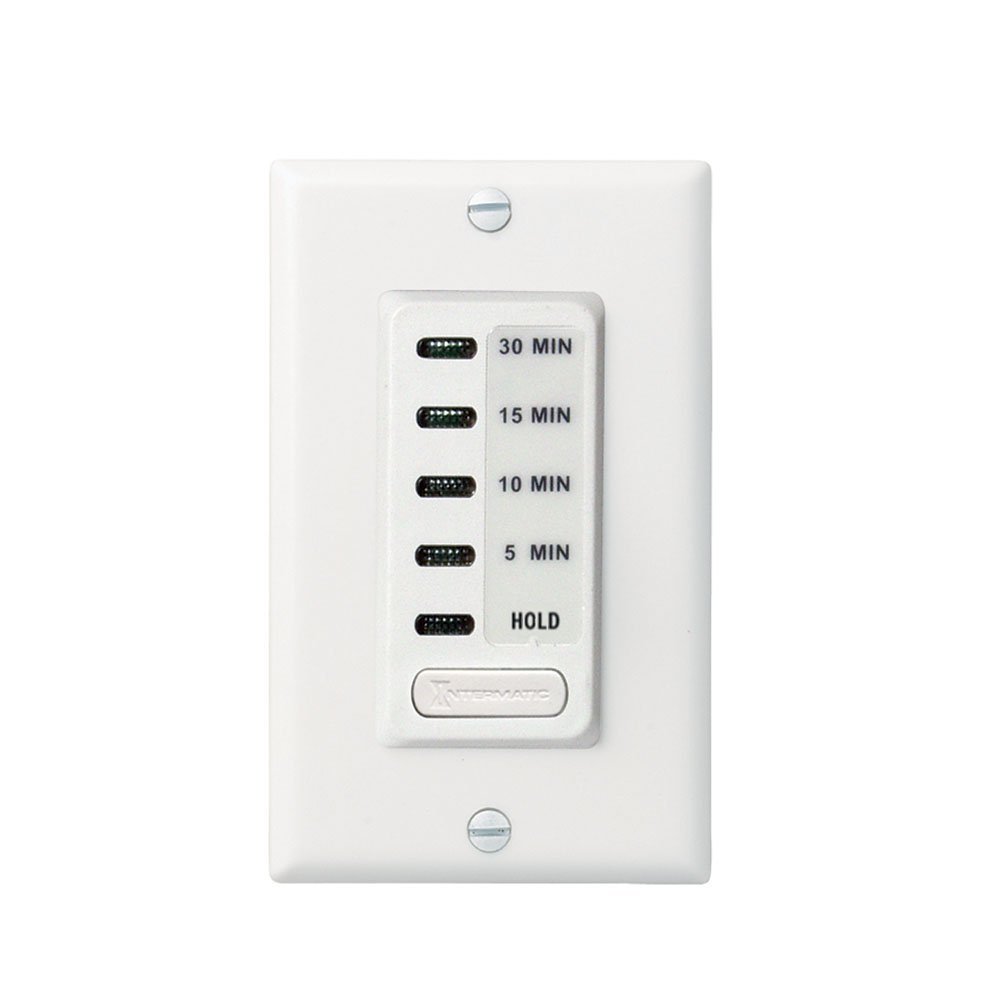
Image: Front view of the Intermatic EI200W Electronic Auto-Off Timer. This image shows the white timer with buttons for 5, 10, 15, 30 minutes, and a 'HOLD' function, along with an 'Intermatic' brand label at the bottom.
Operating Instructions
The EI200W timer features simple single-button operation to select desired countdown times.
- Turning On/Setting Timer: Press the large button at the bottom of the timer. Each press cycles through the available countdown times: 5 minutes, 10 minutes, 15 minutes, 30 minutes, and HOLD. The LED indicator next to the selected time will illuminate.
- Countdown Mode: Once a time is selected (5, 10, 15, or 30 minutes), the connected load (e.g., light, fan) will turn on and remain on for the duration of the selected time. After the time expires, the load will automatically turn off.
- HOLD Mode: Selecting "HOLD" will keep the connected load continuously on. The timer will not automatically turn off in this mode. To exit HOLD mode, press the button again to select a countdown time or turn the load off manually.
- Turning Off Manually: To turn off the connected load before the countdown expires, press the button until no LED indicators are lit, or until the "OFF" state is reached (if applicable, based on specific model behavior, usually cycling past 30 min or HOLD).
Maintenance
The Intermatic EI200W timer is designed for maintenance-free operation. To ensure longevity and proper function:
- Cleaning: Wipe the surface with a soft, damp cloth. Do not use abrasive cleaners or solvents. Ensure power is off before cleaning.
- Inspection: Periodically check for any visible damage to the device or wiring. If damage is observed, disconnect power and consult a qualified electrician.
- Environmental Conditions: Ensure the timer is not exposed to excessive moisture or extreme temperatures, which can affect performance and lifespan.
Troubleshooting
| Problem | Possible Cause | Solution |
|---|---|---|
| Timer does not turn on or operate. | No power to the timer; incorrect wiring; faulty timer. | Check circuit breaker. Verify wiring connections (Line, Load, Neutral, Ground). If wiring is correct and power is present, the timer may be faulty and require replacement. |
| Load (light/fan) does not turn off after countdown. | Timer is in "HOLD" mode; internal malfunction. | Ensure the timer is not set to "HOLD" mode. Cycle through the timer settings. If the issue persists, the timer may be faulty. |
| LED indicators are not working. | No power; internal component failure. | Check power supply. If the timer functions but LEDs do not, it may indicate a minor internal issue that does not affect core functionality, or a faulty unit. |
Warranty Information
This Intermatic EI200W timer comes with a warranty. In the event of a product malfunction or defect, the manufacturer's policy is to replace the product. Please refer to the original purchase documentation or contact Intermatic customer support for specific warranty terms and conditions.
Customer Support
For further assistance, technical support, or warranty claims, please contact Intermatic customer service. You can find contact information on the official Intermatic website or through your product's packaging.
Visit the official Intermatic Store: Intermatic Store on Amazon
Related documentsEI200W


Ask a question about this manual
Ask about setup, troubleshooting, compatibility, parts, safety, or missing instructions. Manuals+ will review the question and use this page’s manual context to help answer it.