
Introduction
The Leviton VRCS2-MRZ Vizia RF+ 2-Button Scene Controller with Switches integrates Z-Wave radio frequency technology for smart lighting control. This device is designed to be compatible with Leviton's Decora design, offering a stylish and functional solution for managing your home's lighting. It enables both local and remote ON/OFF switching for two distinct loads and provides scene control capabilities for Vizia RF+ compatible devices.
Key features include:
- Ideal for retrofit applications, replacing existing switches for local or enhanced scene control.
- Provides local and remote ON/OFF switching for two separate loads.
- Controls two loads from a single location.
- Supports ON/OFF switching for incandescent, low voltage, fluorescent, CFL, and motor loads.
- Requires the Vizia RF+ Handheld Remote (VRCPG, sold separately) for system programming and control.
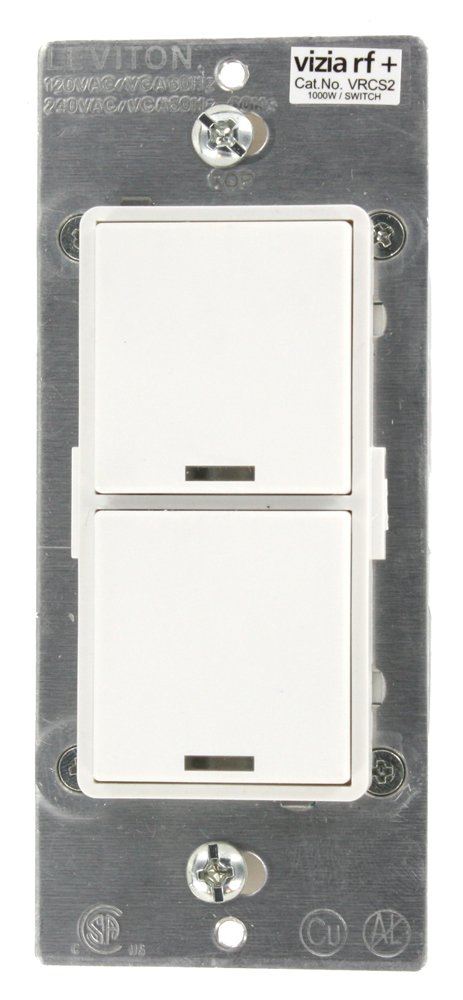
Image: Leviton VRCS2-MRZ Vizia RF+ 2-Button Scene Controller, showing its front face with two buttons and the Decora style.
Setup and Installation
Installation of the VRCS2-MRZ involves electrical wiring and Z-Wave network pairing. It is recommended that installation be performed by a qualified electrician if you are not familiar with electrical wiring.
Wiring Instructions:
- Safety First: Before beginning any wiring, ensure the power to the circuit breaker or fuse box is turned OFF to prevent electrical shock.
- Remove Existing Switch: Carefully remove the existing wall switch from the electrical box.
- Identify Wires: Identify the Line (hot), Load, Neutral, and Ground wires. The VRCS2-MRZ requires a neutral wire for operation.
- Connect Wires: Connect the wires from the wall box to the corresponding terminals on the VRCS2-MRZ using wire nuts or screw terminals as appropriate. The device typically has screw terminals for secure connections.
- Mount Device: Carefully place the wired VRCS2-MRZ into the electrical wall box and secure it with the provided screws.
- Install Wallplate: Attach a compatible Decora wallplate (not included) over the device.
- Restore Power: Turn the power back ON at the circuit breaker.
Z-Wave Network Pairing:
To integrate the scene controller into your Z-Wave network, follow these general steps. Specific steps may vary slightly depending on your Z-Wave controller (hub).
- Initiate Inclusion Mode: Put your Z-Wave controller into inclusion (pairing) mode. Refer to your controller's manual for specific instructions.
- Pair the Scene Controller: On the VRCS2-MRZ, press and hold both the top and bottom buttons for approximately five seconds until both buttons turn amber. This indicates the device is in pairing mode.
- Confirm Pairing: Your Z-Wave controller should detect the device. Once successfully paired, the buttons on the VRCS2-MRZ may change color or flash to confirm. The controller will typically recognize it as a scene controller and two binary switches.
- Configure Scenes (Optional): Use your Z-Wave controller's interface to assign scenes to the buttons or link them to other Z-Wave devices.

Image: Leviton VRCS2-MRZ with its internal components and the included white, ivory, and light almond faceplates.
Operating Instructions
The Leviton VRCS2-MRZ offers both direct load control and advanced scene control through your Z-Wave network.
Local Control:
- ON/OFF Switching: Press the top button to control the first connected load (ON/OFF). Press the bottom button to control the second connected load (ON/OFF).
- Scene Activation: If configured, a quick press of a button can activate a pre-programmed scene.
Remote and Scene Control:
For advanced scene control and remote operation, the VRCS2-MRZ integrates with your Z-Wave network. This allows for:
- Zone Control: Manage multiple light sources across different rooms with a single command from a zone controller.
- Scene Control: Adjust light levels and ambiance for various activities with one touch using a scene controller or a universal remote programmed with the VRCPG.
- Timed Events: Schedule lights to turn on/off or activate other network devices at specific times for enhanced security or convenience.
Note: Programming of scenes and advanced Z-Wave functions typically requires a compatible Z-Wave controller (hub) and the Leviton Vizia RF+ Handheld Remote (VRCPG).
Video: An overview of the Leviton Vizia RF+ system, demonstrating its features and capabilities in a home automation setup.
Maintenance
The Leviton VRCS2-MRZ is designed for long-lasting performance with minimal maintenance.
- Cleaning: To clean the device, wipe it with a soft, damp cloth. Do not use abrasive cleaners, solvents, or harsh chemicals, as these can damage the finish or internal components.
- Regular Checks: Periodically check the wallplate and device for any signs of damage or loose connections. If any issues are found, consult a qualified electrician.
- Firmware Updates: If available, firmware updates for your Z-Wave hub may improve compatibility and performance of connected devices, including the VRCS2-MRZ. Refer to your Z-Wave hub's documentation for update procedures.
Troubleshooting
If you encounter issues with your Leviton VRCS2-MRZ, consider the following troubleshooting steps:
- Device Not Responding:
- Ensure power is supplied to the device. Check your circuit breaker.
- Verify wiring connections are secure and correct.
- If controlling a load, ensure the load itself (e.g., light bulb) is functional.
- Difficulty Pairing with Z-Wave Hub:
- Ensure the Z-Wave hub is in inclusion mode.
- Bring the VRCS2-MRZ closer to the Z-Wave hub during the pairing process, ideally within a few feet.
- Try excluding the device from the network first, then re-including it. To exclude, put your hub in exclusion mode, then press and hold both the top and bottom buttons on the VRCS2-MRZ for approximately five seconds until they turn amber.
- Some Z-Wave controllers may require specific device handlers or configurations for full functionality. Consult your Z-Wave hub's documentation or community forums.
- Intermittent Scene Control or Signal Issues:
- Z-Wave networks benefit from a strong mesh. Ensure you have enough Z-Wave devices (especially always-on, non-battery-powered ones) to act as repeaters, particularly in larger homes or areas with signal obstructions.
- Perform a Z-Wave network heal or repair function on your hub to optimize routing.
- Buttons Not Functioning as Expected:
- Verify that the scenes or load controls are correctly programmed within your Z-Wave hub.
- Ensure the VRCPG Handheld Remote was used for initial programming if complex scenes are involved.
Video: A testimonial discussing the benefits and reliability of the Leviton Vizia RF+ system in a home automation context.
Specifications
| Feature | Detail |
|---|---|
| Model | VRCS2-MRZ |
| Brand | Leviton |
| Switch Type | Dimmer Switch (Scene Controller with ON/OFF) |
| Connectivity Protocol | Z-Wave |
| Control Method | Remote, Push Button |
| Number of Positions | 2 (for loads/scenes) |
| Material | Plastic (Housing), Copper (Contact) |
| Item Dimensions (L x W x H) | 4.75 x 3 x 2.5 inches |
| Mounting Type | Wall Mount |
| Color | White/Ivory/Light Almond (faceplates included) |
| International Protection Rating | IP54 |
| UPC | 078477481523 |

Image: The Z-Wave logo, indicating compatibility with Z-Wave smart home networks.
Warranty and Support
Warranty Information:
This Leviton VRCS2-MRZ Vizia RF+ 2-Button Scene Controller is covered by a 5-Year Limited Warranty. For detailed terms and conditions, please refer to the official Leviton warranty documentation or their website.
Customer Support:
For technical assistance, product inquiries, or warranty claims, please visit the official Leviton website or contact their customer support directly. You can find contact information and additional resources at www.leviton.com.


