
Introduction
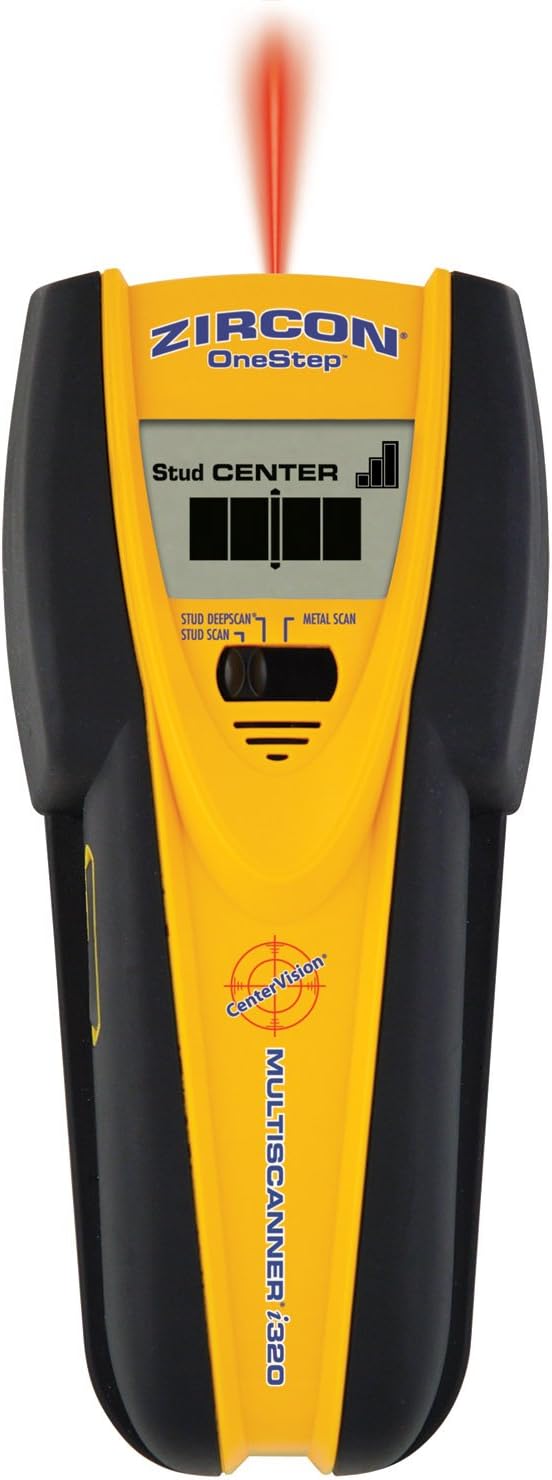
The Zircon MultiScanner i320 OneStep is an advanced electronic wall scanner designed to locate the center and edges of wood and metal studs, joists, and metal targets behind walls, floors, and ceilings. It also features continuous WireWarning detection for live, unshielded electrical wire. This manual provides detailed instructions for proper setup, operation, and maintenance of your device.
Safety Information
Always follow manufacturer instructions and exercise caution when working with electrical wiring. Ensure the device is used correctly to avoid potential injury or damage. Do not rely solely on the stud finder to locate items behind a surface. Always use additional information such as blueprints, construction plans, and visual inspections when available. Disconnect power to the area before cutting or drilling.
Product Overview
The MultiScanner i320 combines multiple scanning functions into one device for comprehensive wall scanning. Its ergonomic design ensures comfortable handling during use.
Key Features:
- Two Stud Scan Modes: Locates wood or metal studs and joists up to 1-1/2 inches (38 mm) deep.
- Metal Scan Mode: Detects metal pipes or rebar up to 3 inches (76 mm) deep.
- WireWarning Detection: Continuously indicates the presence of live, unshielded electrical wire up to 2 inches (51 mm) deep in all modes.
- ACT (Auto Correcting Technology): Automatically corrects common user errors for improved accuracy.
- SpotLite Pointing System: Illuminates a light beam on the scanned surface when a target is found.
- LCD Display: Provides clear visual indications of stud edges, center, and other detected objects.

Setup
Battery Installation:
- Locate the battery compartment cover on the back of the unit.
- Slide the cover open.
- Insert one new 9V alkaline battery, matching the positive (+) and negative (-) terminals correctly.
- Close the battery compartment cover securely.
Note: A weak battery may cause inaccurate readings. Replace the battery when the low battery indicator appears on the display.
Operating Instructions
For optimal performance, ensure the scanning surface is dry and free of debris. Avoid touching the scanning surface with your free hand during operation.
General Scanning Procedure:
- Select Mode: Use the 3-mode switch to select the desired scanning mode: Stud Scan, Stud DeepScan, or Metal Scan.
- Placement: Place the MultiScanner i320 flat against the wall where you wish to begin scanning. Ensure the entire scanning surface is in contact with the wall.
- Calibration: Press and hold the Power Button. The unit will calibrate for a few seconds. Wait for the calibration to complete before moving the tool. Calibration must be performed against the surface to be scanned, away from any known studs or metal.
- Scan: While holding the Power Button, slowly slide the tool horizontally across the surface.
- Detection: The display will indicate when a stud or metal object is detected. The SpotLite Pointing System will illuminate, and an audio tone will sound.
- Marking: Mark the location of the detected object as indicated by the tool.
Stud Scan Mode:
This mode is designed for locating the center and edges of wood and metal studs up to 1-1/2 inches (38 mm) deep. The display will show bars that increase as you approach a stud. When the tool is centered over a stud, all bars will be lit, and the "Stud Center" indicator will appear.

Metal Scan Mode:
Use this mode to locate non-ferrous metal (e.g., copper pipes) and ferrous metal (e.g., rebar) up to 3 inches (76 mm) deep. The signal strength indicator will increase as the tool approaches metal. The "Metal" icon will appear on the display when metal is detected.

WireWarning Detection:
The WireWarning detection feature is always active in all modes. It alerts you to the presence of live, unshielded AC electrical wiring up to 2 inches (51 mm) deep. When live AC wiring is detected, the WireWarning indicator will flash on the display, and an audio tone will sound. Exercise extreme caution when this indicator is active.
Troubleshooting
- Inaccurate Readings:
- Ensure the battery is fresh and fully charged. A weak battery can affect performance.
- Recalibrate the tool by lifting it off the wall, releasing the power button, and then placing it back on the wall in a new location (away from known objects) before pressing the power button again.
- Ensure the tool is held flat against the surface and moved slowly.
- Thick or uneven surfaces (e.g., lath and plaster) can reduce scanning depth and accuracy.
- No Detection:
- Verify the correct mode is selected for the target you are trying to find.
- Ensure proper calibration on a clear section of the wall.
- The object may be deeper than the tool's maximum scanning depth for the selected mode.
- Constant Beeping/False Positives:
- This may occur if the tool is calibrated directly over a stud or dense material. Lift the tool, release the power button, and recalibrate on an empty section of the wall.
- High moisture content in walls can interfere with detection. Allow walls to dry if recently painted or exposed to humidity.
Maintenance
- Cleaning: Wipe the tool with a soft, damp cloth. Do not use abrasive cleaners or solvents.
- Storage: Store the MultiScanner i320 in a dry, dust-free environment at room temperature. Remove the battery if storing for extended periods to prevent leakage.
- Battery Replacement: Replace the 9V battery when the low battery indicator appears or when the tool's performance degrades.
Specifications
| Feature | Specification |
|---|---|
| Model Number | MS i320 |
| Stud Scan Depth | Up to 1.5 inches (38 mm) |
| Metal Scan Depth | Up to 3 inches (76 mm) |
| WireWarning Detection Depth | Up to 2 inches (51 mm) |
| Power Source | 1 x 9V Alkaline Battery (not included) |
| Material | Plastic |
| Item Weight | 10.6 ounces (0.3 kg) |
| Product Dimensions | 6 x 9 x 5 inches (approximate) |
| Display Type | LCD |
Warranty Information
This Zircon product is covered by a manufacturer's warranty. For specific details regarding the warranty period, coverage, and claims process, please refer to the documentation included with your purchase or visit the official Zircon website.
Support
For additional assistance, technical support, or frequently asked questions, please visit the official Zircon website at www.zircon.com. You may also find helpful resources and contact information there.


