1. Introduction
This manual provides instructions for the setup, operation, and maintenance of your AUDIX FP5 Fusion Series 5-Piece Drum Microphone Kit. The FP5 kit is designed to provide a comprehensive microphone solution for capturing drum performances in various settings, including studio recording and live stage applications. It includes specialized microphones tailored for kick drums, snare drums, and tom-toms.
2. What's in the Box
The AUDIX FP5 Fusion Series Drum Microphone Kit includes the following components:
- One (1) AUDIX f5 Snare Microphone
- Three (3) AUDIX f2 Tom Microphones
- One (1) AUDIX f6 Kick Microphone
- Four (4) DCLIP Microphone Clips
- Four (4) DFLEX Microphone Clips
- One (1) MC1 Microphone Clip
- One (1) Aluminum Road Case

The complete AUDIX FP5 kit laid out, showing the five microphones, various mic clips (DCLIP and DFLEX), and the aluminum travel case.

An open view of the rugged aluminum travel case, revealing the custom foam inserts designed to securely hold the five microphones and accessories.
3. Product Overview
The AUDIX FP5 kit features a selection of dynamic microphones from the Fusion Series, each optimized for specific drum components. These microphones are also suitable for other instruments such as guitar cabinets, bass cabinets, and various percussion instruments.

This image displays the five microphones included in the AUDIX FP5 kit: one f5 microphone, one f6 microphone, and three f2 microphones, showcasing their distinct designs.
3.1. AUDIX f5 Snare Microphone
The f5 microphone is specifically designed for snare drums. It features a hypercardioid polar pattern, which helps in isolating the snare sound from other instruments on stage or in the studio, reducing bleed and focusing on the drum's attack and resonance.

A detailed view of the AUDIX f5 microphone, designed for snare drums, highlighting its robust construction and grille.
3.2. AUDIX f2 Tom Microphones
The three f2 microphones are optimized for tom-toms. Their frequency response and hypercardioid pattern are tailored to capture the punch and body of rack and floor toms, providing clear and defined drum sounds.

A detailed view of the AUDIX f2 microphone, intended for tom drums, emphasizing its smaller size and durable build.
3.3. AUDIX f6 Kick Microphone
The f6 microphone is engineered for kick drums. It is designed to handle high sound pressure levels and capture the low-end frequencies and attack characteristic of a kick drum, delivering a powerful and articulate bass drum sound.
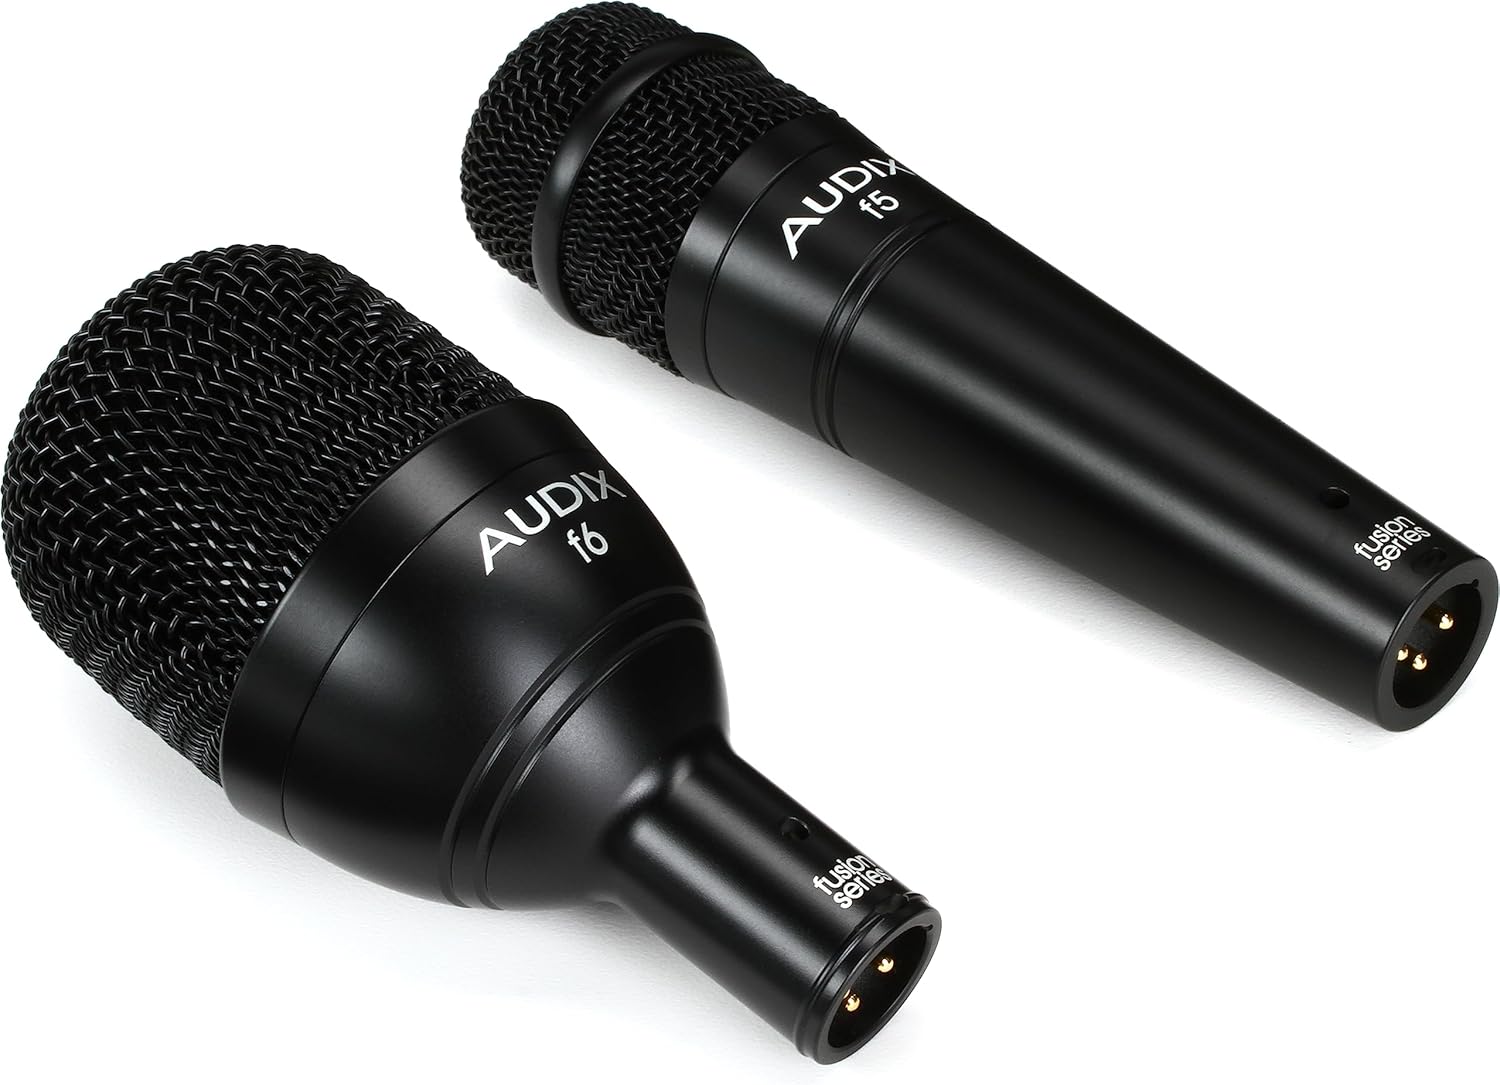
A detailed view of the AUDIX f6 microphone, optimized for kick drums, showcasing its compact design and grille.
4. Setup Instructions
Proper setup is crucial for optimal performance of your drum microphone kit. Follow these steps for installation:
- Mounting Microphones:
- f5 (Snare): Attach the f5 to a microphone stand using the MC1 clip. Position it approximately 1-2 inches from the rim of the snare drum, pointing towards the center of the drum head. Experiment with angles to capture desired attack and body.
- f2 (Toms): Use the DFLEX clips to attach the f2 microphones directly to the rims of your tom-toms. Position each f2 approximately 1-2 inches from the drum head, pointing towards the center. Ensure the clip is securely fastened to prevent movement during performance.
- f6 (Kick): Place the f6 inside the kick drum, typically on a short stand, or mount it externally near the sound hole. Position it 2-6 inches from the beater head for more attack, or further back for more resonance.
- Connecting Cables: Connect standard XLR cables (not included) from each microphone to the input channels of your mixing console or audio interface. Ensure all connections are secure.
- Input Gain Setting: Before playing, set the input gain on your mixer or interface for each channel. Start with the gain low and gradually increase it while the drummer plays at performance volume. Aim for a strong signal without clipping (distortion).
5. Operating Instructions
Once the microphones are set up and connected, follow these guidelines for operation:
- Sound Check: Conduct a thorough sound check, listening to each drum individually and then the full kit. Adjust microphone positions slightly if needed to optimize tone and minimize unwanted bleed.
- Equalization (EQ): Apply EQ sparingly. The Fusion Series microphones are designed to capture the natural sound of the drums. Use EQ to fine-tune the sound, not to drastically alter it.
- Compression: Compression can be used to control dynamics and add punch to drum sounds. Apply it carefully to avoid an unnatural or over-processed sound.
- Monitoring: Ensure that the drummer and other musicians have a clear and balanced monitor mix.
6. Maintenance
Proper maintenance will extend the life and performance of your AUDIX FP5 microphone kit:
- Cleaning: Use a soft, dry cloth to wipe down the microphone bodies after each use. For the grilles, a soft brush can remove dust or debris. Avoid using liquid cleaners directly on the microphone elements.
- Storage: Always store the microphones and accessories in the provided aluminum road case when not in use. This protects them from dust, moisture, and physical damage.
- Cable Care: Coil XLR cables properly to prevent kinks and damage. Avoid stepping on cables or placing heavy objects on them.
- Clip Inspection: Periodically check microphone clips for wear and tear. Replace any damaged clips to ensure secure mounting.
7. Troubleshooting
If you encounter issues with your AUDIX FP5 kit, consider the following:
- No Sound:
- Check all XLR cable connections at both the microphone and the mixer/interface.
- Verify that the input gain on the mixer/interface channel is turned up.
- Ensure the channel is not muted and the fader is up.
- Test with a different XLR cable or input channel to isolate the problem.
- Poor Sound Quality (Distortion, Weak Signal):
- Distortion: Reduce the input gain on the mixer/interface. Ensure the microphone is not positioned too close to a very loud sound source.
- Weak Signal: Increase the input gain. Check microphone placement; it might be too far from the sound source.
- Unwanted Noise: Ensure all cables are properly shielded and away from power cables. Check for ground loops.
- Microphone Drooping/Falling: Ensure microphone clips (DCLIP, DFLEX, MC1) are securely tightened to the stand or drum rim. Replace worn clips if necessary.
8. Specifications
| Feature | Specification |
|---|---|
| Brand | AUDIX |
| Model Name | FP5 |
| Connectivity Technology | XLR |
| Connector Type | XLR |
| Microphone Form Factor | Handheld |
| Polar Pattern | Hyper Cardioid |
| Impedance | 600 Ohm |
| Frequency Response | 15 KHz (Upper Limit) |
| Signal-to-Noise Ratio | 70 dB |
| Audio Sensitivity | 40 Decibels |
| Item Weight | 9.21 pounds (total kit) |
| Product Dimensions (L x W x H) | 16.3 x 13.9 x 5.1 inches (case) |
| Material | Alloy Steel, Aluminum |
| Recommended Uses | Drum Set Recordings, Live Stage Drum Performances |
9. Warranty & Support
AUDIX products are manufactured to high standards and are typically covered by a limited warranty against defects in materials and workmanship. For specific warranty terms, duration, and to register your product, please refer to the official AUDIX website or contact their customer support directly.
For technical assistance, troubleshooting beyond this manual, or service inquiries, please visit the AUDIX official website or contact their customer support team.


