
1. Introduction
This manual provides essential instructions for the safe and effective use of your Sealey SA22 Air Operated Flat Bed Sander. The SA22 is an orbital flat bed sander designed for various sanding applications, including body panels, wood, metals, and plastics. It features a counter-balanced drive shaft for smooth operation and a palm-type trigger for comfortable, one-handed use.
Please read this manual thoroughly before operating the tool and retain it for future reference.
2. Safety Instructions
Always observe general workshop safety rules when using power tools. Failure to do so may result in injury or damage to the tool.
- Personal Protective Equipment: Always wear approved safety glasses, hearing protection, and a dust mask. Gloves are recommended to protect hands.
- Work Area: Ensure your work area is clean, well-lit, and free from obstructions. Keep children and unauthorized persons away from the work area.
- Air Supply: Ensure the air supply is clean, dry, and regulated to the correct pressure (refer to specifications). Disconnect the air supply before changing accessories or performing maintenance.
- Tool Condition: Inspect the sander for damage before each use. Do not use if damaged. Ensure all fasteners are tight.
- Sanding Material: Be aware of the material being sanded. Some materials produce hazardous dust. Ensure adequate ventilation.
- Secure Workpiece: Always secure the workpiece firmly to prevent movement during sanding.
- Avoid Overreaching: Maintain proper footing and balance at all times.
- Flammable Materials: Do not operate the sander near flammable liquids, gases, or dust.
3. What's in the Box
Upon unpacking, please verify that all components are present and undamaged:
- 1 x Sealey SA22 Air Operated Flat Bed Sander
If any items are missing or damaged, please contact your supplier immediately.
4. Setup
4.1. Air Supply Connection
- Ensure the air compressor is turned off and the air line is depressurized.
- Connect a suitable air hose (minimum 3/8" I.D.) to the air inlet of the sander. It is recommended to use an in-line air filter/lubricator unit to ensure clean, lubricated air.
- Set the air pressure regulator on your compressor to the recommended operating pressure (typically 90 psi / 6.2 bar). Do not exceed the maximum operating pressure.
4.2. Attaching Sanding Sheets
The SA22 uses standard flat sanding sheets. To attach a sheet:
- Release the clamping levers on both ends of the sanding pad.
- Insert one end of the sanding sheet under the clamp and secure it.
- Stretch the sanding sheet taut over the pad and insert the other end under the second clamp, securing it firmly.
- Ensure the sheet is flat and wrinkle-free on the sanding pad.
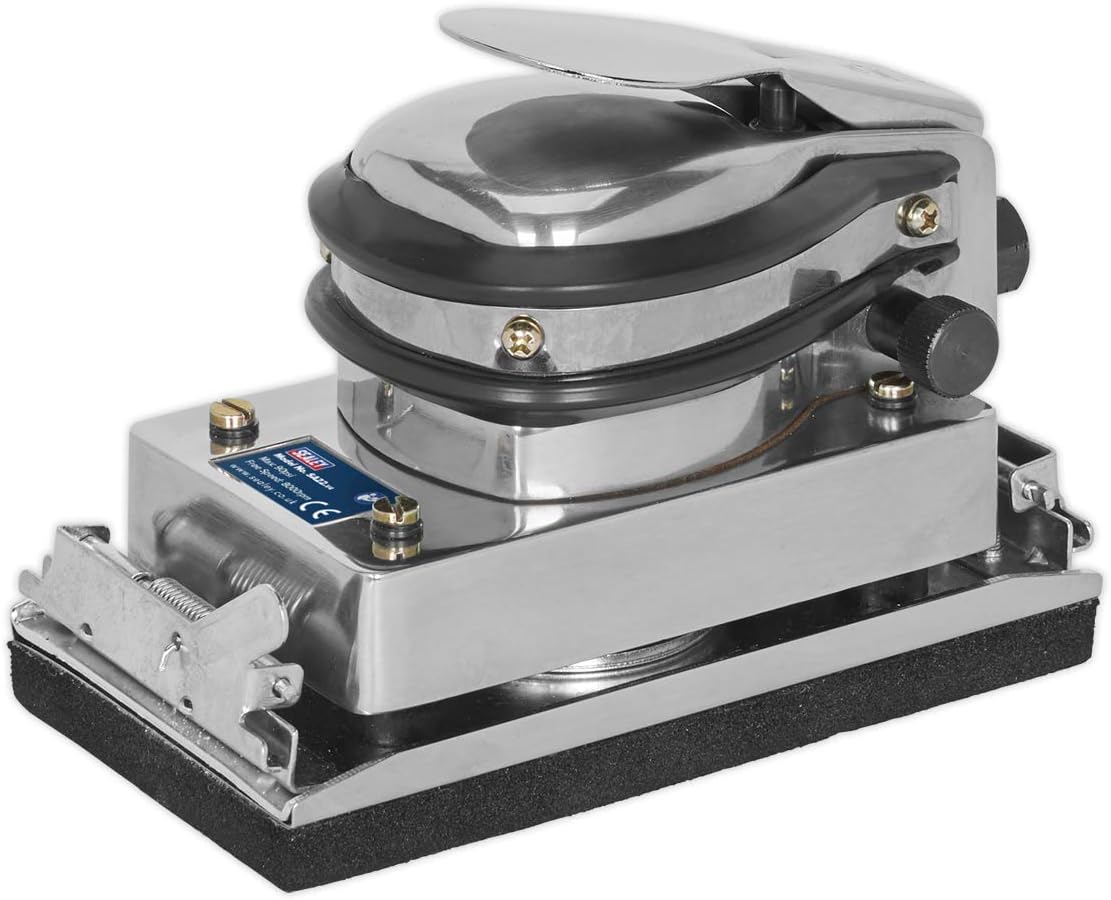
Figure 1: Top-front view of the Sealey SA22 Air Operated Flat Bed Sander, showing the palm trigger and sanding pad.
5. Operating Instructions
5.1. General Operation
- Ensure all safety precautions are followed and the workpiece is securely fastened.
- Connect the air supply.
- Hold the sander firmly with one hand, placing your palm over the trigger mechanism.
- Place the sanding pad flat against the surface to be sanded.
- Depress the palm trigger to start the sander.
- Move the sander in a smooth, overlapping pattern across the surface. Avoid applying excessive pressure; let the tool do the work.
- Release the trigger to stop the sander.
- Disconnect the air supply when finished or before making adjustments.
5.2. Recommended Applications
The Sealey SA22 is suitable for:
- Sanding body panels
- Wood preparation and finishing
- Metal surface preparation
- Sanding plastics

Figure 2: Side-front view of the Sealey SA22 Air Operated Flat Bed Sander, highlighting the air inlet and clamping mechanism.
6. Maintenance
Regular maintenance ensures optimal performance and extends the life of your tool.
- Daily:
- Before each use, check the air tool for loose parts or damage.
- Ensure the air supply is clean and dry. Drain moisture from the air compressor tank daily.
- If not using an in-line lubricator, add a few drops of air tool oil into the air inlet before and after each use.
- Sanding Pad: Regularly inspect the sanding pad for wear or damage. Replace if necessary to ensure even sanding.
- Cleaning: Keep the tool clean. Wipe down the exterior with a damp cloth. Do not use solvents.
- Storage: When not in use, store the sander in a clean, dry, and safe location, out of reach of children.

Figure 3: Side view of the Sealey SA22 Air Operated Flat Bed Sander, showing the compact design.
7. Troubleshooting
| Problem | Possible Cause | Solution |
|---|---|---|
| Sander not operating or low power | Low air pressure; Restricted air flow; Lack of lubrication; Damaged internal components. | Check air compressor pressure and regulator setting; Inspect air hose and fittings for kinks or blockages; Add air tool oil to the air inlet; Contact qualified service personnel. |
| Excessive vibration | Worn sanding pad; Loose sanding sheet; Internal imbalance. | Replace sanding pad; Re-secure sanding sheet; Contact qualified service personnel. |
| Air leakage | Loose fittings; Worn O-rings or seals. | Tighten all air fittings; Replace worn seals or O-rings. |
8. Specifications
| Feature | Detail |
|---|---|
| Model Number | SA22 |
| Brand | Sealey |
| Power Source | Air-Powered |
| Pad Size | 170 x 95mm |
| Orbit Size | Ø5mm |
| Maximum Rotational Speed | 11000 RPM |
| Item Weight | 2.01 Kilograms (4.42 pounds) |
| Product Dimensions | 4.41 x 9.29 x 5.91 inches |
| Recommended Air Pressure | 90 psi (6.2 bar) |
| Air Inlet Size | (Not specified, but typically 1/4" NPT for small air tools) |
9. Warranty and Support
Sealey products are backed by a 12-month guarantee. Hand tools may benefit from a lifetime warranty. For specific warranty details, please refer to the documentation provided with your purchase or visit the official Sealey website.
Sealey maintains an extensive parts service with over 130,000 different parts in stock. For parts lists and online instructions, please visit the official Sealey website or contact their customer support.
Contact Information: For technical support, service, or parts inquiries, please refer to the contact details provided on the official Sealey website or your purchase documentation.

