
1. Introduction
The Gardner Bender GDT-3190 Digital Multimeter is a versatile and essential tool designed for testing various electrical parameters in household appliances and electrical systems. This manual provides detailed instructions for the safe and effective use of your multimeter, covering setup, operation, maintenance, and troubleshooting.
2. Safety Information
Always prioritize safety when working with electrical devices. This multimeter is rated CAT III 600V and conforms to UL 61010-1 standards, certified to CAN/CSA C22.2. Adhere to the following safety guidelines:
- Ensure the multimeter is set to the correct function and range before making any measurements.
- Do not attempt to measure voltages or currents exceeding the specified maximum ratings.
- Always disconnect power to the circuit before connecting or disconnecting test leads, especially when measuring resistance or continuity.
- Inspect test leads for damage before each use. Replace damaged leads immediately.
- Wear appropriate personal protective equipment (PPE), such as safety glasses and insulated gloves, when working with electricity.
- Do not use the multimeter in wet conditions or if the device itself is wet.
- Keep fingers behind the finger guards on the test probes during measurements.
3. Product Overview
The Gardner Bender GDT-3190 Digital Multimeter features a robust design with a clear digital display and intuitive controls. Key components include:
- 3.5-inch Digital Display: Provides clear, easy-to-read measurements.
- 14-Position Manual Ranging Rotary Dial: Selects the desired measurement function and range.
- Test Lead Input Jacks: Securely connect the included positive (red) and negative (black) test leads.
- Durable Rubber Boot: Offers drop resistance (up to 6 ft.) and a comfortable, steadfast grip.
- Wrap-around Lead Holders: Convenient storage for test leads.
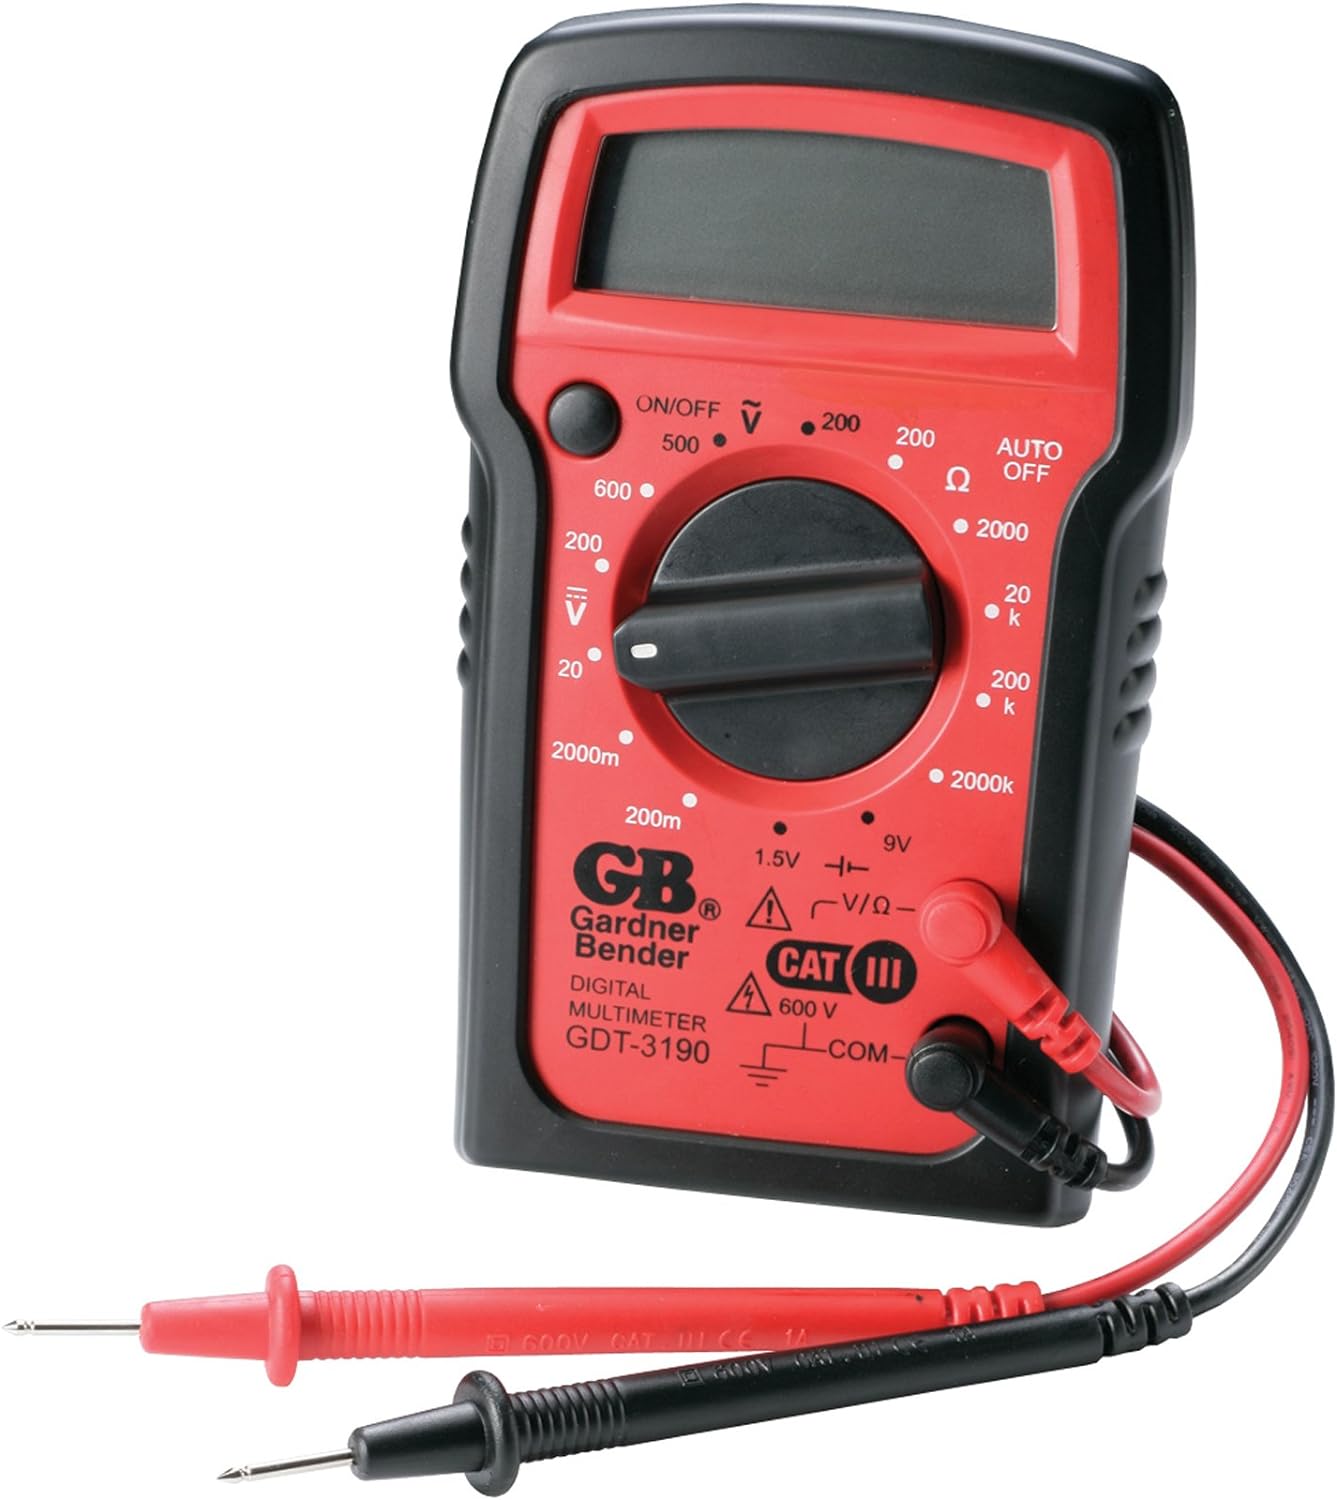
Figure 3.1: The Gardner Bender GDT-3190 Digital Multimeter with its red and black test leads.

Figure 3.2: Testing a switch for continuity or resistance using the multimeter's probes.

Figure 3.3: Measuring voltage within a circuit breaker panel using the multimeter.

Figure 3.4: Checking the voltage of a car battery with the multimeter's test leads.
4. Setup
4.1 Battery Installation
The GDT-3190 Digital Multimeter requires one 9V battery (not included) for operation. To install the battery:
- Locate the battery compartment cover on the back of the multimeter.
- Use a small Phillips head screwdriver to remove the screw securing the cover.
- Carefully remove the battery cover.
- Connect a new 9V battery to the battery clips, ensuring correct polarity (+ to + and - to -).
- Place the battery inside the compartment.
- Replace the battery cover and secure it with the screw.
4.2 Connecting Test Leads
The multimeter comes with a set of positive (red) and negative (black) electrical test leads. To connect them:
- Insert the black test lead into the 'COM' (common) input jack.
- Insert the red test lead into the 'VΩmA' input jack for voltage, resistance, and battery measurements.
- Ensure the leads are firmly seated in their respective jacks.
5. Operating Instructions
The GDT-3190 is a manual ranging multimeter, meaning you must select the appropriate range for your measurement. Always start with the highest range setting and work your way down if the reading is too low.
5.1 Powering On/Off
Turn the rotary dial from the 'OFF' position to any desired measurement function to power on the device. The multimeter features an auto-off function to conserve battery life after a period of inactivity.
5.2 Measuring AC Voltage (ACV)
To measure AC voltage (e.g., household outlets, AC circuits):
- Set the rotary dial to the desired ACV range (e.g., 500V).
- Carefully touch the red and black test probes to the two points in the circuit where you want to measure AC voltage.
- Read the voltage value on the digital display.
5.3 Measuring DC Voltage (DCV)
To measure DC voltage (e.g., batteries, DC power supplies):
- Set the rotary dial to the desired DCV range (e.g., 600V).
- Touch the red test probe to the positive (+) point and the black test probe to the negative (-) point in the circuit.
- Read the voltage value on the digital display. A negative sign indicates reversed polarity.
5.4 Measuring Resistance (Ω)
To measure resistance (e.g., components, wires):
- Ensure the circuit is completely de-energized before measuring resistance.
- Set the rotary dial to the desired Ohm (Ω) range (e.g., 2MΩ).
- Touch the test probes across the component or wire you wish to measure.
- Read the resistance value on the digital display. An 'OL' (Overload) reading indicates the resistance is higher than the selected range; select a higher range.
5.5 Battery Testing
The multimeter can test 1.5V and 9V batteries:
- Set the rotary dial to the '1.5V' or '9V' battery test function.
- Connect the red probe to the positive terminal of the battery and the black probe to the negative terminal.
- Read the battery voltage on the digital display. A low reading indicates a weak or dead battery.
6. Maintenance
6.1 Cleaning
To maintain the accuracy and longevity of your multimeter:
- Wipe the unit with a dry, soft cloth. Do not use abrasive cleaners or solvents.
- Keep the test leads clean and free of debris.
6.2 Battery Replacement
When the low battery indicator appears on the display, replace the 9V battery as described in Section 4.1.
6.3 Storage
Store the multimeter in a cool, dry place away from direct sunlight and extreme temperatures. Utilize the wrap-around lead holders for neat storage of the test leads.
7. Troubleshooting
If you encounter issues with your GDT-3190 Digital Multimeter, refer to the following common problems and solutions:
| Problem | Possible Cause | Solution |
|---|---|---|
| No display or dim display | Dead or weak battery; incorrect battery installation. | Replace the 9V battery; ensure correct polarity. |
| 'OL' (Overload) reading | Measurement exceeds selected range; open circuit (for resistance/continuity). | Select a higher range; check for breaks in the circuit or component. |
| Inaccurate readings | Incorrect function/range selected; poor contact with probes; damaged leads. | Verify function/range; ensure firm contact; inspect and replace damaged leads. |
| Multimeter turns off unexpectedly | Auto-off function activated; low battery. | This is normal behavior for auto-off; replace battery if low battery indicator is on. |
8. Specifications
Below are the technical specifications for the Gardner Bender GDT-3190 Digital Multimeter:
- Brand: Gardner Bender
- Model Number: GDT-3190
- Style: Manual 4 Function / 14 Range
- Color: Red With Black Rubber Boot
- Power Source: Battery Powered (Requires 9V battery, not included)
- Measurement Type: Multimeter
- AC Voltage: Up to 500V
- DC Voltage: Up to 600V
- Resistance: Up to 2 meg Ohms
- Battery Testing: 1.5V and 9V
- Item Weight: 9.6 ounces
- Product Dimensions (L x W x H): 1.75 x 7 x 11.5 inches
- Material: Plastic
- Measurement Accuracy: ± 2%
- Safety Rating: CAT III 600V, UL 61010-1, CAN/CSA C22.2
- Country of Origin: China
- UPC: 032076068370, 100058666460
9. Warranty and Support
9.1 Warranty Information
The Gardner Bender GDT-3190 Digital Multimeter comes with a 1-Year Limited Warranty from the date of purchase. This warranty covers defects in materials and workmanship under normal use. Please retain your proof of purchase for warranty claims.
9.2 Customer Support
For technical assistance, troubleshooting beyond this manual, or warranty inquiries, please contact Gardner Bender customer support. Visit the official Gardner Bender website for contact information and additional resources.
You can find more information and support at the Gardner Bender Store on Amazon.


