Introduction
This manual provides essential instructions for the safe and efficient operation of your Yamaha DVD-S1700 Universal DVD Player. Please read this manual thoroughly before using the unit to ensure proper setup and performance. Keep this manual in a safe place for future reference.
The Yamaha DVD-S1700 is designed to play various disc formats, including DVD-Video, CD, Super Audio CD (SACD), and DVD-Audio, offering high-quality video upconversion up to 1080p.
Important Safety Information
- Power Source: Connect the unit only to an AC outlet of the voltage specified on the rear panel.
- Ventilation: Ensure adequate ventilation. Do not block ventilation openings. Avoid placing the unit on soft surfaces or in enclosed spaces.
- Moisture: Do not expose the unit to rain or moisture. Do not place objects filled with liquids on the unit.
- Heat: Keep the unit away from heat sources such as radiators, heat registers, stoves, or other apparatus that produce heat.
- Servicing: Do not attempt to service this unit yourself. Refer all servicing to qualified service personnel.
Setup Guide
Follow these steps to properly set up your DVD-S1700 player.
1. Unpacking and Placement
Carefully remove the player from its packaging. Place the unit on a stable, level surface with sufficient space around it for proper ventilation. Avoid direct sunlight or proximity to heat sources.
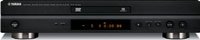
Front view of the Yamaha DVD-S1700 universal DVD player, showcasing its aluminum front panel and display.
2. Connecting to a Television
Choose the best available connection type for your television to achieve optimal video quality.
- HDMI Connection (Recommended for 1080p upconversion): Connect an HDMI cable from the HDMI OUT terminal on the DVD-S1700 to an HDMI IN terminal on your TV. This single cable transmits both video and audio signals digitally.
- Component Video Connection: Use component video cables (red, green, blue) to connect the COMPONENT VIDEO OUT terminals on the player to the corresponding COMPONENT VIDEO IN terminals on your TV. For audio, use separate audio cables (red and white) to connect to your TV or audio receiver.
- S-Video Connection: Connect an S-Video cable from the S-VIDEO OUT terminal on the player to the S-VIDEO IN terminal on your TV. Use separate audio cables for sound.
- Composite Video Connection: Connect a composite video cable (yellow) from the VIDEO OUT terminal on the player to the VIDEO IN terminal on your TV. Use separate audio cables for sound.
3. Connecting to an Audio System
For optimal sound quality, connect the DVD-S1700 to an audio receiver or amplifier.
- HDMI Audio: If using HDMI for video, audio will also be transmitted via the HDMI cable to your TV or HDMI-compatible receiver.
- Digital Audio (Optical/Coaxial): Connect an optical digital cable from the OPTICAL OUT terminal or a coaxial digital cable from the COAXIAL OUT terminal on the player to the corresponding digital audio input on your receiver.
- Analog Audio (Stereo): Connect RCA audio cables (red for right, white for left) from the AUDIO OUT (L/R) terminals on the player to the analog audio input on your receiver.
- Multi-Channel Analog Audio: For SACD and DVD-Audio playback, connect multi-channel RCA cables from the 5.1CH AUDIO OUT terminals on the player to the corresponding 5.1CH input on your receiver.
4. Power Connection
After all audio and video connections are made, plug the power cord into an AC outlet.
Operating Instructions
Basic Playback
- Power On: Press the POWER button on the front panel or the remote control to turn on the unit.
- Open Disc Tray: Press the OPEN/CLOSE button to open the disc tray.
- Insert Disc: Place a disc gently into the tray with the label side facing up.
- Close Disc Tray: Press the OPEN/CLOSE button again to close the tray. The player will automatically begin reading the disc.
- Start Playback: If the disc does not start automatically, press the PLAY button on the remote control.
- Stop Playback: Press the STOP button to stop playback.
- Pause Playback: Press the PAUSE button to temporarily stop playback. Press PLAY to resume.
Disc Types Supported
The DVD-S1700 supports a wide range of disc formats:
- DVD-Video
- DVD-R/RW (Video Mode)
- CD-Audio
- CD-R/RW (CD-DA, MP3, WMA)
- Super Audio CD (SACD)
- DVD-Audio
- JPEG (on CD-R/RW)
Note: Playback of certain recorded discs may not be possible due to recording conditions or disc quality.
Video Settings
Access the setup menu to adjust video output settings, including resolution (e.g., 480p, 720p, 1080i, 1080p) and aspect ratio. Use the remote control's MENU button to navigate and select options.
Audio Settings
The DVD-S1700 offers various audio output options. In the setup menu, you can configure digital audio output (PCM, Bitstream), speaker setup for multi-channel audio, and dynamic range compression.
Remote Control Usage
The included remote control provides full functionality for the DVD-S1700. Ensure batteries are correctly inserted. Key functions include:
- POWER: Turns the unit on/off.
- OPEN/CLOSE: Opens and closes the disc tray.
- PLAY, PAUSE, STOP, SKIP (<< / >>): Basic playback controls.
- MENU/SETUP: Accesses disc menus and system setup.
- ARROW keys and ENTER: Navigation and selection.
- DISPLAY: Shows playback information on screen.
- AUDIO/SUBTITLE: Selects audio tracks or subtitle languages.
- DIMMER: Adjusts the brightness of the front panel display (3-step).
Maintenance
Cleaning the Unit
Wipe the exterior of the unit with a soft, dry cloth. For stubborn dirt, lightly dampen the cloth with water or a mild, non-abrasive cleaner. Do not use strong solvents or abrasive pads, as they can damage the finish.
Disc Handling
- Always hold discs by their edges.
- Keep discs clean and free from dust, fingerprints, and scratches.
- Store discs in their cases when not in use.
- Do not expose discs to direct sunlight or high temperatures.
Troubleshooting
If you experience problems with your DVD-S1700, refer to the following common issues and solutions before contacting service personnel.
| Problem | Possible Cause | Solution |
|---|---|---|
| No power | Power cord not connected securely. | Ensure the power cord is firmly plugged into the unit and the AC outlet. |
| No picture | Incorrect video input selected on TV. Video cables not connected properly. | Select the correct input on your TV. Check all video cable connections (HDMI, Component, S-Video, Composite). |
| No sound | Incorrect audio input selected on receiver/TV. Audio cables not connected properly. Volume too low. | Select the correct audio input. Check all audio cable connections. Increase volume on receiver/TV. |
| Disc does not play | Disc inserted incorrectly. Disc is dirty or scratched. Unsupported disc format. | Insert disc with label side up. Clean the disc. Ensure the disc format is supported by the player. |
| Remote control not working | Batteries are depleted or inserted incorrectly. Obstruction between remote and player. | Replace batteries. Ensure line of sight between remote and player's sensor. |
Specifications
- Model: DVD-S1700
- Supported Media Types: DVD-Video, CD-Audio, SACD, DVD-Audio, CD-R/RW (MP3, WMA, JPEG)
- Video Output Resolution: Up to 1080p (via HDMI upconversion)
- Video Output Connectors: HDMI, Component Video, S-Video, Composite Video
- Audio Output Connectors: HDMI, Optical Digital, Coaxial Digital, Analog Stereo (RCA), 5.1-Channel Analog (RCA)
- Front Panel: Aluminum
- Display Dimmer: 3-step
- Item Weight: Approximately 8.9 pounds (4.0 kg)
- Dimensions (W x H x D): Refer to product documentation for exact measurements.
- Power Requirements: AC 120V, 60Hz (North America) or as specified on the unit.
Support and Warranty
For technical assistance, product information, or warranty inquiries, please visit the official Yamaha website or contact Yamaha customer support. Keep your purchase receipt as proof of purchase for warranty claims.
Yamaha Official Website: www.yamaha.com


