
1. Introduction
This manual provides comprehensive instructions for the setup, operation, and maintenance of your Behringer Ultratone K900FX 90-Watt 3-Channel PA System / Keyboard Amplifier. Designed for versatility and powerful sound, the K900FX is ideal for keyboardists and performers requiring a robust, all-in-one amplification solution. Please read this manual thoroughly to ensure proper use and to maximize the performance and longevity of your amplifier.

Figure 1: Front view of the Behringer Ultratone K900FX Keyboard Amplifier, showcasing its robust design and speaker grille.
2. Key Features
The Behringer Ultratone K900FX offers a range of features designed for optimal performance and flexibility:
- 90-Watt Output: Provides powerful amplification suitable for various performance environments.
- 3-Channel Operation: Each channel features independent Volume and FX Send controls, with Channel 1 including an XLR mic input.
- Integrated Digital FX Processor: Offers 100 presets including reverb, chorus, flanger, delay, and pitch shifter.
- FBQ Feedback Detection System: Instantly identifies and helps eliminate critical feedback frequencies.
- 5-Band Graphic EQ: Allows for precise sound shaping across the frequency spectrum.
- 12'' BUGERA Woofer and 1'' Driver: Custom-made components for full-range sound reproduction.
- Connectivity: Includes Line output, Subwoofer output, CD input, and a separate headphone output.
- Integrated Pole Socket: For stand mounting, allowing use as a PA system.
3. Setup and Connections
Follow these steps to set up your K900FX amplifier:
- Unpacking: Carefully remove the amplifier from its packaging. Retain the packaging for future transport or storage.
- Placement: Place the amplifier on a stable, flat surface. Ensure adequate ventilation around the unit. For PA system use, utilize the integrated 35-mm pole socket for stand mounting.
- Power Connection: Connect the supplied power cable to the amplifier's power input and then to a suitable AC power outlet. Ensure the amplifier's power switch is in the "OFF" position before connecting to power.
- Instrument/Microphone Connections:
- Connect your keyboards or other instruments to the Channel 1, 2, or 3 inputs using 1/4" TS cables.
- For dynamic microphones, use the XLR mic input on Channel 1.
- To play along with external audio, connect a CD player, MP3 player, or other audio source to the CD Input (RCA).
- Output Connections (Optional):
- For direct connection to a mixing console, use the Line Output.
- For enhanced low-end, connect an external subwoofer to the Subwoofer Output.
- For quiet practice, connect headphones to the Headphone Output.
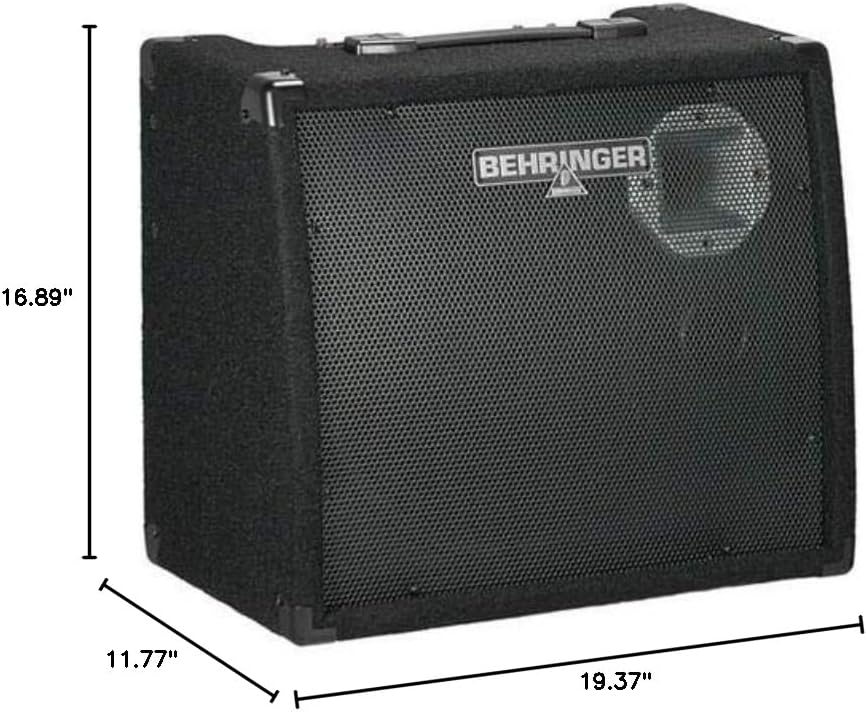
Figure 2: Dimensions of the Behringer Ultratone K900FX, showing its height (16.89"), depth (11.77"), and width (19.37").
4. Operating Instructions
4.1 Powering On/Off
After all connections are made, switch the amplifier's power button to the "ON" position. Always turn on the K900FX after connecting all instruments and turn it off before disconnecting.
4.2 Channel Controls
- Volume: Adjust the individual volume for each of the three channels.
- FX Send: Controls the amount of signal from each channel sent to the internal digital effects processor.
- Channel 1 XLR Input: Use for dynamic microphones. Ensure the volume is set appropriately to avoid feedback.
4.3 Digital FX Processor
The K900FX features a 24-bit digital FX processor with 100 presets. Use the dedicated controls in the MAIN section to select and adjust the desired effect. Effects include reverb, chorus, flanger, delay, and pitch shifter.
4.4 5-Band Graphic EQ and FBQ Feedback Detection
Utilize the 5-band graphic equalizer to fine-tune your sound. The proprietary FBQ Feedback Detection System will illuminate LEDs above the frequency bands that are causing feedback, allowing you to quickly reduce those frequencies and eliminate unwanted noise.
4.5 Main Section Controls
- FX Return: Adjusts the overall level of the returned effect signal.
- Master Volume: Controls the overall output volume of the amplifier.
- Phones: Adjusts the volume for the headphone output.
- Shape: Provides a quick tonal contouring option.
5. Maintenance
Proper maintenance ensures the longevity and optimal performance of your K900FX amplifier.
- Cleaning: Disconnect the amplifier from power before cleaning. Use a soft, dry cloth to wipe down the exterior. Avoid using abrasive cleaners or solvents.
- Ventilation: Ensure that the ventilation openings are clear of dust and debris to prevent overheating.
- Storage: When not in use for extended periods, store the amplifier in a dry, cool environment, ideally in its original packaging or a protective cover.
- Transportation: Exercise caution when moving the amplifier due to its weight. Use proper lifting techniques or transport aids.
6. Troubleshooting
If you encounter issues with your K900FX, refer to the following common problems and solutions:
| Problem | Possible Cause | Solution |
|---|---|---|
| No Sound Output | Power not connected, volume controls too low, faulty cables, instrument not connected properly. | Check power connection and switch. Increase Master Volume and individual channel volumes. Verify all cables are securely connected and functional. Ensure instrument is powered on. |
| Distorted Sound | Input signal too high, EQ settings incorrect, faulty speaker. | Reduce input signal level from your instrument. Adjust the 5-band graphic EQ. If distortion persists, contact customer support. |
| Feedback (High-pitched squeal) | Microphone too close to speaker, high gain settings, specific frequencies boosted too much. | Reposition microphone. Reduce gain on the affected channel. Use the FBQ Feedback Detection System to identify and cut problematic frequencies on the 5-band EQ. |
| Intermittent Sound | Loose cable connection, damaged cable, internal issue. | Check and secure all cable connections. Try different cables. If the issue persists, professional servicing may be required. |
7. Specifications
| Attribute | Detail |
|---|---|
| Model | K900FX |
| Output Wattage | 90 Watts (RMS) |
| Speaker Configuration | 1 x 12" BUGERA Woofer, 1 x 1" Custom Driver |
| Channels | 3 (with independent Volume and FX Send) |
| Inputs | 1/4" TS (Channels 1-3), XLR (Channel 1), RCA (CD Input) |
| Outputs | 1/4" TS (Line Out), 1/4" TS (Subwoofer Out), 1/4" TRS (Headphone Out) |
| Digital Effects | 100 Presets (Reverb, Chorus, Flanger, Delay, Pitch Shifter, Multi-effects) |
| Equalizer | 5-Band Graphic EQ with FBQ Feedback Detection System |
| Dimensions (H x W x D) | 16.89" x 19.37" x 11.77" (429 mm x 492 mm x 299 mm) |
| Item Weight | 39.8 pounds (18.05 kg) |
| Power Source | Corded Electric |
8. What's in the Box
Upon opening your Behringer Ultratone K900FX package, you should find the following items:
- Behringer K900FX Amplifier Unit
- Power Cable
- User's Manual (this document)
9. Warranty and Support
For warranty information and technical support, please refer to the warranty card included with your product or visit the official Behringer website. Behringer provides comprehensive support for its products to ensure customer satisfaction.
Online Resources: For the latest updates, FAQs, and additional support resources, please visit: www.behringer.com


