
TAMIYA 300035227
Tamiya 1:35 WWII Tiger I Initial/Early Vehicles Model Kit Instruction Manual
Model: 300035227
Introduction
This instruction manual provides detailed guidance for the assembly, operation, and maintenance of your Tamiya 1:35 WWII Tiger I Initial/Early Vehicles model kit (Model 300035227). Please read all instructions carefully before beginning assembly to ensure a successful and enjoyable building experience.
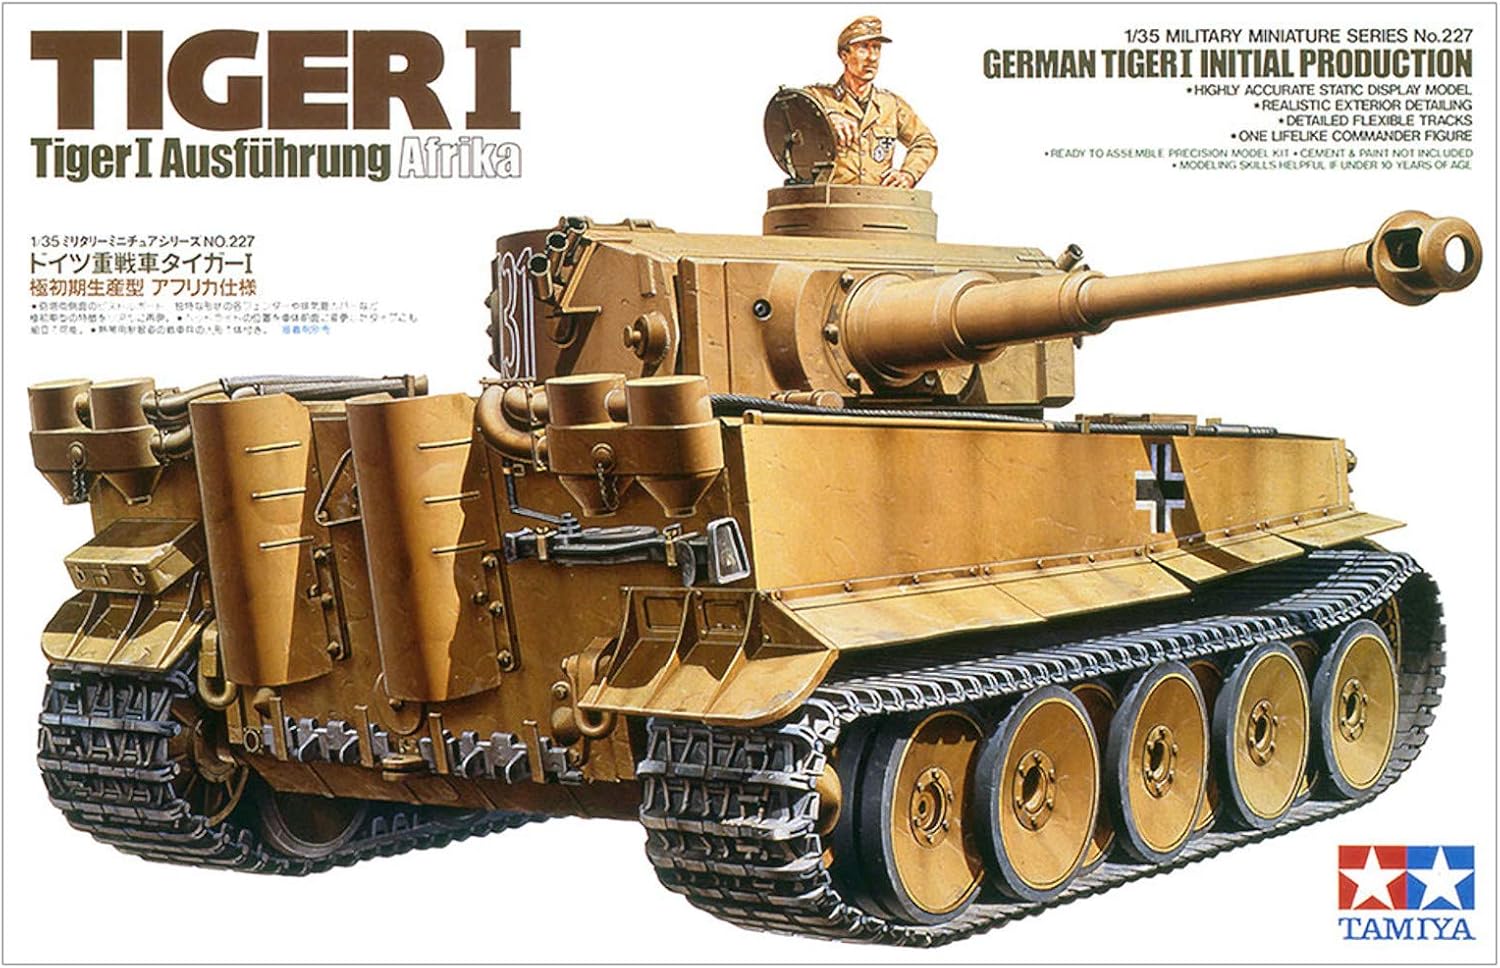
The Tiger I, officially designated Panzerkampfwagen VI Tiger Ausf. E, was a German heavy tank of World War II. This kit accurately replicates the initial and early production variants, often seen in the North African campaign.
Safety Information
WARNING: CHOKING HAZARD - SMALL PARTS. Not for children under 3 years. This model kit contains small parts that may pose a choking hazard. Keep all components and tools out of reach of small children and pets.
Always use appropriate ventilation when working with paints, glues, and thinners. Refer to the safety data sheets (SDS) for all chemical products used during assembly.
Exercise caution when using sharp tools such as hobby knives and nippers. Always cut away from your body and keep fingers clear of cutting paths.
Kit Contents and Setup
Before beginning assembly, verify that all parts are present and undamaged. The kit includes:
- Plastic sprues containing all tank components.
- Rubber tracks.
- One (1) commander figurine.
- Decal sheet for markings.
- Instruction booklet (this manual).
Tools Required (Not Included):
- Hobby nippers or sprue cutters.
- Hobby knife.
- Plastic cement (e.g., Tamiya Extra Thin Cement).
- Tweezers.
- Sandpaper or sanding sticks (various grits).
- Paints and brushes (optional, for finishing).

Assembly Instructions (Operating)
Follow the numbered steps in the included instruction booklet for detailed assembly. This section provides general guidelines and tips for a smooth building process.
- Part Preparation: Carefully remove parts from the sprues using nippers. Clean any mold lines or excess plastic (flash) with a hobby knife or sandpaper.
- Sub-Assembly: Begin by assembling major sub-components such as the hull, turret, and running gear. Test fit parts before applying cement.
- Hull Assembly:
- Assemble the lower hull, ensuring all suspension arms are correctly aligned.
- Attach the road wheels and drive sprockets. Pay attention to the orientation of each wheel.
- Install the rubber tracks. Ensure they are taut but not overly stretched.

Figure 3: Detailed view of the model's track assembly and road wheels, highlighting the intricate suspension components and track links. This shows the complexity of the running gear. - Turret Assembly:
- Assemble the main gun barrel and mount it into the turret.
- Attach the commander's cupola and other turret details.
- Assemble and paint the commander figure before placing it in the cupola.

Figure 4: A close-up of the commander figure positioned within the turret hatch, demonstrating the level of detail in the included figurine. This highlights the human element of the model. - Detailing and Finishing:
- Attach small details such as tools, exhaust pipes, and engine deck grilles.
- Apply decals according to the provided guide. Use decal setting solutions for best results.
- Paint the model using appropriate colors for the WWII Tiger I Initial/Early Vehicles. Reference historical photographs for accuracy.

Figure 5: A detailed view of the model's rear engine deck, showcasing the exhaust system, air filters, and various stowage details. This illustrates the intricate rear section of the tank.
Maintenance
Once assembled, your Tamiya model requires minimal maintenance to preserve its appearance.
- Cleaning: Dust the model regularly with a soft, dry brush or a can of compressed air. Avoid using water or chemical cleaners, as these may damage paint or decals.
- Storage: Store the model in a cool, dry place away from direct sunlight and extreme temperatures. Prolonged exposure to sunlight can cause paint fading and plastic warping.
- Handling: Handle the model carefully, grasping it by the main hull or turret. Avoid applying pressure to delicate parts like antennas, machine guns, or small details.
Troubleshooting
| Problem | Possible Cause | Solution |
|---|---|---|
| Parts do not fit together. | Excess plastic (flash) on parts; incorrect part orientation. | Carefully trim flash with a hobby knife. Refer to instructions for correct part orientation and test fit before cementing. |
| Decals do not adhere or wrinkle. | Surface not smooth; insufficient water; air bubbles. | Ensure surface is glossy and smooth. Use enough water to position. Gently press out air bubbles with a soft cloth or cotton swab. Apply decal setting solution if needed. |
| Paint does not apply smoothly. | Paint too thick; dirty surface; improper brush technique. | Thin paint with appropriate thinner. Clean model surface before painting. Use smooth, even strokes. Apply multiple thin coats instead of one thick coat. |
Specifications
- Model Name: WWII Tiger I Initial/Early Vehicles
- Model Number: 300035227
- Brand: TAMIYA
- Scale: 1:35
- Approximate Assembled Length: 240 mm (9.45 inches)
- Product Dimensions (Box): 15.35 x 9.84 x 2.68 inches
- Item Weight (Boxed): 1.21 pounds
- Manufacturer Recommended Age: 14 years and up
- Release Date: February 16, 2015
Warranty and Support
Tamiya model kits are manufactured to high quality standards. In the unlikely event of missing or defective parts, please contact your retailer or Tamiya customer support directly.
For further assistance, technical questions, or to inquire about replacement parts, please visit the official Tamiya website or contact their customer service department. Contact information can typically be found on the product packaging or the official Tamiya website.
Note: This model kit is intended for hobbyists and does not come with an operational warranty for moving parts as it is a static display model.
Related documents300035227


Ask a question about this manual
Ask about setup, troubleshooting, compatibility, parts, safety, or missing instructions. Manuals+ will review the question and use this page’s manual context to help answer it.