
1. Introduction
This manual provides detailed instructions for the safe and efficient operation of your Lee Precision Pro 1000 Progressive Press, specifically configured for 9mm ammunition. The Pro 1000 is designed for high-volume reloading, allowing for multiple operations with each stroke of the lever. Please read this manual thoroughly before attempting to set up or operate the press.
2. Safety Information
WARNING: Reloading can be dangerous if proper procedures are not followed. Always wear appropriate safety glasses and hearing protection. Keep hands clear of moving parts. Read and understand all instructions before use. Keep out of reach of children.
- Always verify powder charges with a reliable scale.
- Never exceed maximum load data from reputable reloading manuals.
- Ensure proper ventilation when handling primers and powder.
- Store primers and powder in a cool, dry, and secure location, separate from each other.
- Do not force the press handle if resistance is encountered. Investigate the cause immediately.
3. Package Contents
Verify that all components are present in your package:
- Lee Precision Pro 1000 Progressive Press
- Set of 3 caliber-specific dies (9mm)
- Shell plate for 9mm
- Primer feed system
- Powder measure
- Case feeder tubes and collator
- Instruction Manual
4. Setup
4.1 Mounting the Press
Securely mount the press to a sturdy workbench using appropriate bolts and washers. Ensure the press is stable and does not wobble during operation. The mounting holes are typically located at the base of the press frame.
4.2 Installing Dies
The Pro 1000 uses three die stations. For 9mm, these typically include a sizing/decapping die, a powder through expanding die, and a bullet seating/crimping die. Refer to your die set instructions for specific installation and adjustment procedures.
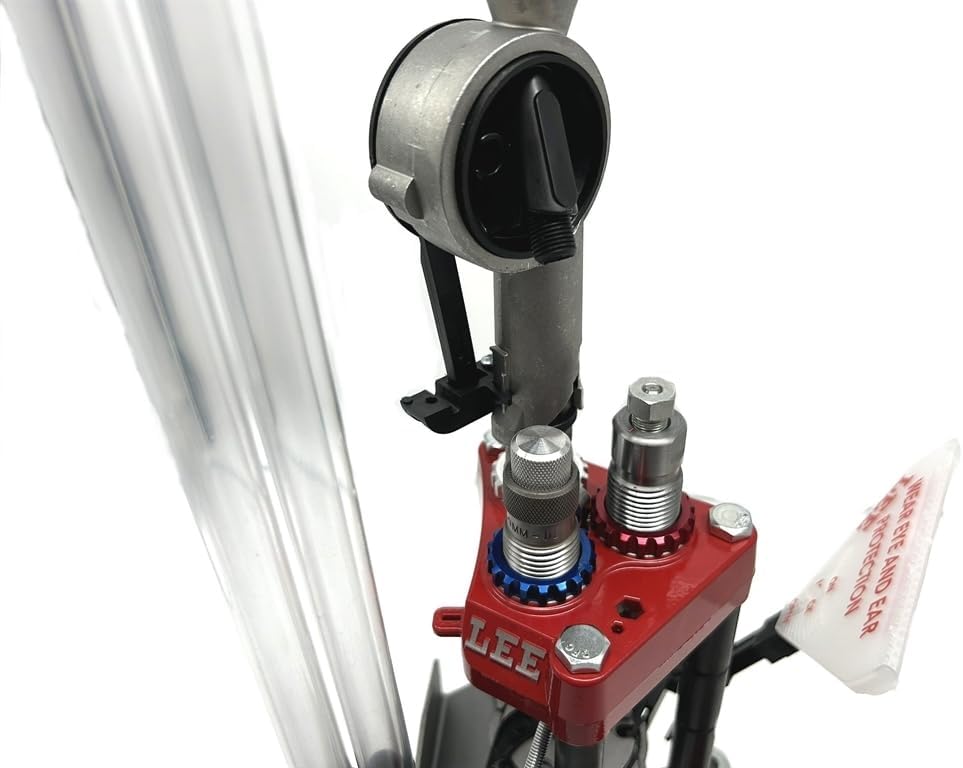
Figure 1: Close-up of the die stations and powder measure assembly.
4.3 Primer System Setup
Assemble the primer feed system according to the included instructions. Ensure the primer tray and chute are correctly oriented for the primer size (small or large pistol, depending on your shell plate and caliber). Proper adjustment is crucial for reliable primer feeding.

Figure 2: View of the shell plate and primer feed mechanism.
4.4 Powder Measure Setup
Attach the Auto-Disk Powder Measure to the powder through expanding die. Calibrate the powder measure using a reliable powder scale to achieve the desired charge weight for your specific powder and bullet combination. Always double-check your powder charge settings.
4.5 Case Feeder Setup
Install the case feeder tubes and collator. Ensure the collator is correctly oriented for the 9mm cases. The case feeder automatically positions cases onto the shell plate.
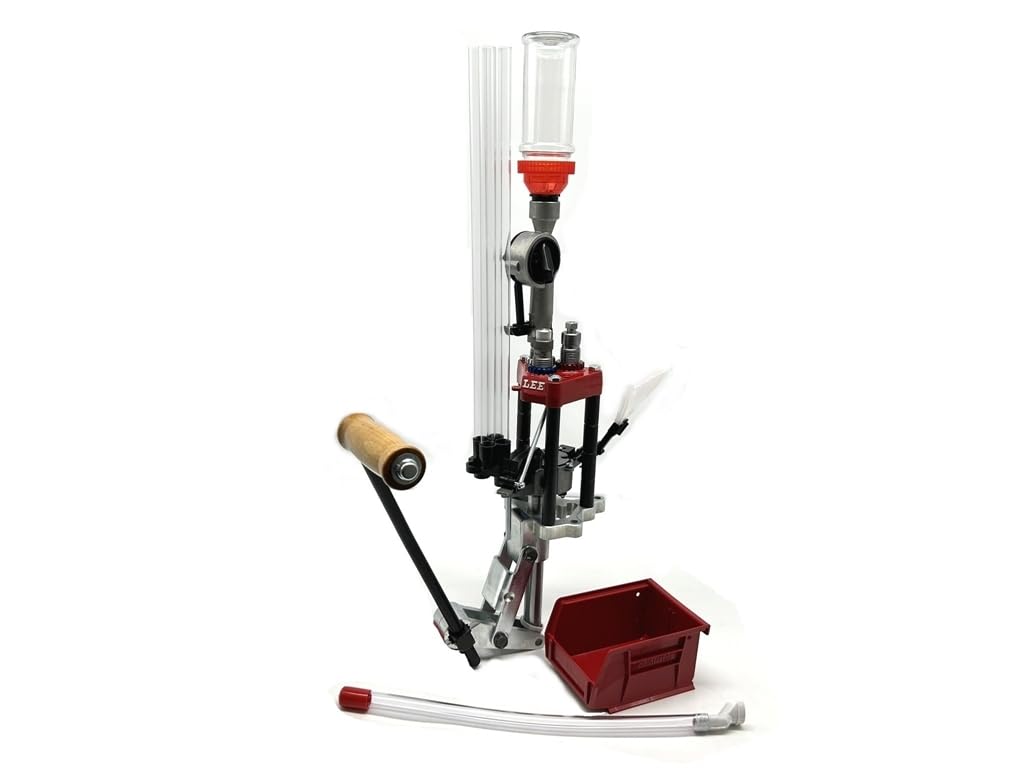
Figure 3: The Lee Precision Pro 1000 Progressive Press fully assembled.
5. Operating Instructions
The Pro 1000 operates in a progressive manner, performing multiple steps with each pull of the handle.
- Prepare Components: Ensure you have a sufficient supply of cases, primers, powder, and bullets.
- Load Cases: Place empty cases into the case feeder collator. The press will automatically feed them onto the shell plate.
- Cycle the Press: With each full stroke of the operating handle, the shell plate rotates, moving cases through the die stations.
- Station 1 (Sizing/Decapping): An empty case is sized and the spent primer is removed.
- Station 2 (Powder Through Expanding/Priming): The case mouth is flared, and a new primer is seated. The powder measure drops a charge into the case.
- Station 3 (Bullet Seating/Crimping): A bullet is placed on the charged case, and the die seats the bullet to the correct depth and applies a crimp.
- Collect Finished Rounds: Completed rounds are ejected into a collection bin.
- Monitor Operation: Continuously observe the process for proper primer seating, powder charge, and bullet seating depth.
6. Maintenance
Regular maintenance ensures the longevity and reliable operation of your press.
- Cleaning: After each reloading session, clean the press to remove powder residue, primer dust, and any spilled lubricants. Use a soft cloth and a suitable cleaning agent.
- Lubrication: Apply a light coat of machine oil to all pivot points and moving parts as recommended by Lee Precision. Avoid over-lubricating, especially near powder and primer systems.
- Inspection: Periodically inspect all components for wear or damage. Pay close attention to the shell plate, dies, and primer system.
- Storage: Store the press in a clean, dry environment when not in use.
7. Troubleshooting
Here are some common issues and their potential solutions:
| Problem | Possible Cause | Solution |
|---|---|---|
| Primer feed issues (jams, no primers) | Incorrect primer orientation, misaligned primer tray, worn primer parts, dirty primer chute. | Ensure primers are correctly oriented. Clean primer chute. Inspect and replace worn parts. Adjust primer system alignment. |
| Powder bridging or inconsistent charges | Fine powder sticking, static electricity, incorrect powder measure setting. | Tap the powder measure periodically. Use an anti-static dryer sheet. Verify powder measure settings. |
| Cases sticking in sizing die | Insufficient case lubrication (for non-carbide dies), dirty die. | Apply proper case lubricant. Clean the sizing die. |
| Bullet seating issues (crooked bullets, inconsistent depth) | Misaligned bullet, incorrect die adjustment, damaged bullet seating stem. | Ensure bullet is properly started in the case mouth. Re-adjust seating die. Inspect seating stem. |
| Press jams or excessive force required | Misaligned components, foreign object, incorrect die setup. | Stop immediately. Inspect all stations for obstructions or misaligned parts. Re-check die adjustments. |
8. Specifications
- Brand: Lee Precision
- Model: Pro 1000
- Item Model Number: 90640
- Caliber: 9 mm
- Color: Multicolor
- Material Type: Other
- Product Dimensions (L x W x H): 50.8 x 33.02 x 17.78 cm
- Weight: 400 grams
- Included Components: Set of 3 caliber-specific dies
- Batteries Included: No
- Country of Manufacture: United States
- Discontinued by Manufacturer: No
- Date First Available: August 7, 2012
9. Warranty and Support
For warranty information, technical support, or to order replacement parts, please contact Lee Precision directly through their official website or customer service channels. Retain your proof of purchase for warranty claims.


