
1. Product Overview
The Hillman 3/16 inch Plastic Pan Head Hollow Wall Anchors are designed for securely fastening items to hollow walls, such as drywall or paneling. These anchors expand behind the wall surface to create a strong, reliable attachment point. This package contains 50 anchors.
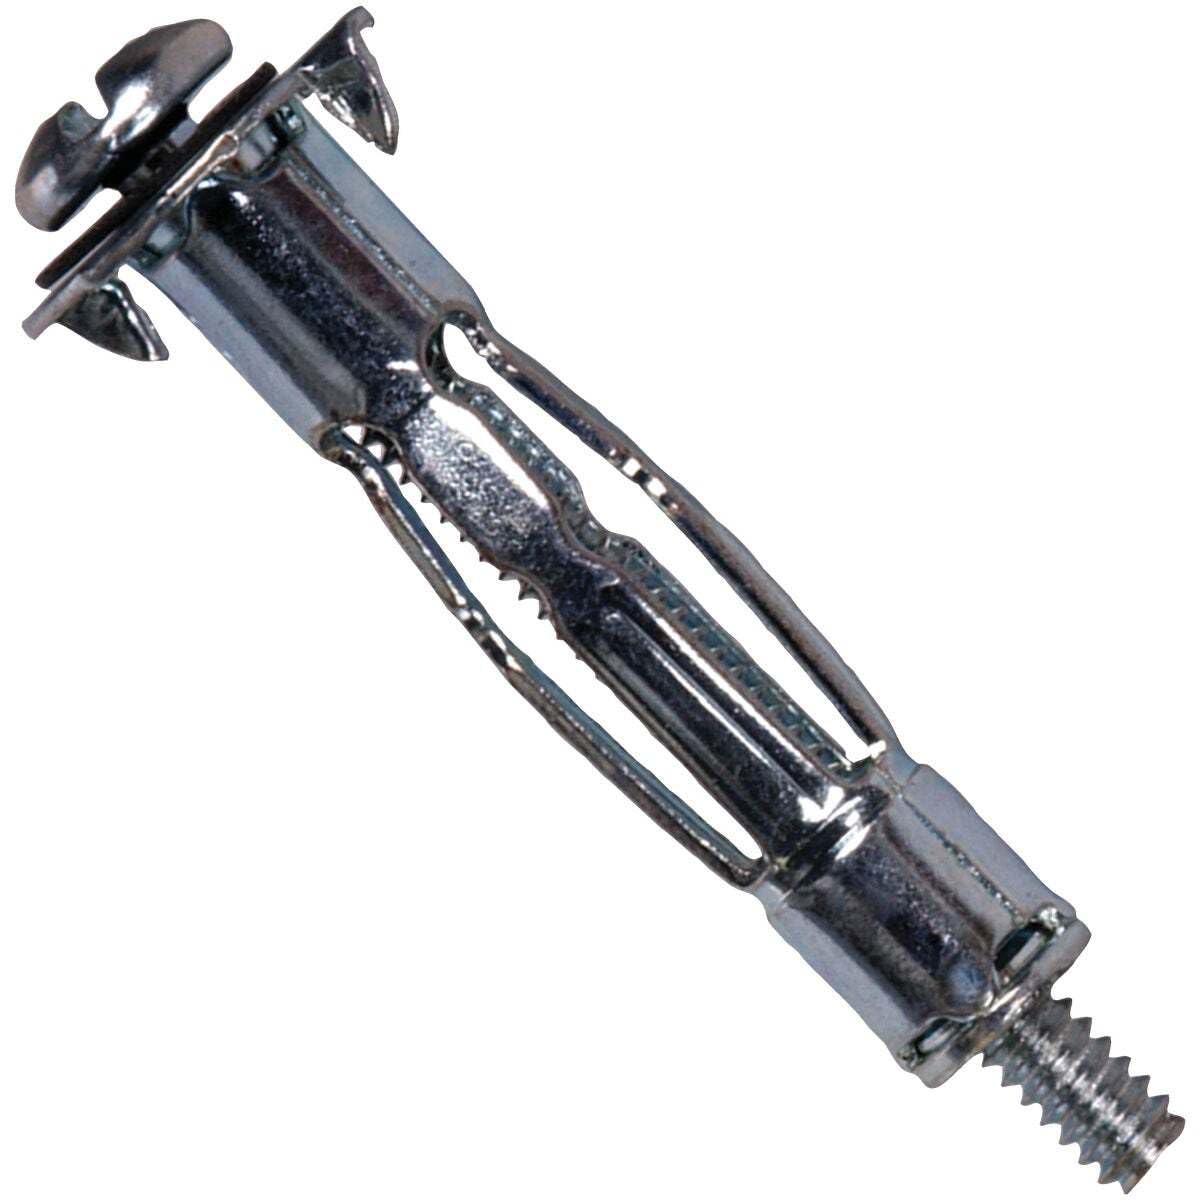
Image 1.1: A single Hillman 3/16 inch plastic pan head hollow wall anchor, showing the screw inserted and the anchor body.
2. Safety Information
- Always wear appropriate personal protective equipment, such as safety glasses, when drilling or installing anchors.
- Ensure the wall area is free of electrical wires, plumbing, and other obstructions before drilling. Use a stud finder if necessary.
- Do not overload anchors. Refer to the load capacity guidelines for the specific wall material and anchor size.
- Keep out of reach of children.
3. Package Contents
- 50 x Hillman 3/16 inch Plastic Pan Head Hollow Wall Anchors
4. Specifications
| Manufacturer | Hillman Group Rsc |
| Part Number | 370012 |
| Item Weight | 1.6 pounds (for 50 anchors) |
| Anchor Size | 3/16 Inch Diameter |
| Material | Plastic |
| Recommended Usage | Drywall, Hollow Walls |
| Required Drill Bit Diameter | Approximately 3/8 inch |
| Compatible Wall Thickness | 3/8 inch to 5/8 inch |
| Screw Diameter | Approximately 3/16 inch |
5. Setup and Installation
Proper installation is critical for the performance and safety of hollow wall anchors. Follow these steps carefully:
- Prepare the Wall: Identify the desired location for the anchor. Ensure there are no hidden pipes or electrical wires.
- Drill the Pilot Hole: Using a drill, create a pilot hole in the wall. The recommended drill bit diameter is approximately 3/8 inch. The hole should be clean and free of debris.
- Insert the Anchor: Gently push the anchor body into the pilot hole until the pan head is flush with the wall surface. Ensure the anchor's 'legs' are not bent inwards before insertion, as this can prevent uniform expansion.
- Expand the Anchor: Insert the screw into the anchor. Turn the screw clockwise with a screwdriver. As the screw is tightened, the anchor body will expand behind the wall, creating a secure grip. Continue tightening until you feel firm resistance. Do not overtighten, as this can strip the anchor or damage the wall.
- Attach Item: Once the anchor is securely expanded, you can attach your item using the provided screw or a compatible screw of the same diameter.
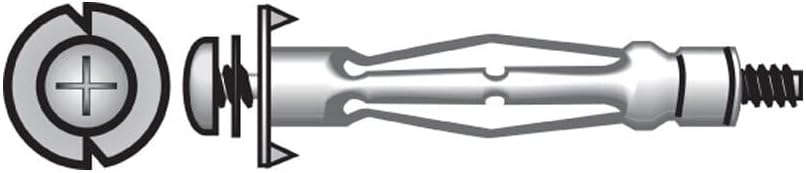
Image 5.1: Exploded diagram showing the anchor's components, including the screw, washer, and expanding body.

Image 5.2: A Hillman hollow wall anchor with the screw fully inserted, illustrating how the anchor expands behind the wall surface for a secure hold.
6. Operating Instructions
Once installed, the Hillman hollow wall anchors provide a fixed point for hanging or mounting objects. The anchor is designed for permanent installation. If you need to remove the screw, the anchor will remain in the wall. To remove the anchor completely, it typically requires damaging the wall around it or pushing it through the wall cavity.
7. Maintenance
These hollow wall anchors are designed for a single, permanent installation and generally require no maintenance after proper installation. Periodically check the mounted item for stability, especially if it is subject to movement or vibration.
8. Troubleshooting
- Anchor spins in the wall: This usually indicates the pilot hole is too large, or the anchor is not suitable for the wall thickness. Ensure the pilot hole matches the recommended 3/8 inch diameter and the wall thickness is between 3/8 inch and 5/8 inch.
- Anchor does not expand properly: Check if the anchor's 'legs' are bent inwards before insertion. Ensure the screw is being tightened correctly. If the wall material is too dense or too thin, the anchor may not expand as intended.
- Anchor head breaks off: This is typically caused by overtightening the screw. Tighten until firm resistance is felt, but avoid excessive force. It can also occur if the anchor is used in a wall thickness outside its specified range.
- Item feels loose after installation: Verify that the anchor was fully expanded and that the screw is tight. Ensure the weight of the item does not exceed the anchor's load capacity.
9. Warranty and Support
Specific warranty information for this product is not provided in the available documentation. For warranty details, product support, or further assistance, please contact Hillman Group Rsc directly through their official customer service channels.