1. Introduction
This manual provides detailed instructions for the installation and use of the Scosche GM1500B Single DIN Radio Dash Kit. This kit is designed to facilitate the installation of an aftermarket single DIN car stereo into select 1982-2004 GM vehicles, ensuring a secure and aesthetically integrated fit within your vehicle's dashboard.
2. Vehicle Compatibility
The Scosche GM1500B dash kit is compatible with a wide range of General Motors vehicles manufactured between 1982 and 2004. Please refer to the detailed fit guide images below to verify compatibility with your specific vehicle make, model, and year.

Figure 2.1: Vehicle Fit Guide (Page 1)

Figure 2.2: Vehicle Fit Guide (Page 2)
3. Package Contents
Ensure all components are present before beginning installation:
- Radio Bezel
- Mounting Brackets
- Universal Adapters and Snap-in Extension
- Instruction Manual (this document)

Figure 3.1: Scosche GM1500B Kit Components
4. Installation Instructions
Professional installation is recommended. If performing a DIY installation, proceed with caution. Always disconnect the vehicle's negative battery terminal before starting any electrical work.
4.1. Preparation
- Disconnect Battery: Disconnect the negative battery terminal of your vehicle to prevent electrical shorts.
- Remove Factory Stereo: Using appropriate panel removal tools, carefully remove any trim panels surrounding the factory stereo. Unfasten and remove the factory stereo from the dashboard. Unplug all wiring harnesses and antenna cables from the back of the factory stereo. Refer to your vehicle's service manual for specific removal instructions.
- Prepare Dash Kit: Review the dash kit components. Break off or remove any tabs from the mounting brackets that are not required for your specific application, as indicated in the kit's included instructions.
Video 4.1: General Radio Dash Kit Installation Guide. This video demonstrates the typical steps for installing an aftermarket radio using a dash kit, including panel removal and stereo mounting.
4.2. Assembling the New Stereo with the Dash Kit
- Mount Aftermarket Stereo: Secure your new single DIN aftermarket stereo into the Scosche GM1500B mounting brackets using the screws provided with your new stereo. Ensure the stereo is firmly seated and aligned within the brackets.
- Attach Radio Bezel: Snap the radio bezel onto the assembled stereo and mounting brackets. This bezel provides a finished, factory-like appearance.

Figure 4.1: Aftermarket Stereo Mounted in Dash Kit

Figure 4.2: Floating Screen Stereo Compatibility
4.3. Wiring Connections
Connect the aftermarket stereo's wiring harness to the vehicle's wiring harness. This may require a separate vehicle-specific wiring adapter (sold separately) to ensure proper electrical connections without cutting factory wires. Match wire colors and functions carefully. Connect the antenna adapter if necessary.
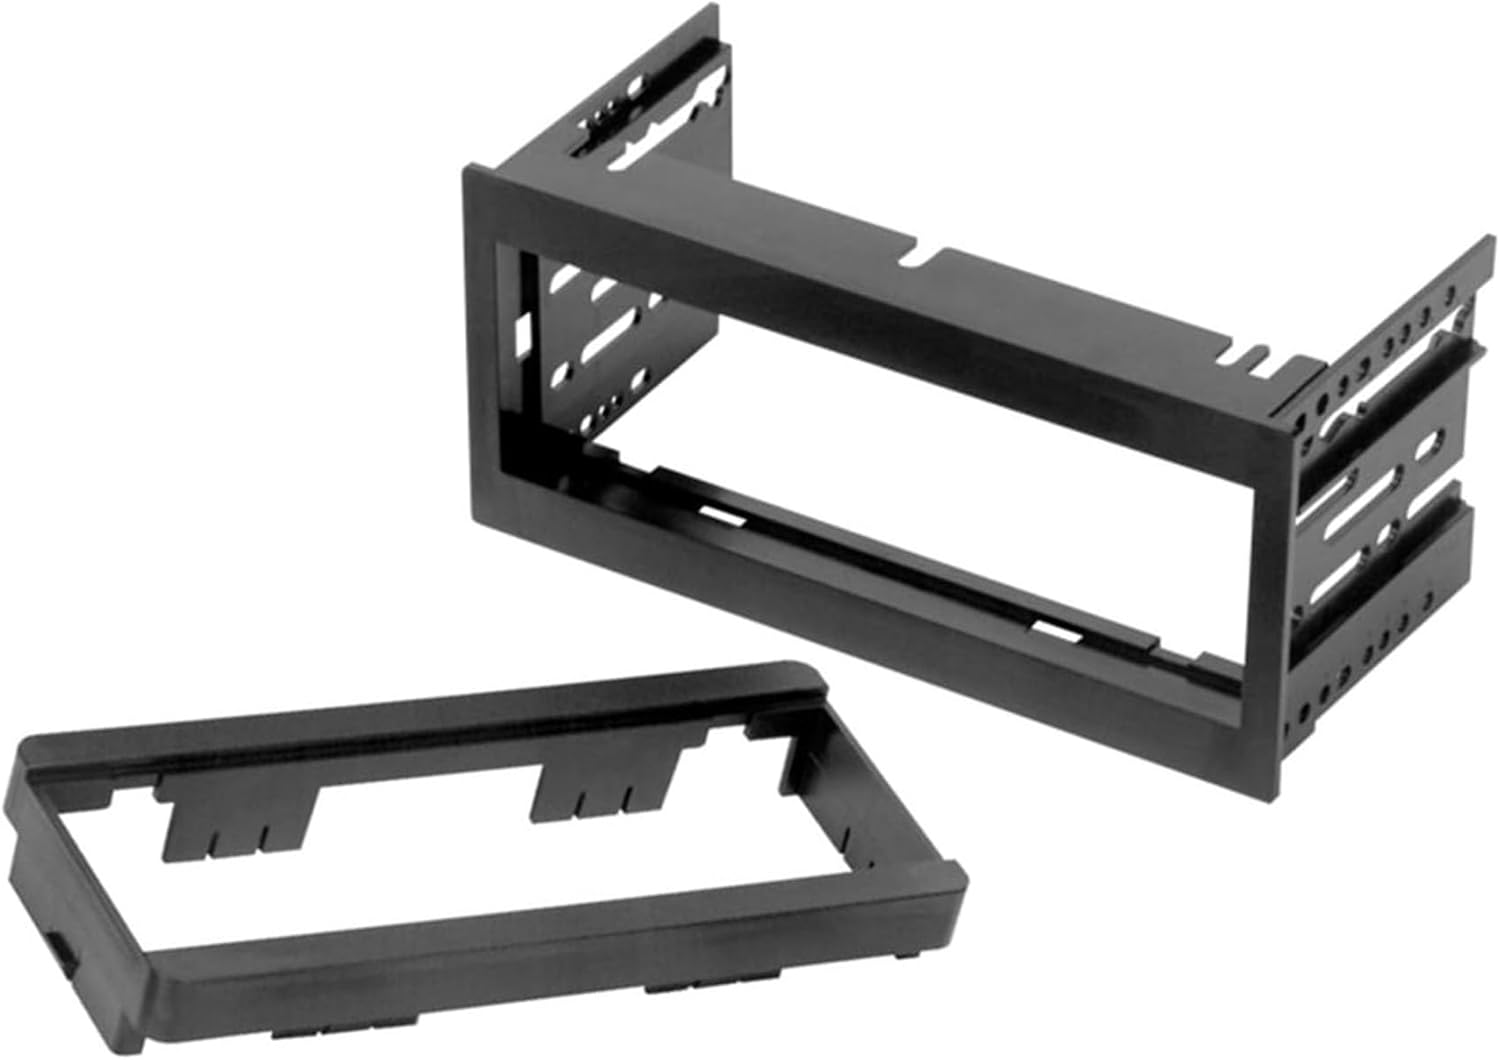
Figure 4.3: Wiring Harness and Adapter Connections
4.4. Final Assembly
- Install Assembled Unit: Carefully slide the assembled stereo and dash kit into the dashboard opening. Secure it using the factory mounting points or screws, ensuring all connections are clear and not pinched.
- Reinstall Trim Panels: Reattach any removed trim panels, ensuring they snap securely into place.
- Reconnect Battery: Reconnect the negative battery terminal.
5. Operation
The Scosche GM1500B dash kit is a mounting solution and does not have operational functions itself. Refer to the instruction manual provided with your aftermarket car stereo for detailed operating instructions, including power on/off, audio settings, and feature usage.
6. Maintenance
The dash kit requires minimal maintenance. To clean, gently wipe the surface with a soft, damp cloth. Avoid using harsh chemicals or abrasive cleaners, as these may damage the finish. Ensure no liquids enter the stereo unit.
7. Troubleshooting
If you encounter issues after installing the dash kit and stereo, consider the following:
- No Power to Stereo: Check all wiring connections, especially the power and ground wires. Ensure the vehicle's battery is properly reconnected and charged. Verify all fuses are intact.
- No Audio: Confirm speaker wire connections are correct and secure. Check the stereo's settings for mute or volume levels.
- Poor Radio Reception: Ensure the antenna adapter (if used) is correctly connected and the antenna cable is securely plugged into the stereo.
- Loose Fit: Double-check that all mounting screws and clips are properly secured.
For persistent issues, consult your aftermarket stereo's troubleshooting guide or contact Scosche customer support.
8. Specifications
- Model Number: GM1500B
- Product Dimensions: 4.5 x 4 x 8 inches
- Item Weight: 6.5 ounces
- Color: Black
- Material: High-quality automotive grade ABS materials
9. Warranty and Support
The Scosche GM1500B Single DIN Radio Dash Kit is backed by Scosche's Limited Lifetime Warranty and Lifetime Tech Support. For warranty claims or technical assistance, please refer to the contact information provided on the official Scosche website or the original product packaging.


