
1. Introduction
This manual provides essential instructions for the safe and effective use of the Mahr Federal uMaxum Digital Electronic Comparator Indicator, Model EDI 10102. This precision instrument is designed for accurate dimensional measurement and comparison tasks in various industrial and scientific applications. Please read this manual thoroughly before operating the device to ensure proper function and longevity.
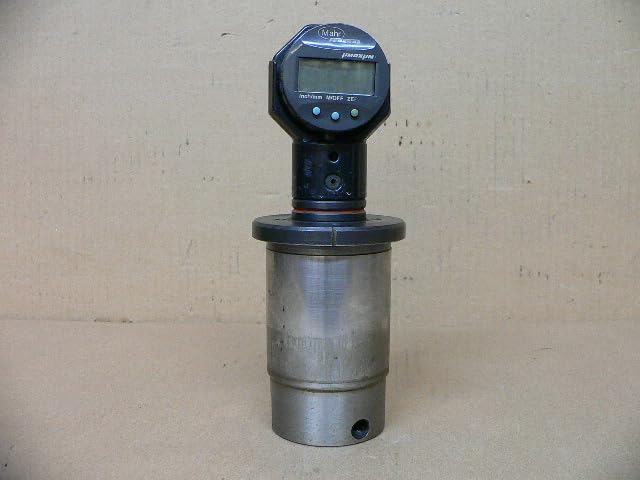
Figure 1: Front view of the Mahr Federal uMaxum Digital Electronic Comparator Indicator, showing the digital display and control buttons.
2. Setup
2.1 Unpacking and Inspection
- Carefully remove the indicator from its packaging.
- Inspect the device for any signs of damage that may have occurred during transit. If damage is found, contact your supplier immediately.
- Ensure all components are present.
2.2 Power Supply (Battery Installation)
The uMaxum indicator operates on internal batteries. To install or replace batteries:
- Locate the battery compartment cover, typically on the rear or side of the unit.
- Use a small screwdriver or coin to open the compartment.
- Insert the required batteries, observing the correct polarity (+/-) as indicated inside the compartment.
- Securely close the battery compartment cover.
2.3 Mounting the Indicator
The indicator features a mounting stem for attachment to various stands or fixtures. Ensure the mounting surface is clean and stable.
- Insert the indicator's stem into the appropriate clamp or holder on your measurement stand.
- Tighten the clamp securely, but do not overtighten, to avoid damaging the stem or the indicator body.
- Position the indicator so that its measuring probe can make proper contact with the workpiece.
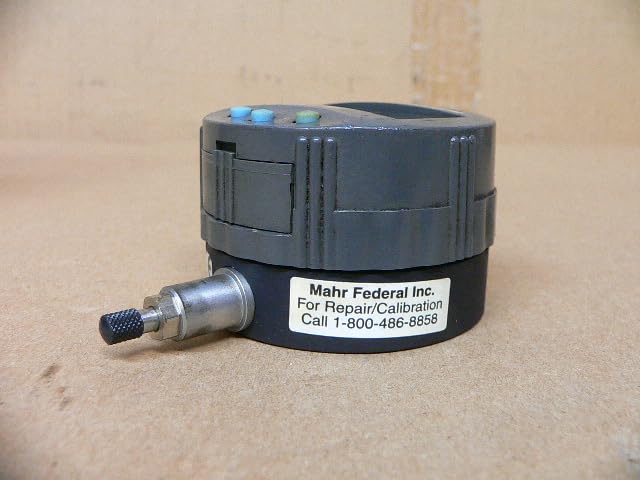
Figure 2: Side view of the indicator, showing the mounting stem and the product label with manufacturer information.
3. Operation
3.1 Power On/Off
- To power on the indicator, press the M/OFF button briefly. The display will illuminate.
- To power off, press and hold the M/OFF button until the display turns off.
3.2 Unit Selection (Inch/Millimeter)
The indicator can display measurements in either inches or millimeters.
- Press the inch/mm button to toggle between inch and millimeter units. The selected unit will be displayed on the screen.
3.3 Zeroing the Display
Before taking comparative measurements, it is crucial to zero the indicator at a reference point.
- Position the indicator's probe against your reference surface or master workpiece.
- Ensure the probe is making firm, consistent contact.
- Press the ZEF (Zero) button. The display will reset to zero.
3.4 Taking Measurements
After zeroing, the indicator is ready for comparative measurements.
- Carefully move the workpiece to be measured under the indicator's probe.
- Allow the probe to settle on the measurement surface.
- Read the deviation from the zero reference directly on the digital display. A positive value indicates the workpiece is larger than the reference, and a negative value indicates it is smaller.
4. Maintenance
4.1 Cleaning
- Keep the indicator clean and free from dust, dirt, and oils.
- Use a soft, lint-free cloth to wipe the display and body.
- For stubborn grime, a cloth lightly dampened with isopropyl alcohol may be used. Avoid harsh chemicals or abrasive cleaners.
- Ensure no liquids enter the internal components.
4.2 Storage
- When not in use, store the indicator in its protective case or a clean, dry environment.
- Avoid exposing the device to extreme temperatures, high humidity, or direct sunlight.
- If storing for extended periods, remove the batteries to prevent leakage.
4.3 Calibration
Regular calibration is essential to maintain the accuracy of your digital indicator. It is recommended to have the device calibrated by qualified personnel at regular intervals, depending on usage and environmental conditions.
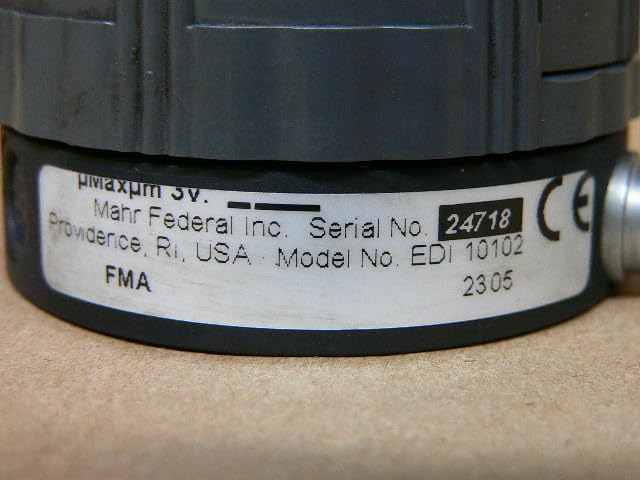
Figure 3: Product label showing model number, serial number, and contact information for repair/calibration services.
5. Troubleshooting
| Problem | Possible Cause | Solution |
|---|---|---|
| Display does not turn on. | Dead or incorrectly installed batteries. | Replace batteries, ensuring correct polarity. |
| Inaccurate or inconsistent readings. |
|
|
| Buttons are unresponsive. | Low battery or internal malfunction. | Replace batteries. If problem persists, contact support. |
6. Specifications
| Feature | Detail |
|---|---|
| Model Number | EDI 10102 |
| Product Dimensions | 7.09 x 6.3 x 8.27 inches |
| Item Weight | 11.41 pounds |
| Manufacturer | Mahr Federal |
| ASIN | B0006J3IMM |
| Date First Available | October 7, 2019 |
| Measurement Units | Inch / Millimeter |
| Display Type | Digital Electronic |
7. Warranty & Support
7.1 Warranty Information
For detailed warranty information, please refer to the documentation provided with your purchase or visit the official Mahr Federal website. Warranty terms and conditions may vary.
7.2 Technical Support and Service
Should you require technical assistance, repair, or calibration services for your Mahr Federal uMaxum Digital Electronic Comparator Indicator, please contact Mahr Federal Inc. directly.
Contact for Repair/Calibration:
- Phone: 1-800-486-8858
- Manufacturer: Mahr Federal Inc.
- Location: Providence, RI, USA
Please have your model number (EDI 10102) and serial number (found on the product label) ready when contacting support.


