
1. Introduction
The GE SmartHome Keypad Controlled Door Alarm (GESEC59MA1) provides an effective security solution for your home or office. This device features a 120-decibel alarm that activates when the main unit and its magnetic sensor are separated, indicating an unauthorized entry. It operates with a customizable 4-digit keypad code for arming and disarming, offering both alarm and chime modes. This manual provides detailed instructions for installation, operation, and maintenance to ensure optimal performance of your door alarm.
2. Safety Information
- Read all instructions carefully before installation and use.
- Keep the device away from water and excessive moisture.
- Do not attempt to open or modify the device; this will void the warranty and may cause damage.
- Ensure batteries are inserted with correct polarity.
- Keep batteries out of reach of children.
- The alarm produces a loud sound (120 dB). Avoid prolonged exposure to prevent hearing discomfort.
3. Package Contents
Verify that all components are present in your package:
- GE SmartHome Keypad Controlled Door Alarm Main Unit
- Magnetic Sensor
- Mounting Hardware (screws)
- Instruction Manual (this document)
4. Battery Installation
The GE SmartHome Keypad Controlled Door Alarm requires 3 AAA batteries (not included).
- Locate the battery compartment on the back of the main alarm unit.
- Using a small Phillips head screwdriver (approximately 3/32"), carefully remove the screw securing the battery compartment cover.
- Remove the cover.
- Insert 3 AAA batteries, ensuring correct polarity (+/-) as indicated inside the compartment.
- Replace the battery compartment cover and secure it with the screw.
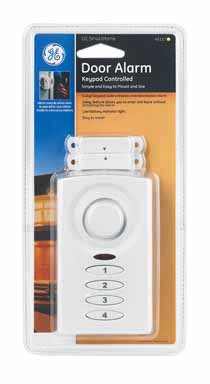
Image: Rear view of the GE SmartHome Keypad Controlled Door Alarm, showing the battery compartment. Note the small screw for securing the cover.
5. Installation
Proper placement of the main unit and magnetic sensor is crucial for the alarm's functionality.
- Choose Mounting Location: The alarm unit and magnetic sensor must be mounted on the door and door frame, or vice versa, such that they are aligned and within 1.5 cm (approximately 0.6 inches) of each other when the door is closed. For flush-mounted doors where the magnet might be too far back, mount the main unit on the door frame and the magnet on the door.
- Mounting Options:
- Screw Mounting: Use the provided screws. You may need a drill to create pilot holes.
- Adhesive Mounting: For easier installation and adjustability, double-sided adhesive tape (not included) can be used. Ensure the surfaces are clean and dry before applying.
- Positioning: Ensure the main unit and the magnetic sensor are aligned horizontally or vertically. The alarm will sound if the distance between them exceeds 1.5 cm when the door opens. The magnet must be in close proximity, ideally touching the base when the door is closed, for proper function.
Image: Example installation of the GE SmartHome Keypad Controlled Door Alarm main unit on a door frame and its magnetic sensor on the adjacent door, showing proper alignment.
6. Programming the Keypad Code
The alarm uses a 4-digit code for activation and deactivation. You must program this code before first use.
- Locate the 'Learn' button, typically near the Chime/Alarm switch on the unit.
- Press the 'Learn' button. The unit may emit a short beep or flash an indicator light.
- Enter your desired 4-digit code using the keypad.
- Press the 'Learn' button again to confirm the code. The unit will beep to indicate successful programming.
Note: If you wish to change the code later, repeat these steps.
Image: Close-up of the GE SmartHome Keypad Controlled Door Alarm, highlighting the keypad and the 'Learn' button.
7. Operation
The alarm unit offers two operational modes: Alarm Mode and Chime Mode.
7.1. Selecting Operating Mode
To switch between Chime and Alarm modes, you must access the switch located within the battery compartment. This means the unit needs to be removed from its mounting location and the battery cover opened to change the mode.
7.2. Alarm Mode
In Alarm Mode, the unit provides security with entry and exit delays.
- Arming: Enter your 4-digit code on the keypad. The unit will provide a 45-second exit delay, allowing you to leave the premises before the alarm is fully armed.
- Disarming: Upon re-entry, the alarm will provide a 30-second entry delay. During this time, enter your 4-digit code to disarm the system. If the code is not entered within the delay period, the 120-decibel alarm will sound.
- Triggering: If the door opens while armed and the code is not entered within the entry delay, the alarm will sound continuously until disarmed or for a set duration.
7.3. Chime Mode
In Chime Mode, the unit acts as an entry alert without the loud alarm sound.
- When the door opens and the magnetic sensor separates from the main unit, the unit will emit a two-tone chime, repeated twice.
- Chime mode is instantaneous; there are no entry or exit delays.
- To activate Chime Mode, ensure the mode switch inside the battery compartment is set to 'Chime'.
8. Maintenance
- Battery Replacement: The unit features a low battery indicator light. When this light illuminates, replace the 3 AAA batteries as described in Section 4. Regular battery replacement ensures continuous protection.
- Cleaning: Wipe the unit with a soft, dry cloth. Do not use abrasive cleaners or solvents.
- Testing: Periodically test the alarm's functionality by arming it and opening the door to ensure it triggers correctly.
9. Troubleshooting
| Problem | Possible Cause | Solution |
|---|---|---|
| Alarm does not sound when door opens. |
|
|
| Alarm sounds unexpectedly. |
|
|
| Keypad code not working. |
|
|
| Low battery indicator light is on. | Batteries are low. | Replace the 3 AAA batteries immediately. |
10. Specifications
- Model Number: GESEC59MA1
- Brand: GE
- Power Source: 3 x AAA Batteries (not included)
- Noise Level: 120 Decibels
- Activation Distance: Alarm sounds when distance between main unit and magnet is greater than 1.5 cm.
- Exit Delay: 45 seconds (Alarm Mode)
- Entry Delay: 30 seconds (Alarm Mode)
- Item Weight: 7.2 ounces
- Package Dimensions: 10 x 7.5 x 0.6 inches
- UPC: 043180511089
11. Warranty and Support
For warranty information or technical support, please refer to the contact details provided with your product packaging or visit the official GE SmartHome website. Keep your purchase receipt as proof of purchase for any warranty claims.

