ARTURIA KeyLab mk3 49 key USB Midi
Keyboard Controller User Guide
1.Setting up your unit
You have two ways to use the integration script for FL Studio:
- Use the latest version of FL Studio that contains the KeyLab mk3 integration script.
- Download the script from the Arturia website and install it.
1. Use the latest FL Studio version If you manage to install the latest version of FL Studio, here are the steps:
- Connect your KeyLab mk3 and select DAW program (Prog button).
- Open FL Studio.
- The KeyLab mk3 should automatically be detected and ready to use.
If the KeyLab mk3 is not detected:
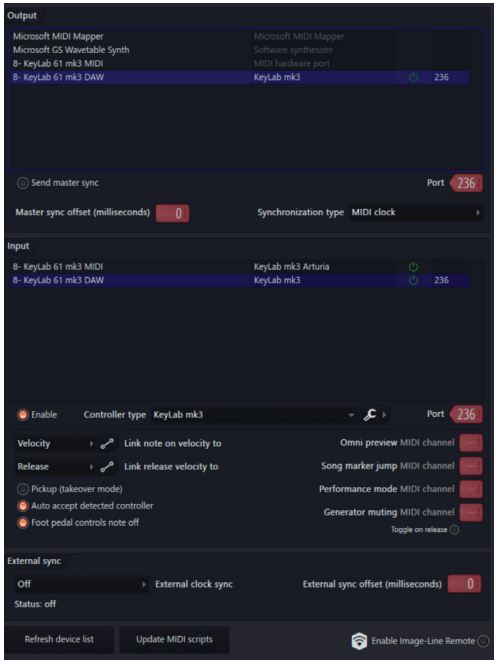
- Go to FL Studio MIDI settings (Options / MIDI Settings / MIDI tab)
- Click on “Update MIDI scripts” at the bottom of the page
- For the MIDI Port called “KeyLab xx mk3 DAW”:
→ Select the Controller Type called “KeyLab mk3” for the MIDI port “KeyLab xx mk3 DAW”
→ Select a MIDI port for input and output. You’ll need them to match (see screenshot, like 236) - KeyLab mk3 should be detected and ready to use.
2. Download the script on Arturia Website
If you do not have the latest version of FL Studio, you still can use KeyLab mk3 with FL Studio scripts using the following steps:
- Go to https://link.arturia.com/klmk3re
- Download the scripts corresponding to your DAW
- Extract the folders
- You should take the folder named “Arturia KeyLab mk3” from the “FL Studio Scripts” folder and place it at the end of this path:
Win: `C:Users<username>DocumentsImage-LineFL StudioSettingsHardware`
MacOS: `/Users/<username>/Documents/Image-Line/FL Studio/Settings/Hardware/` When this is done you can follow the “Use the latest FL Studio” section above to set up your device properly.
Now your controller is set for FL Studio.
2.Script features
Transport control and DAW commands :

- Loop / Fast Forward / Rewind / Metronome
- Stop / Play / Record / Tap Tempo
- Save / Quantize / Undo / Redo
Main encoder:
- Navigates in the channels
Main encoder click:
- Opens the selected plugin GUI
- Enters Analog Lab mode if the selected channel contains an Arturia plugin
Back
- Close the selected plugin GUI
Knobs 1 8
- Control some parameters of the current focused plugin (Device)
- Control the pan of the focused track (Mixer)
Faders 1 8:
- Control the parameter of the plugin on the selected track (Device)
- Control the volume of the selected track (Mixer)
Knob 9 and fader 9:
- Control the volume and the pan of the selected track
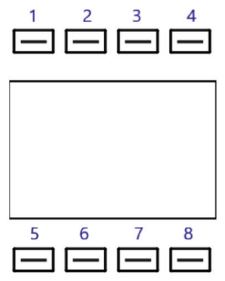
Contextual buttons:
- Contextual 1: Selects Device mode
- Contextual 2: Selects Mixer mode
- Contextual 3: Previous pattern
- Contextual 4: Next pattern
- Contextual 5: Toggle mute state of the selected track
- Contextual 6: Toggle solo state of the selected track
- Contextual 8: Toggle arm state of the selected track
Pad Bank DAW:
- Controls a 32-steps built-in FL Studio sequencer of the selected track
- Pads 1 to 8 controls steps
- Pads 9 to 12 controls the step pages
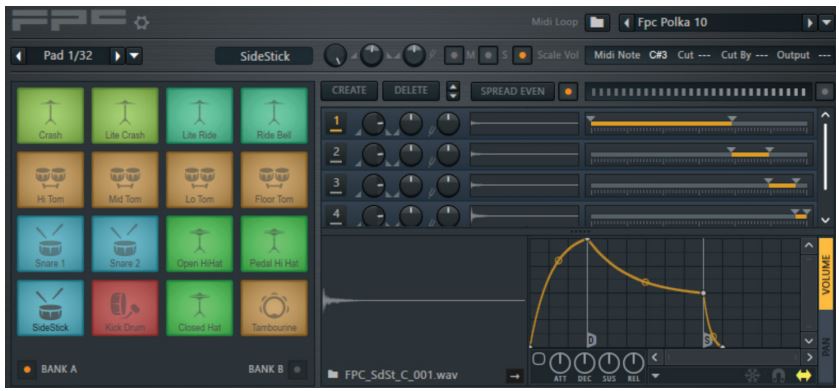
Pad Bank A/B/C/D:
- Pressing the pads will triggers sounds
- Pads have been automatically mapped to FPC Plugin
Arturia Plugins
- If you use Arturia’s VSTs like Analog Lab or a V Collection instrument on the picture above, please make sure to connect the plugin to the MIDI input 10:

- If you are using Arturia software, make sure the correct device is selected when you open the plugin
You can enter Arturia Mode to have perfect control over Arturia software in two ways: - Pressing on the main encoder on a track that contains an Arturia Plugin
- Press Prog + Arturia
- When an Arturia software is selected, you can manage the plugin as you would do in standalone (Navigation, selection and FX).
Documents / Resources
 |
ARTURIA KeyLab mk3 49 key USB Midi Keyboard Controller [pdf] User Guide KeyLab mk3, KeyLab mk3 49 key USB Midi Keyboard Controller, KeyLab mk3, 49 key USB Midi Keyboard Controller, key USB Midi Keyboard Controller, Midi Keyboard Controller, Keyboard Controller, Controller |