Introduction
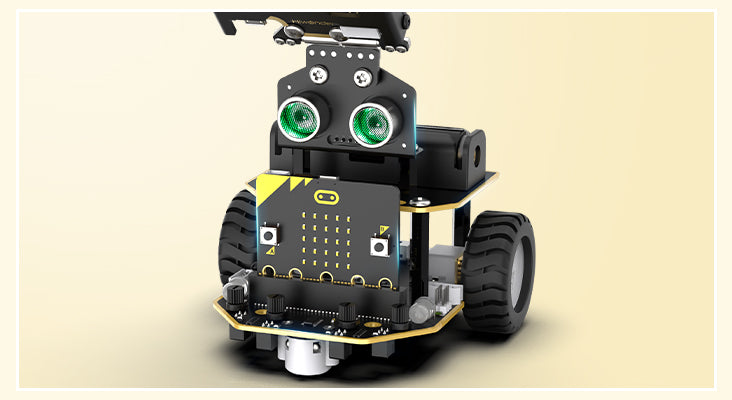
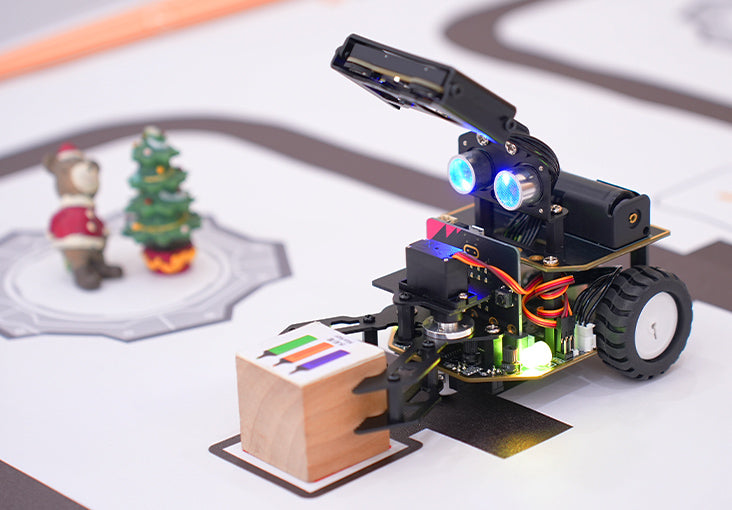
The Hiwonder Nexbit is an AI smart robot car powered by micro:bit V2, designed for educational programming and robotics. It integrates advanced features such as a high-precision 4-channel line follower, an AI vision module, a glowy ultrasonic sensor, and an infrared receiver. Nexbit supports a wide range of functionalities from basic line following and obstacle avoidance to complex AI tasks like road sign recognition, autonomous driving, and face recognition. This manual provides essential information for assembly, operation, maintenance, and troubleshooting.
Setup
Components Overview
Your Nexbit kit includes various components depending on the package (Starter or Standard). Please refer to the images below to identify all parts.


Assembly
Nexbit's PCB board is crafted with gold plating, showcasing an exquisite gold-black appearance. The compact body includes a glowy ultrasonic sensor, 4-channel line follower, RGB lights, and other components. It is designed to be user-friendly for wiring and assembly. Refer to the detailed assembly guide provided with your kit or online resources for step-by-step instructions.
Powering On
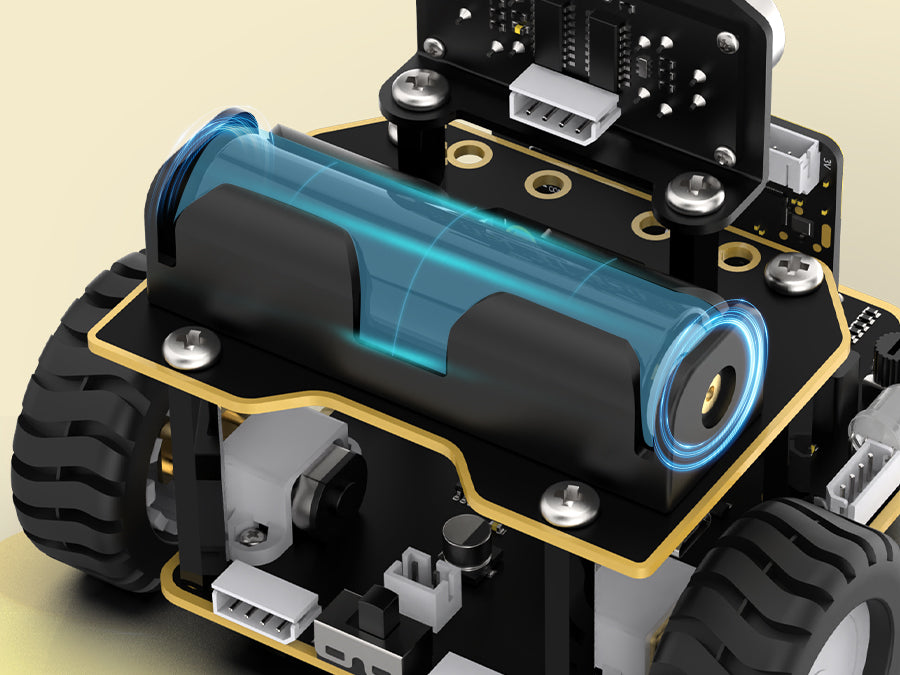
The robot car is powered by a 1800mAh LiPo battery. Ensure the battery is fully charged before first use. Connect the USB data cable to charge the battery. The USB port allows for convenient and safe charging.
Operating Instructions
Programming
Nexbit supports Makecode programming, allowing users to drag and drop building block-style modules for easy learning. It also supports iOS/Android APP programming.

Control Methods
- Mobile APP Control: Control Nexbit via a dedicated Android/iOS application, enabling remote control and access to various AI intelligent gameplay modes.
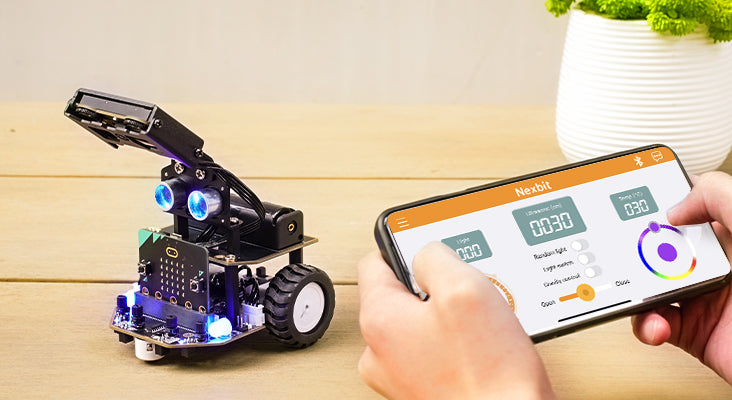
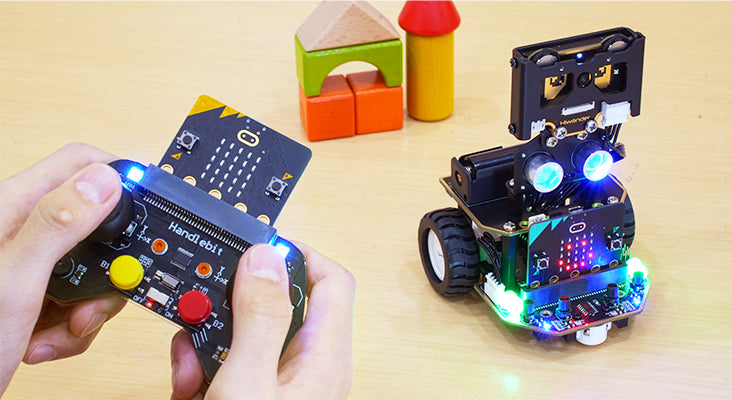
- Handlebit Remote Control: For a more tactile experience, Nexbit can be controlled using a Handlebit remote, providing convenient and enjoyable operation.
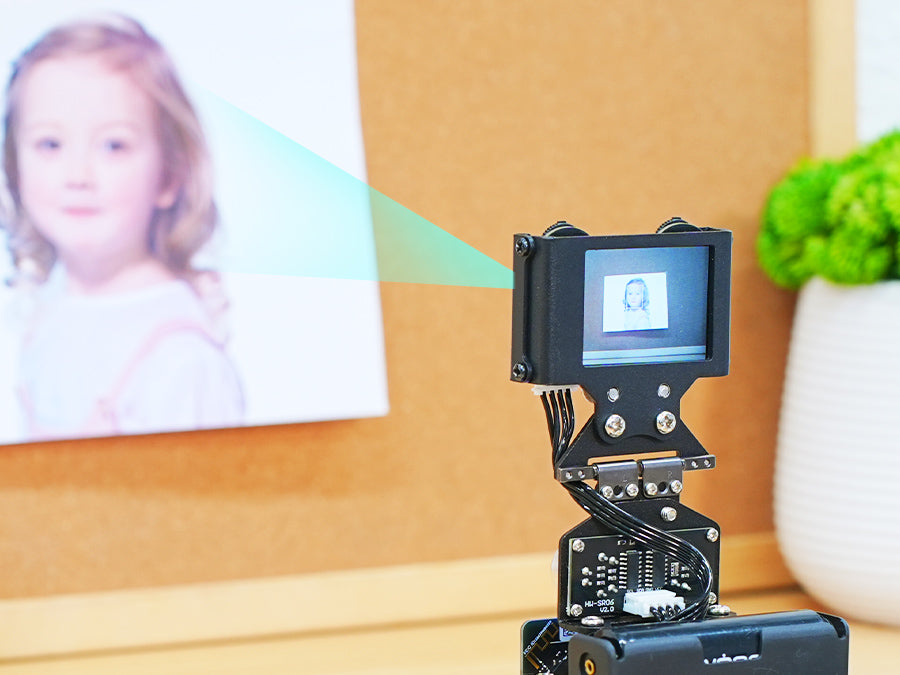
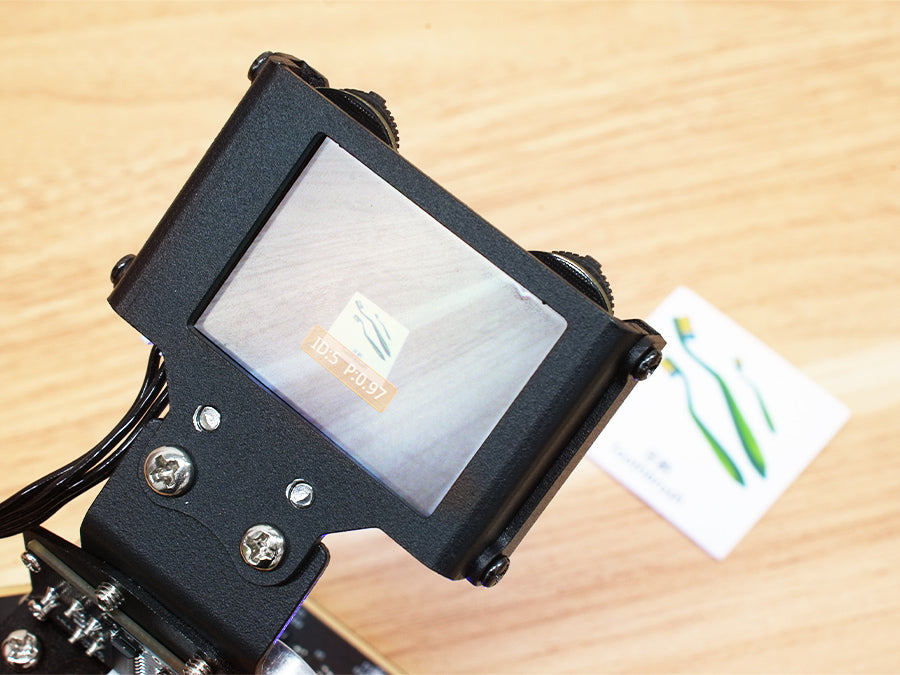
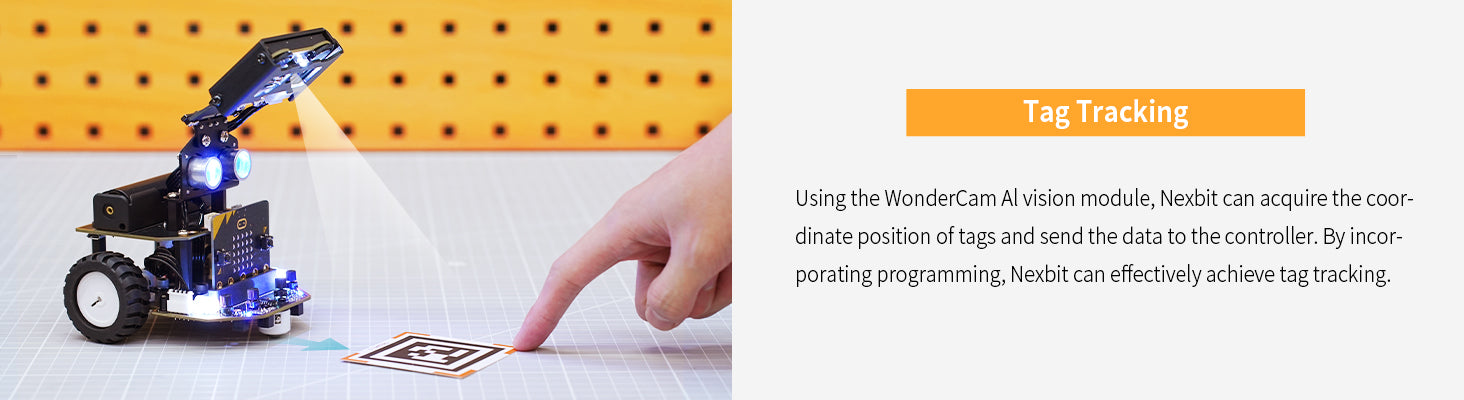
AI Vision Functions (WonderCam Module)
The high-performance WonderCam AI vision module with an integrated HD camera enables various AI applications.
- One-click Training and Learning: The AI vision module integrates learning algorithms for diverse AI vision projects.
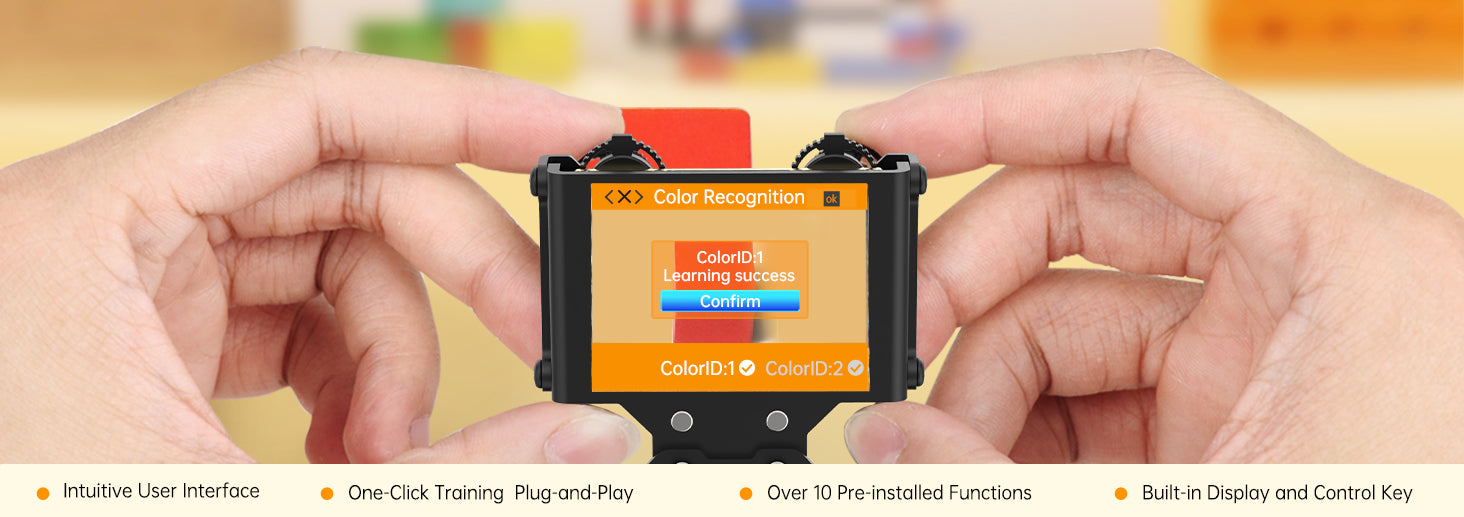
- Color Recognition: Identify colors of items, framed on the screen upon recognition.
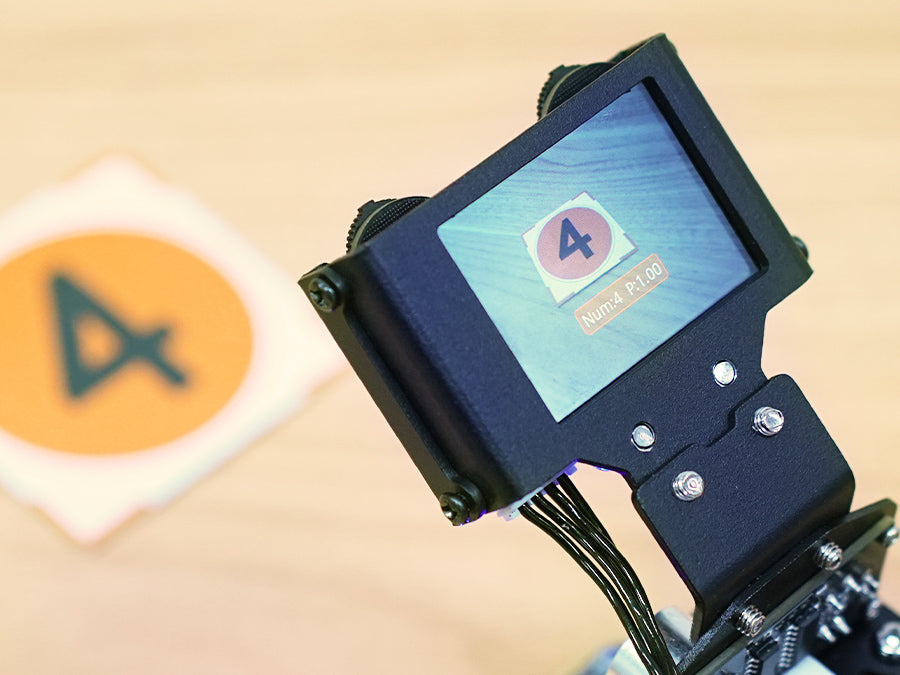
- Number Recognition: Accurately recognize numbers and frame them on the screen.
- Face Recognition: Detects faces and identifies matches based on conditions and display image.
- Waste Sorting: Recognize distinct waste cards and display corresponding patterns on the micro:bit's LED matrix.
- Vision Line Following: Retrieve position, offset, and angle of lines for smooth line following.

- Target Tracking: Track specific targets using the WonderCam module.
AI Autonomous Driving Simulation
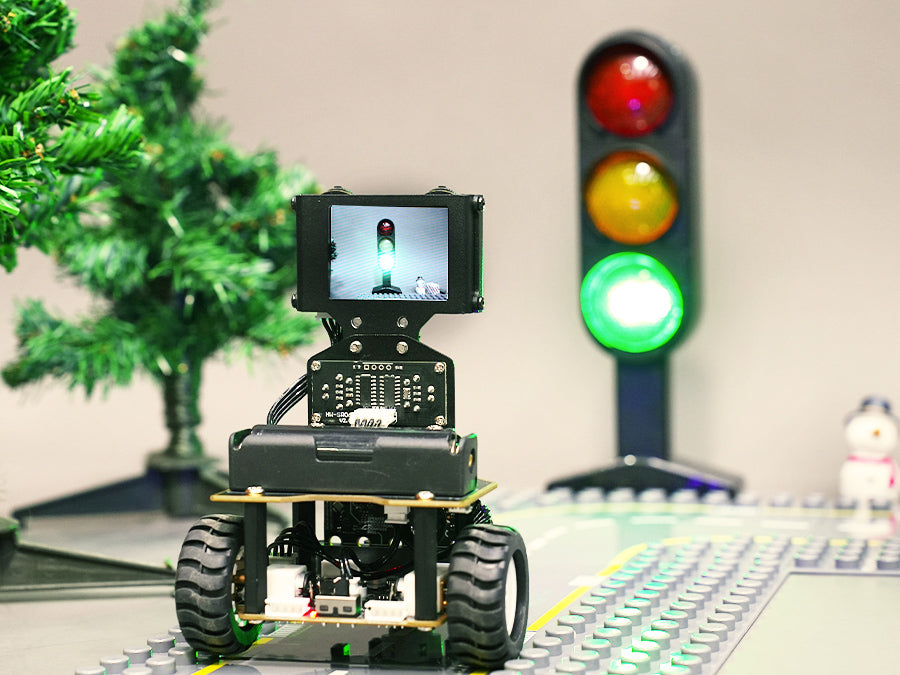
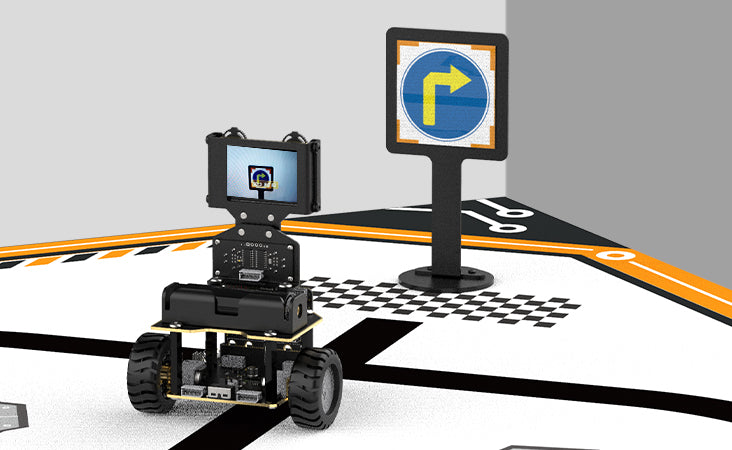
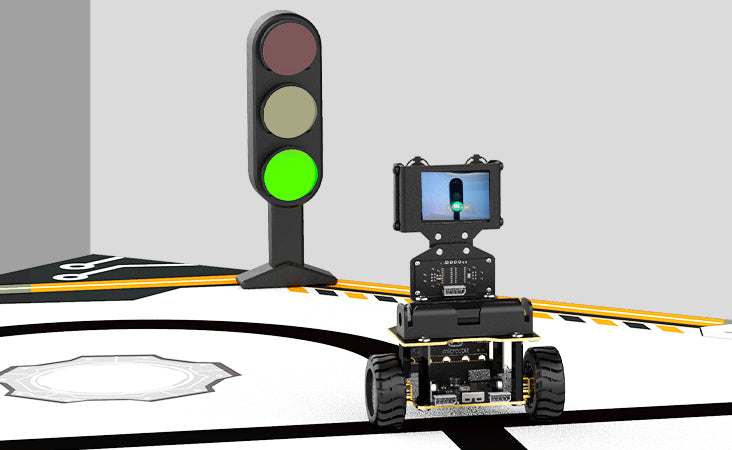
Nexbit can simulate autonomous driving scenarios, including road sign and traffic light recognition.
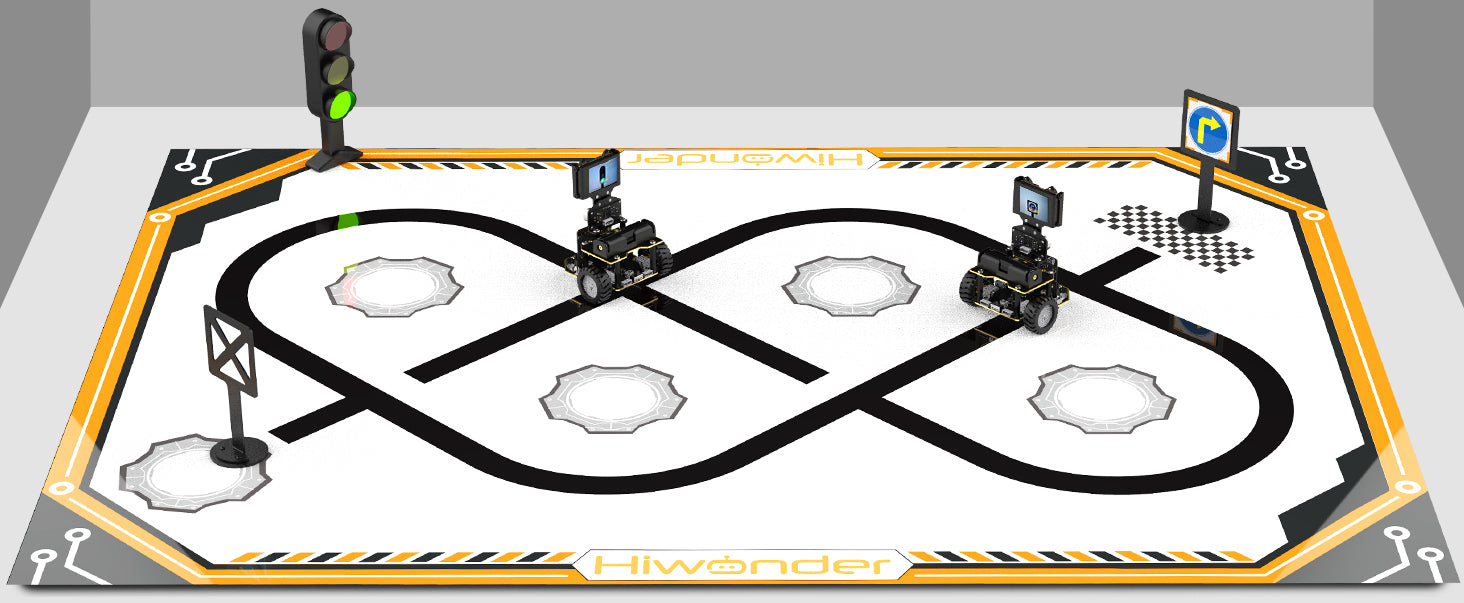
- Road Sign Recognition: Recognize road sign patterns (straight, turn, U-turn) and perform data analysis.
- Traffic Light Recognition: Recognize traffic lights to determine maneuvers.
Obstacle Avoidance
Equipped with a glowy ultrasonic sensor, Nexbit can measure distances and emit various colors of light for real-time feedback, enabling obstacle avoidance.
Expansion
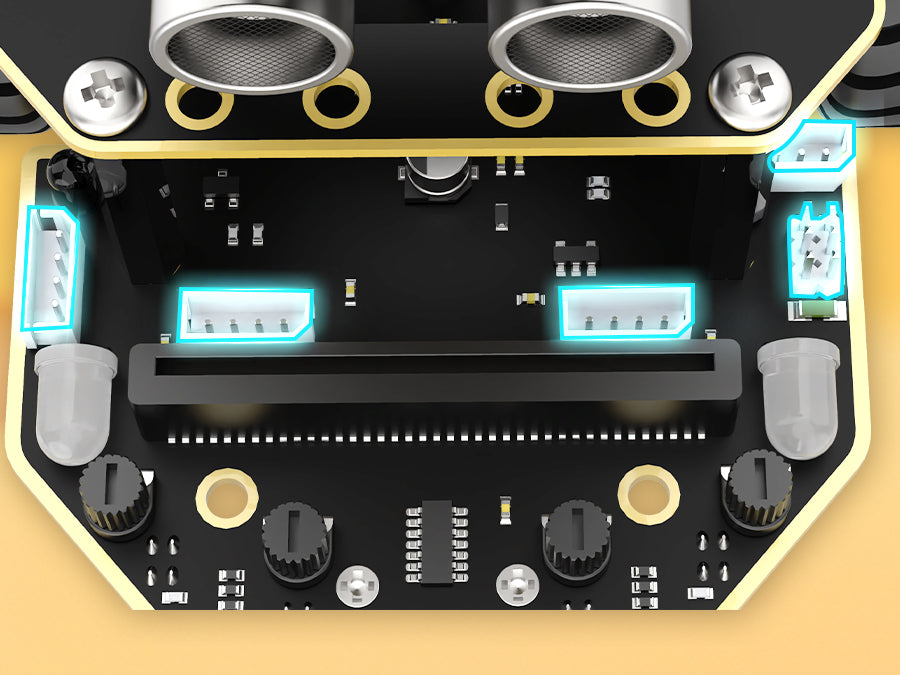
Nexbit's base board features multiple IIC, GPIO, and 4PIN ports for seamless expansion with additional sensors or grippers.

Maintenance
- Battery Care: The 1800mAh LiPo battery should be charged using the provided USB cable. Avoid overcharging or fully discharging the battery to prolong its lifespan. Store the robot in a cool, dry place when not in use.
- Cleaning: Use a soft, dry cloth to clean the robot's exterior. Avoid using liquids or harsh chemicals, especially near electronic components and sensors.
- Sensor Maintenance: Keep the ultrasonic sensor and WonderCam lens clean and free from dust or obstructions for optimal performance.
Troubleshooting
- Robot Not Responding: Ensure the battery is charged and correctly installed. Check all connections to the micro:bit and other modules.
- Programming Issues: Verify your Makecode or APP program for errors. Ensure the correct firmware is loaded onto the micro:bit.
- Sensor Malfunctions: Clean the sensor surfaces. Check wiring connections for the affected sensor. Recalibrate if necessary through the programming interface.
- Connectivity Problems (APP/Handlebit): Ensure Bluetooth is enabled on your control device and the robot. Re-pair the device if connection issues persist.
Specifications
Product Parameters
| Feature | Detail |
|---|---|
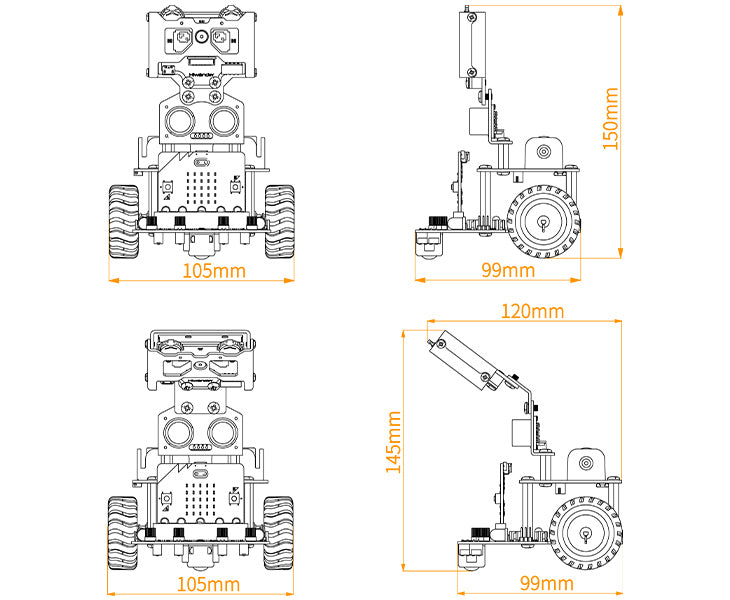
| Product size | 99*105*150mm |
| Product weight | about 245g |
| Material | metal bracket |
| Controller | micro:bit V2 |
| Display | 2.0-inch LCD screen with resolution of 320*240 |
| Programming software | micro:bit+ iOS/ Android APP |
| Output | RGB light, buzzer, servo port, IIC port, GPIO port and 5*5 LDE matrix |
| Input | 4-channel line follower, glowy ultrasonic sensor, infrared receiver and WonderCam vision module |
| Power supply | 1* 1800mAh 18650 LiPo battery |
| Control method | mobile APP control, handle control |
| Protection method | overcurrent protection, low voltage protection |
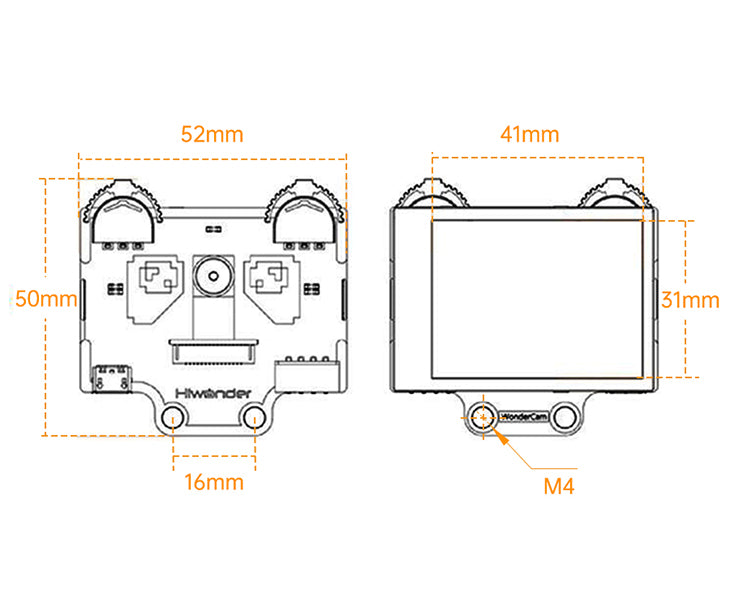
WonderCam Vision Module Parameters
| Feature | Detail |
|---|---|
| Processor | Kendryte K210 |
| Camera | 2 megapixel |
| Supply voltage | 5.0V |
| Working current | 300mA (Typical working condition: facial recognition, 100% backlight, fill light off) |
| Connectors | I2C |
| Display | 2.0IPS, resolution 320x240 |
| Built-in function | Facial recognition, image classification, feature learning, color recognition, vision line following, tag recognition, number recognition and landmark recognition. |
| Dimension | 52mmx50mm |
| Display dimension | 41mmx31mm |
User Tips
- Start with basic programming examples to understand the robot's movements and sensor interactions before attempting complex AI tasks.
- Experiment with the adjustable sensitivity knobs on the 4-channel line follower to optimize performance on different surfaces.
- Utilize the WonderCam's one-click training feature for quick setup of recognition tasks like color or number identification.
- Regularly check for firmware updates for both the micro:bit and the Nexbit robot to ensure access to the latest features and improvements.
Warranty and Support
For technical assistance, programming guides, or warranty information, please refer to the official Hiwonder website or contact their customer support. Keep your purchase receipt for any warranty claims.


