Trossen Robotics Aloha Mobile Robotic Machine Learning Kit

Product Specifications
- Manufacturer: Trossen Robotics
- Product Name: Aloha Mobile Robotic Machine Learning Kit
- Number of Parts: Multiple, see parts list
- Power Supply: Various power supplies included
- Control: FS-i6S Controller, PS4 Controller
- Cameras: Intel RealSense D405
- Computer: System76 Serval WS
- Robot Arms: Aloha ViperX 6dof Mobile, Aloha WidowX 6dof
Product Usage Instructions
- Step 1: Unpacking and Organizing Parts
Unpack the pallets and organize all parts as per the itemized list provided in the manual. - Step 2: Removing Slotted Power Station Plate
Use the M3 ball-end driver or M3 T-driver to remove the slotted power station plate. Set aside M5x8b bolts for later use and add a zip tie between two front slots for cable management. - Step 3: Positioning the Podium
Lift and position the podium atop the SLATE base, aligning brackets to bolt holes. Ensure the display panel is on the same side as the podium’s open side. - Step 4: Bolting Podium to SLATE Top Plate
Bolt the podium to the SLATE top plate using M5x12b bolts with Loctite. Start threading bolts with a straight M3 driver and finish tightening with the T-driver. - Step 5: Replacing Slotted Power Station Plate
Replace the slotted power station plate using the M5x8b bolts set aside earlier. Apply Loctite on the bolts for secure fastening. - Step 6: Adjusting ViperX Vertical Mount
With two people, remove the ViperX vertical mount, rotate it 180 degrees to face forward, and secure all 4 locks. Use caution when adjusting heights and always ensure stability with a second person.
Frequently Asked Questions (FAQ)
- Q: Where can I find additional support for this product?
- A: For additional support, you can submit a support ticket at trossenrobotics.com/support .
- Q: Are there any recommended resources for assembly guidance?
- A: Yes, we highly recommend watching the video version of the assembly guide available at youtu.be/jh21xCD_H0w .
THANK YOU
for purchasing the Trossen Robotics
Aloha Mobile Robotic Machine Learning Kit.
We highly recommend that you also watch the video version of the assembly guide by going to youtu.be/jh21xCD_H0w
If you require additional support, please submit a support ticket at trossenrobotics.com/support
Additional Resources
- Trossen Robotics GitHub: github.com/interbotix
- Product Documentation docs.trossenrobotics.com
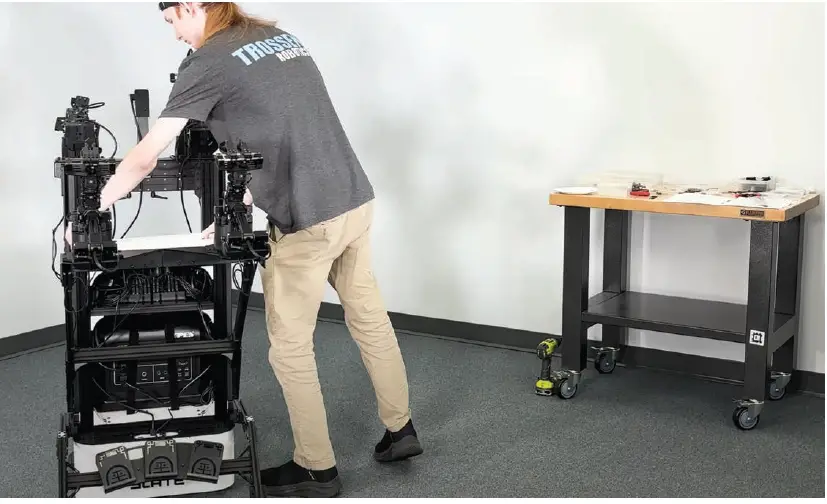
STEP 1
Unpack the two pallets and organize all the parts so they are easy to grab for assembly. On the following page, there is an itemized list of all parts.

PARTS LIST
| Frame + Hardware | |
| Podium with Adjustable Rails + Electronics Shelf | 1 |
| ViperX Vertical Mount with Left + Right VX Arm Mounts | 1 |
| WidowX Vertical Mount with Left + Right WX Arm Mounts
+ Cables |
1 |
| Caster Horizontal Mount with Foot Pedal | 1 |
| Camera Stand | 1 |
| M2.5x6s | 10 |
| M3x6s | 5 |
| M3x10s | 5 |
| M4x12b | 5 |
| M5x8b | 30 |
| M5x10b | 15 |
| M5x12b | 30 |
| M5x18s | 5 |
| M2.5 T-Driver | 1 |
| M3 Ball-End Driver | 1 |
| M4 T-Driver | 1 |
| Loctite | 3 |
| Zip Ties – 6 in | 10 |
| Zip Ties – 10 in | 10 |
| 3D Printed Parts | |
| 2020 USB Cable Clip | 20 |
| 2040 USB Cable Clip | 20 |
| ViperX wrist cam mount | 4 |
| Overhead cam mount | 2 |
| Electronics Shelf Inside Podium | |
| 4 Outlet Power Strip | 1 |
| 12v20a Power Supply | 2 |
| 12v10a Power Supply | 2 |
| Sabrent 7-Port USB Hub | 2 |
| 1ft Outlet Extension | 2 |
| Small Electronics | |
| USB A 3.0 Male to Male Cable 6 Foot | 1 |
| USB 3.0 to Micro B Cable 3m Locking Right Angled | 3 |
| USB A to Micro USB 10 Foot | 1 |
| PS4 Controller | 1 |
| Foot Pedal Switch (NOT YET IMPLEMENTED) | 1 |
| Cameras | |
| Intel RealSense D405 | 3 |
| Computer | |
| System76 Serval WS | 1 |
| Power Supply Charger | 1 |
| Power Supply | |
| OUPES 1800W Portable Power Station, 1.4kWh | 1 |
| Power Station Charger | 1 |
| Robot Base | |
| SLATE | 1 |
| FS-i6S Controller | 1 |
| Contact Charger | 1 |
| Power Supply | 1 |
| Pigtail Cable | 1 |
| USB 3.0 A Male to A Male Cable 3 Foot | 1 |
| Robot Arms | |
| Aloha ViperX 6dof Mobile | 2 |
| Aloha WidowX 6dof | 2 |
| VX Finger Bag | 2 |
| Bolts | |
| M2.5x6s | 10 |
| M3x6s | 5 |
| M3x10s | 5 |
| M4x12b | 5 |
| M5x8b | 30 |
| M5x10b | 15 |
| M5x12b | 30 |
| M5x18s | 5 |
| M2.5 T-Driver | 1 |
| M3 Ball-End Driver | 1 |
| M4 T-Driver | 1 |
STEP 2
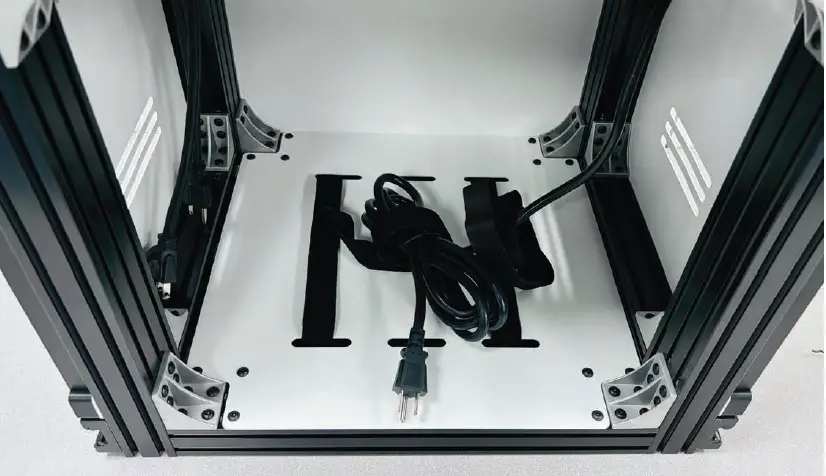
Remove slotted power station plate using the M3 ball-end driver or M3 T-driver. Set the M5x8b bolts aside for future use. Add zip tie between two of the front slots for later use as cable tie-down.
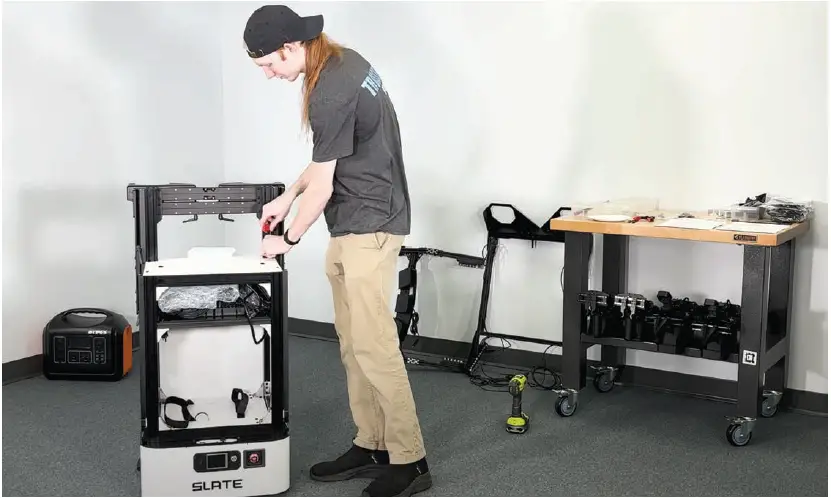
STEP 3
Lift and position the podium atop the SLATE base, aligning brackets to bolt holes with a screwdriver. Mind the SLATE’s orientation. The display panel should be on the same side as the podium’s open side.

TIP: If a bolt is not threading into its intended hole easily, loosen other bolts in the same bracket/plate and reposition as needed. Any Loosened bolts will require fresh loctite.
STEP 4
Bolt podium to SLATE top plate using M5x12b bolts with Loctite. Use a straight M3 driver to start threading bolts, finish tightening with the T-driver.

STEP 5
Replace the slotted power station plate using the same M5x8b bolts set aside earlier. Use Loctite on the bolts.

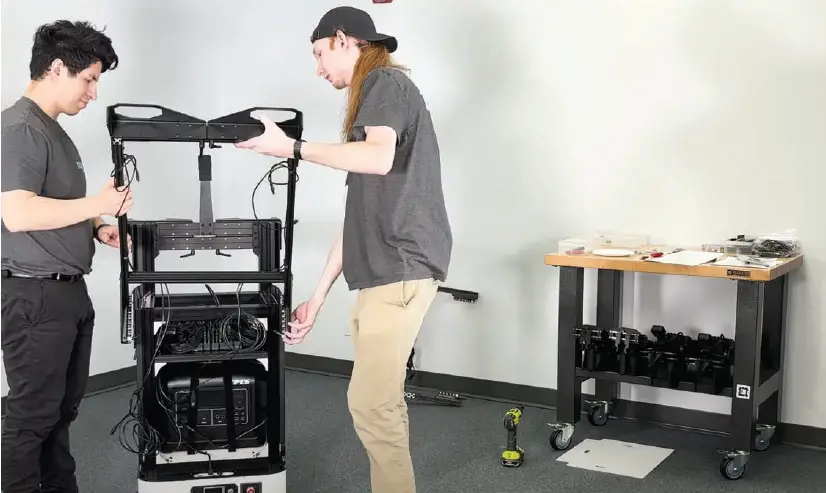
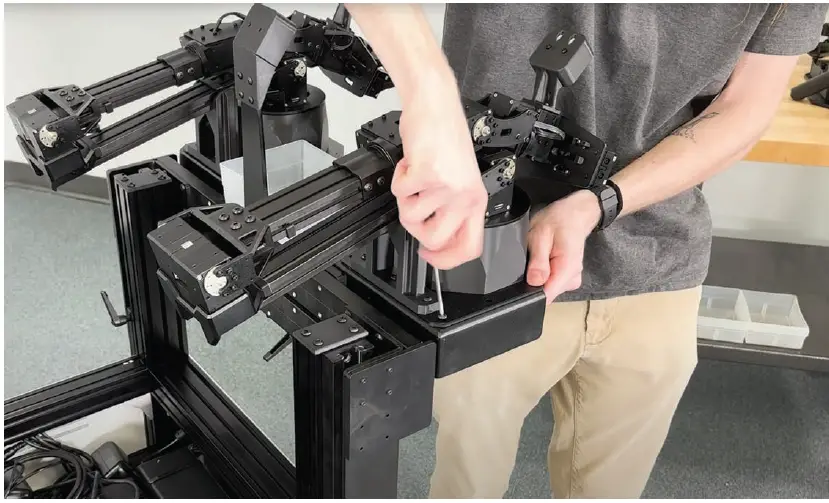
STEP 6
With two people, remove ViperX vertical mount, rotate 180 degrees so that it faces forward, and secure all 4 locks.

TIP: When loosening the locks or adjusting the height of ViperX or WidowX Vertical Mounts, be sure to hold the assemblies so that they do not fall. It is highly recommended that you use a second person to hold them in place.
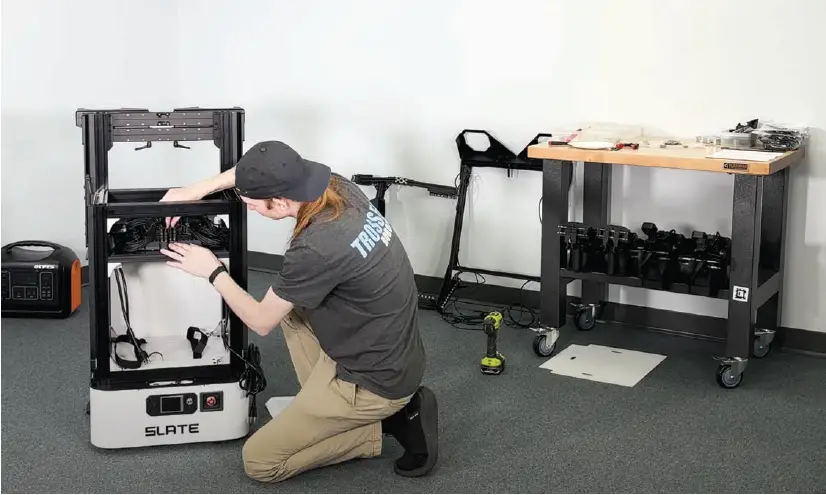
STEP 7
Remove the laptop plate to easily remove the bubble wrap placed for shipping. Set M5x8b bolts aside for future use. Pull 1ft outlet extensions through the side slot into the base of the podium for connection into the power station.
STEP 8
Check all power supply cable connections and all USB cables in the USB hubs. Confirm that all buttons corresponding to used USB ports are pressed down.
STEP 9
Insert power station into podium. Secure the power station with Velcro straps. Connect the 1ft outlet extensions to the top 2 outlets, and add the 4-outlet power strip cord into the bottom outlet.
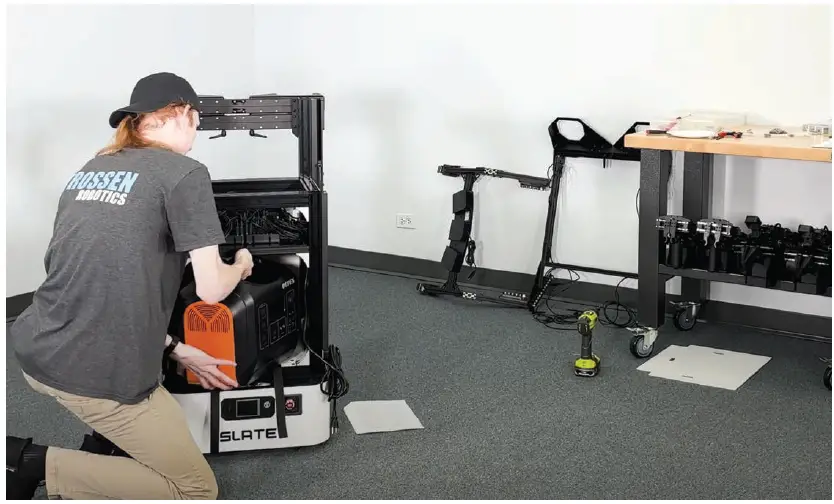
TIP: Place the power station next to the opening and put the top velcro straps through the handle before picking the power station up and placing it into the podium.
STEP 10
Connect USB-A male-male cable into SLATE, and USB hub. Thread cable through the zip-tie on the slotted power station plate that was added previously.

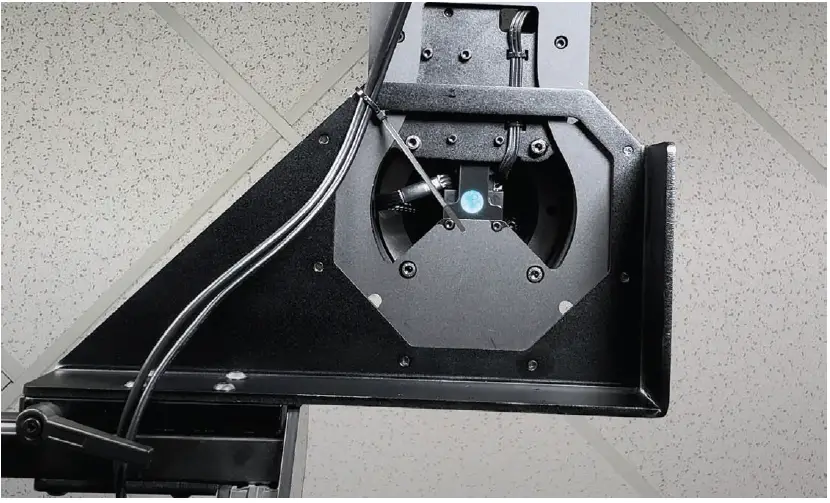
STEP 11
Add front facing straight camera mount to ViperX upright using M5x12b. Add camera mount to front facing straight camera mount using M4x12b. Add camera into middle camera mount using M3x10s.

STEP 12
Slot the WidowX leader arm vertical mount to podium rails. Secure all 4 locks. Plug USB-A males into hubs, and plug barrel extensions females into 12v10a power supplies.
TIP: Pre-tighten locks to be centered with the wheels.
STEP 13
Add foot pedal onto caster mount using M5x18s and M4 T-driver. Thread the bolts slightly past the base of the foot pedal so the bolts align the foot pedal to the mounting plate.

STEP 14
Slide caster mount onto bottom horizontal rails. Ensure the locks are centered. Tap the Caster Mount onto the rails if needed. Run USB cable to usb hub. Make sure the corresponding USB hub port button is pressed down.

STEP 15
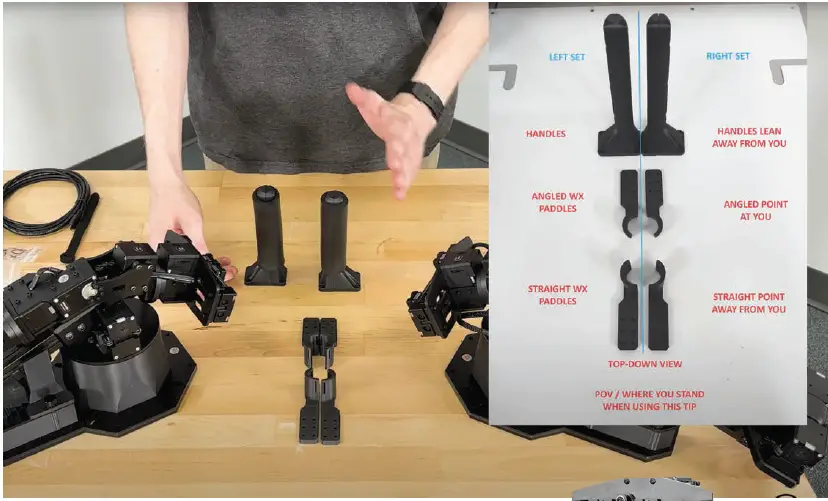
Attach WidowX paddles using M3x12s. Attach WidowX handles onto WidowX arms using M3x8s with M2.5 T-driver or hex key.

STEP 16
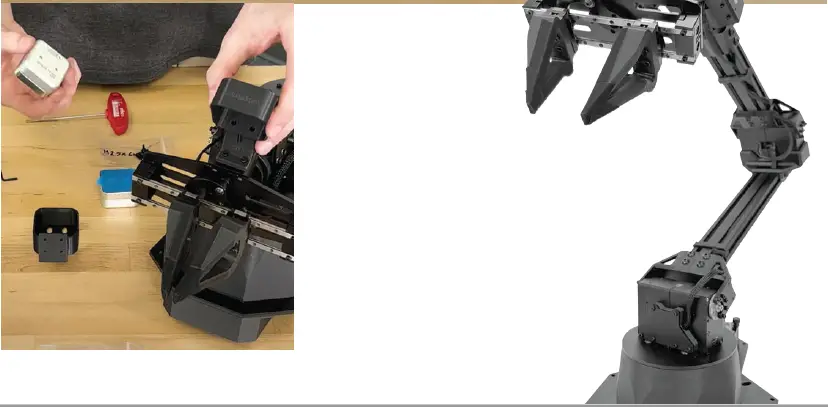
Attach ViperX fingers using M3x14s and M2.5 hex key and wrist cam mounts onto ViperX arms using M2.5×6 and M2 hex key. Add cameras into ViperX camera mounts using M3x6s.
STEP 17
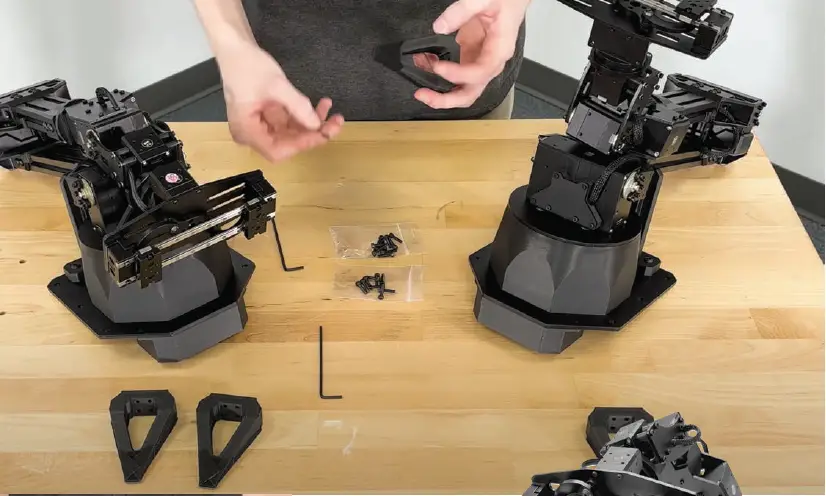
Add ViperX arms onto front follower arm mounts M5x10b using Loctite. Don’t let go of the ViperX until two bolts are screwed in.
STEP 18
Add WidowX arms onto the back WidowX upright mounts. Don’t let go of the WidowX until two bolts are screwed in.

STEP 19
Add micro USB-B locking cables to hubs, and zip tie to the electronics shelf to avoid damaging electronics in case cables catch on anything. Attach micro USB-B into cameras. Use 2040 cable clips for cable management.
TIP: Only hand tighten locking USB cables to avoid overtightening and sheering the screw off.
STEP 20
Connect power and USB cables to all 4 arms. Secure cables with zip ties as needed.
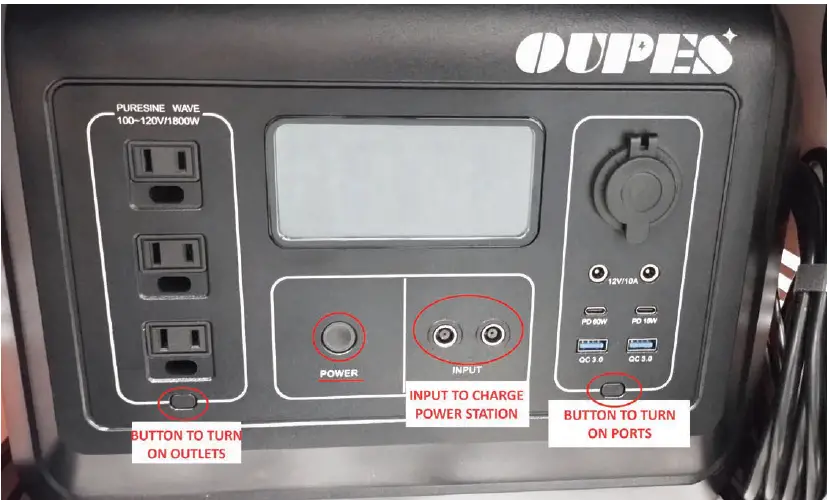
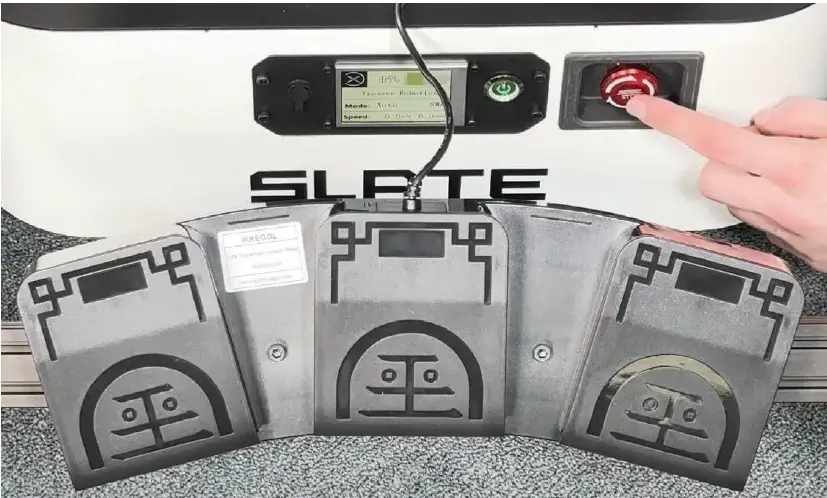
STEP 21
Turn on power station + press button to turn on outlets. Ensure the power strip inside the podium is switched on. Ensure all U2D2s in the arms are glowing red to show they have power. If not, confirm that all buttons corresponding to used USB ports are pressed down.
STEP 22
Replace laptop plate with bolts set aside from earlier. Use Loctite. Run the USB-A male 3.0 cables out of the left slot of the podium.
STEP 23
Secure the connected cables to the underside of each arm.
TIP: Zip-tie all cables to avoid the risk of damaging ports if cables get caught.
STEP 24
Ensure SLATE E-stop is released.
Documents / Resources
 |
Trossen Robotics Aloha Mobile Robotic Machine Learning Kit [pdf] Installation Guide Aloha Mobile Robotic Machine Learning Kit, Aloha Mobile, Robotic Machine Learning Kit, Machine Learning Kit, Learning Kit |


