Bubuka
This manual provides detailed instructions for the installation, operation, and maintenance of your DVKNM Wireless RV Backup Camera System. Please read this manual thoroughly before using the product to ensure proper function and safety.
Eusi pakét
Pastikeun yén sadaya item anu didaptarkeun di handap aya dina pakét anjeun:
- 7 inch IPS Touchscreen Monitor x1
- Tukangeun View Kaméra x1
- Fan-Shaped Bracket x1
- Suction Cup Bracket x1
- Camera Antenna x1
- Monitor Antenna x2
- Camera Power Cable x1
- Carjer mobil x1
- Kabel Daya USB x1
- Pamasangan Kit

Gambar 1: Eusi pakét
Setup sareng Instalasi
The DVKNM Wireless RV Backup Camera System is designed for easy installation, supporting both Furrion pre-wired RVs and universal 12-36V vehicles.
Pamasangan kaméra
- For Furrion Pre-Wired RVs: The camera can be installed directly into the existing Furrion pre-wired mounting location. Connect the camera's power cable to the pre-wired connector. No drilling is required.
- For Universal 12-36V Vehicles: For vehicles not equipped with Furrion pre-wiring, connect the camera to a 12-36V DC power source. A 12V power cable is included for this purpose. Ensure proper polarity (+ to + and - to -).

Figure 2: Camera Wiring Options

Gambar 3: Diagram Sambungan Sistim
Pamasangan Monitor
- Attach the fan-shaped bracket or suction cup bracket to the 7-inch IPS touchscreen monitor.
- Mount the monitor in a suitable location within your vehicle that provides a clear view without obstructing your driving.
- Connect the monitor to power using the provided car charger or USB power cable.
- Attach the two monitor antennas to the designated ports on the monitor.
Catetan: For some Chevrolet or GMC vehicle owners, a 7-way vehicle power adapter may be required. This is because the taillights and running lights may not provide a stable 12-volt power supply, which can affect system performance. Contact customer support for more details or to purchase the adapter if needed.
Parentah Operasi
Powering On and Basic Operation
- Once powered, the monitor will automatically connect to the camera.
- The 7-inch IPS touchscreen allows for easy navigation and control of system features.
- The system provides real-time 1080P FHD views for safe parking, lane changes, and maneuvering.

Figure 4: Monitor Features Overview
Tampilan Layar Terbagi
The monitor supports split-screen display, allowing you to view feeds from up to 4 cameras simultaneously (additional cameras sold separately). Access split-screen modes through the touchscreen menu for enhanced driving safety.

Figure 5: Touchscreen Split Screen Settings
Ngarekam Loop
Insert an SD card (not included) into the monitor to activate the loop recording function. This feature saves footage continuously, similar to a dash cam. Critical moments can be rewound and replayed directly on the monitor. Ensure the SD card is formatted correctly before use.

Gambar 6: Fungsi Rekaman Loop
Garis Parkir Anu Bisa Disaluyukeun
The system allows for DIY adjustable parking lines. You can customize the width between the lines, as well as their vertical height and position, to assist with precise parking guidance.

Figure 7: DIY Adjustable Parking Lines
Pangropéa sarta durability
Résistansi Cuaca
The camera features an IP69 waterproof rating and a rust-proof aluminum housing. This design ensures reliable performance in various weather conditions, including heavy rain, snow, and exposure to road debris. The system is built to operate effectively in temperatures ranging from -22°F to 149°F.
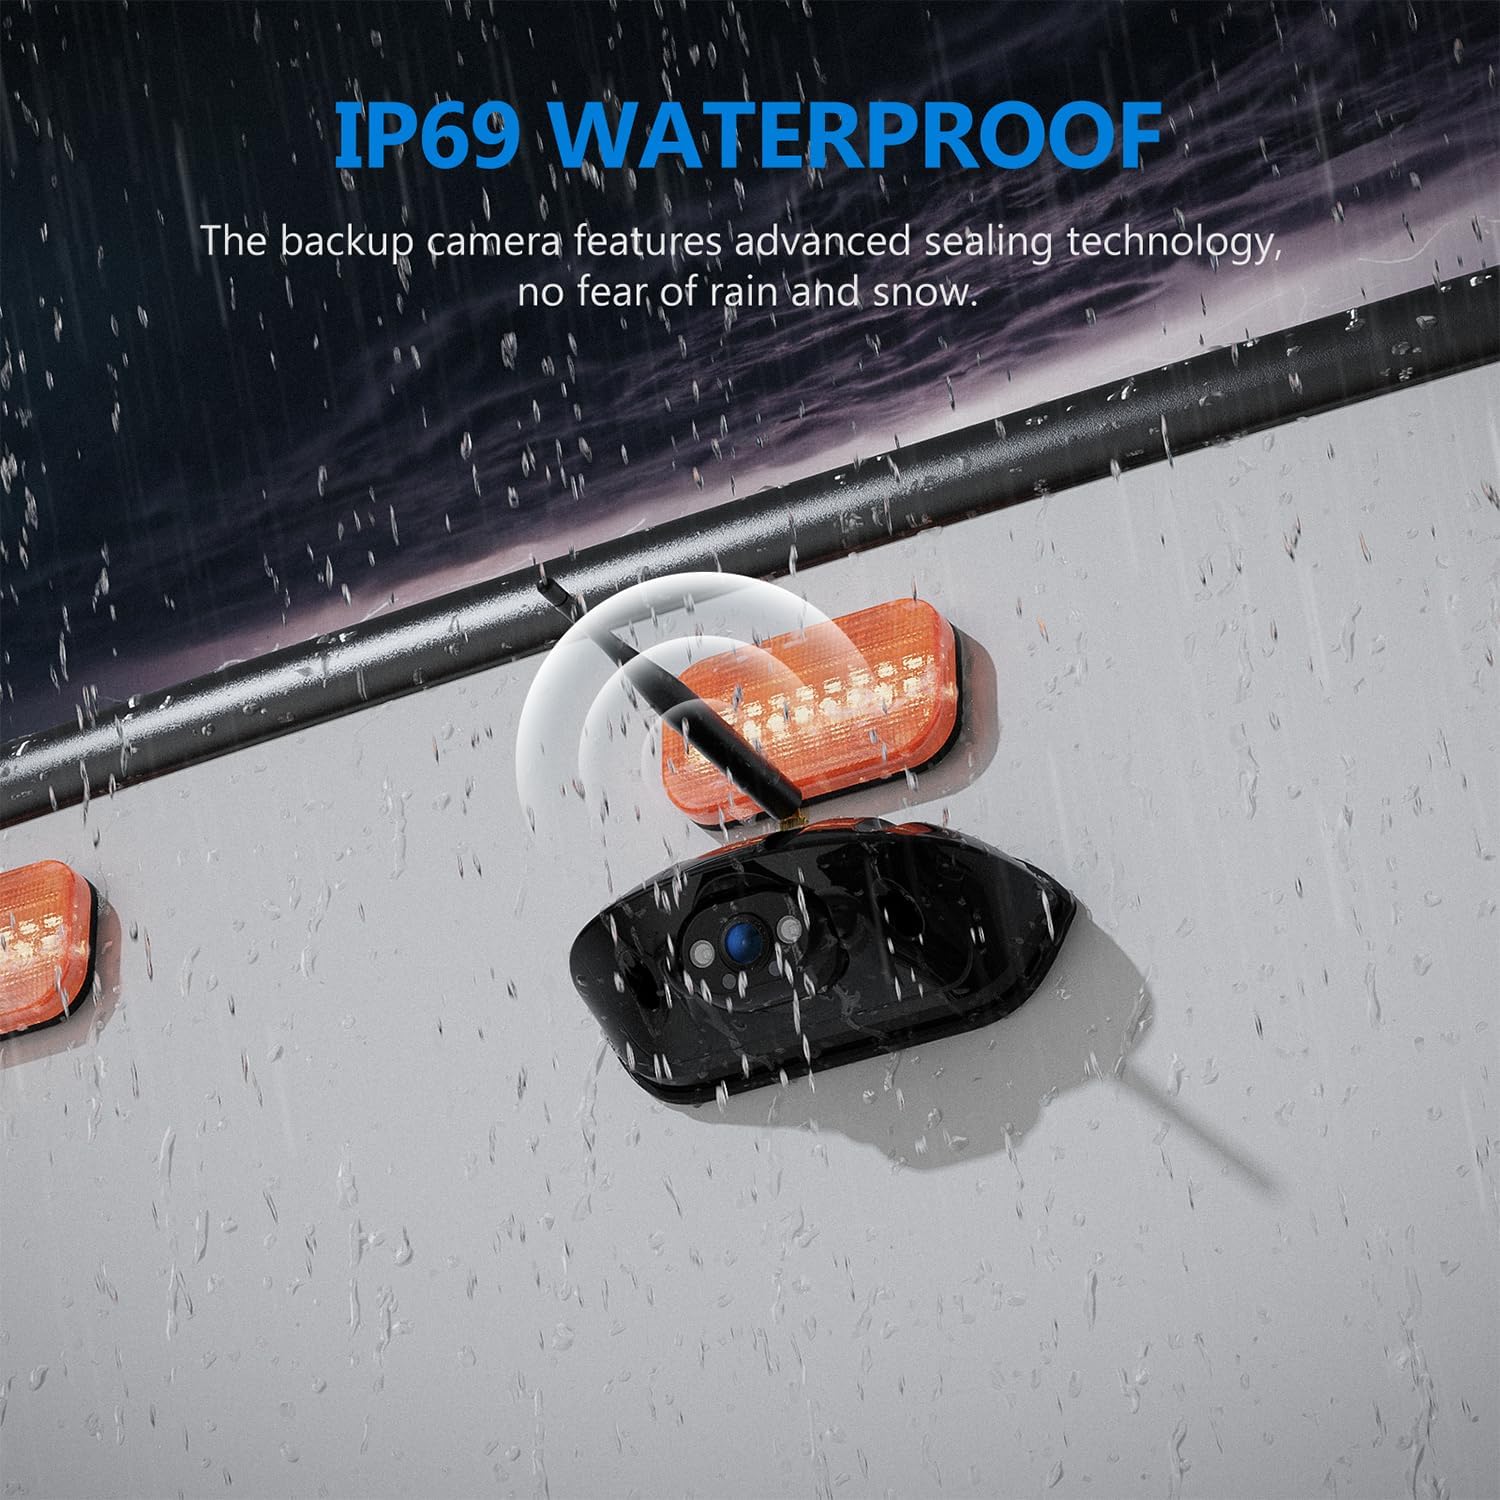
Figure 8: IP69 Waterproof Camera

Figure 9: All-Weather Performance
Visi Peuting
The camera is equipped with an upgraded 1080P CMOS image sensor and 3 infrared LEDs. This technology provides clear night vision, ensuring visibility even in total darkness or low-light conditions.

Figure 10: FHD Super Night Vision
beberesih
- Wipe the camera lens and monitor screen with a soft, damp lawon. Ngahindarkeun cleaners abrasive.
- Ensure the camera lens is free from dirt, mud, or snow for optimal image clarity.
Pamérésan masalah
| Masalah | Mungkin Cukang lantaranana | Solusi |
|---|---|---|
| Taya gambar dina monitor |
|
|
| Unstable or flickering image |
|
|
| Night vision unclear |
|
|
| Loop recording not working |
|
|
spésifikasi
| Fitur | Rincian |
|---|---|
| merek | DVKNM |
| Modél | F7 (Compatible with F7-3, F5, F5-3) |
| Ukuran layar | 7 inci |
| Tipe tampilan | Layar rampa IPS |
| Resolusi Video | 1080P FHD |
| Téhnologi nirkabel | 2.4GHz |
| Rentang sinyal | Up to 328ft (open areas) |
| Sensor Kaméra | 1080P CMOS |
| Visi Peuting | 3 LED Infrabeureum |
| Peunteun waterproof | IP69 |
| Operasi Voltage | 12-36V (DC) |
| Ngarekam Loop | Supported (with SD card, not included) |
| Product Dimensions (Monitor) | 7 "L x 1.4" W x 4.3" H |
| Item Beurat | 3.39 pon (total sistem) |
Garansi sarta Rojongan Palanggan
DVKNM offers a Garansi ngagantian 3 taun for this product. Additionally, rojongan customer 24-jam is available to assist with any questions or issues you may encounter.
For assistance or replacement parts, please contact DVKNM customer support through the vendor's contact information provided at the point of purchase or on the official DVKNM websitus.


