1. Bubuka
This manual provides essential information for the safe and efficient operation, installation, and maintenance of your Panda Compact Dryer, model PAN760SF-001. Please read all instructions carefully before using the appliance and retain this manual for future reference.

Gambar 1: Hareupeun view of the Panda Compact Dryer.
2. Émbaran Kasalametan
Salawasna turutan pancegahan kaamanan dasar nalika nganggo alat-alat listrik pikeun ngirangan résiko kahuruan, kejutan listrik, atanapi tatu pikeun jalma.
- Baca sagala parentah saméméh ngagunakeun dryer nu.
- Entong garing barang-barang anu saacanna dibersihkeun, dikumbah, direndam, atanapi kasawang ku béngsin, pangleyur pambersih garing, atanapi bahan anu gampang kaduruk atanapi ngabeledug.
- Ulah ngantep barudak maén dina atawa dina alat. Pengawasan anu ketat pikeun murangkalih diperyogikeun nalika alatna dianggo caket barudak.
- Ulah ngahontal kana alat lamun kendang keur obah.
- Entong masang atanapi nyimpen alat ieu di tempat anu bakal kakeunaan cuaca.
- Ulah tamper kalawan kadali.
- Ngabersihan layar lint sateuacan atanapi saatos unggal beban.
- The dryer automatically shuts off when the door is open for safety.
3. Setup jeung Instalasi
3.1 Ngabongkar bungkusan
Carefully remove the dryer from its packaging. Check for any shipping damage and ensure all accessories are present. Included components are the plastic venting hose and mounting kits.
3.2 Pilihan panempatan
The Panda Compact Dryer offers versatile installation options:
- Nangtung bébas: Teundeun dina datar, permukaan stabil.
- Tumpuk: Can be stacked on top of a compatible washing machine (ensure stability).
- Dipasang dina témbok: Use the provided mounting kits to secure the dryer to a sturdy wall.

Figure 2: Dryer dimensions for placement planning.
3.3 Sambungan Daya
Plug the dryer into any standard 120V outlet. Ensure the outlet meets the electrical requirements of the appliance (1500W).
3.4 Ngubaran
The dryer is a vented model and must be connected to an exhaust system to expel moist air. Use the provided plastic venting hose. Ensure the vent is clear of obstructions.

Gambar 3: Tukangeun view showing the vent connection.
3.5 Knob Installation
If the control knobs are not pre-installed, gently push them onto their respective shafts on the control panel until they are secure.
Video 1: Demonstration of knob installation for Panda dryers. This video shows how to correctly attach the control knobs to the dryer's panel.
4. Parentah Operasi
4.1 Ngamuat Pakéan
Open the see-through door (opens up to 105 degrees for easy loading). Load up to 13.2 pounds of laundry into the 3.51 cu.ft. stainless steel drum. Avoid overloading to ensure efficient drying and prevent excessive wrinkling.
4.2 Control Panel Leuwihview

Gambar 4: Detil view tina panel kontrol.
4.3 Selecting a Drying Mode
Your dryer features customizable drying modes:
- Cold (0-20 minutes): For cooling down clothes and preventing creasing.
- Hot (30-200 minutes): Ideal for bulky items or large loads requiring thorough drying.
- Air Dry (0-80 minutes): Ngagunakeun hawa tiis pikeun nyegerkeun baju tanpa panas.
- ECO: An energy-saving mode with a preset drying time.
- Sénsor garing: Automatically adjusts drying temperature by detecting moisture levels in clothes and the drum.
Turn the timer knob to select the desired drying time or mode. For ECO and Sensor Dry, the dryer will manage the cycle automatically.
4.4 Starting the Dryer
After loading clothes and selecting the desired mode, close the door firmly. The dryer will begin operation. The dryer automatically shuts off when the door is opened during a cycle for safety.
5. Pangropéa
5.1 Lint Filter beberesih
The dryer is equipped with a three-layer filter set that traps lint and hair. For optimal performance and safety, clean the lint filter before or after each load.
- Buka panto pengering.
- Locate the lint filter assembly inside the drum.
- Cabut saringan ku cara narik kaluar.
- Separate the layers and remove accumulated lint.
- Reassemble the filter layers and place the filter back into the drum securely.
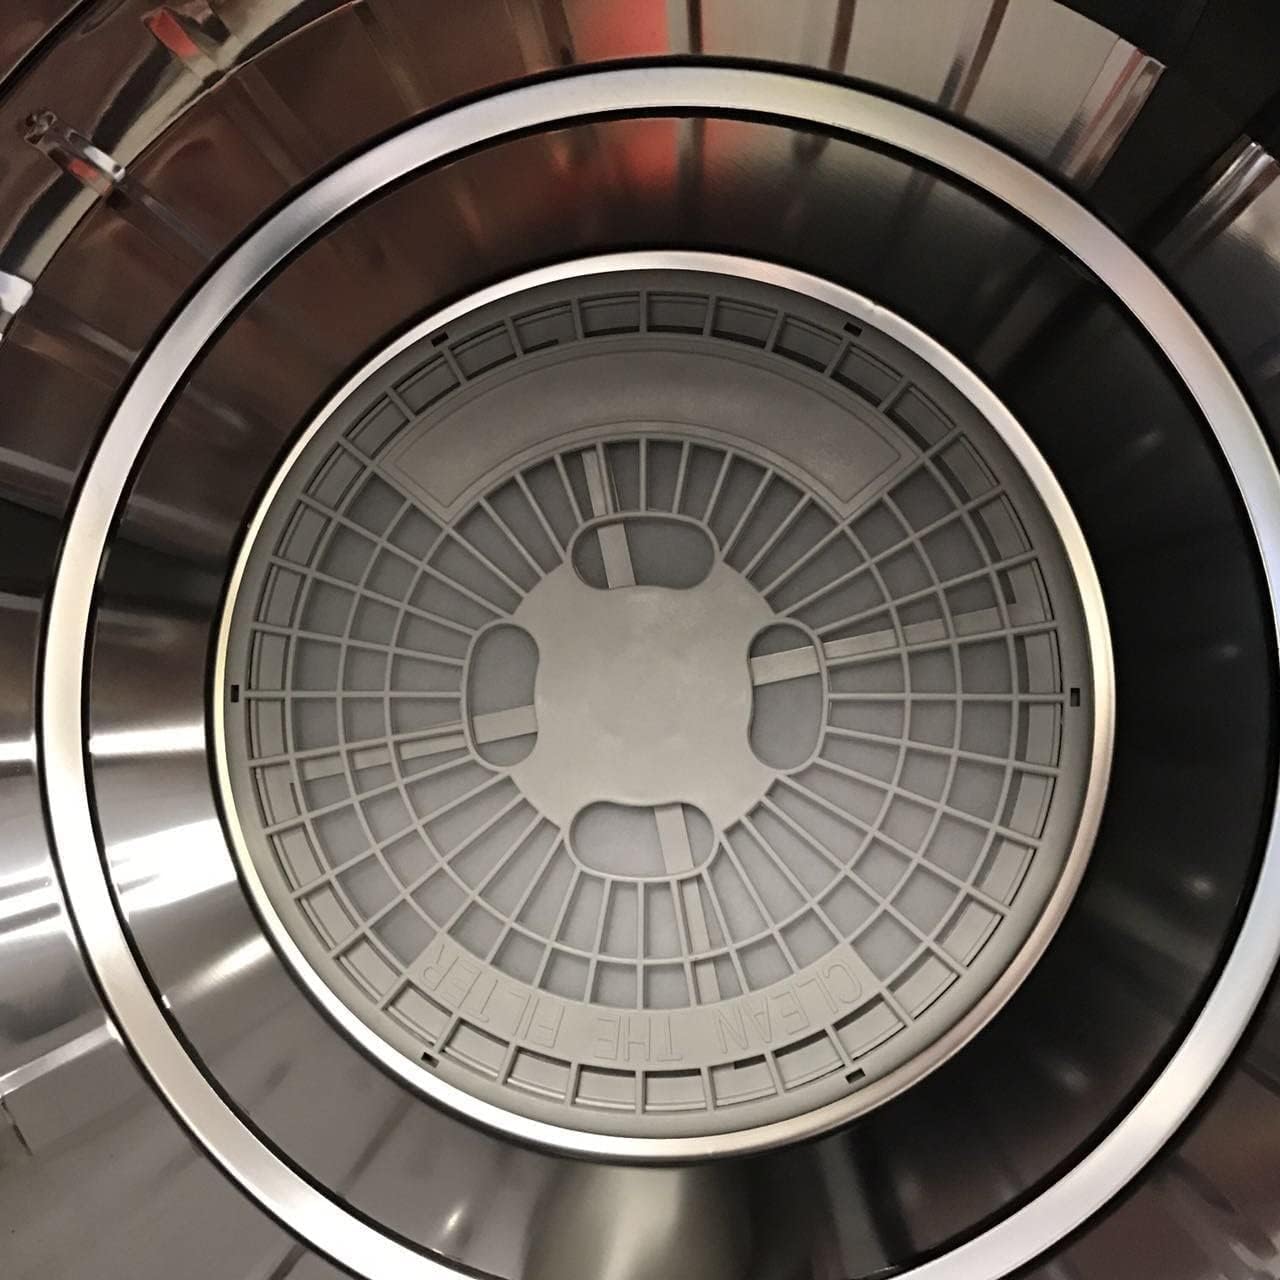
Figure 5: Lint filter located inside the drum.
Video 2: Demonstration of assembling filter parts. This video illustrates the process of putting together the dryer's filter components.
6. Cara ngungkulan
If you encounter issues with your Panda Compact Dryer, refer to the following common troubleshooting steps:
| Masalah | Mungkin Cukang lantaranana | Solusi |
|---|---|---|
| Dryer teu ngamimitian | No power; Door not closed properly | Check power connection; Ensure door is fully latched. |
| Pakéan teu garing sagemblengna | Overloaded; Lint filter clogged; Incorrect drying mode selected | Reduce load size; Clean lint filter; Select appropriate drying mode. |
| Noise mahiwal salila operasi | Loose items in drum; Dryer not level; Internal component issue | Remove foreign objects; Adjust leveling feet; Contact customer support if noise persists. |
| Pangering eureun teu disangka-sangka | Overheat protection activated; Power interruption | Allow dryer to cool down; Check power supply. |
Upami masalah masih aya saatos nyobian solusi ieu, mangga ngahubungi dukungan palanggan.
7. Spésifikasi
| Fitur | Spésifikasi |
|---|---|
| merek | Panda |
| Nomer modél | PAN760SF-001 |
| Kapasitas | 3.52 Cubic Feet (13.2 lbs load volume) |
| Kakuatan | 110V, 1500W |
| Ukuran (W x D x H) | 23.5" x 21.5" x 27.25" |
| Item Beurat | 48.5 pon |
| Bahan Drum | Beusi sténless |
| Modeu garing | Cold, Hot, Air Dry, ECO, Sensor Dry |
| Komponén Kaasup | Plastic Venting Hose, mounting kits |
8. Garansi jeung Rojongan
For warranty information, please refer to the documentation included with your purchase. If you require technical assistance, replacement parts, or have any questions not covered in this manual, please contact Panda customer support through their official channels or the retailer where the product was purchased.


