1. Bubuka
This manual provides detailed instructions for the installation, operation, maintenance, and troubleshooting of your AINAVI QLED Touch Screen Car Stereo. Please read this manual thoroughly before using the product to ensure proper functionality and safety. This unit is designed to enhance your driving experience with advanced features such as wireless CarPlay, Android Auto, GPS navigation, and a high-resolution display.
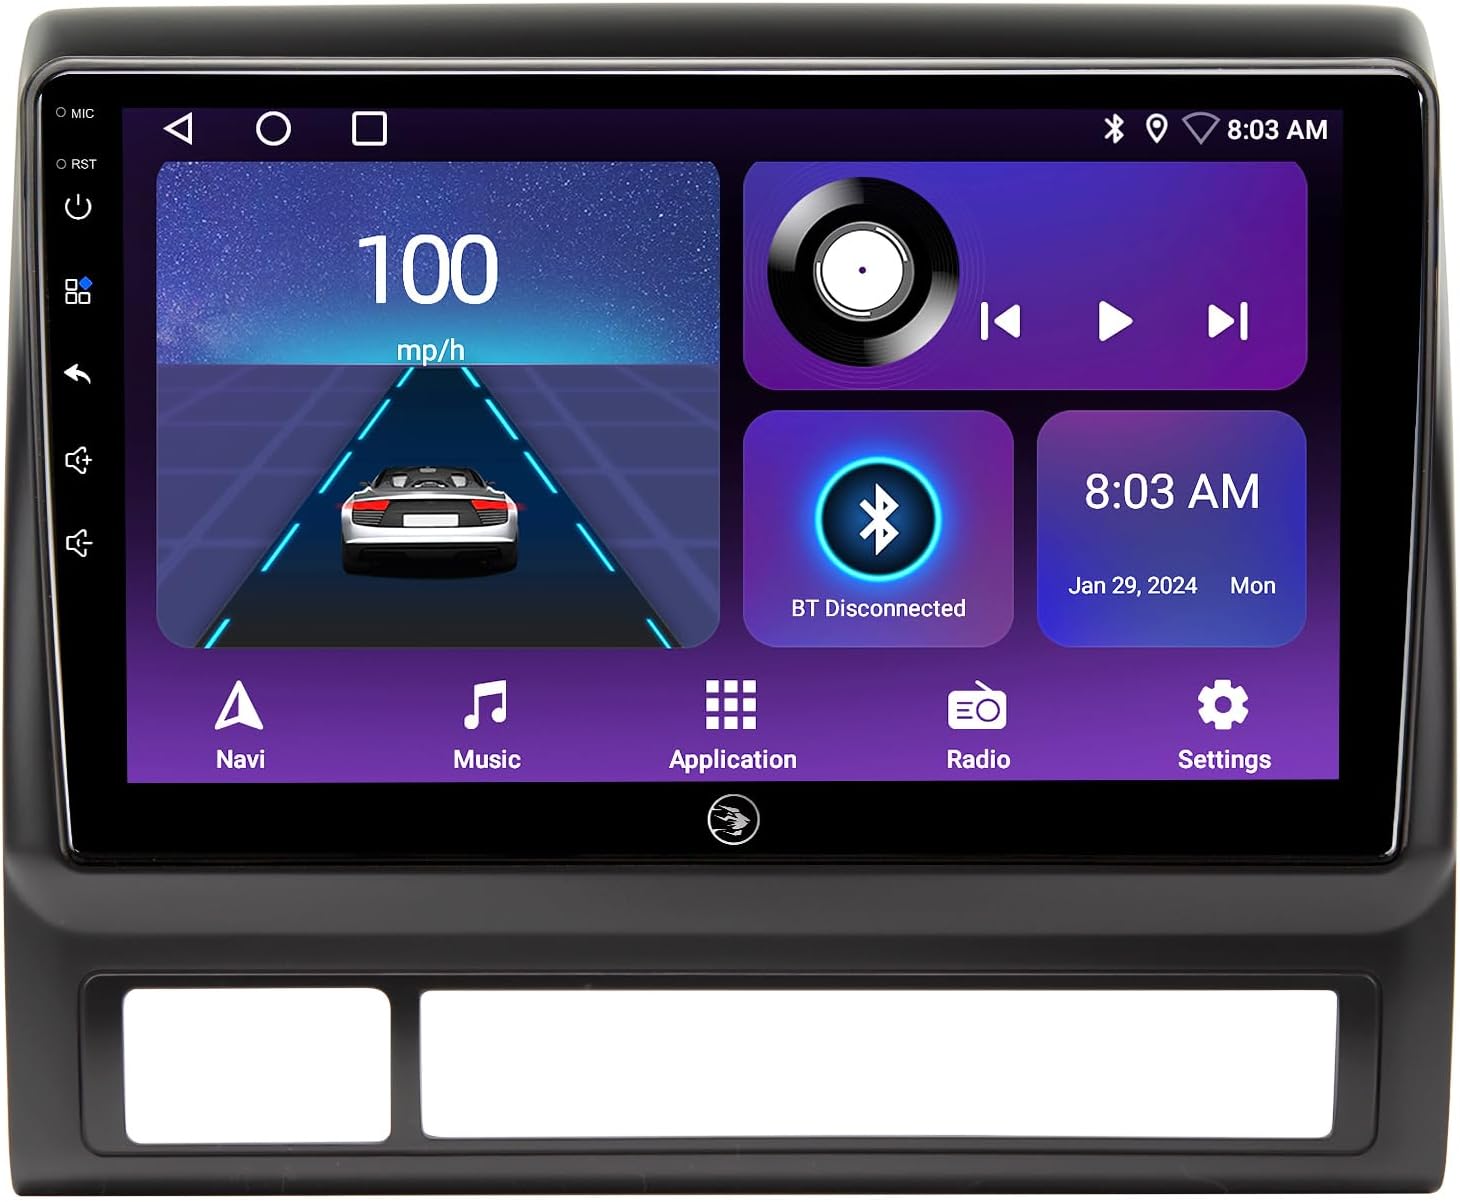
Figure 1.1: AINAVI QLED Touch Screen Car Stereo unit.
2. Émbaran Kasalametan
- Salawasna ngajalankeun kandaraan kalayan aman. Nyetir anu teu fokus tiasa nyababkeun kacilakaan.
- Do not attempt to install or service the unit if you are not experienced with car electronics. Consult a professional installer.
- Pastikeun sadaya kabel disambungkeun kalayan leres pikeun nyegah korsleting atanapi karusakan kana unit sareng kendaraan.
- Jauhkeun unit tina cai sareng kalembaban anu kaleuleuwihan.
- Entong meungpeung lawang angin.
- Anggo ngan ukur sumber daya sareng asesoris anu ditangtukeun.
3. Naon dina Box
Pastikeun yén sadaya komponén anu didaptarkeun di handap kalebet kana pakét anjeun:
- Car Head Unit with Frame for Toyota Tacoma (x1)
- Kabel Daya (x1)
- Kabel RCA (x1)
- Car Microphone (x1)
- GPS Antenna (x1)
- USB 4Pin Cable (x1)
- USB 6Pin Cable (x1)
- AHD 1080P Rear View Kaméra (x1)
- Blue Frame Removal Tool (x1)
- Buku Panduan Pamaké (x1)

Figure 3.1: Included components diagram.
4. Pitunjuk Instalasi
4.1. Cék Pra-Pamasangan
- Pegatkeun sambungan batré: Sateuacan ngamimitian, pegatkeun terminal négatif batré kendaraan anjeun pikeun nyegah korsleting listrik.
- Cabut Radio Lawas: Carefully remove the existing factory radio and dashboard trim. Use the provided blue frame removal tool to avoid damage.
- Pariksa Wiring: Familiarize yourself with the vehicle's wiring harness and the new unit's power cable.
4.2. Sambungan Wiring
Connect the provided cables to the corresponding ports on the head unit and your vehicle's wiring harness. Ensure all connections are secure.
- Kakuatan Kabel: Connect the main power harness.
- Anteneu GPS: Sambungkeun anteneu GPS sareng rutekeunana ka lokasi anu jelas view langit (contona, dasbor).
- Kabel USB: Connect the 4-pin and 6-pin USB cables for external devices.
- Mikropon: Connect the external microphone for clear voice commands and calls.
- Tukangeun View Kaméra: Connect the AHD 1080P rear view camera and its control wire to the reverse light signal.
- Kabel RCA: Connect RCA cables for audio output to external amplifiers or video output to headrest monitors (if applicable).
4.3. Pamasangan Unit
- Carefully slide the new head unit into the dashboard opening, ensuring all wires are tucked away and not pinched.
- Secure the unit using the vehicle's mounting points. Note that this unit is designed to fit the Tacoma dash without traditional bolts, relying on clips for a flush fit.
- Reinstall the dashboard trim and any removed panels.
- Reconnect the vehicle's battery negative terminal.

Figure 4.1: Dashboard before and after installation.
5. Setup Awal
5.1. Hurungkeun Mimiti
- Turn on your vehicle's ignition. The head unit should power on automatically.
- Turutan parentah dina layar pikeun setelan awal.
5.2. Setélan dasar
- Basa: Select your preferred language from the settings menu.
- Tanggal & Waktos: Set the correct date and time. This can often be synchronized via GPS or network.
- Sambungan Wi-Fi: Go to Settings > Network & Internet > Wi-Fi. Connect to an available Wi-Fi hotspot to enable online features like map updates and app downloads.
- Masangkeun Bluetooth: Go to Settings > Connected devices > Pair new device. Enable Bluetooth on your mobile phone and search for the head unit to pair.

Figure 5.1: Wi-Fi and Bluetooth connection interface.
6. Parentah Operasi
6.1. Home Screen & Navigation
The home screen provides quick access to essential functions. Swipe left or right to navigate between screens or use the app drawer to find installed applications.
6.2. Wireless CarPlay & Android Auto
Connect your iPhone or Android device wirelessly for seamless integration of navigation, music, calls, and messaging apps directly on the head unit's display.
- Ensure Bluetooth is enabled on both the head unit and your phone.
- Follow the on-screen prompts to establish the wireless connection.
6.3. GPS Napigasi
The built-in GPS module supports various navigation applications available on the Google Play Store. 5G Wi-Fi enhances accuracy and real-time traffic updates.

Gambar 6.1: Tampilan Navigasi GPS.
6.4. Audio Settings (48-EQ & DSP)
Customize your audio experience using the 48-band Equalizer (EQ) and Digital Sound Processor (DSP). Adjust sound profiles (Normal, Jazz, Pop, Classical, Heavy Metal, Vocal, Soft), surround sound patterns, bass boost, and individual speaker volume controls.
6.5. Split Screen Mode
Run two applications simultaneously on the screen, such as navigation and a media player, for enhanced multitasking.
6.6. Kontrol Setir (SWC)
Configure your vehicle's steering wheel controls to operate the head unit's functions, allowing for safe and convenient control without taking your hands off the wheel.

Figure 6.2: Split Screen Mode and Steering Wheel Control.
6.7. Mobile Phone Mirroring (Tlink)
Mirror your smartphone's screen directly onto the head unit's display, supporting both iPhone (Airplay) and Android devices.

Figure 6.3: Mobile Phone Mirroring and Color Keylight options.
6.8. Tukangeun View Kaméra
The unit supports a 1080P AHD rear view camera, providing a clear, wide-angle view when reversing. Guidelines assist with parking maneuvers.

Figure 6.4: 1080P Rearview Camera display.
6.9. Full RCA Output
Utilize the RCA output function to connect external monitors, such as headrest displays, allowing backseat passengers to enjoy videos independently.

Figure 6.5: Full RCA Output to external monitors.
7. Pangropéa
- beberesih: Anggo lawon anu lemes sareng garing pikeun ngabersihkeun layar sareng unitna. Hindarkeun pembersih atanapi pelarut anu abrasif.
- Apdet parangkat lunak: Pariksa apdet parangkat lunak sacara berkala ngalangkungan setélan sistem pikeun mastikeun kinerja anu optimal sareng aksés kana fitur-fitur énggal. Sambungkeun ka Wi-Fi pikeun apdet.
8. Cara ngungkulan
| Masalah | Mungkin Cukang lantaranana | Solusi |
|---|---|---|
| Unit teu hurung. | wiring salah; sekering ditiup; Sambungan leupas. | Check power cable connections; Inspect vehicle's fuse box; Ensure all harnesses are securely plugged in. |
| Taya sora. | Volume low teuing; Jempé diaktipkeun; Masalah kabel speaker. | Increase volume; Deactivate mute function; Check speaker wire connections. |
| Bluetooth/CarPlay/Android Auto not connecting. | Bluetooth off; Incorrect pairing; Software glitch. | Ensure Bluetooth is on for both devices; Delete previous pairings and re-pair; Restart the head unit and phone. |
| GPS signal weak/inaccurate. | Anteneu GPS ngahalangan atanapi teu leres disimpen. | Relocate GPS antenna to a clear, unobstructed area (e.g., dashboard, away from metal). |
| Tukangeun view kaméra teu némbongan. | Camera wiring incorrect; Reverse signal not detected. | Check camera power and video signal connections; Verify reverse trigger wire is connected to the vehicle's reverse light signal. |
9. Spésifikasi
| Fitur | Rincian |
|---|---|
| Sistem operasi | Android 13 |
| Ukuran tampilan | 9 Inches QLED Touch Screen |
| Resolusi | 1280 x 720 (HD) |
| Ram | 2GB |
| Rom | 64GB |
| Konektipitas | Bluetooth, USB, Wi-Fi (2.4GHz & 5GHz), Wireless CarPlay, Android Auto |
| Fitur Audio | 48-EQ, Professional DSP, Surround Stereo |
| Napigasi | Built-in GPS module, supports Google Maps and other map software |
| Tukangeun View Rojongan kaméra | 1080P AHD (Included) |
| Fitur husus | Split Screen Function, Mobile Phone Mirroring (Tlink), Colorful Panel Light, RCA Output |
| Jinis Layanan Kandaraan | Truck (Toyota Tacoma 2005-2015) |
| Item Beurat | 4.24 pon |
| Ukuran Paket | 13.07 x 12.24 x 5.75 inci |
10. Garansi jeung Rojongan
Your AINAVI QLED Touch Screen Car Stereo comes with a 12 Months Manufacturer Guarantee.
For technical support, installation assistance, or any inquiries, please contact our professional technical support team. We are committed to assisting you as soon as possible.
You can typically find contact information on the seller's page or within your purchase documentation. For direct assistance, please refer to the customer support details provided at the time of purchase or on the product listing.

Figure 10.1: Customer Installation Support contact information example.


