1. Bubuka
The ELECROW 5-inch ESP32 HMI Display is a versatile Human-Machine Interface solution featuring an 800x480 RGB TFT LCD touch screen. It is powered by an ESP32-S3-WROOM-1-N4R8 main controller, which includes a dual-core 32-bit LX6 processor operating at up to 240MHz. This display integrates WiFi and Bluetooth wireless functionality, making it suitable for a wide range of applications.
The module supports multiple development environments such as Arduino IDE, Espressif IDF, PlatformIO, and MicroPython, and is compatible with the LVGL graphics library for intuitive user interface development. Its expandable connectivity includes a TF card slot, various peripheral interfaces, a USB interface, a speaker interface, and a battery interface, offering flexible integration into diverse projects.
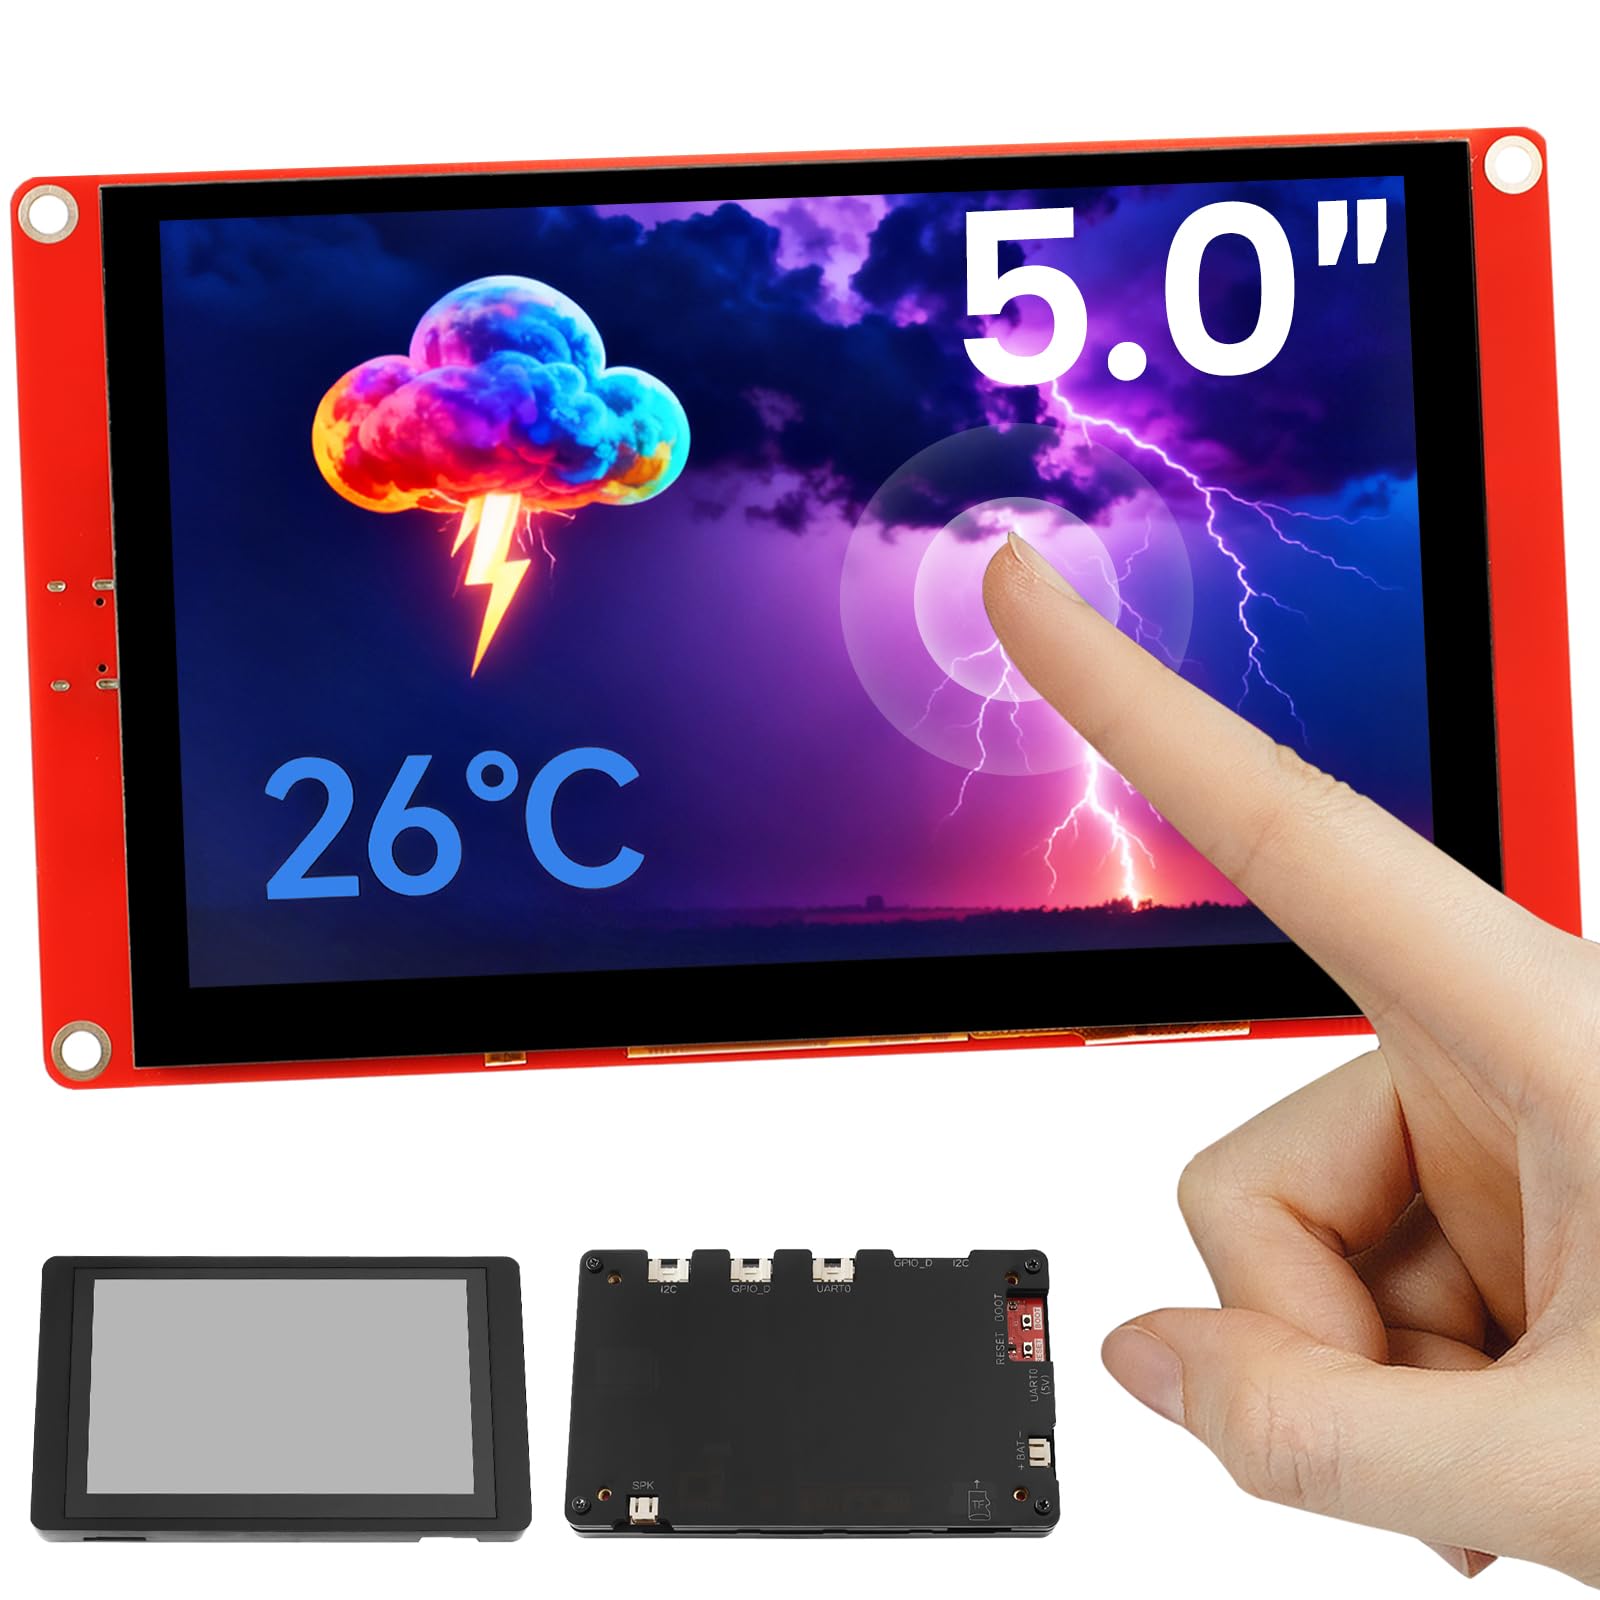
Figure 1: ELECROW 5-inch ESP32 HMI Display with acrylic case.
2. Naon dina Box
Upon unboxing your ELECROW 5-inch ESP32 HMI Display, please ensure all the following components are present:
- 1x CrowPanel ESP32 Display - 5.0 Inch Display
- 1x Kabel USB-A ka Tipe-C
- 1x Crotail/Grove to 4pin DuPont cable
- 1x Wadah Akrilik

Figure 2: Package contents including the display, cables, and acrylic case.
3. Setélan
To begin using your ELECROW 5-inch ESP32 HMI Display, follow these setup instructions:
3.1. Pakakas Ngalangkunganview
Familiarize yourself with the display's hardware components and interfaces.
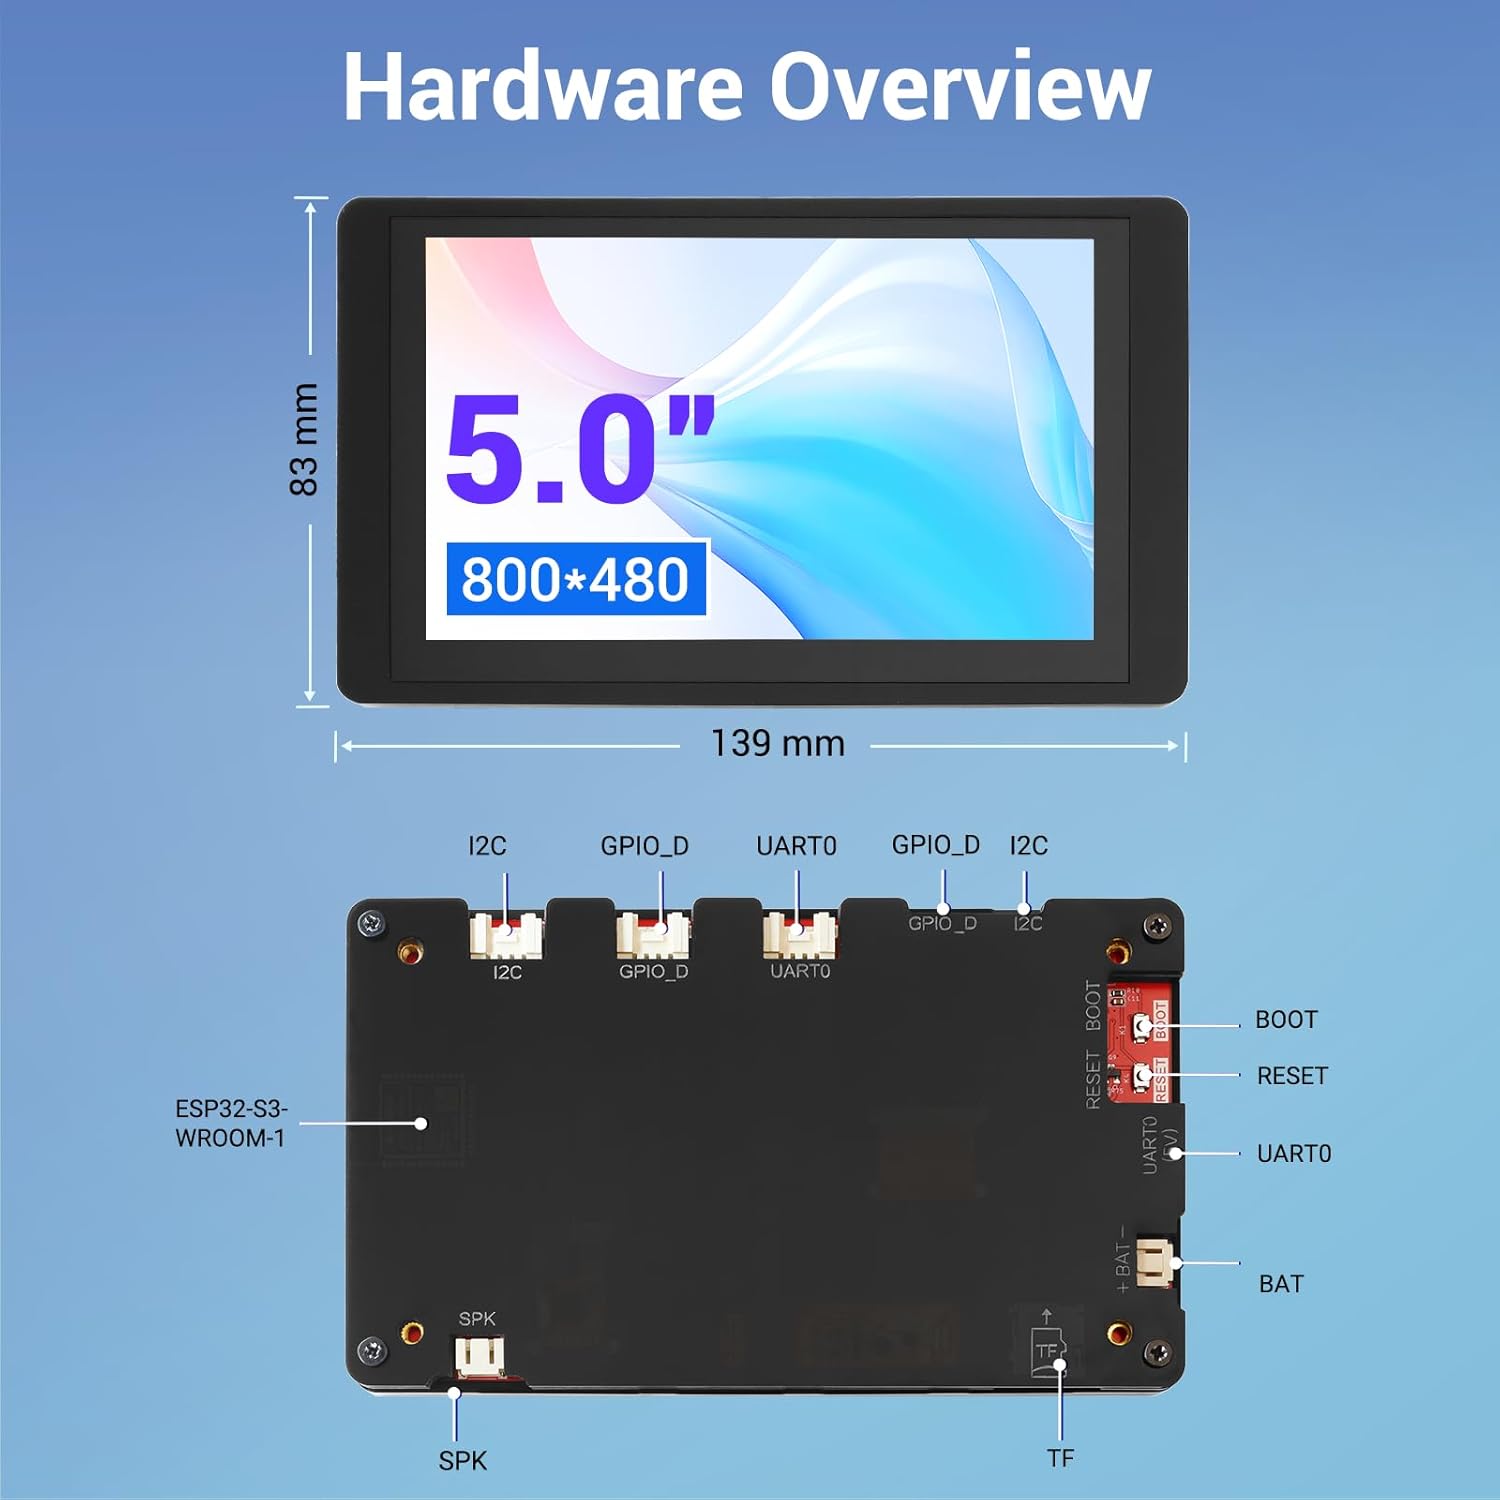
Gambar 3: Detil view of the ESP32 HMI Display board, highlighting key components and dimensions.
3.2. Development Environment Configuration
The ESP32 HMI Display supports various development environments. For Arduino IDE, follow these general steps:
- Unduh sareng Pasang Arduino IDE: Obtain the latest version from the official Arduino websitus.
- Install ESP32 Board Package: Within the Arduino IDE, navigate to File > Karesep. Add the ESP32 board manager URL (biasana
https://raw.githubusercontent.com/espressif/arduino-esp32/gh-pages/package_esp32_index.json) to 'Additional Boards Manager URLs'. Then, go to Parabot> Dewan> Manajer Dewan, search for 'ESP32', and install the package. - Pilih Board sareng Port: Connect the display to your computer using the provided USB-A to Type-C cable. In Arduino IDE, select the appropriate board (e.g., 'ESP32S3 Dev Module' for 5-inch display) under Tools > Board > ESP32 Arduino. Also, select the correct COM port under Parabot > Port. If the port is not recognized, you may need to install the CH340 driver.
- Configure PSRAM and Partition Scheme: For 5-inch displays, set PSRAM to 'OPI PSRAM' and Partition Scheme to 'Huge App' (or 'Default AAB with spiffs (1.2MB APP/1.5MB SPIFFS)' if not using LVGL) under Parabot.
For a visual guide on setting up the development environment, please refer to the official video tutorial:
Video 1: Get Started with ESP32: Set Up the Development Environment. This video provides a step-by-step guide to configuring your Arduino IDE for ESP32 development.

Figure 4: The display supports various development environments including Arduino IDE, MicroPython, Espressif IDF, and PlatformIO.
4. Ngoperasikeun Tampilan
The ELECROW 5-inch ESP32 HMI Display offers intuitive operation through its responsive touch screen and versatile programming capabilities.
4.1. Basic Touch Operation
The 800x480 resolution TFT LCD supports responsive touch operations, enabling intuitive user interface interaction. You can design and implement custom graphical user interfaces (GUIs) using libraries like LVGL.

Figure 5: The display is compatible with the LVGL graphics library, allowing for advanced GUI development.
4.2. Média Playback
The display includes a speaker interface, allowing for audio output. This can be utilized for multimedia applications or audible feedback in your projects.
Video 2: 5 & 7 Inch ESP32 Display, HMI RGB TFT LCD ESP32 Touch Screen. This video demonstrates the display's features, including touch functionality and media playback.
4.3. Expandable Connectivity
The display features a TF card slot for expanded storage, multiple peripheral interfaces for connecting external modules, a USB interface for data transfer and power, and a battery interface for portable applications.

Figure 6: The display offers extensive connectivity options, including compatibility with Crowtail sensors for enhanced functionality.
5. Skenario Aplikasi
The 5.0-inch CrowPanel ESP32 touchscreen is designed for a variety of scenarios, including:
- Automotive HMI: For in-car display systems.
- Parabot Médis: For user interfaces in medical devices.
- Smart Home & Home Automation: For control panels and smart appliance interfaces.
- Kontrol Industri: For monitoring and control systems in industrial environments.
- Civil Electronics & IoT Application Devices: For various consumer electronics and Internet of Things projects.

Gambar 7: Kelamples of the display's use in industrial control, medical monitoring, home appliances, and driving recorders.
6. Spésifikasi
Detailed technical specifications for the ELECROW 5-inch ESP32 HMI Display:
| Fitur | Spésifikasi |
|---|---|
| Dimensi produk | 5.4 x 3.1 x 0.3 inci |
| Item Beurat | 3.2 ons |
| Nomer Modél Item | ESP32 5-inch Display |
| Ukuran Layar Ngadeg | 5 inci |
| Rasio Aspék | 16:9 |
| Voltage | 5 volt |
| Resolusi | 800x480 Piksel |
| Caang Gambar | 175 Candela per Méter Pasagi |
| Total palabuhan USB | 2 |
| Pedaran Permukaan layar | Herang |
7. Pangropéa
To ensure the longevity and optimal performance of your ELECROW 5-inch ESP32 HMI Display, please adhere to the following maintenance guidelines:
- beberesih: Use a soft, dry, anti-static cloth to clean the screen and casing. Avoid abrasive cleaners, solvents, or aerosol sprays, as these can damage the display surface or internal components.
- Penanganan: Handle the display with care to prevent physical damage. Avoid dropping the device or subjecting it to strong impacts.
- Panyimpenan: Store the display in a cool, dry environment away from direct sunlight, extreme temperatures, and high humidity. When not in use, it is recommended to store it in its original packaging or a protective case.
- kakuatan: Always use the recommended power supply (5V) to prevent electrical damage. Disconnect power when not in use or during maintenance.
8. Cara ngungkulan
If you encounter issues with your ELECROW 5-inch ESP32 HMI Display, consider the following troubleshooting steps:
- Layar Teu Nyala: Ensure the USB-C cable is securely connected to both the display and a reliable power source. Verify the power source is active.
- Henteu aya kaluaran tampilan: Check if the display is receiving power. If using a custom program, ensure it has been successfully uploaded and is designed to initialize the display.
- Layar rampa teu ngaréspon: Verify that the touch screen ribbon cable is properly seated. If using a custom program, ensure the touch driver is correctly initialized in your code.
- Compilation or Upload Errors: Double-check your Arduino IDE setup, including the installed ESP32 board package version, selected board, COM port, PSRAM setting, and partition scheme. Ensure all necessary libraries are installed.
- Garbled Serial Output: Confirm that the baud rate set in your serial monitor matches the baud rate configured in your program (e.g., 9600 baud).
- Computer Not Recognizing Serial Port: Install or update the CH340 USB-to-Serial driver for your operating system.
If these steps do not resolve the issue, please refer to the support resources mentioned in the next section.
9. Garansi jeung Rojongan
ELECROW is committed to providing reliable products and excellent customer support. We offer expert technical assistance for any questions or issues you may encounter with your ESP32 HMI Display.
- Bantosan Téknis: Our expert technical team is ready to assist with troubleshooting and provide solutions, typically within 24 hours.
- Manual Produk: For detailed information, refer to the official product manual: ESP32 Display HMI User Manual
- Tutorial: Access comprehensive tutorials for the CrowPanel ESP32 Display: CrowPanel ESP32 Display Tutorials (YouTube)
- Rujukan LVGL: For LVGL graphics library documentation: LVGL Library Reference
- Forum Komunitas: Post your technical questions and engage with the community: ELECROW Display Forum

Figure 8: ELECROW provides various resources for technical support and community engagement.


