Bubuka
This manual provides essential instructions for the setup, operation, and maintenance of your Nikon FG 35mm SLR film camera. The Nikon FG is a versatile camera offering Programmed AE, Aperture-priority AE, and Manual exposure modes, along with a built-in light meter and hot shoe for external flash units. Please read this manual thoroughly to ensure proper use and care of your camera.
1. Setélan
1.1 Pamasangan batré
The Nikon FG requires two LR44 batteries for its light meter and electronic functions. Proper battery installation is crucial for the camera's operation.

Gambar 1.1: Handap view of the Nikon FG camera, highlighting the battery compartment cover.
- Locate the circular battery compartment cover on the bottom plate of the camera (refer to Figure 1.1).
- Use a coin to turn the battery compartment cover counter-clockwise until it can be removed.
- Insert two fresh LR44 batteries, ensuring that the positive (+) side of each battery faces upwards, as indicated by the markings inside the compartment.
- Replace the cover and turn it clockwise with a coin until it is securely fastened.
1.2 Kantétan lénsa
The Nikon FG uses Nikon F-mount lenses, specifically AI (Automatic Indexing) type lenses. Ensure the lens is clean before attachment.
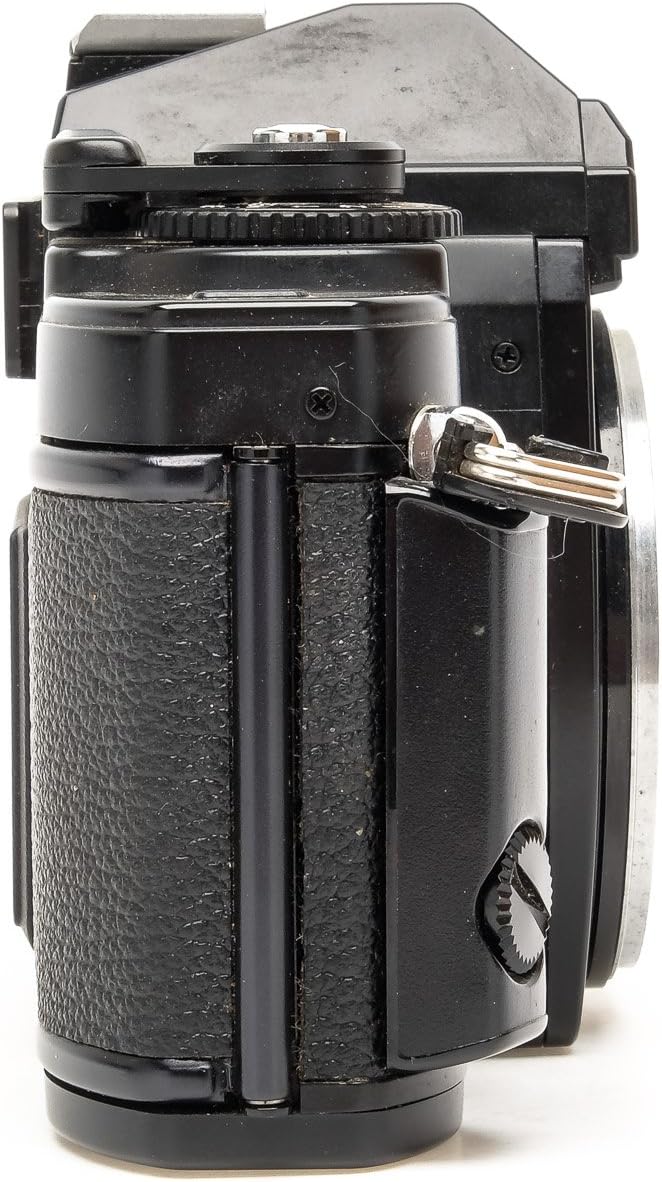
Gambar 1.2: Sisi view of the Nikon FG camera, showing the lens mount area.
- Cabut tutup awak tina kaméra sareng tutup pungkur tina lensa.
- Align the red dot on the lens barrel with the red dot on the camera body's lens mount (refer to Figure 1.2).
- Gently insert the lens into the mount and rotate it clockwise until it clicks into place. Do not force the lens.
- To remove the lens, press the lens release button located on the camera body and rotate the lens counter-clockwise until it detaches.
1.3 Pilem Loading
The Nikon FG uses standard 35mm film cartridges. Handle film in subdued light to prevent accidental exposure.

Gambar 1.3: Hareupeun view of the Nikon FG camera, showing the film advance lever and rewind knob.
- Pull up the film rewind knob (located on the top left, refer to Figure 1.3) until the camera back opens.
- Insert a 35mm film cartridge into the film chamber on the left side of the camera. Push the rewind knob back down to secure the film cartridge.
- Tarik pamimpin pilem meuntas ka spool nyokot-up di sisi katuhu. Selapkeun ujung pamimpin pilem kana salah sahiji slot dina spool nyokot-up.
- Advance the film using the film advance lever (located on the top right, refer to Figure 1.3) until the film perforations engage with the sprockets above and below the take-up spool.
- Tutup kaméra deui pageuh nepi ka klik pareum.
- Advance the film two more frames, pressing the shutter release button each time, to ensure the exposed leader is wound onto the take-up spool. The frame counter should now show '1'.
2. Ngoperasikeun kaméra
2.1 Setting ISO Sensitivity
The ISO setting on your camera must match the ISO (ASA/DIN) rating of the film you are using. This ensures accurate light meter readings.
- Locate the ISO dial, usually integrated with the shutter speed dial on the top plate of the camera.
- Lift and rotate the dial to align the correct ISO value with the index mark.
2.2 Modeu Paparan
The Nikon FG offers three primary exposure modes for varying levels of control:
- Programmed AE (P): In this mode, the camera automatically selects both the shutter speed and aperture for optimal exposure. This is ideal for quick shooting or when you prefer the camera to handle exposure settings.
- Aperture-priority AE (A): You select the desired aperture (f-stop) on the lens, and the camera automatically sets the appropriate shutter speed to achieve correct exposure. This mode allows control over depth of field.
- Manual (M): In Manual mode, you have full control over both shutter speed and aperture. The built-in light meter provides guidance in the viewfinder to help you achieve correct exposure. This mode includes a Bulb (B) setting for very long exposures.
2.3 Shutter Speed and Light Meter
The Nikon FG features a focal plane shutter with speeds ranging from 1 second to 1/1000 second, plus Bulb. The built-in light meter assists in determining correct exposure.
- Puteran gancang: Rotate the shutter speed dial on the camera's top plate to select your desired speed in Manual mode, or to set the camera to 'P' or 'A' for automatic modes.
- Viewpapanggihan Panéang: When looking through the viewfinder, an LED dot array will display the recommended or selected shutter speed, and provide indications for over/under exposure in Manual mode.
2.4 Focusing and Composing
Focus your lens by rotating the focusing ring until your subject appears sharp in the viewfinder. Compose your shot using the viewfinder's frame lines.
2.5 Nyokot Gambar
- Ensure the film is advanced and the frame counter shows the correct number.
- Set your desired exposure mode (P, A, or M) and adjust settings as needed.
- Focus the lens on your subject.
- Gently press the shutter release button located on the top right of the camera body to take the photograph.
- After each shot, advance the film using the film advance lever to prepare for the next exposure.
2.6 Using an External Flash
The Nikon FG is equipped with a hot shoe for attaching compatible external flash units, supporting TTL (Through-The-Lens) flash control for automatic flash exposure with appropriate Nikon flashes.
- Slide the external flash unit onto the hot shoe mount on top of the camera until it locks into place.
- Turn on the flash unit and ensure it is set to a compatible mode (e.g., TTL or Auto).
- Refer to your flash unit's manual for specific operating instructions.
2.7 Film Rewinding and Removal
Once all frames on the film roll have been exposed, the film must be rewound back into its cartridge before opening the camera back.
- Press the film rewind button located on the bottom plate of the camera. This button typically stays depressed until the film is fully rewound.
- Turn the film rewind crank (integrated with the film rewind knob on the top left) clockwise. Continue turning until you feel the resistance cease, indicating the film has fully rewound into its cartridge.
- Tarik kenop mundurkeun pilem pikeun muka kaméra deui.
- Remove the film cartridge and store it properly for development.
3. Pangropéa
3.1 Ngabersihan Kaméra
Regular cleaning helps maintain the camera's performance and longevity.
- Awak kaméra: Use a soft, lint-free cloth to wipe the camera body. For stubborn dirt, slightly dampen the cloth with water or a mild cleaning solution, then wipe dry. Avoid harsh chemicals.
- Lensa: Use a specialized lens cleaning brush or air blower to remove dust. For smudges, apply a small amount of lens cleaning solution to a clean lens cloth and gently wipe in a circular motion from the center outwards. Never touch the lens elements directly with your fingers.
- Viewfinder/Mirror: Use an air blower to remove dust. Avoid touching these delicate surfaces. If professional cleaning is required, consult a camera repair specialist.
3.2 Panyimpenan
Proper storage protects your camera from environmental damage.
- Store the camera in a dry, cool, and well-ventilated place, away from direct sunlight, high humidity, and extreme temperatures.
- If storing for an extended period, remove the LR44 batteries to prevent leakage, which can damage the camera's electronics.
- Keep the camera in a protective bag or case to prevent dust accumulation and physical damage.
4. Cara ngungkulan
Ieu sababaraha masalah umum sareng solusi poténsialna:
- Camera Not Powering On / Light Meter Not Working:
- Check if the LR44 batteries are correctly installed with the proper polarity.
- Replace the batteries with fresh ones. Depleted batteries are a common cause of power issues.
- Shutter Not Firing:
- Ensure the film advance lever is fully wound. The shutter will not fire if the film is not advanced.
- Check battery status. A weak battery can prevent the shutter from firing.
- Ensure the camera is not in a self-timer mode that has not been fully engaged.
- Film Advance Lever Stuck / Film Not Advancing:
- Verify that the film is correctly loaded and engaged with the take-up spool and sprockets.
- Do not force the film advance lever. If it's stuck, re-check film loading or consult a professional.
- Exposure Problems (Too Dark/Too Bright):
- Confirm that the ISO setting on the camera matches the film's ISO.
- In Manual mode, ensure the light meter indications in the viewfinder suggest a correct exposure.
- In AE modes, ensure the light meter is functioning and not obstructed.
5. Spésifikasi
| Fitur | Rincian |
|---|---|
| merek | Nikon |
| Ngaran modél | Nikon FG |
| Jenis Format Pilem | 35 mm |
| Pasang Lensa | Nikon F-Mount (AI type) |
| Modeu Paparan | Programmed AE, Aperture-priority AE, Manual |
| Jenis jepret | Focal Plane Shutter |
| Laju jepret | 1 to 1/1000 sec., Bulb (B) |
| Méter Lampu | Built-in TTL (Through-The-Lens) |
| Flash kasaluyuan | Hot Shoe, TTL Flash Control |
| Sumber Daya | Two LR44 batteries |
| Item Beurat | 1.83 pon (kira-kira 830g) |
| Ukuran Paket | 10.35 x 7.64 x 5.71 inci |
| UPC | 657768796265 |
6. Garansi jeung Rojongan
This Nikon FG camera is a renewed product. As such, it is typically covered by the seller's specific return and replacement policy rather than a manufacturer's warranty.
- Kabijakan pamulangan: Please refer to the specific return policy provided by the seller at the time of purchase. Renewed products often come with a 90-day refund or replacement guarantee.
- Bantosan Téknis: For any operational issues or technical assistance, please contact the seller directly. They are best equipped to provide support for renewed items.
Always retain your proof of purchase for any warranty or support claims.


