1. Bubuka
This manual provides detailed instructions for the installation, operation, and maintenance of the VIVOTEK ND9323P H.265 8-Channel Embedded PoE Network Video Recorder (NVR). Please read this manual thoroughly before using the product to ensure proper and safe operation. Keep this manual for future reference.
2. Émbaran Kasalametan
Observe the following safety precautions to prevent damage to the NVR and to ensure user safety:
- Sasayogian tanaga: Use only the power adapter supplied with the NVR. Ensure the power source matches the NVR's voltage syarat.
- Ventilasi: Ulah ngahalangan liang ventilasi naon waé. Pasang NVR di tempat anu ventilasina saé pikeun nyegah panas teuing.
- Lingkungan: Avoid exposing the NVR to water, moisture, extreme temperatures, or direct sunlight. Do not place heavy objects on the NVR.
- Palayanan: Entong nyobian ngalayanan produk ieu nyalira. Rujuk sadayana ngalayanan ka tanaga jasa anu mumpuni.
- Penanganan: Handle the NVR with care. Avoid dropping or subjecting it to strong impacts.
3. Eusi Paket
Carefully unpack the box and ensure all items are present and in good condition. If any items are missing or damaged, contact your vendor immediately.
- Unit NVR VIVOTEK ND9323P
- Adaptor kakuatan
- Mouse USB
- Guide Instalasi Gancang
- Accessory Pack (Screws for HDD installation, Ethernet cable)
- Case (referring to the NVR enclosure itself)
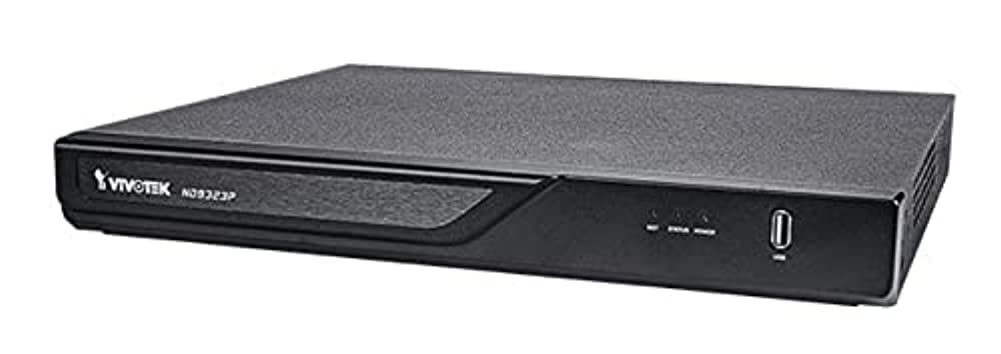
Figure 3.1: VIVOTEK ND9323P NVR unit. This image shows the front panel of the NVR, typically featuring status indicators and USB ports.
4. Produk Langkungview
The VIVOTEK ND9323P is an 8-channel embedded Network Video Recorder designed for IP surveillance systems. It supports H.265 video compression for efficient storage and bandwidth usage. With its integrated Power over Ethernet (PoE) ports, it simplifies camera installation by providing both power and data connectivity through a single Ethernet cable.
4.1 Fitur konci
- 8-Channel Video Input
- H.265/H.264 Video Compression
- 8 x 802.3at/af PoE Ports
- Local Display Output (HDMI/VGA)
- Remote Access via VIVOTEK VIVOCloud App or VMS
- Supports up to 16TB HDD storage (HDD not included)
4.2 Panels hareup jeung pungkur
Refer to the Quick Installation Guide for detailed diagrams of the front and rear panels, indicating ports and indicators.
- Panel hareup: Power LED, HDD LED, Network LED, USB ports.
- Panel Pungkur: Power input, LAN port, PoE ports (1-8), HDMI output, VGA output, Audio I/O, USB ports.
5. Setélan
5.1 Pamasangan Hard Drive (Opsional)
The NVR does not typically include a pre-installed hard drive. Follow these steps to install a 3.5-inch SATA hard drive:
- Cabut sareng cabut panutup luhur NVR.
- Sambungkeun kabel data sareng daya SATA tina NVR ka hard drive.
- Pasangkeun hard drive kana rangka NVR nganggo sekrup anu disayogikeun.
- Ganti panutup luhur sareng amankeun ku sekrup.
Catetan: Ensure the NVR is powered off and unplugged before installing or removing a hard drive.
5.2 Sambungan fisik
- Sambungkeun kaméra: Connect your IP cameras to the NVR's PoE ports (1-8) using Ethernet cables. The NVR will provide power and network connectivity to the cameras.
- Nyambung kana Jaringan: Connect the NVR's LAN port to your local network router or switch using an Ethernet cable.
- Sambungkeun tampilan: Sambungkeun monitor ka port kaluaran HDMI atanapi VGA NVR.
- Sambungkeun Mouse: Colokkeun beurit USB kana salah sahiji port USB NVR.
- Daya Hurung: Sambungkeun adaptor daya kana input daya NVR teras colokkeun kana stop kontak. NVR bakal otomatis hurung.
5.3 Konfigurasi Awal
Upon first boot, the NVR will guide you through a setup wizard on the connected monitor:
- Pilihan Basa: Pilih basa anu anjeun pikaresep.
- Setup kecap akses: Create a strong password for the administrator account. This is crucial for security.
- Setélan jaringan: Configure network settings (DHCP or Static IP). DHCP is recommended for most home users.
- Waktos sareng Tanggal: Setel zona waktos, kaping, sareng waktos anu leres.
- Inisialisasi Hard Drive: If you installed a new hard drive, the NVR will prompt you to format it. Confirm to proceed. Awas: Format bakal ngahapus sadaya data dina drive.
- Camera Search and Add: The NVR will automatically search for connected VIVOTEK cameras. Select and add them to the NVR.
- rengse: Complete the wizard to access the NVR's live view.
6. Ngoperasikeun NVR
6.1 Ngaksés NVR
You can access and manage the NVR through various methods:
- Tampilan Lokal: Directly via the connected monitor and USB mouse.
- Web Browser: Enter the NVR's IP address into a web browser dina komputer disambungkeun ka jaringan nu sami.
- VIVOTEK VIVOCloud App: Download the mobile app for remote viewngokolakeun sarta manajemén.
- VIVOTEK VAST 2 VMS: For advanced management and multi-NVR systems.
6.2 Hirup View
Anu hirup view displays real-time video feeds from all connected cameras. You can switch between single-camera view, grid multi-kaméra view, and customize the display layout.
6.3 Setélan Rékam
Konpigurasikeun jadwal sareng modeu rékaman pikeun unggal kaméra:
- Rékam Kontinyu: Rékaman 24/7.
- Ngarekam Deteksi Gerak: Rékam ngan nalika gerakan dideteksi.
- Rekaman Dijadwalkeun: Rékam salami période waktos anu khusus.
- Rekaman Acara: Records based on external triggers or alarms.
Access these settings through the NVR's main menu: Configuration > Recording > Schedule.
6.4 Playback
Pikeun ulangview dirékam footage:
- Tina ménu utama, pilih Playback.
- Pilih kaméra sareng rentang tanggal/waktos anu anjeun hoyong rekamview.
- Use the timeline and playback controls (play, pause, fast forward, rewind) to navigate through the footage.
6.5 Event Management and Notifications
Configure the NVR to respond to events such as motion detection, camera tampering, or network disconnection. The NVR can send email notifications, trigger alarms, or start recording.
Access these settings via: Configuration > Event.
7. Pangropéa
7.1 Apdet firmware
Regularly check for and install firmware updates to ensure optimal performance, security, and access to new features. Firmware can be updated via the NVR's web interface or local display menu: Configuration > System > Firmware Upgrade.
Awas: Do not power off the NVR during a firmware upgrade. This can cause permanent damage.
7.2 Manajemén hard drive
Monitor the health of your hard drive(s) and ensure sufficient storage space. The NVR will automatically overwrite the oldest recordings when the disk is full, based on your settings.
Access HDD status and settings via: Configuration > Storage > HDD Management.
7.3 beberesih
Keep the NVR unit clean and free from dust. Use a soft, dry cloth for cleaning. Do not use liquid cleaners or aerosols.
8. Cara ngungkulan
This section addresses common issues you might encounter with your VIVOTEK ND9323P NVR.
8.1 Teu Aya Tampilan Video dina Monitor
- Pariksa Kabel: Pastikeun kabel HDMI/VGA disambungkeun pageuh kana NVR sareng monitor.
- Input Monitor: Verify the monitor is set to the correct input source (HDMI/VGA).
- Kakuatan NVR: Confirm the NVR is powered on and its power LED is illuminated.
8.2 Cameras Not Showing Up / No Image
- Sambungan PoE: Ensure cameras are properly connected to the NVR's PoE ports. Check if the PoE port LEDs on the NVR are active.
- Kakuatan kaméra: If not using PoE, ensure cameras are receiving power from their own power adapters.
- Konektipitas Jaringan: Verify the NVR and cameras are on the same network segment if not directly connected via PoE.
- Status kaméra: Check the camera's own status indicators.
- NVR Camera Management: Pindah ka Configuration > Camera > Camera Management to ensure cameras are added and enabled. Try rescanning for cameras.
8.3 Cannot Access NVR via Web Pangotektak
- Alamat IP: Confirm the NVR's IP address is correct and that your computer is on the same network.
- Kabel Jaringan: Ensure the NVR's LAN port is connected to your network.
- Firewall: Temporarily disable your computer's firewall to check if it's blocking access.
- Kasaluyuan browser: Use a recommended web panyungsi (contona, Chrome, Firefox).
8.4 Kecap aksés Hilap
If you forget the administrator password, you may need to perform a factory reset. Refer to the VIVOTEK support website or contact technical support for the specific procedure for your model, as this often involves a physical reset button or a specific utility.
9. Spésifikasi
The following table lists the key specifications for the VIVOTEK ND9323P NVR:
| Fitur | Spésifikasi |
|---|---|
| Nomer modél | ND9323P |
| merek | VIVOTEK |
| Jumlah Saluran | 8 |
| Téhnologi konektipitas | Ethernet |
| Alat nu cocog | Camera, Mobile Device |
| Komprési Video | H.265, H.264 |
| Palabuhan PoE | 8 x 802.3at/af |
| Dimensi produk | 19.69 x 19.69 x 11.02 inci |
| Item Beurat | 0.01 ons |
| Produsén | Vivotek |
10. Garansi jeung Rojongan
Produk VIVOTEK ditangtayungan ku garansi kawates. Kanggo syarat sareng katangtuan garansi anu lengkep, mangga tingali kartu garansi anu kalebet dina produk anjeun atanapi kunjungi situs resmi VIVOTEK. websitus.
For technical support, product registration, or to download the latest firmware and software, please visit the VIVOTEK support portal:
VIVOTEK Official Support Websitus
When contacting support, please have your NVR's model number (ND9323P) and serial number ready.


