1. Produk Langkungview
The Kicker 47KEYLOC Key Series Smart Powered Line-Out Converter is designed to integrate aftermarket amplifiers with factory audio systems. This device intelligently detects the frequency range of your speaker leads, providing a clean, full-range signal for optimal audio performance. It features KICKER's FIT 2+ technology for versatile input sensitivity and includes an optional all-pass filter defeat to counteract factory time delay or equalization.

Gambar 1: Top view of the Kicker 47KEYLOC, showing the KICKER logo, KEYLOC model name, and LED indicators for power and signal analysis.
2. Setup jeung Instalasi
Proper installation is crucial for the optimal performance of your KEYLOC. Ensure all connections are secure and correctly polarized.
2.1. Sambungan Wiring
The KEYLOC requires power, ground, and speaker-level input connections from your factory head unit or amplifier, and provides RCA outputs for your aftermarket amppangagung.
- Power (ACC +12V): Connect to a switched +12V source.
- Taneuh (GND): Sambungkeun ka titik ground chassis anu padet.
- Speaker Inputs (L+, L-, R+, R-): Connect these to the speaker output wires from your factory head unit or amppangagung.
- RCA Outputs (L, R): Connect these to the RCA inputs of your aftermarket amppangagung.
- Kaluaran Jauh (REM OUT): Provides a +12V turn-on signal for your aftermarket amppangagung.

Gambar 2: Tukangeun view of the Kicker 47KEYLOC, showing the wiring harness input terminal and the HI/LO input sensitivity button.
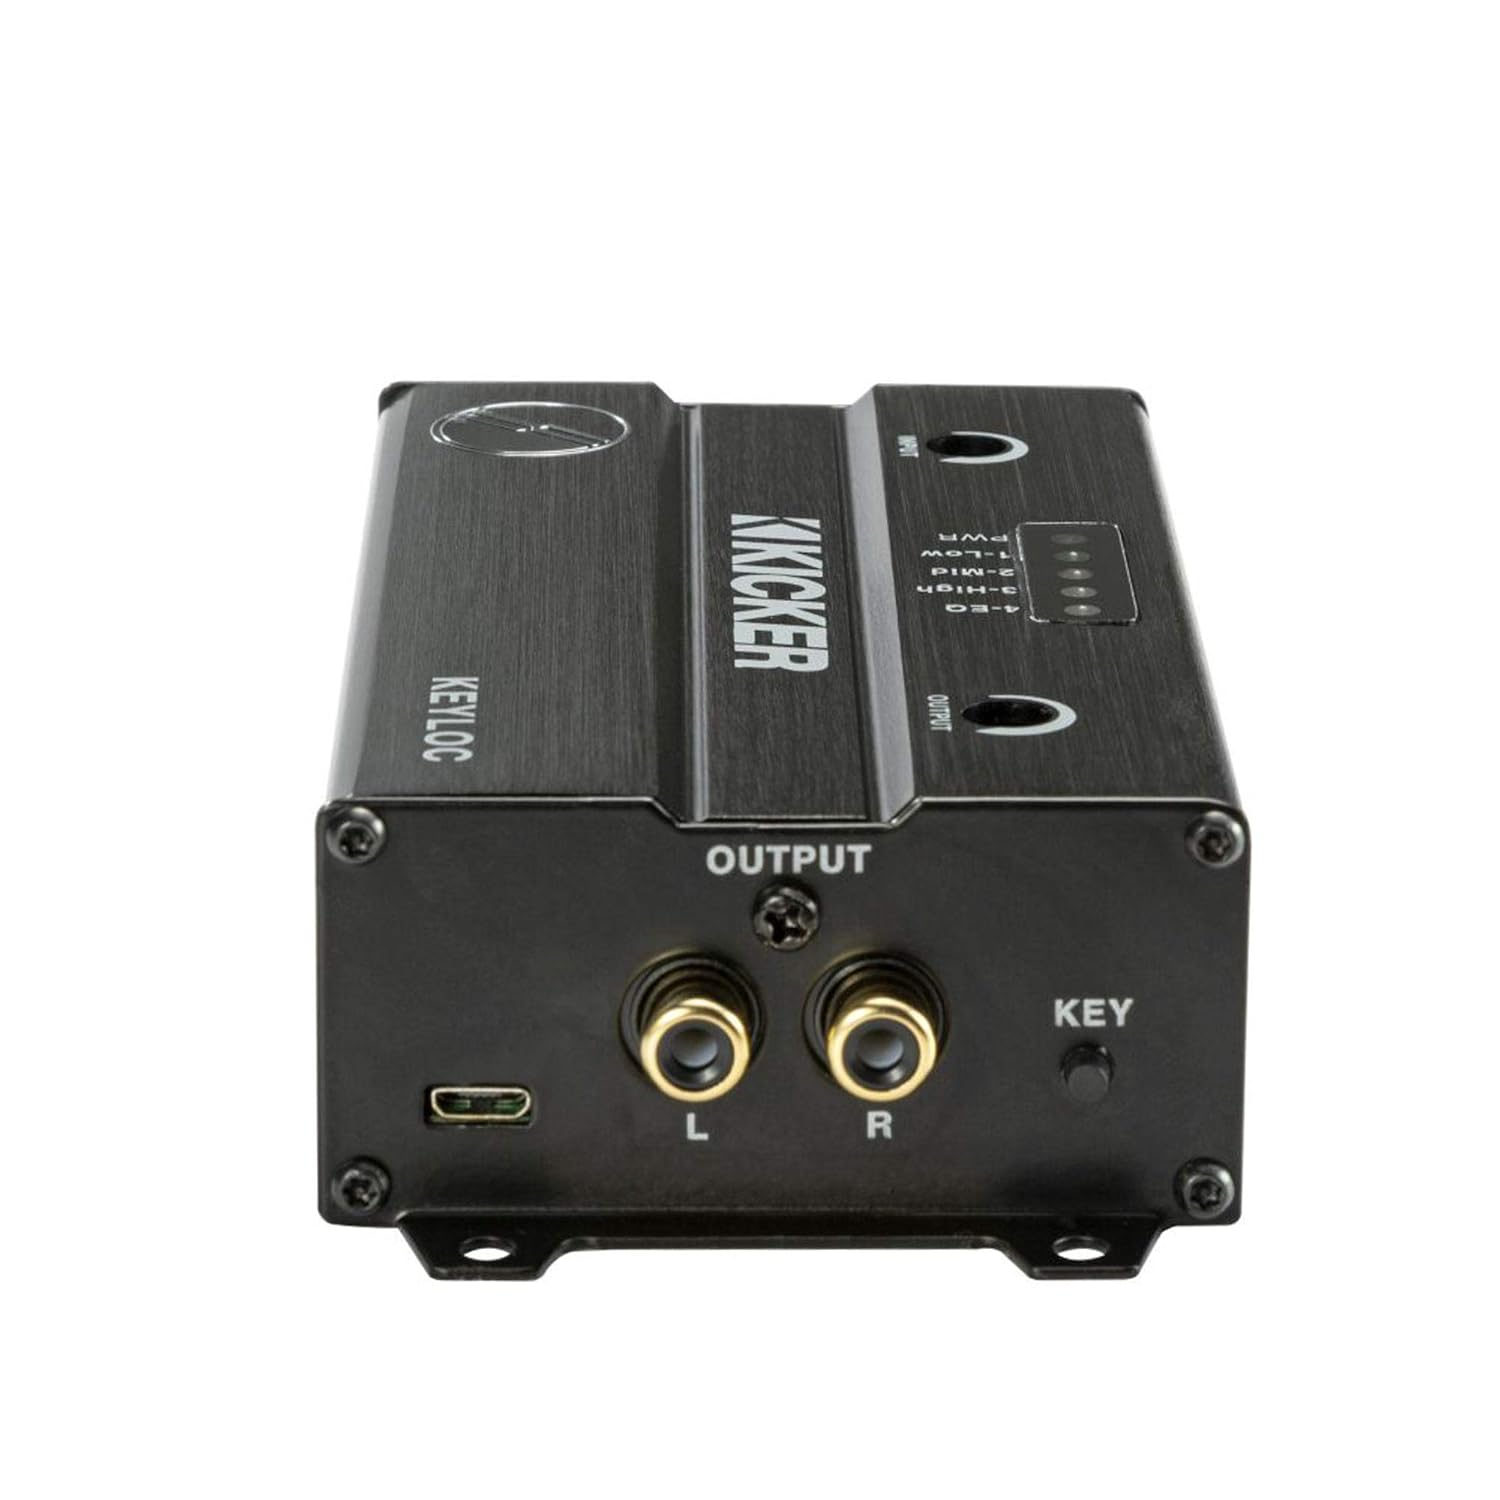
Gambar 3: Hareupeun view of the Kicker 47KEYLOC, displaying the RCA output jacks and the KEY button for signal analysis.
2.2. Input Sensitivity Setting
The KEYLOC features a versatile input sensitivity range. Use the HI/LO button on the input side to select the appropriate range for your factory system:
- LO: For input signals ranging from 125 mV to 10V.
- HI: For input signals ranging from 1V to 40V.
Most factory systems will require the HI setting. Refer to your vehicle's audio system specifications if unsure.
3. Operation and Signal Analysis
The KEYLOC's primary function is to analyze and correct the factory audio signal. This process is automated and guided by LED indicators.
3.1. Automatic Signal Detection (KEY Process)
To initiate the signal analysis, follow these steps:
- Ensure the KEYLOC is properly wired and powered on. The "PWR" LED should be illuminated.
- Play a full-range test tone through your factory audio system. KICKER provides specific test tones on their official website for this purpose. Ensure the volume is set to a moderate level, typically around 75% of maximum, with all factory equalization (bass, treble, balance, fader) set to flat or center.
- Press and hold the "KEY" button on the KEYLOC for approximately 3 seconds until the LEDs begin to flash.
- The KEYLOC will analyze the incoming signal. The "1-Low", "2-Mid", "3-High", and "4-EQ" LEDs will illuminate to indicate the frequency range detected on the connected speaker wires.
- 1-Low: Indicates low-frequency signal detected.
- 2-Mid: Indicates mid-range frequency signal detected.
- 3-High: Indicates high-frequency signal detected.
- 4-EQ: Indicates that factory equalization or time delay has been detected and corrected.
- Once the analysis is complete, the LEDs will stop flashing and remain illuminated according to the detected signal characteristics. This process automatically flattens the frequency response and corrects any factory time delay or all-pass filters.
This intelligent analysis eliminates the need for external oscilloscopes or Real-Time Analyzers (RTAs) to determine the signal characteristics.
4. Pangropéa
The Kicker 47KEYLOC is designed for reliable, long-term operation with minimal maintenance. Follow these guidelines to ensure its longevity:
- beberesih: Use a soft, dry cloth to wipe the exterior of the unit. Avoid using harsh chemicals, solvents, or abrasive cleaners, as these can damage the finish or internal components.
- Sambungan: Periodically check all wiring connections to ensure they remain secure. Loose connections can lead to signal loss or intermittent performance.
- Lingkungan: Ensure the unit is installed in a dry location, away from excessive heat, moisture, and direct sunlight. Proper ventilation is important to prevent overheating.
5. Cara ngungkulan
If you experience issues with your Kicker 47KEYLOC, refer to the following common problems and solutions:
| Masalah | Mungkin Cukang lantaranana | Solusi |
|---|---|---|
| Teu aya kakuatan (LED PWR pareum) |
|
|
| Taya kaluaran audio |
|
|
| Kualitas sora anu menyimpang atanapi goréng |
|
|
| Amplifier stays on after vehicle is off (if using DC offset auto-on) |
|
|
6. Spésifikasi
Key technical specifications for the Kicker 47KEYLOC:
| Fitur | Rincian |
|---|---|
| Nomer modél | 47KEYLOC |
| Ukuran produk (L x W x H) | 13 x 10 x 1 inci |
| Beurat | 14.07 ons |
| Masukan Voltage Range (LO) | 0.125V - 10V |
| Masukan Voltage Range (HI) | 1V - 40V |
| Produsén | Kicker |
7. Garansi jeung Rojongan
For detailed warranty information, please refer to the documentation included with your Kicker 47KEYLOC or visit the official KICKER websitus. Sarat jeung kaayaan jaminan bisa rupa-rupa.
If you require technical assistance, have questions about installation, or need to troubleshoot an issue not covered in this manual, please contact KICKER customer support directly. You can typically find contact information on the KICKER official websitus atawa ngaliwatan dealer otorisasi Anjeun.
KICKER Resmi Websitus: www.kicker.com


