1. Bubuka
This manual provides detailed instructions for the setup, operation, maintenance, and troubleshooting of your Sharkoon Light² 200 Gaming Mouse. Please read this manual thoroughly before using the device to ensure optimal performance and longevity.
2. Eusi Paket
Pastikeun yén sadaya item aya dina bungkusan:
- Sharkoon Light² 200 Gaming Mouse
- Interchangeable Solid Top Cover (7g)
- Set of Replacement PTFE Glide Feet
- Instruksi Manual
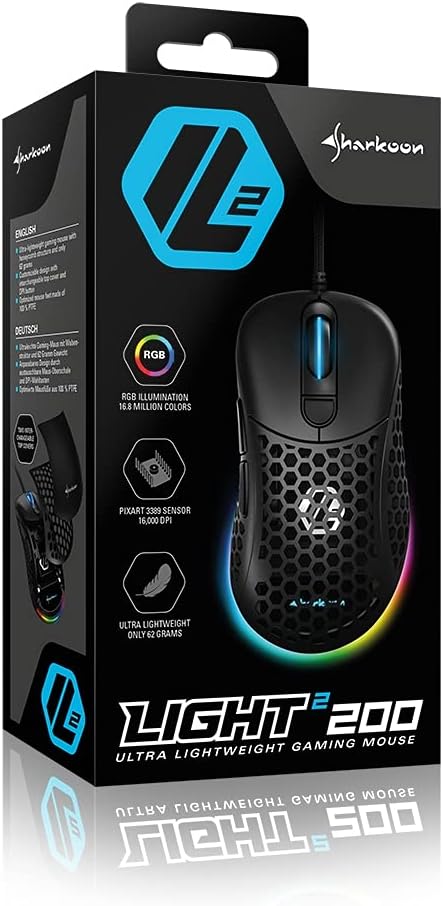
Image: The retail packaging for the Sharkoon Light² 200 Gaming Mouse, showing the mouse and its key features.
3. Setélan
3.1 Nyambungkeun Mouse
- Unpack the Sharkoon Light² 200 Gaming Mouse from its packaging.
- Plug the USB connector of the mouse cable into an available USB port on your computer.
- Sistem operasi bakal otomatis ngadeteksi sareng masang panggerak anu diperyogikeun.

Image: The Sharkoon Light² 200 Gaming Mouse with its USB cable, ready for connection to a computer.
3.2 Pamasangan parangkat lunak
For full customization and access to all features, download and install the Sharkoon gaming software from the official Sharkoon website. The software allows for DPI adjustments, button programming, and RGB lighting control.
- Visit the official Sharkoon websitus.
- Navigate to the support or downloads section for the Light² 200 Gaming Mouse.
- Download the latest version of the gaming software.
- Turutan pitunjuk dina layar pikeun ngarengsekeun pamasangan.
4. Ngoperasikeun Mouse
4.1 Fungsi Dasar
The Light² 200 features standard mouse buttons and a scroll wheel:
- Klik Kénca: Tombol aksi primér.
- Klik katuhu: Tombol aksi sekundér, biasana pikeun menu kontéks.
- Gulung kabayang: For vertical scrolling. Can also be pressed for a middle-click function.
- Kancing samping: Two buttons located on the left side, typically for 'forward' and 'back' navigation.
- Tombol DPI: Located behind the scroll wheel, used to cycle through DPI settings.

Gambar: Sisi view of the Sharkoon Light² 200 Gaming Mouse, highlighting the two programmable side buttons and the honeycomb structure.
4.2 DPI adjustment
The optical PixArt sensor supports up to 16,000 DPI. You can adjust the DPI sensitivity using the dedicated DPI button behind the scroll wheel or through the Sharkoon gaming software. The RGB lighting on the scroll wheel and rear of the mouse indicates the current DPI profile.
4.3 Tombol anu tiasa diprogram
The Light² 200 features six programmable buttons. Use the Sharkoon gaming software to assign custom functions, macros, or key bindings to these buttons for an optimized gaming experience.
4.4 Kustomisasi Lampu RGB
The mouse features adjustable RGB illumination on the scroll wheel and the back end. The gaming software allows you to customize colors, effects, and brightness to match your preferences or gaming setup.
4.5 Modular Design: Changing the Top Cover
The Light² 200 has a modular design, allowing you to change the top surface. The default honeycomb top cover can be replaced with a closed 7-gram alternative for a different feel or aesthetic.
- Gently lift the rear edge of the honeycomb top cover to detach it. It is held by magnets.
- Align the replacement solid top cover with the mouse body and gently press it down until the magnets secure it in place.

Image: The Sharkoon Light² 200 Gaming Mouse with its honeycomb top cover removed, revealing the internal structure and magnetic attachment points.
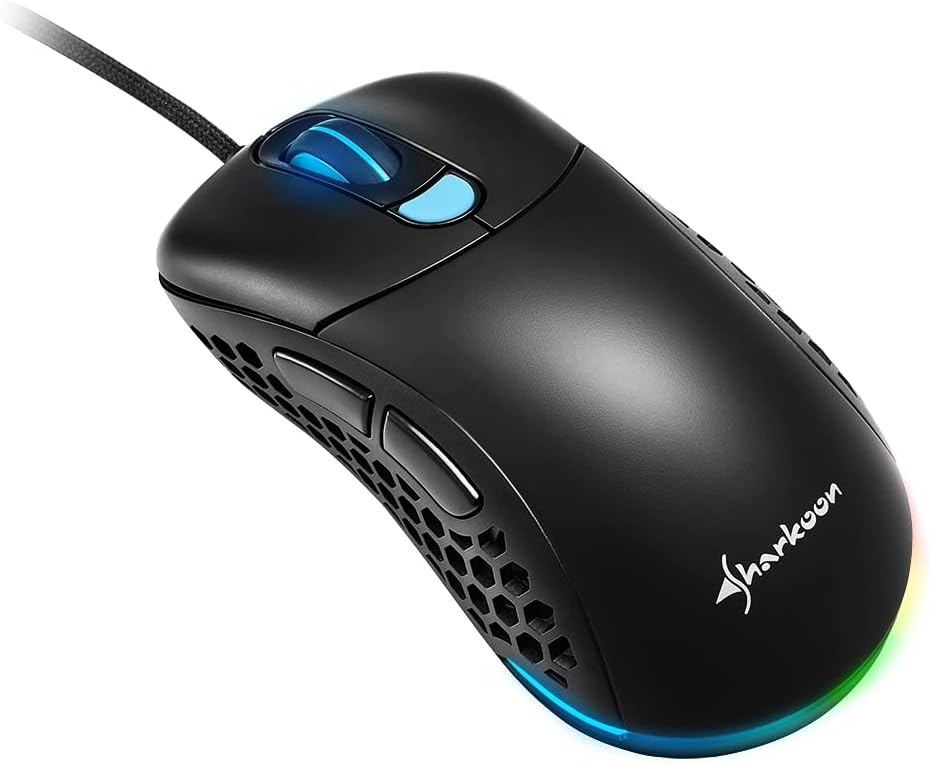
Image: The Sharkoon Light² 200 Gaming Mouse with the alternative solid top cover installed, providing a different aesthetic and feel.
5. Pangropéa
5.1 Ngabersihan Beurit
Pikeun ngajaga kinerja anu optimal, bersihan beurit anjeun sacara rutin:
- Pegatkeun sambungan mouse tina komputer Anjeun.
- Anggo kaén anu lembut sareng garing pikeun ngusap permukaan beurit.
- Keur kokotor bandel, rada dampen lawon ku cai atawa solusi beberesih hampang. Hindarkeun bahan kimia anu kasar.
- Use compressed air to clear dust from the honeycomb structure and around buttons.
- Clean the optical sensor area with a cotton swab lightly dampDipasang dengan isopropil alkohol.
5.2 Replacing PTFE Glide Feet
The PTFE glide feet ensure smooth movement. If they become worn, replace them using the included spare set:
- Taliti mesek off suku PTFE heubeul ngagunakeun ipis, alat non-abrasive.
- Bersihkeun permukaan tempat suku napel pikeun mastikeun teu aya sésa anu nyésa.
- Peel the new PTFE feet from their backing and carefully apply them to the corresponding areas on the mouse's underside.
- Pencét pageuh pikeun mastikeun adhesion ditangtoskeun.

Image: The underside of the Sharkoon Light² 200 Gaming Mouse, showing the optical sensor, the DPI switch, and the four white PTFE glide feet.
6. Cara ngungkulan
- Mouse teu ngabales:
- Ensure the USB cable is securely connected to a working USB port.
- Try connecting the mouse to a different USB port or another computer to rule out port or system issues.
- Balikan deui komputer anjeun. - Setélan DPI teu robah:
- Ensure the Sharkoon gaming software is installed and running.
- Check if the DPI button is functioning correctly. - Lampu RGB henteu jalan atanapi henteu leres:
- Verify that the Sharkoon gaming software is installed and that lighting settings are configured correctly.
- Ensure the mouse is properly connected. - Mouse movement is erratic or imprecise:
- Clean the optical sensor on the underside of the mouse.
- Ensure you are using the mouse on a suitable surface (e.g., a mouse pad).
- Check for any physical obstructions around the sensor. - Tombol teu ngabales:
- Check button assignments in the Sharkoon gaming software.
- Ensure no physical debris is obstructing the button mechanism.
7. Spésifikasi
| Fitur | Rincian |
|---|---|
| Ngaran modél | Caang² 200 |
| Nomer Modél Item | 4044951029013 |
| Dimensi produk | 4.72 x 2.6 x 1.65 inci (120 x 66 x 42 mm) |
| Item Beurat | 2.19 ons (62 gram) |
| Téhnologi Deteksi Gerakan | Optik (Sénsor PixArt) |
| Max DPI | 16,000 DPI |
| Tombol Programmable | 6 |
| Téhnologi konektipitas | USB |
| Fitur husus | RGB LED Lights, Modular Design |
| Produsén | Sharkoon Technologies |
8. Garansi jeung Rojongan
8.1 Émbaran jaminan
Sharkoon products are covered by a manufacturer's warranty against defects in materials and workmanship. The specific warranty period and terms may vary by region. Please retain your proof of purchase for warranty claims.
8.2 Rojongan Téknis
For technical assistance, driver downloads, or further information, please visit the official Sharkoon websitus:
- Websitus: www.sharkoon.com
You may also find FAQs and troubleshooting guides on their support pages.


