1. Produk Langkungview
The Targus Pro Series TG-P60T is a 60-inch tripod designed for stabilizing digital cameras and camcorders. It features a 3-way panhead and a bubble level for precise adjustments, making it suitable for photographers of various experience levels.
fitur konci ngawengku:
- Konstruksi anu awét sareng tiasa dipercaya pikeun kinerja anu konsisten.
- Functional and portable design, including a carrying case for easy transport.
- Quick release plate for efficient camera attachment and removal.
- Independent leg adjustments, allowing for use at multiple angles and on uneven surfaces.
- Maximum height extension of 60 inches.
- Integrated hook at the base of the center column for attaching counterweights to enhance stability.
- 3-way panhead with a handle for smooth panning and tilting movements.
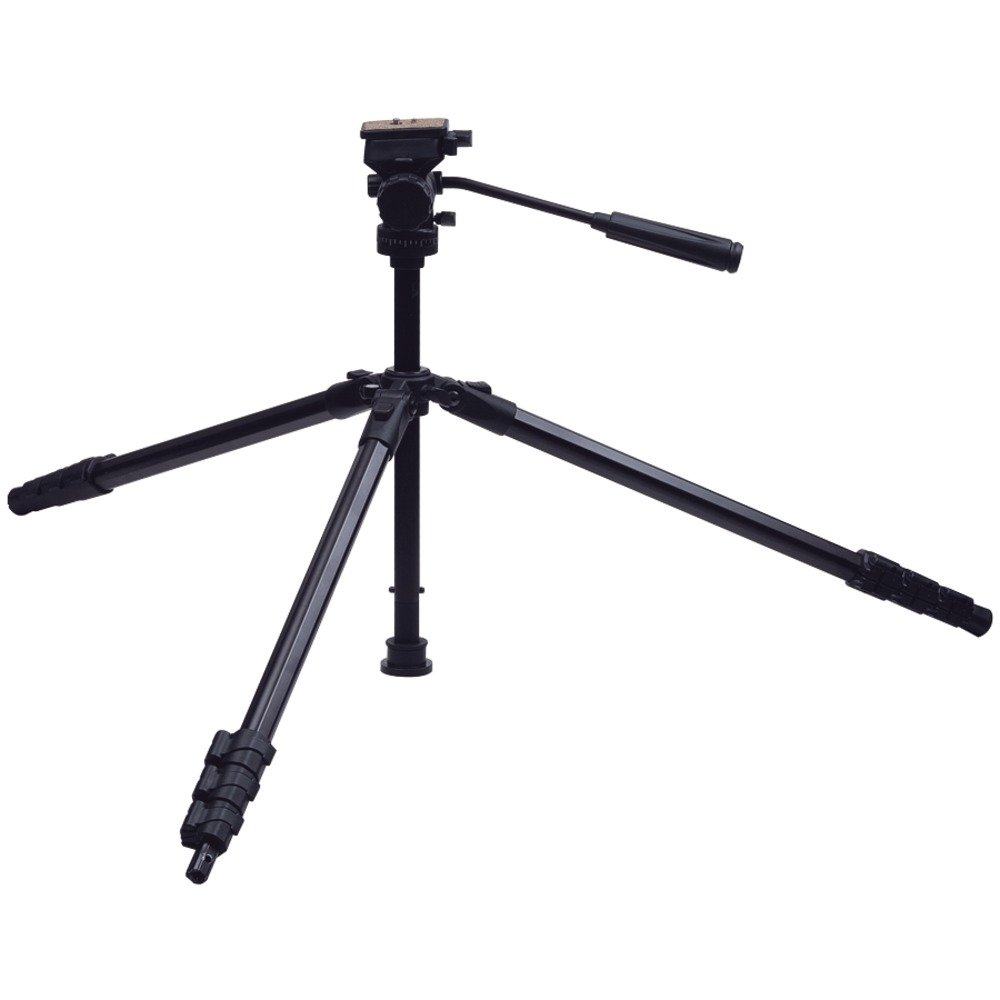
Image 1: The Targus Pro Series TG-P60T 60-Inch Tripod, showcasing its extended legs and panhead.
2. komponén
The Targus TG-P60T tripod includes the following main components:
- 3-Way Panhead with Handle: Allows for precise camera positioning and smooth movement.
- Pelat Pelepasan Gancang: Detachable plate for fast camera mounting and dismounting.
- Tingkat gelembung: Integrated on the panhead platform for accurate leveling.
- Extendable Legs with Latches: Three-section legs with quick-release latches for height adjustment.
- Center Column with Counterweight Hook: Provides additional height and a point for adding stability.
- Leg Braces: Connect legs to the center column for structural support.
- Mawa Kasus: Pikeun panyimpenan sareng transportasi anu merenah.
3. Parentah Setup
3.1 Ngabongkar bungkusan
Carefully remove all components from the packaging. Ensure all parts listed in the Components section are present and undamaged.
3.2 Ngalegaan Suku Tripod
- Place the tripod on a stable surface.
- To extend a leg, open the quick-release latches on each leg section.
- Pull the leg sections outwards to the desired length.
- Close the latches firmly to secure each leg section in position.
- The legs can be adjusted independently and at multiple angles to accommodate uneven terrain or specific shooting requirements.
3.3 Ngalampirkeun Kaméra Anjeun
- Locate the quick release plate on the 3-way panhead.
- Press the release lever or button to detach the quick release plate from the panhead.
- Securely screw the quick release plate onto the tripod mounting thread at the base of your camera or camcorder. Ensure it is tightened to prevent movement.
- Slide the camera with the attached quick release plate back into the panhead until it clicks securely into place. Verify that the camera is firmly attached before releasing éta.
3.4 Leveling Tripod
Use the integrated bubble level on the panhead platform to ensure the tripod is level. Adjust the leg lengths as necessary until the bubble is centered within its indicator.
4. Parentah Operasi
4.1 Nyaluyukeun Jangkungna
- The tripod legs can be extended to a maximum height of 60 inches. Use the leg latches as described in Section 3.2 to adjust each leg section.
- The center column can also be extended for additional height. Loosen the center column locking knob, raise the column to the desired height, and then tighten the knob to secure it.
4.2 Panning sareng Miringkeun
The 3-way panhead allows for horizontal panning and vertical tilting movements.
- Panning Horisontal: Loosen the horizontal locking knob (typically at the base of the panhead) and use the handle to rotate the camera horizontally. Tighten the knob to lock the position.
- Ngalengkungkeun Vertikal: Loosen the vertical locking knob (typically on the side of the panhead) and use the handle to adjust the camera's vertical angle. Tighten the knob to lock the position.
4.3 Ngagunakeun Counterweight Hook
For increased stability, especially when using heavier equipment or at maximum height, a counterweight (not included) can be attached to the hook located at the base of the center column. This helps to lower the center of gravity and reduce vibrations.
5. Pangropéa
5.1 beberesih
- Wipe down the tripod with a soft, dry cloth after each use to remove dust and dirt.
- Pikeun kokotor anu bandel, anggo saeutikamp cloth with mild soap, then dry thoroughly. Avoid harsh chemical cleaners, which can damage the finish or components.
5.2 Panyimpenan
- Store the tripod in its provided carrying case in a dry, cool place to protect it from dust and moisture.
- Ensure all knobs and latches are in a relaxed, unlocked position during storage to prevent unnecessary stress on the components.
6. Cara ngungkulan
6.1 Tripod Stability Issues
If the tripod feels unstable or legs slowly collapse:
- Check Leg Latches: Ensure all leg section latches are fully closed and secured after extension.
- Distribusi beurat rata: Distribute the camera's weight evenly on the panhead.
- counterweight: For heavier cameras or when using the tripod at full extension, attach a counterweight to the center column hook to improve stability.
- Beungeut: Ensure the tripod is placed on a stable, level surface. Adjust leg angles to adapt to uneven ground.
6.2 Panhead Drift or Looseness
If the panhead drifts or spins off during panning:
- Tighten Locking Knobs: Ensure all pan and tilt locking knobs are sufficiently tightened after adjustment.
- Beurat kaméra: The panhead is designed for most digital, SLR, and video cameras. Extremely heavy camera/lens combinations may exceed the panhead's capacity, potentially leading to drift. Consider using a lighter setup or a tripod designed for heavier loads if this is a persistent issue.
- Pelat Pelepasan Gancang: Verify that the quick release plate is securely attached to both the camera and the panhead. A loose connection can cause instability.
7. Spésifikasi
| Fitur | Rincian |
|---|---|
| Nomer modél | TG-P60T |
| Jangkungna maksimum | 60 inci (152 cm) |
| Ukuran Produk (dilipat) | 24 x 4.25 x 5 inci |
| Item Beurat | 3.5 pon |
| Bahan | logam |
| Tipe Sirah | 3-Way Panhead |
| Alat nu cocog | Camcorder, Camera (Digital, SLR, Video) |
| Fitur husus | Portabel |
8. Garansi jeung Rojongan
Specific warranty details are not provided within this manual. For comprehensive warranty information, product support, or service inquiries, please visit the official Targus website or contact Targus customer service directly.
You can typically find support information at www.targus.com.