STEAM EZ-Animator Tutorial HappyCat Software
Welcome to the EZ-Animator Tutorial! This tutorial aims to show you a step by step guide to creating a sample animation.
Getting Started
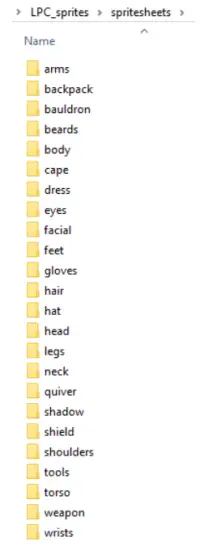
In this tutorial, we will use sprites from the LPC project
Download and extract the LPC sprites zip somewhere on your computer.
The sprite tile sheets will the located in the “spritesheets” folder of the extracted content and are conveniently organized into categories.
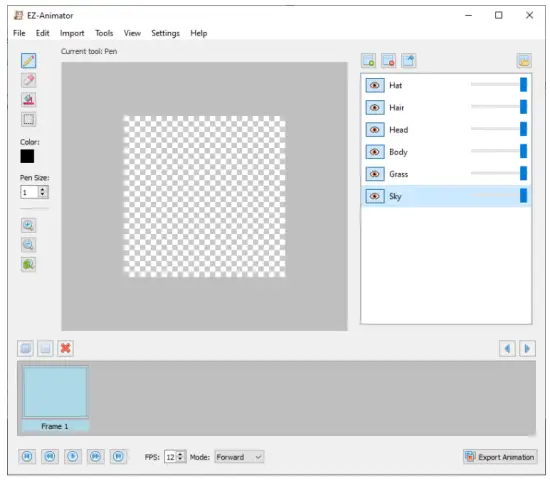
Creating Layers
In the layer panel, we click “Add layer” to add each desired layer to the project.
We then rename each layer by double clicking a layer, entering a name and pressing the enter key.
Importing to layers
In the layer panel we select a layer and click “Import to layer”.
This will launch the import wizard.1
By selecting each layer in turn and pressing “import to layer” we can set the layer content. For this example we selected import sprite sheet and the file “spritesheets\body\bodies\male\light.png”.
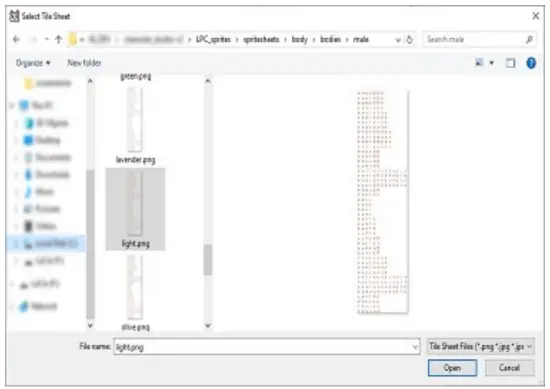 a
a
Figure 1: Sprite Sheet file selection
After selecting the sprite sheet file, we must set the individual cell dimensions. When you enter values here, a red box will outline your set dimensions to visually confirm size. In this example the cell dimensions are 64×64 pixels so we enter 64 and 64 and press “Next”
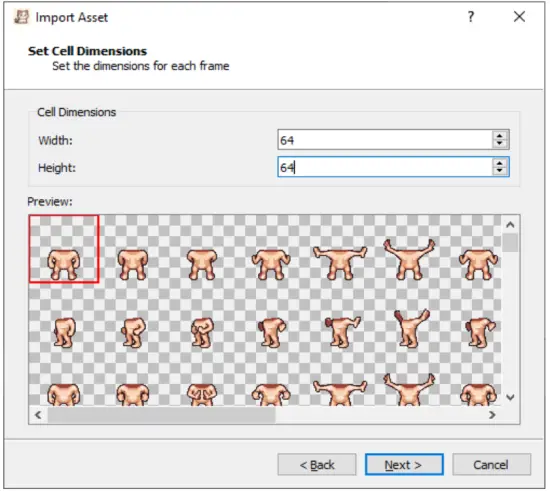
Figure 2: Set the animation cell dimensions
The next step is to set the desired row and column to grab the frames from. In the preview, the selected rows and columns will be highlighted in red, you may need to scroll to see the selection depending on the size of the sprite sheet. In this example we grab row 10 and the columns 0 to 8 found on that row. This will import 9 frames into our project.

Figure 3: Set rows and columns to grab image from
Now we press “Finish” and we should now see our imported sprite sheet on the canvas. Now repeat these steps for each layer to build your animation and customize further as needed.

Testing
Using the playback controls, you can preview what your animation will look like before exporting. This is useful for ensuring your animation is working as you intend.
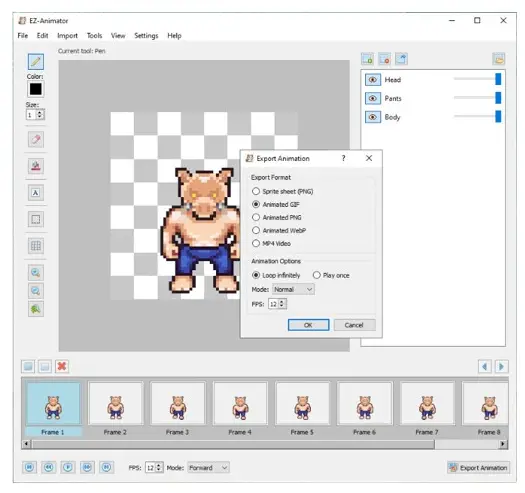
Exporting
Once you’ve created an animation the next step is to export it for use in other projects or for sharing.

Sprite sheet’s are exported as PNG and can be used in your own games and projects.
Animated GIF/PNG/WEBP are image formats that can be shared online or used in projects.
Exporting to MP4 will create a video file using the open source openh264 avc1 video codec format.
By following this tutorial, you should be well-equipped to start creating amazing animations with EZ-Animator. Happy animating!
Documents / Resources
 |
STEAM EZ-Animator Tutorial HappyCat Software [pdf] User Guide EZ-Animator Tutorial HappyCat Software, Tutorial HappyCat Software, HappyCat Software, Software |


