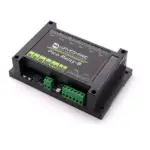
ZPE-RL4-U01 4 Channel Relay Module

Quick Install Guide
Let’s set up your 4-Channel Relay Module
- Connect the module to any available USB 2.0 or USB 3.0 port on Nodegrid Serial Consoles, Services Routers, or USB hubs connected to Nodegrid hardware.

- Mount module by screwing it on a surface where wires can run through.
You may also use mounting tape.
- Ensure minimum Nodegrid OS version meets module requirements.
Upgrade Nodegrid OS to minimum version 5.4.1
- For more information, visit the “Sensor Quick Install Guide” section at: https://www.zpesystems.com/user-manuals/

- OPTIONAL: To configure data collection in ZPE Data Lake, refer to Appendix C in the latest ZPE Cloud Manual at: zpesystems.com/user-manuals/
We suggest placing the product here
Rack cage may be a different model or size
Product Specifications
HARDWARE
- Onboard DPDT Relays 4
- Supply Power 12V via USB cable
- Requirements 1A/ 120V AC / 2A/ 24V DC
- Maximum Switching Current
- Cable Included. Detached. USB Mini B to USB Type A. 3 meters (10 feet)
DESCRIPTION
Automate control of your equipment and sensors with this easy-to-use 4-port relay module. Connect to Nodegrid USB port, and relay simple commands to devices . Control and read relay status with CLI, Web, SNMP or Restful APIs.
ASSEMBLED IN THE USA
ZPESYSTEMS.COM +1.844.4ZPESYS
Documents / Resources
 |
zpe ZPE-RL4-U01 4 Channel Relay Module [pdf] Installation Guide ZPE-RL4-U01 4 Channel Relay Module, ZPE-RL4-U01, 4 Channel Relay Module, 4 Channel Module, Relay Module, Module, Relay |