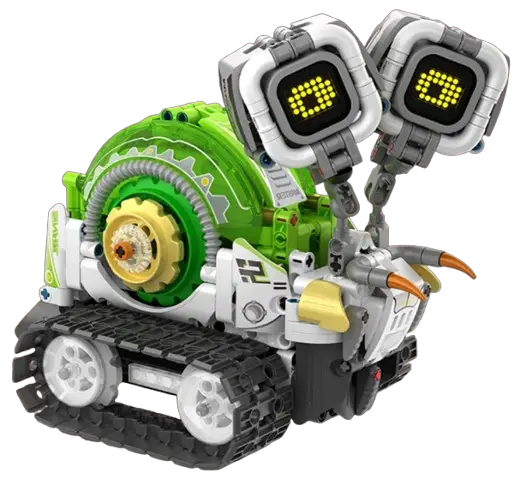
Sillbird RX-S2 Robot Building Kit with Remote Control
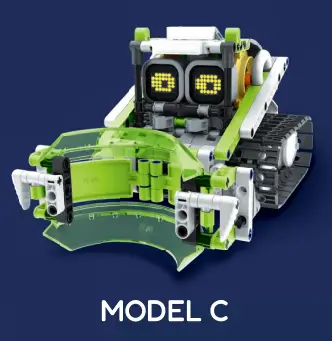
MODELS


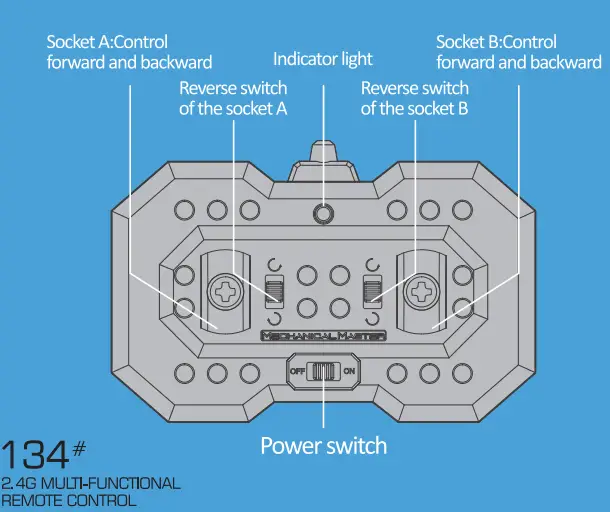
R/C PARTS INSTRUCTION
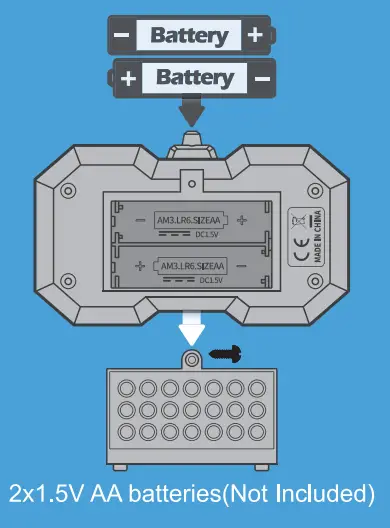
2×1.5V AA batteries(Not Included)
- Insert batteries (2×1.5 VAA type) into the remote control.
- Turn on the remote control, the indicator light blinks, the coding starts.
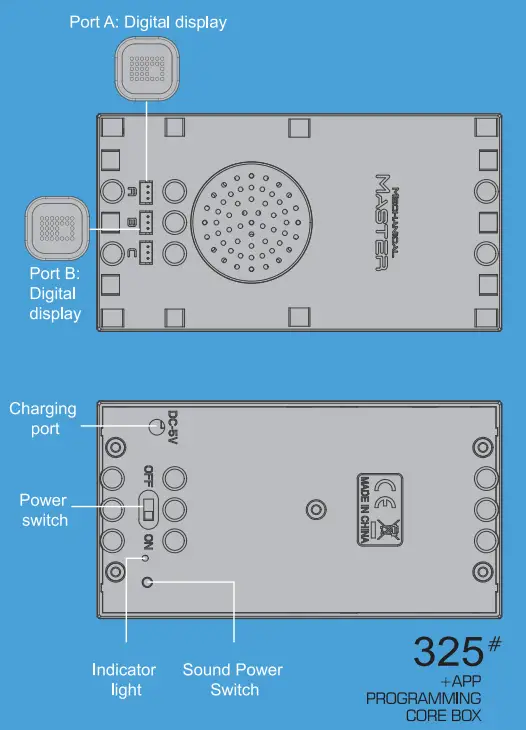
- Switch the 325 +APP PROGRAMMING CORE BOX power to ON.
- The indicator light remains lit in blue, the coding is successful, the light of remote control indicator remains lit as well.
- The indicator light blinks means the coding is failed.
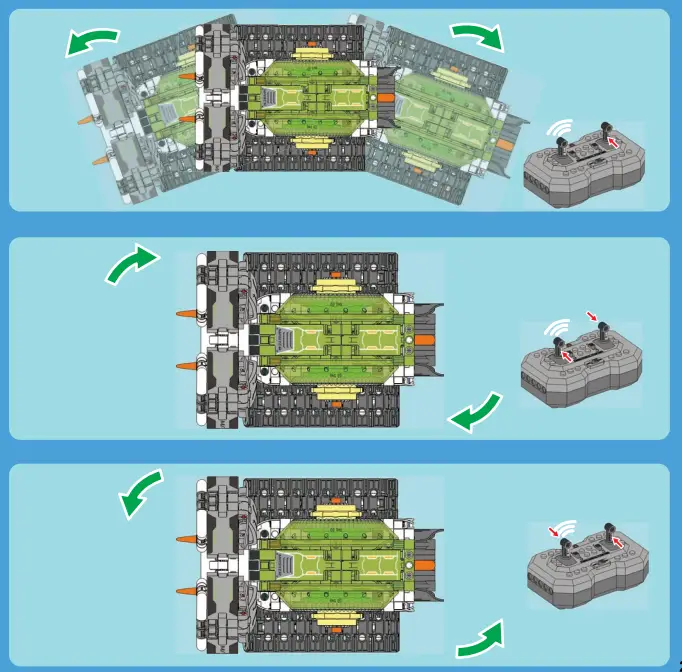
- Press the lever of remote control test if its function is normal,
- Charging: Use DC 5V 1 – 2A adapter, with the attached USB cable to charge the master control box.
While charging, the indicator light remains lit in red. The red indicator light gets off when fully charged. - Use mobile phone to scan the QR code on the box or instructions, download and install the APP. Follow the instructions to enjoy your manipulation and program- ming.
Further instruction for 2.4G pair coding
- Each controller can code one Motor Box only. Once coding succeeds, it will not Influence the other Motor Box. It means many items can be played at the same time, and do not influence each other.
- If the coding over 10 mins fails, or without any operation, after coding succeeds, the Motor box will auto power off.
- To code the controller with another Motor Box, it needs to turn off the pair of controllers and Motor Box both first and then start coding with another one.
Charger block(Not Included} Power supply:5V 1-2A
(DO NOT suggest power supply higher than this)
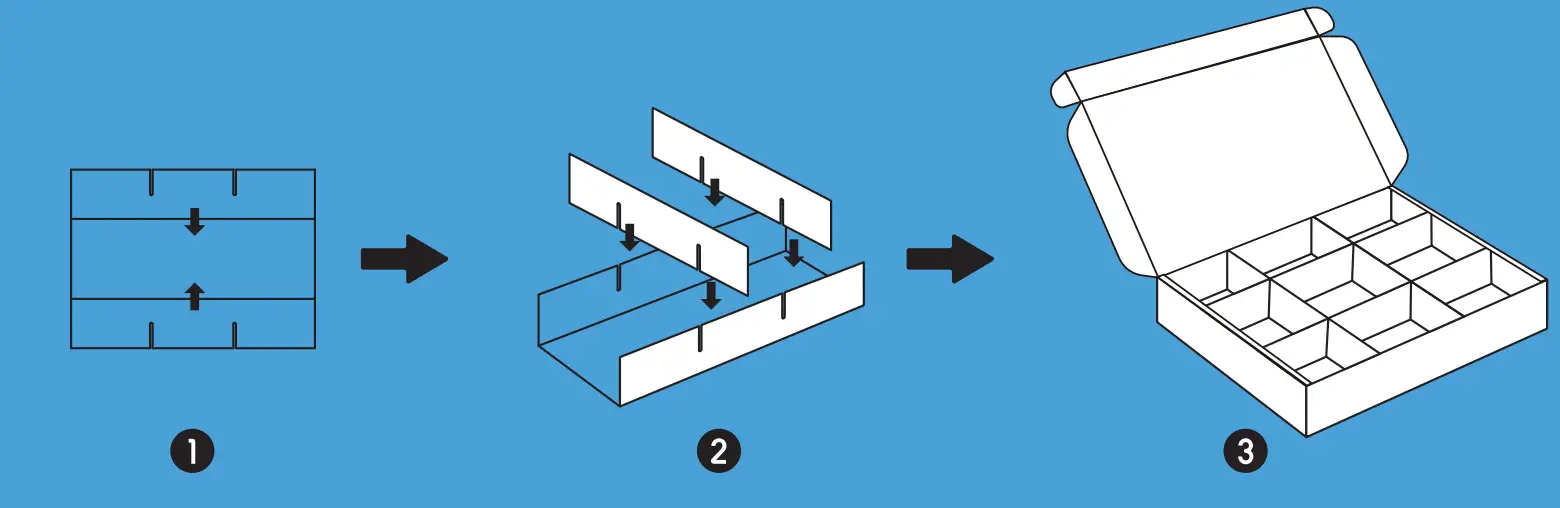
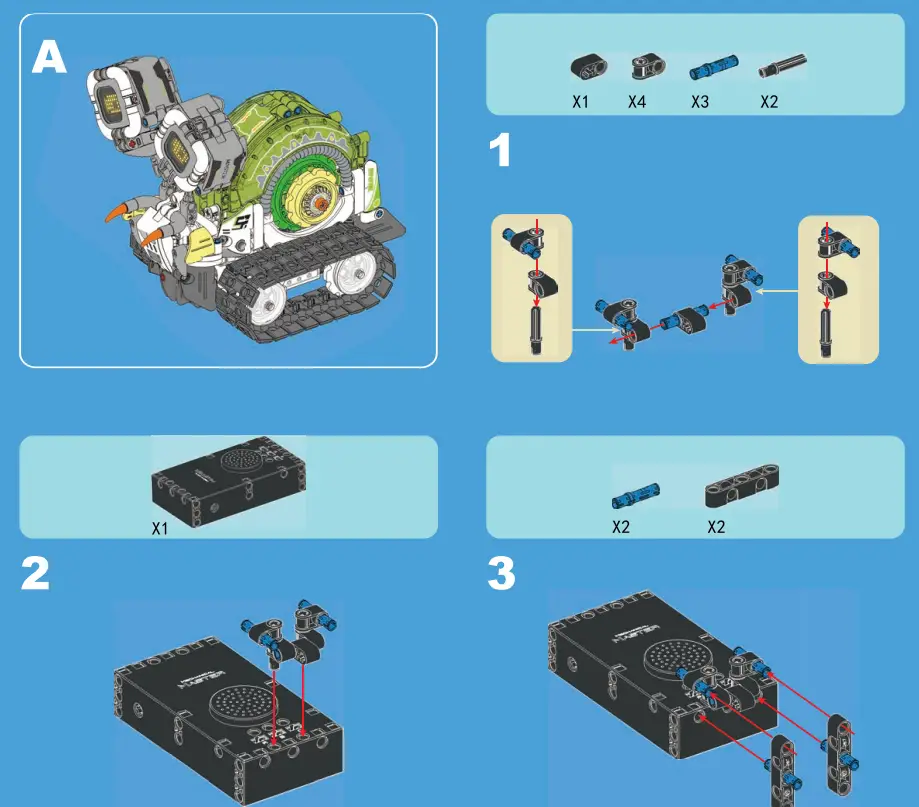
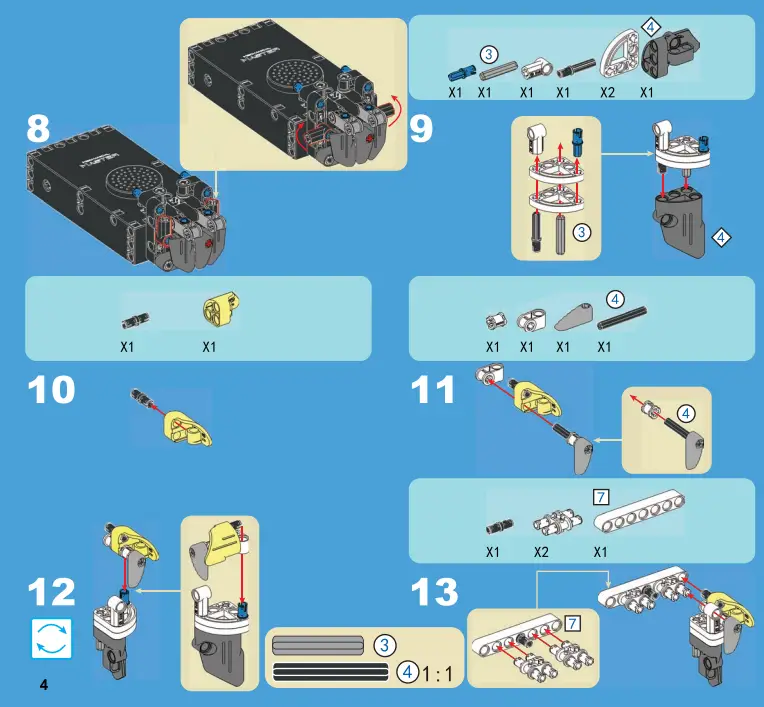
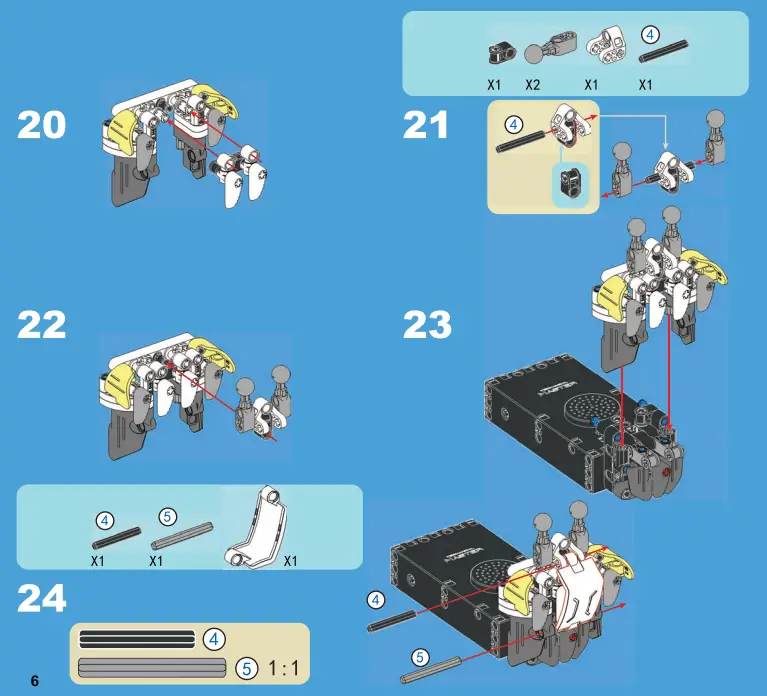
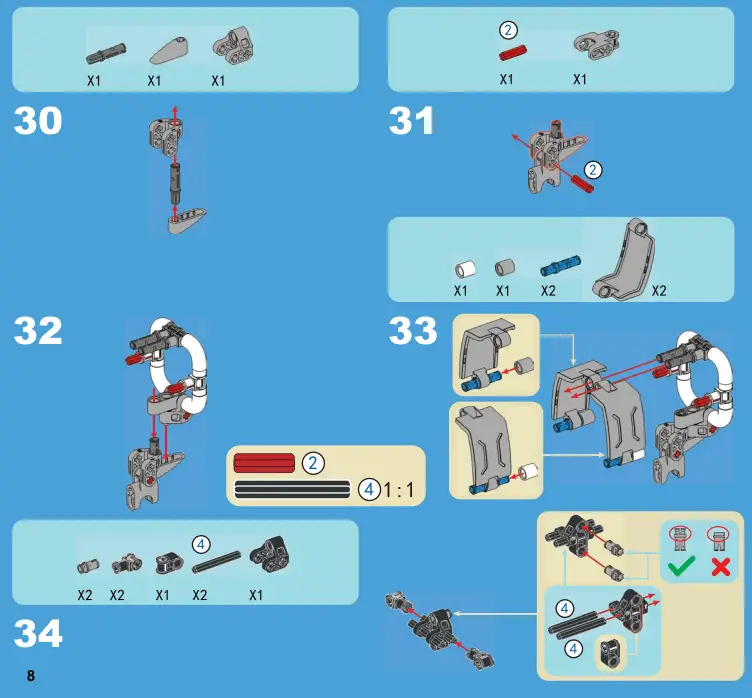
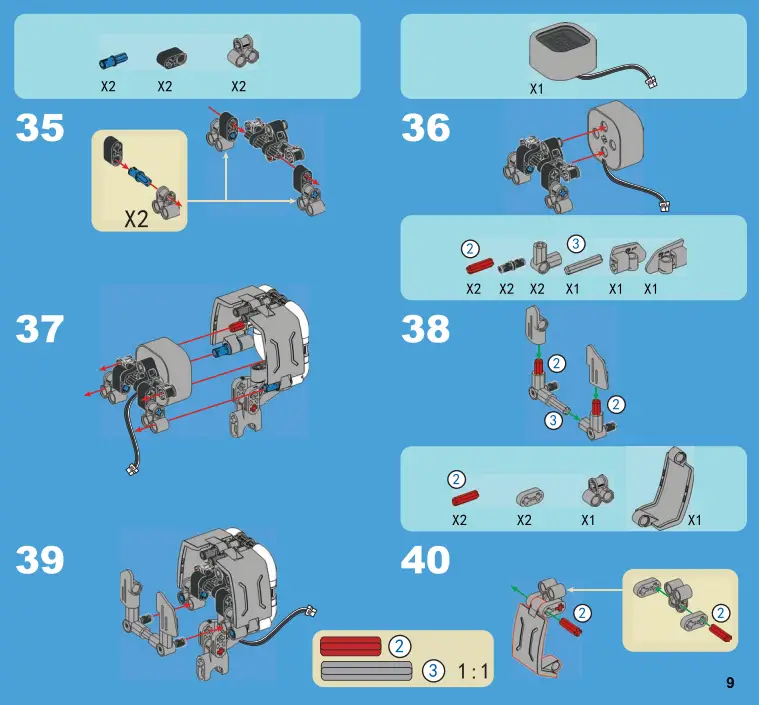
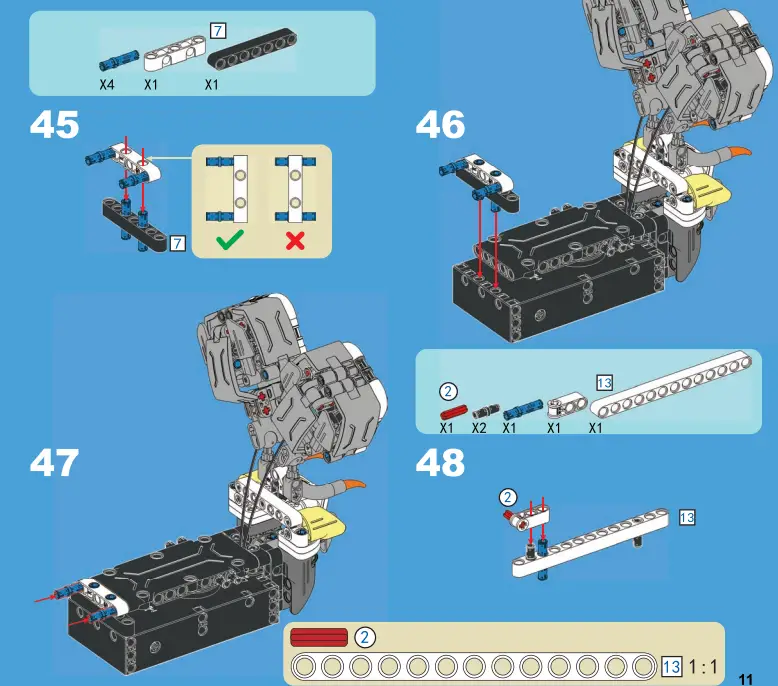
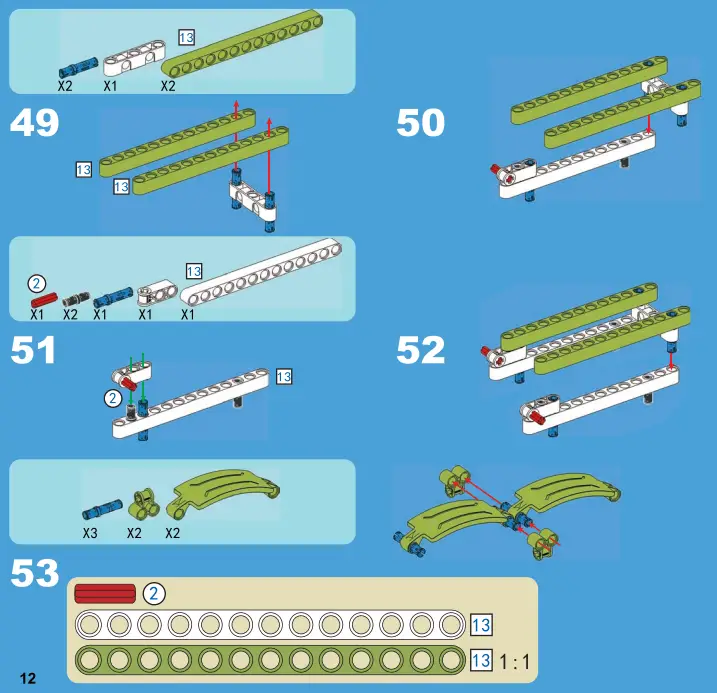
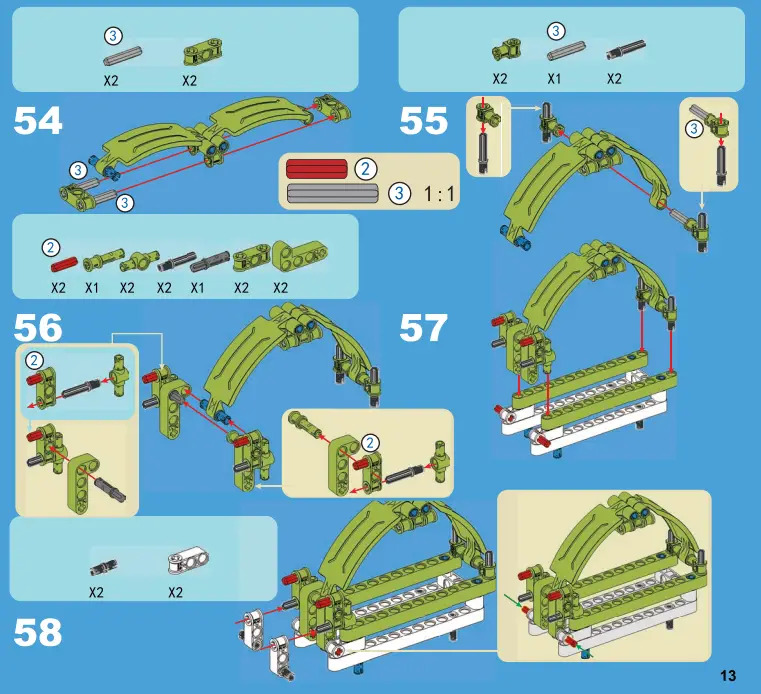
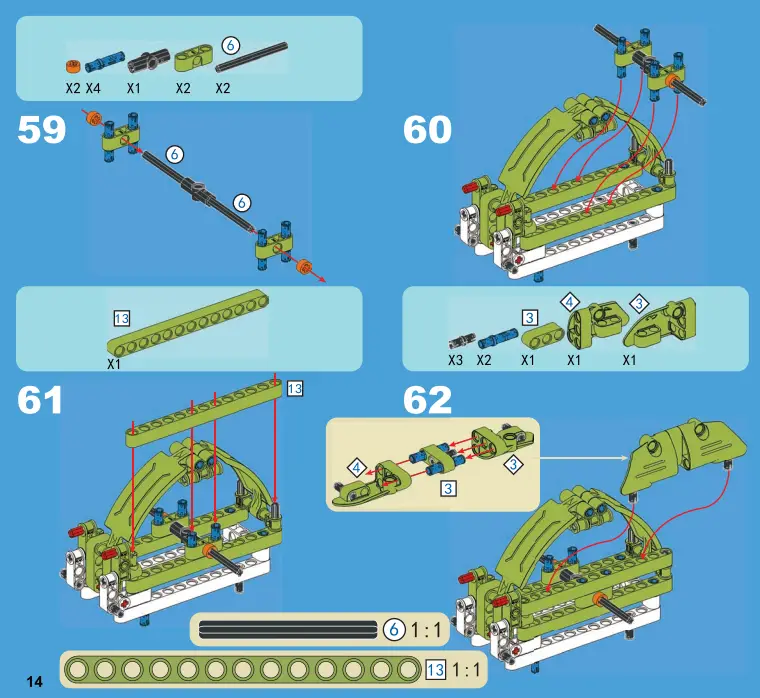
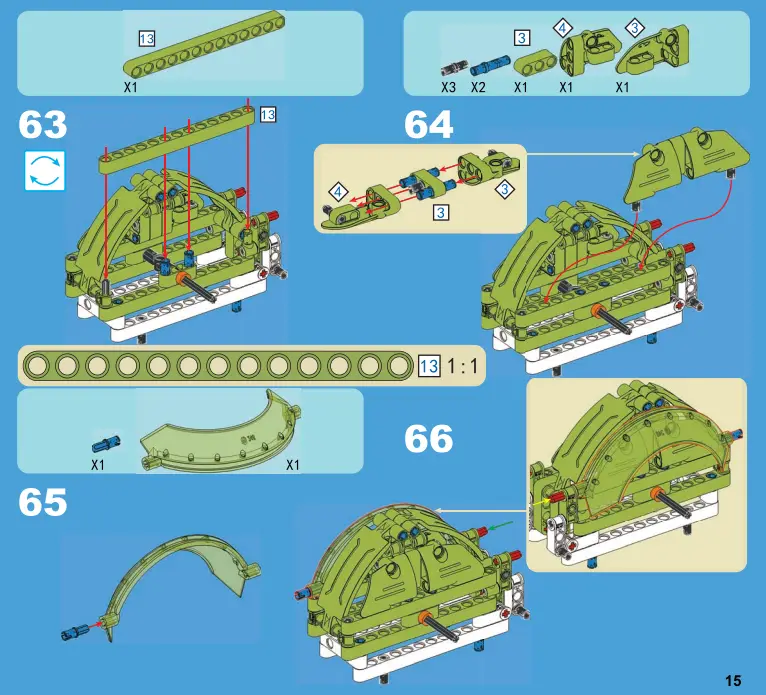
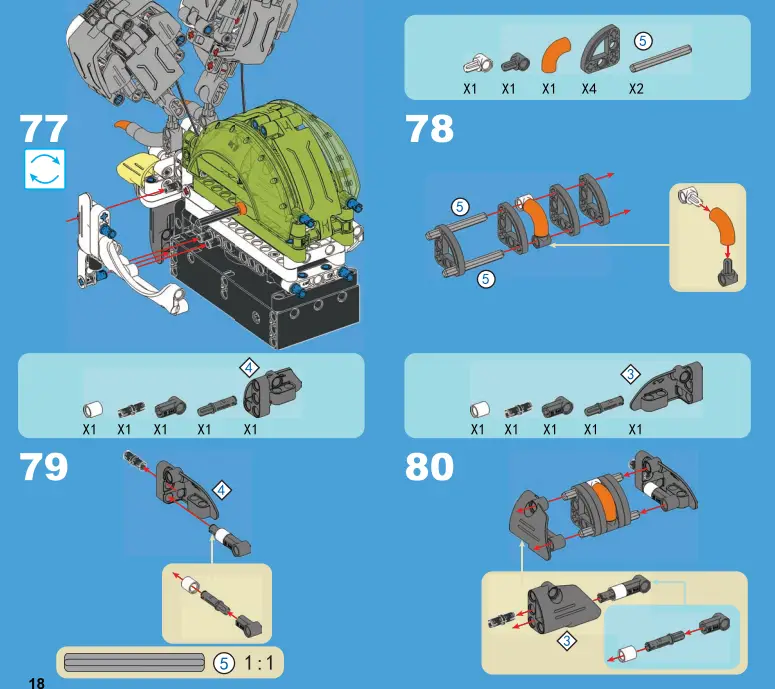
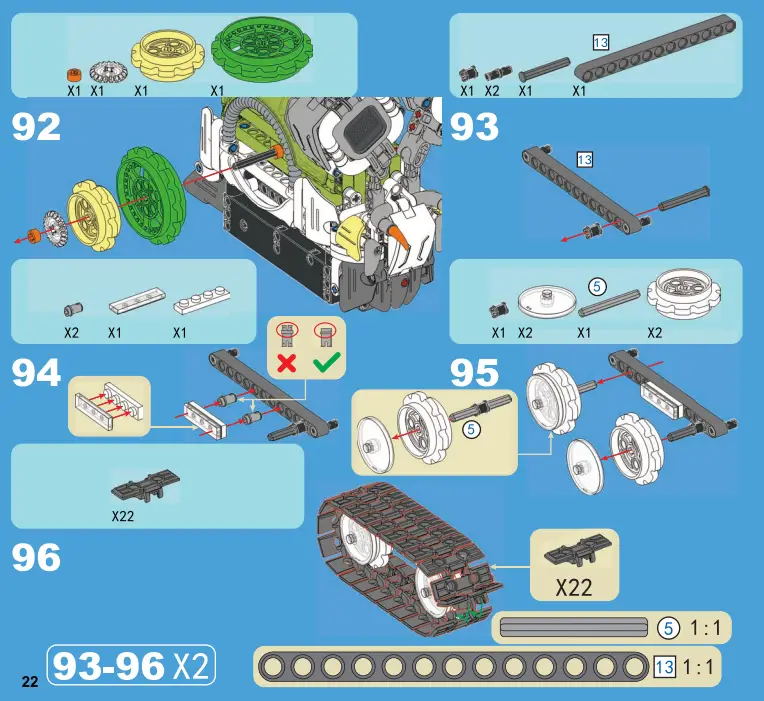
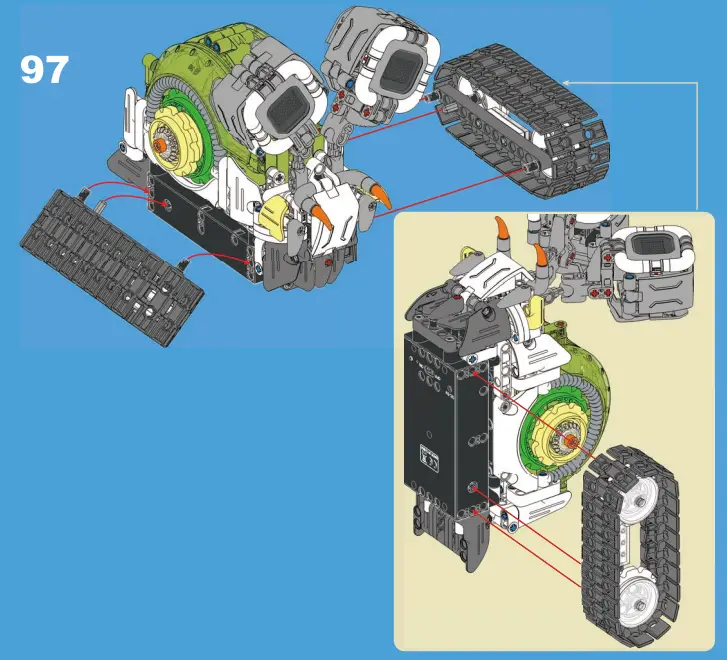
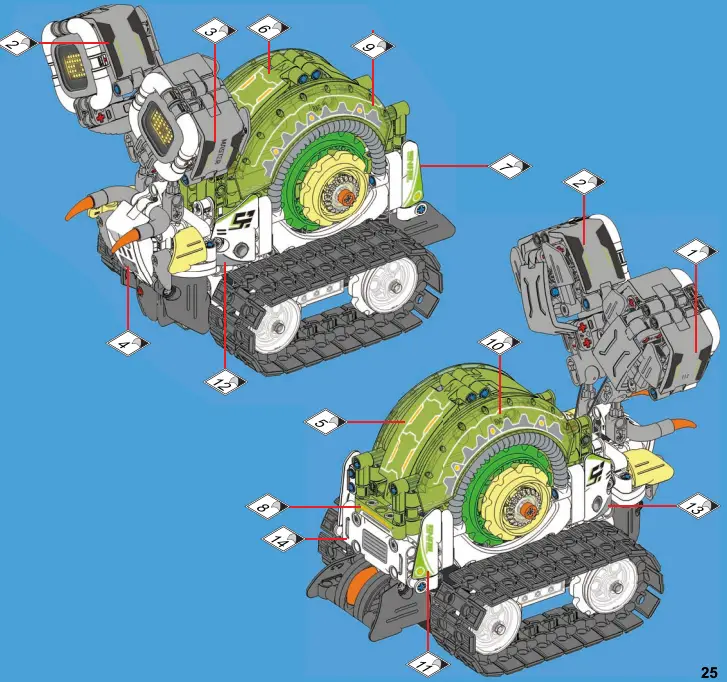
INSTALLATION INSTRUCTION
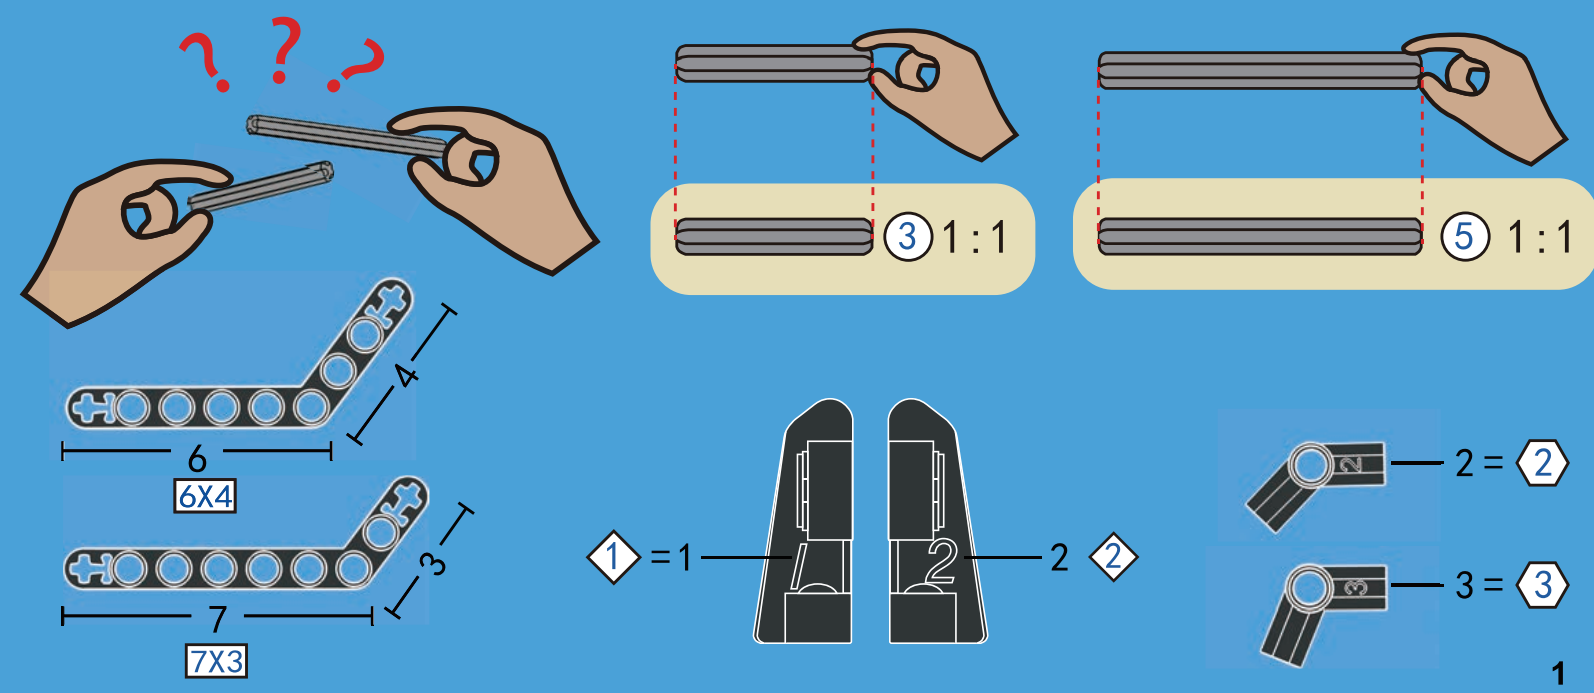
Please note the small differences between the parts.


PRODUCT OWERVEW
USING INSTRUCTION

Documents / Resources
 |
Sillbird RX-S2 Robot Building Kit with Remote Control [pdf] Installation Guide RX-S2 Robot Building Kit with Remote Control, RX-S2, Robot Building Kit with Remote Control, Kit with Remote Control, Remote Control |