![]()
E100 ® , E200 ® , E300 ® Series
RESET BUTTON REPLACEMENT
INSTALLATION INSTRUCTIONS
PART # W151250011112
Required Tools: (Not included)
A. Phillips screwdriver
B. 4 mm Allen wrench
C. 8 mm wrench
D. Long nose needle pliers
 WARNING
CAUTION: To avoid potential shock or another injury, turn the power switch OFF and disconnect the charger before conducting any assembly or maintenance procedures. Failure to follow these steps in the correct order may cause irreparable damage.
Step 1 Using a Phillips screwdriver, remove the four (4) screws on the deck cover. The locations of the screws are circled in the image below.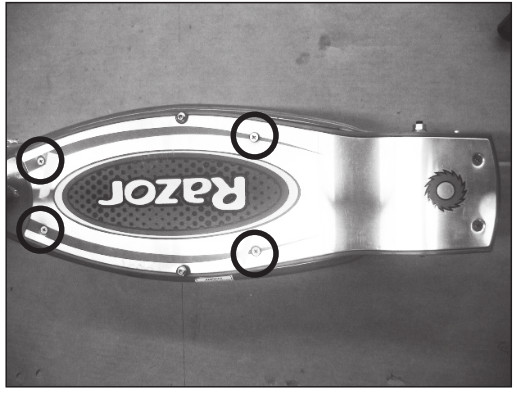
Step 2 Using a Phillips screwdriver and an 8 mm wrench, remove the two (2) nuts and screws on the tail of the deck cover.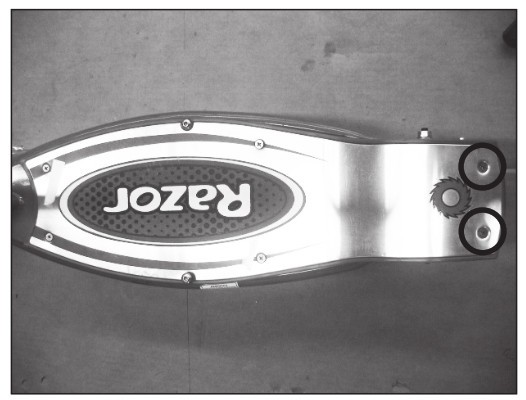
Step 3 Using a 4 mm Allen wrench, remove the two (2) hexagonal screws on the deck cover. The locations of the screws are circled in the image below. Remove the deck cover and set it aside.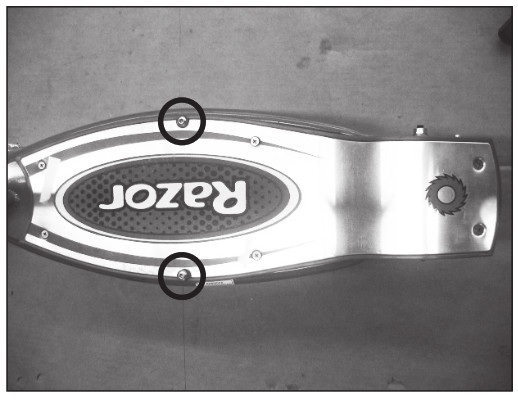
Step 4 Using a Phillips screwdriver, remove the four (4) screws on the battery holder. Locations of the screws are circled in the image below. Remove battery holder and set aside.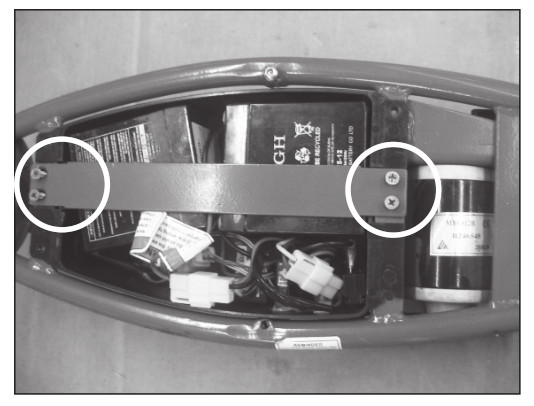
Step 5 Locate and disconnect the battery from the controller before trying to disconnect the reset button.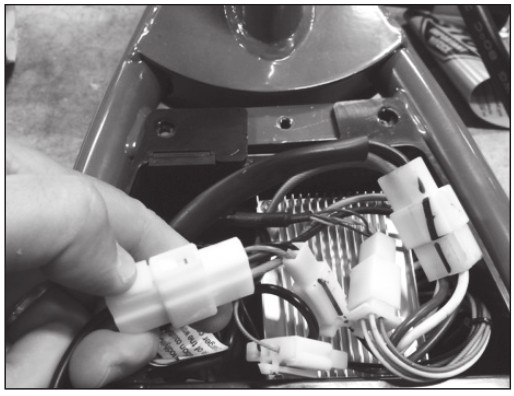
Step 6 Using long-nose needle pliers, disconnect the black and red wires that connect to the reset button.
Step 7 Using long-nose needle pliers, disconnect the ring that holds the reset button to the battery tray.

Step 8 Remove the reset button from the battery tray.
Step 9
Reverse the steps to install the new reset button.
- Place the new reset button and secure it with the plastic lock ring.
- Reconnect the black and red wires that come from the battery, wires can be connected in any sequence onto the reset button prongs.
- Reattach the battery holder on top of the battery.
- Reposition the deck cover and attach it with the screws and nuts that were removed in Steps 1-3.
ATTENTION: Charge battery 12 hours before using.
Need Help? Visit our website at www.razor.com or call toll-free at 866-467-2967 Monday – Friday 8:00 am – 5:00 pm Pacific Time.
Documents / Resources
 |
Razor Reset Button Replacement [pdf] Instruction Manual Razor, E100, E200, E300, Series |


