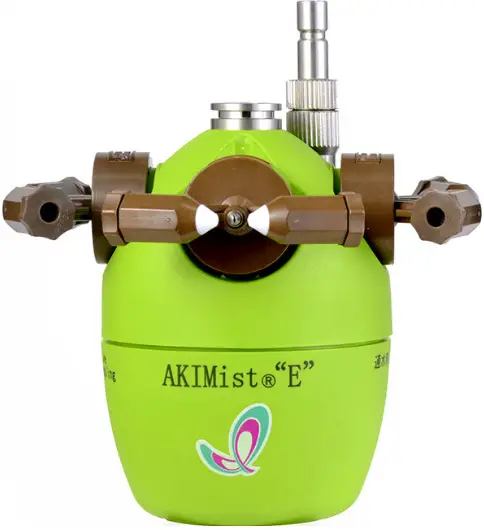
H IKEUCHI Dry Fog Humidifying System

Thank you for purchasing the AKIMist Humidifier with Wall Mounting or Hanging-down Kit. To properly use the installation kit, please read this instruction manual.
Check the contents of the box.
Contents:
AKIMist with connection kit, AKIMist Instruction Manual, and this manual
Parts Description
For the order of spare parts, use the specific description and code number below.

The sketch above shows HANGINGDOWN KIT. Please note that the shape of plate (#13) for the WALL MOUNTING KIT is different from the above.
| Section | Part No. | Description | Material* | Code No. |
| Air Line | 1 | Valve (Red) | S304 | #289481 |
| 2 | Nipple | S304 | #14634 | |
| 3 | Pressure Regulator (with a pressure gauge) | POM,
aluminum |
#265941 | |
| 4 | Coupler (Socket) | #193606 | ||
| 5 | Coupler (Plug) | #12234 | ||
| 7 | Fixed Socket & Nut Set | S303 | #14038 | |
| (Socket)
(Nut) |
(#109007)
(#109008) |
|||
| Water Line | 6 | Valve (Blue) | S304 | #289482 |
| 7 | Fixed Socket & Nut Set | S303 | #14038 | |
| (Socket)
(Nut) |
(#109007)
(#109008) |
|||
| 8 | Tube Fitting (Elbow) | #130693 | ||
| 9 | Tube | Nylon | #18582 | |
| 10 | Tube Fitting | #130694 | ||
| 11 | Liquid Coupler (Socket) | Polyacetal | #157467 | |
| 12 | Liquid Coupler (Plug) | S303 | #216627 | |
| Plate | 13 | Plate for Wall Mounting | S304 | #186169 |
| 14 | Plate for Hanging-down | S304 | #186170 |
*Materials S303/S304/S316’s “S” means stainless steel in this manual.
Note: Parts No.5 and No.12 are provided in the AKIMist humidifier, not in the kit.
How to Install
Wall Mounting Kit

Hanging-down Kit

The part numbers mentioned in the assembly instructions correspond to the parts listed on the previous page

- Connect the liquid coupler socket (Part #11) to the liquid coupler plug (#12) of the AKIMist humidifier. Push the coupler into the black cover part until it clicks into place. The joint part indicated in the diagram will be hidden under the black cover.
- Secure the plate on the wall or ceiling with bolts or a hanging fixture.
- Connect air and water tubes to valves (#1 and #6) respectively. Rc 1/4″ threaded connection for both air and water. (Recommended torque: 15 N-m)
- Open valves (#1 and #6) and set the air pressure with a pressure regulator (#3).
For installation and operation of AKIMist, refer to the enclosed Instruction Manual for AKIMist Dry Fog Humidifier
Caution
- Connect the air pipe and water pipe correctly.
- When wall-mounted, do not aim the spray nozzles towards the wall.
- Be careful not to drop anything during installation at high places.
- For inquiry/order, use the specific part name and code number on the previous page.
CONTACT
- H. IKEUCHI & CO., LTD.
- Daiichi Kyogyo Bldg., 1-15-15, Awaza, Nishi-ku, Osaka 550-0011 JAPAN
- Fax: +81-6-6538-4022
- Email: overseas@kirinoikeuchi.co.jp
- https://www.kirinoikeuchi.co.jp/eng/
Documents / Resources
 |
H IKEUCHI Dry Fog Humidifying System [pdf] User Guide Dry Fog Humidifying System, Dry Fog Humidifying System, Humidifying System, System |


