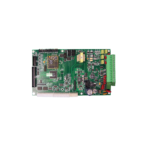
EBYTE ME31-XXXA0006 Network I/O Networking Module

This manual may be updated with product improvements, please refer to the latest version of the manual! Chengdu Yibaite Electronic Technology Co., Ltd. reserves the final interpretation and modification rights for all contents in this instruction!
Overview
Product Introduction
ME31-XXXA0006 is a network I/O networking module with 6 analog outputs (0-20mA/4-20mA) and supports Modbus TCP protocol or Modbus RTU protocol for acquisition and control. The device can also be used as a simple Modbus gateway (automatically send commands with non-local Modbus addresses through the serial port/network port).
Functional Features
- Support standard Modbus RTU protocol and Modbus TCP protocol;
- Support various configuration software/PLC/touch screen;
- RS485 acquisition control I/O;
- RJ45 acquisition control I/O, support 4-way host access;
- Support OLED display to display status information, and configure device parameters through buttons;
- 6 analog outputs (0-20mA/4-20mA);
- Support custom Modbus address setting;
- Support 8 common baud rate configurations;
- Support DHCP and static IP;
- Support DNS function, domain name resolution;
- Support Modbus gateway function;
Product Application Topology Diagram


Quick use
【Note】This test needs to be carried out with the default factory parameters.
Device preparation
The following table lists the items required for this test:

Device connection
RS485 connection

Note: When the 485 bus high-frequency signal is transmitted, the signal wavelength is shorter than the transmission line, and the signal will form a reflected wave at the end of the transmission line, which will interfere with the original signal. Therefore, it is necessary to add a terminal resistor at the end of the transmission line so that the signal does not reflect after reaching the end of the transmission line. The terminal resistance should be the same as the impedance of the communication cable, the typical value is 120 ohms. Its function is to match the bus impedance and improve the anti-interference and reliability of data communication.
AO analog output connection

Simple use

Wiring: The computer is connected to the RS485 interface of ME31-XXXA0006 through USB to RS485, A is connected to A, and B is connected to B.
Networking: Insert the network cable into the RJ45 port and connect to the PC.
Power supply: Use DC-12V switching power supply (DC 8~28V) to power ME31-XXXA0006.
Parameter Configuration
Step 1: Modify the IP address of the computer to be consistent with the device. Here I am modifying it to 192.168.3.100 to ensure that it is on the same network segment as the device and that the IP is different. If you cannot connect to the device after the above steps, please turn off the firewall and try again; Step 2: Open the network assistant, select the TCP client, enter the remote host IP192.168.3.7 (default parameter), enter the port number 502 (default parameter), and select HEX to send.
Control Testing
Modbus TCP control
Use the network assistant to control the first AO output of ME31-XXXA0006 to 10mA.

Other functions can be tested through the commands in the table below.

Modbus RTU control
Use the serial port assistant to read the current AO1 output of ME31-XXXA0006.

Other functions can be tested through the commands in the table below.

Technical Specification
Specifications
| Category | Name | Parameters |
| Power supply | Operating Voltage | DC8~28V |
| Power indicator | Blue LED indication | |
|
Serial port |
Communication
Interface |
RJ45, RS485 |
| Baud rate | 9600bps (customizable) | |
| Protocol | Standard Modbus TCP, Modbus RTU protocol | |
| MODBUS | Device address | Can be modified by Modbus command and host
computer |
|
AO output |
Number of AO
channels |
6 way |
| AO output type | Current output, 2-wire connection | |
| AO output range | 0~20mA \4~20mA | |
| AO resolution | 16 bits | |
| Output accuracy | 3‰ | |
| Output indication | OLED screen display | |
|
Other |
Product Size | 121mm * 72mm * 34mm (L*W*H) |
| Product weight | 135 ±5 g | |
| Working temperature and
humidity |
-40 ~ +85℃, 5% ~ 95%RH (no
condensation) |
|
| Storage
temperature and humidity |
-40 ~ +105℃, 5% ~ 95%RH (no
condensation) |
|
| Installation method | Din-rail installation |
Device Default Parameters
| Category | Name | Parameters |
|
Ethernet parameters |
Operating mode | TCP server (up to 4-way client access) |
| Local IP | 192.168.3.7 | |
| local port | 502 | |
| Subnet mask | 255.255.255.0 | |
| Gateway address | 192.168.3.1 | |
| DHCP | Close |
| Native MAC | Determined by the chip (fixed) | |
| Target IP | 192.168.3.3 | |
| Target port | 502 | |
| DNS server | 114.114.114.114 | |
| Active upload | Close | |
|
Serial parameters |
Baud rate | 9600bps (8 types) |
| Check method | None (default), Odd, Even | |
| Data bit | 8 | |
| Stop bit | 1 | |
| MODBUS parameter | Modbus master-slave | Slave |
| Address | 1 |
Mechanical Dimensional Drawing

Port and indicator light description

| No. | Label | Illustrate |
| 1 | TX(LED) | Serial port send data indicator light |
| 2 | RX(LED) | Serial port receiving data indicator light |
| 3 | LINK(LED) | Network connection light |
| 4 | NET(LED) | Network data sending and receiving indicator light |
| 5 | PWR(LED) | Power input indicator |
| 6 | GND | Negative pole of power input terminal, DC 8V~28V, 5.08mm Phoenix
terminal. |
| 7 | VCC | Positive pole of power input terminal, DC 8V~28V, 5.08mm Phoenix
terminal. |
| 8 | AO3 | Analog output current (positive pole), channel 3, 5.08mm Phoenix terminal. |
| 9 | AGND | Analog output current (negative pole), channel 3, 5.08mm Phoenix terminal. |
| 10 | AO4 | Analog output current (positive pole), channel 4, 5.08mm Phoenix terminal. |
| 11 | AGND | Analog output current (negative pole), channel 4, 5.08mm Phoenix terminal. |
| 12 | AO5 | Analog output current (positive pole), channel 5, 5.08mm Phoenix terminal. |
| 13 | AGND | Analog output current (negative pole), channel 5, 5.08mm Phoenix terminal. |
| 14 | AO6 | Analog output current (positive pole), channel 6, 5.08mm Phoenix terminal. |
| 15 | AGND | Analog output current (negative pole), channel 6, 5.08mm Phoenix terminal. |
| 16 | Ethernet | Ethernet interface, standard RJ45 interface. |
| 17 | AGND | Analog output current (negative pole), channel 2, 5.08mm Phoenix terminal. |
| 18 | AO2 | Analog output current (positive pole), channel 2, 5.08mm Phoenix terminal. |
| 19 | AGND | Analog output current (negative pole), channel 1, 5.08mm Phoenix terminal. |
| 20 | AO1 | Analog output current (positive pole), channel 1, 5.08mm Phoenix terminal. |
| 21 | GND | Signal ground, 5.08mm Phoenix terminal. |
| 22 | 485-A | The A of the serial port is connected to the A interface of the external device,
and the 5.08mm Phoenix terminal. |
| 23 | 485-B | The B of the serial port is connected to the B interface of the external device,
and the 5.08mm Phoenix terminal. |
Product Function Introduction
AO output
AO output range
Analog output (AO), the current output type can be configured as 0~20mA or 4~20mA, the precision is 3‰, and the resolution is 16 bits.
The power-on default output value can be set (when the working mode is switched, the power-on value will be output according to the lowest value of the current range).
Modbus Gateway
The device can transparently transmit non-native Modbus commands from the network/serial port to the serial port/network, and the local Modbus commands are directly executed.
Modbus TCP/RTU protocol conversion
After it is turned on, the Modbus TCP data on the network side will be converted to Modbus RTU data.
Modbus Address Filtering
This function can be used when some host software or configuration screen is used as the host to access the serial port of the device, and the gateway function of the device is used, the slave is at the network end, and the Modbus TCP to RTU function is turned on. Multiple slaves on the bus may cause data confusion. At this time, enabling address filtering can ensure that only the specified address can pass through the device; when the parameter is 0, the data will be transparently transmitted; when the parameter is 1-255, only the set slave machine address data.
Modbus TCP Protocol Data Frame Description
TCP frame format:
| Transaction ID | Protocol ID | Length | Device address | Function code | Data segment |
| 2 Bit | 2 Bit | N+2 Bit | 1 Bit | 1 Bit | N Bit |
- Transaction ID: It can be understood as the serial number of the Generally, 1 is added after each communication to distinguish different communication data messages.
- Protocol identifier: 00 00 means Modbus TCP
- Length: Indicates the length of the next data in
Example: get DI status
| 01 00 | 00 00 | 00 06 | 01 | 02 | 00 00 00 04 |
| Transaction ID | Protocol ID | Length | Device address | Function code | Data segment |
Modbus RTU protocol data frame description
RTU frame format:
| Device address | Function code | Data segment | Check codeCRC |
| 1 Bit | 1 Bit | N Bit | 2 Bit |
Example: get DI status command
| 01 | 02 | 00 00 00 04 | 79 C9 |
| Device Modbus address | Function code | Data segment | CRC check code |
Custom Module Information
Modbus Address
The device address is 1 by default, and the address can be modified, and the address range is 1-247.
Module Name
Users can configure the device name according to their own needs to distinguish, support English, digital format, up to 20 bytes.
Network parameters
Unless otherwise specified: the following network-related parameters default to IPV4-related parameters.
- MAC of the device: the user can obtain it by reading the specified register, and this parameter cannot be
- IP address: device IP address, readable and writable.
- Modbus TCP port: the port number of the device, readable and writable.
- Subnet mask: address mask, readable and
- Gateway address:
- DHCP: Set the way the device obtains IP: static (0), dynamic (1).
- Target IP: When the device works in client mode, the target IP or domain name of the device
- Destination port: When the device is working in client mode, the destination port of the device
- DNS server: The device is in the client mode and resolves the domain name of the server.
- Module working mode: switch the working mode of the module. Server: The device is equivalent to a server, waiting for the user’s client to The maximum number of connections is 4. Client: The device actively connects to the target IP and port set by the user.
- Active upload: When this parameter is not 0, and the device is in the client mode, the discrete input status of the device will be uploaded to the server when it is connected for the first time or the input changes, and the analog input will be uploaded according to the configured time
Serial Port Parameters
Parameters for setting serial communication:
Default parameters:
- Baud rate: 9600 (03); Data bit: 8bit;
- Stop bit: 1bit;
- Check digit: NONE(00);
Baud rate:
| Baud rate code value table | |
| 0x0000 | 1200 |
| 0x0001 | 2400 |
| 0x0002 | 4800 |
| 0x0003
(default) |
9600 |
| 0x0004 | 19200 |
| 0x0005 | 38400 |
| 0x0006 | 57600 |
| 0x0007 | 115200 |
Check Digit:
| Check Digit | |
| 0x0000(default) | NONE |
| 0x0001 | ODD |
| 0x0002 | EVEN |
OLED display and parameter configuration
The display interface includes an information display page (AO input value display page) and a parameter setting page (some parameters).
Information Display Interface
Including the AO input value display page, short press the up and down buttons to switch the interface.
Equipment parameter display interface
Press the left button or right button to enter the password input interface, complete the correct password input, and the device parameter information interface will be displayed (password interface: default password: 0000; short press the middle to verify the password, the left and right buttons switch the password bit, and the up and down buttons switch the current bit value, the password has a total of 4 digits, and each input is a number ranging from 0- 9):
The parameter setting interface from top to bottom is:
- Modbus address;
- Baud rate;
- Data bits;
- Check Digit;
- Stop bit;
- Local port;
- Local IP address;
- Gateway;
- Subnet mask;
- DNS;
- MAC address;
- DHCP;
- Target IP;
- Destination port;
- Modbus TCP/RTU protocol conversion;
- Active upload;
- Modbus address filtering;
Equipment Parameter Configuration Interface
Press and hold the confirmation button to enter the password input interface, complete the correct password input, and enter the configuration interface (password interface: default password: 0000; short press the middle to verify the password, the left and right buttons switch the password bit, and the up and down buttons switch the value of the current bit , the password has a total of 4 digits, and each input range is a number from 0-9).
- Select the setting item, enter the parameter configuration page and short press the up and down keys to switch the setting item;
- Select the setting item, short press to confirm or right click, the setting item gets the cursor to represent the selection and enter the setting item;
- Adjust the parameter value: After selecting the setting item, the up and down keys can change the value or optional value; the left and right keys move the cursor in the parameter item;
- Confirm the parameter value: After adjusting the parameter value, press the enter key to exit the current setting item.
Save parameter settings and restart: After setting the parameters, move the cursor to save and restart, then short press the confirmation key to enter the confirmation save and restart state. Short press the confirmation key (press other keys to exit the confirmation state) to save the parameters and restart the device.
Exit without saving parameters: move the cursor to exit, then short press the confirmation key to enter the confirmation exit state, short press the confirmation key (press other keys to exit the confirmation state), and then exit the parameter configuration interface without saving the parameters.
Among them, the data bit and stop bit cannot be set. After the DHCP mode is turned on, the local IP address, gateway, and subnet mask cannot be configured and are only assigned by the router;
Screen Sleep
The device screen has a sleep function, which is off by default and can be set to on in the configuration interface.
In any interface, when there is no button operation for 180 seconds, the screen will enter the sleep mode. At this time, the interface displays Ebyte robot. Press any button can exit the sleep mode.
When the screen is in sleep mode, the running efficiency of device programs will be improved.
MODBUS parameter configuration
Note: According to the usage requirements, some software (such as KingView) requires adding +1 when converting from hexadecimal to decimal in order to operate on registers (all decimal values in the table have already been adjusted by +1).
AO Register List
| Register function | Register address
(HEX) |
Register address
(DEC) |
Register type |
Number |
Operate |
Data Range/Remarks |
Related function code |
| Analog
output value |
0x0000 |
4-0001 |
Holding register |
12 |
RW |
32-bit floating point type, unit mA | R:0x03 W:0x10 |
| Analog output
value |
0x0064 |
4-0101 |
Holding register |
6 |
RW |
Analog channel output quantity, 2-byte integer, unit (uA) | R:0x03 W:0x10 |
| AO output mode |
0x0514 |
4-1301 |
Holding register |
6 |
RW |
AO channel output range 0x0000: 0~20mA
0x0001: 4-20mA |
R:0x03 W:0x06、0x10 |
| AO power- on output initial value |
0x00C8 |
4-0201 |
Holding register |
12 |
RW |
Output engineering quantity when the analog channel is powered on, a 4-byte floating
point number, the default is 0 |
R 0x03 W 0x10 |
Module related registers
| Register function | Register
address (HEX) |
Register
address (DEC) |
Register type |
Number |
Operate |
Data Range/Remarks |
Related function code |
| Module
address |
0x07E8 | 4-2025 | Holding
register |
1 | RW | Modbus address,
1~247 configurable addresses |
R:0x03
W:0x06 |
| Module
model |
0x07D0 | 4-2001 | Holding
register |
12 | R | Get the current model | R:0x03 |
| Firmware
version |
0x07DC | 4-2013 | Holding
register |
1 | R | Get firmware version number | R:0x03 |
| Module
name |
0x07DE | 4-2015 | Holding
register |
10 | RW | Custom module name | R:0x03
W:0x10 |
| Module
restart |
0x07EA | 4-2027 | Holding
register |
1 | W | Write 0x5BB5 to reboot. | W:0x06 |
| Restore factory
parameters |
0x07E9 |
4-2026 |
Holding register |
1 |
W |
Write 0x5BB5 to restore factory settings. |
W:0x06 |
| Serial
baud rate |
0x0834 | 4-2101 | Holding
register |
1 | RW | See baud rate code table,
Default is 9600 (0x0003) |
R:0x03
W:0x06、0x10 |
| Serial check
digit |
0x0836 |
4-2103 |
Holding register |
1 |
RW |
0x0000 no checksum (default) 0x0001 odd parity
0x0002 even parity |
R:0x03 W:0x06、0x10 |
Network related registers
| Register function | Register address
(HEX) |
Register address
(DEC) |
Register type |
Number |
Operate |
Data Range/Remarks |
Related function code |
| Module MAC
address |
0x0898 |
4-2201 |
Holding register |
3 |
R |
Device MAC parameters |
R:0x03 |
| Local IP
address |
0x089B | 4-2204 | Holding
register |
2 | RW | Default: 192.168.3.7 | R:0x03
W:0x06、0x10 |
| local port | 0x089D | 4-2206 | Holding
register |
1 | RW | 1~65535, default: 502 | R:0x03
W:0x06、0x10 |
| Subnet mask
address |
0x089E |
4-2207 |
Holding register |
2 |
RW |
Default: 255.255.255.0 |
R:0x03 W:0x06、0x10 |
| Gateway
address |
0x08A0 | 4-2209 | Holding
register |
2 | RW | Default: 192.168.3.1 | R:0x03
W:0x06、0x10 |
| DHCP
mode setting |
0x08A2 |
4-2211 |
Holding register |
1 |
RW |
0x0000 static IP (default) 0x0001 Obtain IP automatically | R:0x03 W:0x06、0x10 |
| Target
IP/domain name |
0x08A3 |
4-2212 |
Holding register |
64 |
RW |
String format stored in IP/domain name
Default IP: 192.168.3.3 |
R:0x03 W:0x06、0x10 |
| Server port | 0x08E3 | 4-2276 | Holding
register |
1 | RW | 0-65535, default 502 | R:0x03
W:0x06、0x10 |
| DNS
server IP address |
0x08E4 |
4-2277 |
Holding register |
2 |
RW |
Default 8.8.8.8 |
R:0x03 W:0x06、0x10 |
| Module
work mode |
0x08E6 | 4-2279 | Holding
register |
1 | RW | 0x0000 server mode
0x0001 client mode |
R:0x03
W:0x06、0x10 |
| Active
upload |
0x08E7 | 4-2280 | Holding
register |
1 | RW | 0x0000 disabled, others:
1~65535s cycle sending |
R:0x03
W:0x06、0x10 |
| MOSBUS TCP/RTU
conversion enable |
0x08E8 |
4-2281 |
Holding register |
1 |
RW |
0, close, 1 open protocol conversion |
R:0x03 W:0x06、0x10 |
|
MODBUS address filtering |
0x08E9 |
4-2282 |
Holding register |
1 |
RW |
0: transparent transmission, 1-255: when the data is not local, check the slave address of the command , and it can be passed when it is the
set value |
R:0x03 W:0x06、0x10 |
Examples of Modbus command operation instructions
Read coil (DO) status
Use the read coil state (01) function code to read the output coil state, for example:
| 01 | 01 | 00 00 | 00 04 | 3D C9 |
| Modbus address | Function code | Register first
address |
Number of output coils read | CRC check
code |
After sending the above command to the device through the 485 bus, the device will return the following values:
| 01 | 01 | 01 | 01 | 90 48 |
| Modbus address | Function code | Bytes of data | Returned status data | CRC check code |
The status data 01 returned above indicates that the output DO1 is turned on.
Control coil (DO) state
Support operation of single coil (05), operation of multiple coils (0F) function code operation. Use the 05 command to write a single command, for example:
| 01 | 05 | 00 00 | FF 00 | 8C 3A |
| Modbus address | Function code | Register first
address |
Continuity: FF 00
Close: 00 00 |
CRC check code |
After sending the above command to the device through the 485 bus, the device will return the following values:
| 01 | 05 | 00 00 | FF 00 | 8C 3A |
| Modbus address | Function code | Register first
address |
Operation method | CRC check code |
The DO1 coil is turned on.
Use 0F function code as the command to write multiple coils, for example:
| 01 | 0F | 00 00 | 00 04 | 01 | 0F | 7E 92 |
| Modbus
address |
Function
code |
Initial
address |
Number of
coils |
Bytes of data | Control coil data | CRC check
code |
After sending the above command to the device through the 485 bus, the device will return the following values:
| 01 | 0F | 00 00 | OO O4 | 54 08 |
| Modbus address | Function code | Register address | Number of coils | CRC check code |
The coils are all on.
Read the holding register
Use 03 function code to read one or more register values, for example:
| 01 | 03 | 05 78 | 00 01 | 04 DF |
| Modbus address | Function code | Register first
address |
Number of registers read | CRC check code |
After sending the above command to the device through the 485 bus, the device will return the following values:
| 01 | 03 | 02 | 00 00 | B8 44 |
| Modbus address | Function code | Bytes of data | Returned data | CRC check code |
The above 00 00 means that DO1 is in level output mode.
Operation holding register
Support operation of single register (06), operation of multiple registers (10) function code operation.
Use 06 function code to write a single holding register, for example: set the working mode of DO1 to pulse mode:
| 01 | 06 | 05 78 | 00 01 | C8 DF |
| Modbus address | Function code | Register address | Write value | CRC check code |
After sending the above command to the device through the 485 bus, the device will return the following values:
| 01 | 06 | 05 78 | 00 01 | C8 DF |
| Modbus address | Function code | Register address | Write value | CRC check code |
If the modification is successful, the data in the 0x0578 register is 0x0001, and the pulse output mode is turned on.
Use function code 10 to write multiple holding register commands, for example: set the working mode of DO1 and DO2 at the same time.
| 01 | 10 | 05 78 | 00 02 | 04 | 00 01 00 01 | 5A 7D |
| Modbus
address |
Function
code |
Register head
address |
Number of
registers |
Number of bytes of
written data |
Written data | CRC check
code |
After sending the above command to the device through the 485 bus, the device will return the following values:
| 01 | 10 | 05 78 | 00 02 | C1 1D |
| Modbus address | Function
code |
Register address | Number of registers | CRC check code |
If the modification is successful, the values of the two consecutive registers starting with 0x0578 are 0x0001 and 0x0001 respectively, marking DO1 and DO2 to enable pulse output.
Configuration Software
Acquisition and Control
Step 1: Connect the device to the configuration software.
- You can configure the device by selecting the interface (serial port/network port); if you choose the network port, you must first select the network card and then search for the device.

- If you choose a serial port, you need to select the corresponding serial port number, and the same baud rate, data bit, stop bit, parity bit and address segment search range as the device, and then search.
 Step 2: Select the corresponding device.
  Step 3: Click the device online to enter the IO monitoring. The following is the IO monitoring screen display.
Parameter configuration interface
Step 1: Connect the device refer to “Acquisition and Control”.
Step 2: You can configure device parameters, network parameters, DI parameters, AI parameters, DO parameters, and AO parameters (for example: if the device has no AO function, the AO parameters cannot be configured)
Step 3: After configuring the parameters, click Download Parameters. After the prompt message in the log output shows that the parameters are saved successfully, click Restart the device. After the device restarts, the modified parameters will take effect. 
Revise history
| Version | Revision date | Revision Notes | Maintenance man |
| 1.0 | 2023-6-6 | Initial version | LT |
| 1.1 | 2024-10-18 | Content revision | LT |
About us
Technical support: support@cdebyte.com
Documents and RF Setting download link: https://www.fr-ebyte.com
Tel:+86-28-61399028
Fax:028-64146160
Web:https://www.fr-ebyte.com
Address: Innovation Center D347, 4# XI-XIN Road, Chengdu, Sichuan, China
Copyright ©2012–2024, Chengdu Ebyte Electronic Technology Co.,Ltd.
Documents / Resources
 |
EBYTE ME31-XXXA0006 Network I/O Networking Module [pdf] User Manual ME31-XXXA0006, ME31-XXXA0006 Network IO Networking Module, ME31-XXXA0006, Network IO Networking Module, Networking Module, Module |