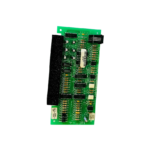
DAUDIN GX-CM111 Serial Communication Module

Specifications
Module Specifications
- Working Voltage: 24 VDC (-15%~+20%)
- Working Current: Max. 130mA @ 5VDC
General Specifications
- Size (W x D x H): 25 x 105 x 69mm (Coupler), 12 x 105 x 69mm (I/O Module)
- Weight: 80g (Coupler), 65g (I/O Module)
- Operating Temperature: RH 95%, non-condensing
- Storage Temperature: < 2000m
- IP Protection Level: IP 20
- Pollution Degree: II
- Safety Certifications: CE
- Wire Gauge Range (IEC / UL): 0.2mm2 ~ 1.5mm2 / AWG 24~16
- Recommended Terminals: DN00510D, DN00710D
Communication Module Specifications
- Number of Channels: 3
- Communication Protocol: Modbus RTU Master / Slave
- Communication Mode: Modbus Master, Slave, Free Port
- Baud Rate Range: 1200 to 115.2 kbps
- Signal Type: RS232, RS485
- Data Bits: 7, 8
- Stop Bits: 1, 2
- Parity Check: None, Odd, Even
- Character Interval: 1.5T~200T, default 3.5T
- Response Timeout: Customizable, default 1000 ms
- Polling Interval: Customizable, default 100 ms
- Data Input Handling Mode: Retain last input value, clear input value
- Data Output Mode: Power-on Output Module Control Mode Output Module Control Output Module Control Mode Slave ID Polling, data change
Product Usage Instructions
Installation Guidelines
- Ensure the device is used indoors only and kept away from high temperatures and humidity.
- Avoid dropping or bumping the device to prevent damage to electrical components.
Electrical Connection
- Connect the module to a power source with a working voltage of 24 VDC.
- Use the recommended wire gauge range and terminals for proper electrical connection.
Communication Setup
- Configure the communication protocol based on your requirements: Modbus RTU Master / Slave.
- Set the baud rate within the range of 1200 to 115.2 kbps according to your communication needs.
Data Handling
- Choose the appropriate data bits, stop bits, and parity check settings for your communication.
- Customize the response timeout and polling interval as needed for efficient data transfer.
Frequently Asked Questions
- Q: Can the module be used outdoors?
- A: No, the module is designed for indoor use only to prevent damage from environmental factors.
- Q: What is the recommended working voltage for the module?
- A: The recommended working voltage is 24 VDC with a tolerance of -15% to +20%.
- Q: How many communication channels does the module support?
- A: The module supports three communication channels for versatile connectivity.
- Q: What safety certifications does the module have?
- A: The module is CE certified for safety compliance.
Introduction
The GX-CM111 Serial Communication Module for Plug-in I/O is compatible with GX Series couplers. With a variety of functional modules, it enables Modbus master-slave, serial communication. Compact and efficient, these modules are designed for straightforward data handling, fitting various serial communication needs across multiple applications.
Product Features
- Multi-Protocol Support
Simplified system configuration, supporting standard industrial communication protocols including PROFINET, EtherCAT, EtherNetIP, and ModbusTCP when used with a coupler. - Two Communication Interfaces
Offers interface options for RS485 and RS232. - Supporting Two Communication Protocols
Modbus RTU/ASCII - Compact Design
Space-saving, compact structure. - Easy Diagnostics
Intuitive and clear channel status display for simplified monitoring and maintenance. - Straightforward Configuration
Quick and easy module configuration. - Convenient Installation
Designed for standard DIN 35 mm rail mounting with quick-connect terminals for fast and easy wiring.
Caution (ATTENTION):
- THIS DEVICE IS FOR INDOOR USE ONLY, DON’T PUT OR USE IT IN HIGH TEMPERATURE AND HIGH HIGHMOISTURE ENVIRONMENTS.
- AVOID FALLING AND BUMPING OTHERWISE THE ELECTRICAL COMPONENTS WILL BE DAMAGED.
- DON’T TRY TO DISASSEMBLE OR OPEN THE COVER UNDER ANY CIRCUMSTANCE IN ORDER TO AVOID DANGER.
- IF THE EQUIPMENT IS USED IN A MANNER NOT SPECIFIED BY THE MANUFACTURER, THE PROTECTION PROVIDED BY THE EQUIPMENT MAY BE IMPAIRED.
- THE INSTALLATION THAT THE SAFETY OF ANY SYSTEM INCORPORATING THE EQUIPMENT IS THE RESPONSIBILITY OF THE ASSEMBLER OF THE SYSTEM.
- USE WITH COPPER CONDUCTORS ONLY. INPUT WIRING: MINIMUM 28 AWG, 85°C, OUTPUT WIRING:MINIMUM 28 AWG, 85°C
- FOR USE IN A CONTROLLED ENVIRONMENT. REFER TO MANUAL FOR ENVIRONMENTAL CONDITIONS.
- DISCONNECT ALL SOURCES OF SUPPLY BEFORE SERVICING.
- PROPER VENTILATION IS REQUIRED TO REDUCE THE RISK OF HAZARDOUS OR EXPLOSIVE GAS BUILDUP DURING INDOOR CHARGING. SEE OWNERS MANUAL.
- PLEASE BE SURE TO USE CERTIFIED POWER SUPPLY WITH SELV OUTPUT OR CERTIFIED POWER SUPPLY PROVIDING DOUBLE INSULATION EVALUATED BY UL60950-1, UL 62368-1, OR UL61010-1 AND UL61010-2-201 STANDARDS.
Module Specifications
- Electrical Specifications
| Electrical Specifications | ||
| Serial Communication Module | Working Voltage | 24 VDC (-15%~+20%) |
| Working Current | Max. 130mA @ 5VDC | |
- General Specifications
| General Specifications | ||
|
Size (W x D x H) |
Coupler | 25 x 105 x 69mm |
| I/O Module | 12 x 105 x 69mm | |
|
Weight |
Coupler | 80g |
| I/O Module | 65g | |
| Operating Temperature | 0 … +60°C | |
| Storage Temperature | -25˚C…+85˚C | |
| Relative Humidity | RH 95%, non-condensing | |
| Altitude Limit | < 2000m | |
| IP Protection Level | IP 20 | |
| Pollution Degree | II | |
| Safety Certifications | CE | |
| Wire Gauge Range (IEC / UL) | 0.2mm2 ~ 1.5mm2 / AWG 24~16 | |
| Recommended Terminals | DN00510D
DN00710D |
|
- Communication Module Specifications
| Serial Communication Specifications | |
| Number of Channels | 3 |
| Communication Protocol | Modbus RTU Master / Slave |
| Communication Mode | Modbus Master, Slave, Free Port |
| Baud Rate Range | 1200 to 115.2 kbps |
| Signal Type | RS232, RS485 |
| Data Bits | 7, 8 |
| Stop Bits | 1, 2 |
| Parity Check | None, Odd, Even |
| Character Interval | 1.5T~200T, default 3.5T |
| Response Timeout | Customizable, default 1000 ms |
| Polling Interval | Customizable, default 100 ms |
| Data Input Handling Mode | Retain last input value, clear input value |
| Data Output Mode | Polling, data change |
| Power-on Output Module
Control Mode |
Enable, disable |
| Output Module Control | Enable, disable |
| Output Module Control Mode | Polling (continuously active), rising-edge trigger (single activation) |
| Slave ID | Customizable, default 1 |
| Slave Response Time | Customizable, default 50 ms |
| Free-Transmission
Communication Mode |
Auto-report, listening mode |
| System Indicators | 1 Green LED(SP), 1 Red LED(AL) |
| Channel Indicators | 3 Green LEDs, 3 Red LEDs |
Module Panel Introduction
- GX-CM111

- Fig. 3.1 GX-RT200
| NO. | Name | Description | |||
| 1 | Signal Terminal | Input/output signal interface, plug-in terminal | |||
| 2 | Channel Status
Indicator |
3 x Green LEDs, 3 x Red LEDs | |||
| 3 | System Bus
Interface |
Interface for communication and power supply | |||
| Status Indicators | |||||
| Name | Label | Color | Status | Description | |
|
Communication Indicator |
1A, 2A TX |
Green |
Flashing | Communication interface transmitting
packets |
|
| Off | No configuration or no packet transmission | ||||
| RA RX |
Red |
On | Module communication error, packet error, or response timeout | ||
| Off | Normal module communication | ||||
Module Installation and Removal Instructions
Installation
- Align each module unit’s side with the direction indicated by the arrow, and snap it onto the upper side of the DIN rail.
- Once each unit is positioned, the clip automatically locks onto the rail.

Figure 4.1 Module Installation Diagram
Note: If the clip fails to engage, press the top of the clip to reset and secure it to the rail.
Removal
Use a screwdriver to pull down the metal hook on the bottom of each module unit. Following the reverse order of installation, remove each module unit from the DIN rail. 
Module Dimensions
- I/O and Functional Module Dimensions

Module Wiring Instructions
- Communication Module
 Parameter Setting and Configuration Instructions
- Product Assembly Configuration
As shown in the image below, product configuration primarily involves couplers and I/O modules.

Quantity Limit for Configuration
- A maximum of 64 physical I/O modules can be configured on the coupler.
- The coupler supports up to 64 modules in total, including both expanded virtual and physical modules.
Virtual Module Limitations
Currently, only GX-CM111 applications are supported. For expanded commands, the virtual module configuration limit is set to 32.
- Coupler Parameter Description

General Settings
- Module Slot: Slot number (position); fixed at 0 for the coupler.
- Device Name: Used for name recognition in Profinet network communication. Follow standard naming conventions for the settings.
- Reset Time: Defaults to 0 if not set, meaning the reset function is disabled.
If the timeout parameter is set to 1000, it means that within 1 second, the module must exchange IO data with the host computer. If no data exchange occurs within this set time, the module will set the output channels to 0. - Hot Swap: Allows replacement of the same model module without powering down.
Network Settings
- IP Address: Can be configured in IPv4 network address format, with a default factory setting of 192.168.1.20.
- Subnet Mask: Configurable; default setting is 255.255.255.0.
- Default Gateway: Configurable; default setting is 19.168.1.20.
- Physical Address: Not configurable; MAC address is factory-set for network identification of different device modules.
Module Information
- Firmware Version: Current module firmware version
- Hardware Version: Module hardware design version
- Product Serial Number: Unique identifier for Daudin products
As shown in Figure 6.2, all parameters (except MAC) can be configured as needed. After completing the settings, proceed to upload the parameters as shown in Figure 6.3. 
Before proceeding with relevant settings, the system operation must be paused.
Factory Defaults
Apart from setting parameters through i-Designer, users can also reset system parameters using the reset button located inside the side casing.
| Press Time/Mode | Application Mode |
| Light Press (<6 seconds) | Module restart (RESET) |
| Long Press (>6 seconds) | Restore default parameters (Application Mode)Note |
Note: When the user presses the reset button for more than six seconds, the SYS light will illuminate red. After releasing the button, the red light will flash, indicating that the default parameters have been restored.

Error Code Lookup
Users can query system error information and identify timed-out physical modules via the error code module (virtual module).Once setup is complete, the error code module will automatically occupy the last three available slots. If no slots are available, the system will disregard it.
| Error Code | Purpose | Length (Word) |
| System Error | System error information | 2 |
| Error Module (01-32) | Physical modules 1-32 triggering timeout | 2 |
| Error Module (33-64) | Physical modules 33-64 triggering timeout | 2 |
System Error: System error log, 32-bit data ordered from HSB to LSB
|
Description |
System Error [4 Byte] | |||||||
| Bit 7 | Bit 6 | Bit 5 | Bit 4 | Bit 3 | Bit 2 | Bit 1 | Bit 0 | |
| System Error [3] | Reserved | |||||||
| System Error [2] | Reserved | Err17 | Err16 | |||||
| System Error [1] | Err15 | Err14 | Err13 | Err12 | Err11 | Err10 | Err9 | Err8 |
| System Error [0] | Err7 | Err6 | Err5 | Err4 | Err3 | Err2 | Err1 | Err0 |
- Err0: Reserved
- Err1: Bit set to 1 (Coupler/IO module): Indicates the first boot, with no relevant data in memory Err2: Bit set to 1 (Coupler/IO module): Indicates memory exceeds the planned size
- Err3: Bit set to 1 (Coupler/IO module): Indicates a Checksum error
- Err4: Bit set to 1 (Coupler/IO module): Indicates boot failure
- Err5: Bit set to 1 (IO module): Indicates that the power is not supplied to the load side of the IO module
- Err6: Bit set to 1 (IO module): Indicates IO module over-voltage/over-current
- Err7: Bit set to 1 (IO module): Indicates ADC read error in the analog module
- Err8: Bit set to 1 (Coupler/IO module): Indicates memory write/erase operation failed
- Err9: Bit set to 1 (Coupler): Indicates no saved station record in memory
- Err10: Bit set to 1 (Coupler): Indicates the memory station record differs from the boot scan Err11: Bit set to 1 (Coupler): Indicates no module station number was detected in the boot scan Err12: Bit set to 1 (Coupler): Indicates communication timeout in Polling Mode for IO modules
- Err13: Bit set to 1 (Coupler): Indicates station failure
- Err14: Bit set to 1 (Coupler/IO module): Indicates data length in operating mode exceeds the set value
- Err15: Bit set to 1 (Coupler): Indicates hot-swap function recovery failure
- Err16: Bit set to 1 (Coupler): Indicates network initialization failure
- Err17: Bit set to 1 (Coupler): Indicates register address exceeds the control range
Error Module (01-32) : Records IO module timeout information, 32-bit data ordered from HSB to LSB
|
Description |
Error Module (01-32) [4 Byte] | |||||||
| Bit 7 | Bit 6 | Bit 5 | Bit 4 | Bit 3 | Bit 2 | Bit 1 | Bit 0 | |
| Module Error [3] | Slot32 | Slot31 | Slot30 | Slot29 | Slot28 | Slot27 | Slot26 | Slot25 |
| Module Error [2] | Slot24 | Slot23 | Slot22 | Slot21 | Slot20 | Slot19 | Slot18 | Slot17 |
| Module Error [1] | Slot16 | Slot15 | Slot14 | Slot13 | Slot12 | Slot11 | Slot10 | Slot9 |
| Module Error [0] | Slot8 | Slot7 | Slot6 | Slot5 | Slot4 | Slot3 | Slot2 | Slot1 |
- Slot1: IO module ID 1; Bit set to 1 indicates polling timeout for this module
- Slot2: IO module ID 2; Bit set to 1 indicates polling timeout for this module
- Slot3: IO module ID 3; Bit set to 1 indicates polling timeout for this module :(and so on) :
- Slot32: IO module ID 32; Bit set to 1 indicates polling timeout for this module
Error Module (33-64) : Records IO module timeout information, 32-bit data ordered from HSB to LS
|
Description |
Error Module (33-64) [4 Byte] | |||||||
| Bit 7 | Bit 6 | Bit 5 | Bit 4 | Bit 3 | Bit 2 | Bit 1 | Bit 0 | |
| Module Error [3] | Slot64 | Slot63 | Slot62 | Slot61 | Slot60 | Slot59 | Slot58 | Slot57 |
| Module Error [2] | Slot56 | Slot55 | Slot54 | Slot53 | Slot52 | Slot51 | Slot50 | Slot49 |
| Module Error [1] | Slot48 | Slot47 | Slot46 | Slot45 | Slot44 | Slot43 | Slot42 | Slot41 |
| Module Error [0] | Slot40 | Slot39 | Slot38 | Slot37 | Slot36 | Slot35 | Slot34 | Slot33 |
- Slot33: IO module ID 33; Bit set to 1 indicates polling timeout for this module
- Slot34: IO module ID 34; Bit set to 1 indicates polling timeout for this module
- Slot35: IO module ID 35; Bit set to 1 indicates polling timeout for this module : (and so on) :
- Slot64: IO module ID 64; Bit set to 1 indicates polling timeout for this module
Serial Communication Parameters
Valid Mode Parameters
| Serial Port
Modes |
Master |
Slave |
Free Port |
Description |
| Function Parameters | ||||
| Communication Port | Port 1~3 | RS485(Port 1,2),
RS232(Port 3) |
||
| Serial Mode | ● | ● | ● | Modbus RTU/ASCII Note 1 |
| Transmission Format |
● |
● |
● |
Data bits: 7, 8
Parity bit: None, Odd, Even Stop bits: 1, 2 |
| Baud Rate | ● | ● | ● | 1200 ~115200 |
| Character
Interval |
● | ● | ● | 1.5t~200t |
| Data Input Processing Mode | ● | Retain last input value, clear input value | ||
| Data Output Mode | ● | Polling, data change | ||
| Command Delay Time | ● | ● | Custom, default 100ms | |
| Output Module Reset Time | ● | Custom, default 0ms (disabled) | ||
| Output Module
Control |
● | Enabled/Disabled | ||
| Output Module Control Mode |
● |
Polling (continually active),
rising edge trigger (single activation) |
||
| Power-on Output
Module Control Mode |
● |
Enabled/Disabled |
||
| Command Reply Timeout | ● | ● | Custom, default 1000ms | |
| Slave ID | ● | Custom, default 1 | ||
| Response Delay Time | ● | Custom, default 50ms | ||
| Communication Return Mode | ● | Automatic reporting, acknowledge mode | ||
- Note 1: ASCII Mode is currently not supported by the firmware version.
Function Parameter Description
- (M/S/F) Operating Modes:
- Modbus Master: Used with virtual modules starting with SubM or SubMS_
- Modbus Slave: Used with virtual modules starting with SubS_ or SubMS
- Free Port Mode: Used with virtual modules starting with SubF_
- (M/S/F) Communication Ports:
- Port 1: RS485 (labeled 1A.1B on the casing)
- Port 2: RS485 (labeled 2A.2B on the casing)
- Port 3: RS232 (labeled TX.RX on the casing)
- (M/S/F) Serial Mode: Modbus Protocol Mode
- RTU
- ASCII
- (M/S/F) Transmission Format:Supports eight modes based on data bits, parity bits, and stop bits.
- (N, 8, 1)
- (N, 8, 2)
- (E, 8, 1)
- (O, 8, 1)
- (E, 7, 1)
- (E, 7, 2)
- (O, 7, 1)
- (O, 7, 2)
- (M/S/F) Baud Rate:Standard baud rate, default 9600bps.
- 1200 bps
- 2400 bps
- 4800 bps
- 9600 bps
- 14400 bps
- 19200 bps
- 38400 bps
- 57600 bps
- 115200 bps
- (M/S/F) Character Interval:
Time interval for receiving packet data; T represents the time for a single character transmission, related to the baud rate, default is 3.5T.- 1.5T
- 3.5T
- 5T
- 10T
- 10T
- 20T
- 50T
- 100T
- 200T
- (M) Data Input Processing Mode:
Defines how input data is handled during a timeout while reading from devices. The default is to retain the last input value.- Retain last input value
- Reset input value to zero
- (8) (M) Data Output Mode:
In Master mode, this defines how the virtual output module sends commands.- Polling Mode: Sends packets periodically
- Data Change: Sends write commands only when output data changes
- (9) (M/F) Command Delay Time (ms):
Interval between Modbus command transmissions (from receiving a response packet from a device to sending the next command). Range: 1-65535 ms, default is 100ms. - (10) (M) Output Module Reset Time (ms):
If the CM111 module does not update data after the set time in communication with the coupler system, the output module control data will be set to 0.A setting of 0ms disables the reset function.- 0: Function disabled
- Available range: 1-65535
- (M) Output Module Control:
When it is necessary to control Modbus module commands, the content of SubM_Control_Output_xxDev should be used as a control value to determine whether the corresponding module sends commands for read/write control.- Off
- On
- (M) Output Module Control Mode:
The method used to control the output module. This control value is only valid when the output module control function is enabled.- Polling (continually active)
- Rising edge trigger (single activation)
- (M) Power-On Output Module Control Mode:
Sets the timing for when the output module sends commands.- On: The CM111 module will send output module commands immediately after power stabilization.
- Off: The CM111 waits to send output module commands until communication control with the coupler is established.
- (M/F) Command Reply Timeout (ms):
The time the master station waits for a response after sending a command to a slave device.Valid range: 1–65535 ms, default is 1000 ms. - (S) Slave ID:
When switching to Slave mode, this ID is the slave ID. The valid range is 1–247. - (S) Response Reply Time :
When switching to Slave mode, the time it takes for the module to respond after receiving a command. Valid range: 0–65535 ms, default is 50 ms. - (F) Communication Return Mode :
The module’s sending/receiving mode when switching to FreePort Mode.- Autonomous Reporting: Displays received data in the configured virtual input module.
- Acknowledge Mode: Requires control of virtual output module commands (requests) via SubF_Control_Status to display received data in the configured virtual input module (response).
Virtual Module Settings and Descriptions
- Master Mode
- Diagnostic Module
- Module Status Input (SubMS_Status_xxDev): Available in four lengths: 08, 16, 24, and 32 Dev, each occupying 1, 2, 3, or 4 bytes of input space. Each bit corresponds to the index of a virtual module, with “0” indicating no error and “1” indicating an error in that module.
- Module Error Code Input (SubMS_ErrorInfo_xxDev): Available in four lengths: 08, 16, 24, and 32 Dev, each occupying 8, 16, 24, or 32 words of input space. Each word contains an error message associated with a specific virtual module index, composed of the module’s function code and error code. Users can identify error causes based on these codes to determine corrective actions.
| Master Error Codes | ||
| Error
Code |
Description | Solution |
| 0x00 | Operating
normally |
None |
| 0xAA | Slave device timeout | Verify module serial port settings and connections to the slave device |
| 0xXX | Slave device
error code |
Address issues based on the error codes from
the slave device |
- Module Output Control (SubM_Control_Output_xxDev): Available in four lengths: 08, 16, 24, and 32 Dev, occupying 1, 2, 3, or 4 bytes of input space. Each bit acts as a control switch for a virtual module index. This setting takes effect only when the output module control function is enabled. In Polling Mode, when the control bit is set to 0, command transmission is disabled; when set to 1, command transmission is enabled. In rising-edge trigger mode, only the transition from 0 to 1 triggers command transmission.
- Polling Time Input (SubM_Polling_Time): Occupies 3 words, representing polling times for Port1, Port2, and Port3.
Read Coil Module (SubS_Write_xxxBytes_01): Data length: 8 to 128 bytes

Read Discrete Coil Module (SubS_Write_xxxBytes_02): Data length: 8 to 128 bytes

Read Input Register Module (SubS_Write_xxxWords_04): Data length: 8 to 128 bytes

Read Holding Register Module (SubS_Write_xxxWords_03): Data length: 8 to 128 bytes

Write Coil Module (SubS_Read_xxxBytes_0F): Data length: 8 to 128 bytes

Supports Single Coil Writing (SubM_Write_xxxBits_05)
 Write Holding Register Module (SubM_Write_xxxWords_10): Data length: 1 to 16 words

Supports single register writing (SubM_Write_xxxWords_06)

- Slave Mode
- Diagnostic Module
- Module Status Input (SubMS_Status_xxDev): Available in four lengths: 08, 16, 24, and 32 Dev, each occupying 1, 2, 3, or 4 bytes of input space. Each bit corresponds to the index of a virtual module, with “0” indicating no error and “1” indicating an error in that module.
- Module Error Code Input (SubMS_ErrorInfo_xxDev): Available in four lengths: 08, 16, 24, and 32 Dev, each occupying 8, 16, 24, or 32 words of input space. Each word contains an error message associated with a specific virtual module index, composed of the module’s function code and error code. Users can identify error causes based on these codes to determine corrective actions.
| Slave Error Codes | ||
| Error
Code |
Description | Solution |
| 0x00 | Operating normally | None |
|
0x01 |
Invalid function code | Module does not support the current function code; refer to the relevant function code
module. |
| 0x02 | Invalid data address | Data exceeds module address range; modify the data starting position or length. |
| 0x03 | Invalid data length | Incorrect data length; adjust to the correct length. |
|
0x04 |
Incorrect or invalid virtual
module configuration |
Refer to the settings for the corresponding virtual module. |
Read Coil Module (SubS_Write_xxxBytes_01): Data length: 1 to 128 bytes

Read Discrete Coil Module (SubS_Write_xxxBytes_02): Data length: 1 to 128 bytes

Read Input Register Module (SubS_Write_xxxWords_04): Data length: 1 to 64words

Read Holding Register Module (SubS_Write_xxxWords_03): Data length: 1 to 64 words

Write Coil Module (SubS_Read_xxxBytes_0F): Data length: 1 to 128 bytes

Write Holding Register Module (SubS_Read_xxxWords_10): Data length: 1 to 64

- Free Mode
- Status Control Module (SubF_Control_Status):
| Control and Status Module Data Definition | ||||
| Data Direction | Data Name | Data Variable
Name |
Data Type | Byte Offset |
|
Input Data |
Send Control Feedback | TransControl | uint16_t | 0 |
| Send Status
Feedback |
TransStatus | uint16_t | 2 | |
| Send Length
Feedback |
TransLenth | uint16_t | 4 | |
| Receive Count Value | ReceiveCount | uint16_t | 6 | |
| Receive Length | ReceiveLenth | uint16_t | 8 | |
| Error Count Value | ErrCount | uint16_t | 10 | |
|
Output Data |
Output Control | SendControl | uint16_t | 0 |
| Send Length | SendLenth | uint16_t | 2 | |
Input Data Module (SubF_Read_xxxWords): Data length: 1 to 64 words

Output Data Module (SubF_Write_xxxWords): Data length: 1 to 64 words

Diagnostic Module


Appendix I: i-Designer Instructions
Installation
Download the i-Designer program from the official website, then click on the program (as shown in the figure) to install it.

After reading the user agreement, please check the box and click Start Installation.

During installation, the progress will be displayed.

Once the software installation is complete, you can choose to run it immediately by clicking the Finish button.

UI Screen Description
After installation, locate the program icon on the desktop and click it to open the settings screen (see the figure below).

The screen is organized as follows, from top to bottom:
- Tab Area: Select different product series or switch languages.
- Function Key Area: Displays different function keys based on the selected tab.
- Display and Configuration Area: Shows the module status and settings.
- Progress Display Area: Displays the progress of various functions in percentages, helping users understand the current execution status, such as configuration or updates.

Tab Area:
- Homepage Tab: Provides information about i-Designer and options for switching the language.
- Product Settings Tab: Used for setting parameters for various
 product series.

Function Key Area:
The function keys displayed here vary based on the selected tab and product. The relevant descriptions are as follows:


i-Designer Information Verification
Click on the homepage -> About i-Designer

Language Settings
i-Designer currently supports three languages: Traditional Chinese, Simplified Chinese, and English. Use this feature to change the language.

COM Port Connection Settings
i-Designer communicates with thecoupler module primarily through the COM Port interface. Connection modes include automatic module search mode and manual COM Port connection mode.
Before setting up a custom connection with the, please confirm the COM Port number assigned to the coupler module to proceed with configuration.


Connection Setting Instructions
Once the connection is successful, the current connection mode will be displayed in the window, and the firmware version of all modules will be detected. If the system is running, a pop-up window will ask whether to stop the system to perform firmware version detection for all modules.


Only after the system is stopped can the module functions be configured.

When connecting to X series modules, if the listed modules do not match the actual modules, you can search for modules through the Auto Station Assignment function.

After configuring the module functions, you must click “Upload Parameters” to save the settings correctly.

You can view the IO point status through the online debugging feature.
Note: You must disconnect from the external master station before proceeding.

The system will detect whether the current module version is the latest and prompt for updates.

The GX-CL140 will display the Modbus register positions for the configured IO modules.

Documents / Resources
 |
DAUDIN GX-CM111 Serial Communication Module [pdf] User Manual GX-CM111 Serial Communication Module, GX-CM111 Serial, Communication, Module |