![]() Unity
Unity
User manual
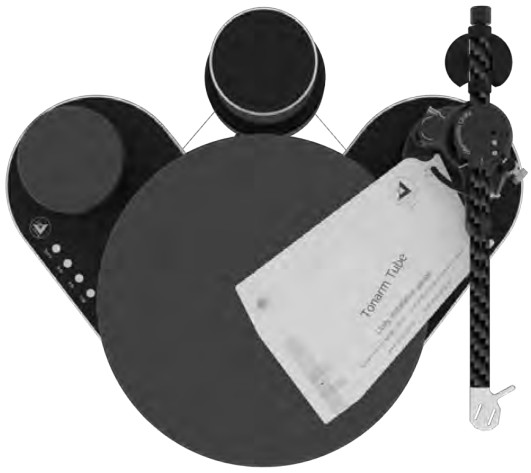
Unity Tonearm
 Pic. similar
Dear Clearaudio customer,
Thank you for choosing a high-quality product from Clearaudio electronic GmbH.
The new Clearaudio tonearm combines the proven single-point bearing with a newly developed magnet stabilization design. Thanks to this enhancement of the single-point bearing design, new performance standards are set for vinyl playback.
All tonearm adjustments are now possible at the micron level, ensuring the most accurate alignment and perfect tracking for high-end cartridge systems. The continuous height adjustment allows for convenient setup even during playback.
This state-of-the-art tonearm is available in black and silver, with a 10 inch Monocouque carbon tonearm tube, making it the perfect complement for all Clearaudio products as well as many products from other manufacturers.
Please take a moment to read this product manual to ensure correct set-up and to avoid any possible damage.
Clearaudio wishes you much enjoyment with your new Unity tonearm.
You’re Clearaudio team
Safety instructions
- General information
Check the tonearm for any damage before using it. Do not connect the tonearm if damaged!
Never connect the tonearm if it has been dropped or gotten wet, contact your dealer to have the tonearm checked.
Never expose the tonearm to rain or moisture.
The inside of the tonearm is maintenance free. Never open the case or attempt to repair the unit yourself, since this can lead to loss of warranty!
Before using the tonearm for the first time or after a long period of inactivity the lift must be operated approx. 4-5 times to loosen the grease in the tonearm lift to lower the lift bar evenly again.
Not suitable for children! Scope of delivery may contain small parts that can be swallowed. - Intended use
The Unity is a tonearm for playing music and is intended exclusively for use on turntables.
Only use the Unity tonearm in accordance with the information provided in the user manual. - Location of installation
Avoid locations with direct sunlight, temperature fluctuations and high humidity. Likewise, avoid placing electronic devices near heaters, heat lamps, or other devices that produce heat.
The device is designed for operation at room temperature.
No objects with an open flame may be placed on or near the device (burning candles or similar). - Maintenance
We recommend moving the tonearm lift at regular intervals to keep the bearing grease supple and to prevent the tonearm from getting stuck during playback if you do not use your Clearaudio tonearm for a longer period.
Never use aggressive cleaning agents.
Do not use dry cloths for cleaning as this generates static electricity. Suitable cleaning and care products from Clearaudio are available at www.analogshop.de or from specialist retailers.
Only use a soft cloth with a smooth surface or a soft brush for cleaning. - Health information
Permanently high volume can lead to various types of hearing damage. Use high volume responsibly! - Service
The Unity tonearm should be repaired during the guarantee period by the manufacturer only, otherwise the warranty claim expires. All Clearaudio products should only be serviced by specialist retailer.
If, despite the high production standard, a service is necessary, the Unity tonearm must be send to Clearaudio through your dealer. - Transport
Use the original packing material for further transportation of the Unity tonearm, otherwise serious damage could occur.
Be sure to pack the device exactly as it was shipped.
Safe transport is only guaranteed in the original packaging.
Proceed in reverse as described for assembly when packing. - Disposal
 Do not dispose this product together with other waste. WEEE Reg. No.: DE26004446
 - CE Marking
 This electronic product corresponds to the applicable guidelines for obtaining the CE mark.
List of components
The Clearaudio Unity tonearm is delivered in a customized packing to ensure its safe transport.
Please retain the original packaging for any future transportation and shipping.
Please see the list below to check the contents of your Clearaudio Unity tonearm.
 Pic. 1: List of components (Pic. similar)
| 1 | Unity tonearm | 5 | Clamping base (incl. pre-mounted screw M6 x 8) |
| 2 | Hex wrench (#1.5 ; 2; 3) | 6 | Unity alignment gauge |
| 3 | Counterweight pairs for Unity: – 28g (14g each) – 36g (18g each) – 64g (32g each) |
7 | Pivot support |
| 4 | Screws for clamping ring 3 pcs M4 x 10 1 pcs threaded pin M6 x 8 |
8 | Without picture: Warranty Card, Clearaudio Quality Card, user manual, return delivery note |
Recommended tools:
- Clearaudio Cartridge alignment gauge (Art. No. AC005/IEC)
- Clearaudio Weight Watcher touch (Art. No. AC163)
- Clearaudio Trackability Test Record (Art. No. LPT 83063)
These items and more accessories are available through your dealer or at www.analogshop.de.
Mounting the tonearm base
2.1 Mounting the tonearm base on the Clearaudio Performance DC or Ovation turntable
If you did not order your turntable together with the Unity tonearm, it is usually necessary to replace the tonearm base, as usually a tonearm base for 9 inch tonearms is pre-assembled.
Place the turntable on the edge of a table or similar surface to gain access to the tonearm base from below. Remove the tonearm base by loosening the six M4 x 35mm screws with a hex wrench on the bottom side of the clamping ring.
When assembling the Unity tonearm base, please note to not fully tighten the screws yet, as the base must be able to rotate freely for final fine adjustment. In addition, the side hole with threaded pin (M6x8) in the tonearm base must remain accessible (Pic. 3).
Make sure the fit is precise and the mounting surfaces are flat.

Pic. 2: Roundbase for Performance DC / Ovation / Reference Jubilee and Master Jubilee turntable (Art. No. AC031-9)
 Pic. 3: Rough alignment of the tonearm base
2.1 Mounting the tonearm base on the Clearaudio Reference Jubilee or Master Jubilee turntable
If you did not order your turntable together with the Unity tonearm, it is usually necessary to replace the tonearm base, as usually a tonearm base for 9 inch tonearms is pre-assembled.
Remove the previous tonearm base by using the hex wrench (#1.5) to loosen one of the three M3x4 grub screws on the tonearm base (Pic. 5).
When assembling the Unity tonearm base, please note to not fully tighten the screws yet, as the base must be able to rotate freely for final fine adjustment. In addition, the side hole with threaded pin (M6x8) in the tonearm base must remain accessible (Pic. 5).
Make sure the fit is precise and the mounting surfaces are flat.

Pic. 4: Roundbase for Performance DC / Ovation / Reference Jubilee and Master Jubilee turntable (Art. No. AC031-9)

Pic. 5: Rough alignment of the tonearm base
2.3 Mounting the tonearm base on a Clearaudio Innovation series turntable
If you did not order your turntable together with the Unity tonearm, it is usually necessary to replace the tonearm base, as usually a tonearm base for 9 inch tonearms is pre-assembled.

Pic. 6: Tonearm base for Innovation Serie (Art. No. AC030-4)
If another tonearm base as shown in Picture 6 is installed, remove it by loosening the M4x10 screw by using an hex wrench (#3) and using the hex wrench (#7) to remove the M10x20 screw together with the tonearm base.
Mount the tonearm base Art. No. AC030-4 by first loosely tightening the M10x20 screw so that the tonearm base remains freely rotatable for the final adjustments.
If the correct tonearm base is already mounted, just loosen the M10x20 and M4x10 screws slightly so that the tonearm base can be rotated freely for the fine adjustments.
Please remove the previous clamping ring.
The clamping of the Unity tonearm will be installed later.

Pic. 7: Rough alignment of the tonearm base
2.4 Mounting the clamping ring on another manufacturers’ turntables
Drill three holes into the turntable chassis to mount the aluminium clamping ring.
Use the measurements given in the drawing template below to ensure the correct position of the three holes (Pic. 8).
Use a 3.3mm drill for this step. After you have drilled the three holes, thread the holes using an appropriate tap cutter. If the material of the turntable chassis is not suitable for threading, please use a 4.5mm drill for the holes. In this case, you will need longer screws with nuts to fit the tonearm base.
Please note that this image is not true to scale.

Pic. 8: Drilling template for mounting the clamping ring on a other manufacturers‘ turntable
Mounting the Unity tonearm
Due to the specially packaging, the screw for VTA adjustment is completely screwed in for delivery.
To install the Unity tonearm, it must be in the “0” position.
To do this, loose the locking screw on the tonearm foot (Pic. 9).
 Pic. 9: Locking screw VTA adjustment
By turning the VTA screw counterclockwise, the tonearm lowers and the scale on the VTA unit becomes negative.
Turning clockwise raises the tonearm; the scale of VTA unit becomes positive.
Now set this to “0” for the next assembly steps.

Pic. 10: Scale of the VTA unit
3.1 Mounting on a Performance DC / Ovation / Reference Jubilee / Master Jubilee turntable
First insert the tonearm cable and then the tonearm foot of the Unity tonearm into the hole in the tonearm base.
Please note:
If you have ordered your Unity tonearm in a DIN version, the included tonearm cable (DIN to RCA) must first be connected to the tonearm.
Please now carefully guide the tonearm foot through the screwed-on base and the clamping ring.
3.2 Mounting on an Innovation series turntable
Take the clamping ring out of the packaging and place it on the recess in the tonearm base.
Now you can attach the clamping ring to the tonearm base using the 3 M4x10 screws provided.
Make sure that the side hole with the set screw (M6x8) remains accessible (Pic. 12).
 Pic. 11: Mounting the clamping ring
 Pic. 12: Alignment of the clamping ring
After that you can first guide the tonearm cable and then the tonearm foot of the Unity tonearm into the hole of the tonearm base.
Please note:
If you have ordered your Unity tonearm in a DIN version, the included tonearm cable (DIN to RCA) must first be connected to the tonearm.
Make sure that the cable is not damaged or kinked.
Adjustment of the Unity tonearm
4.1 Setting the distance from spindle to tonearm pivot point and from spindle to rest position holder
 Pic. 13: Positioning the alignment gauge
To make the next adjustment, the tonearm or tonearm base must be rotated as far away from the platter spindle as possible.
Now place the included alignment gauge directly on the turntable and align it so, that the “VTA tower” marking points are in the direction of the Unity tonearm (Pic. 13.).
Now turn the tonearm or base towards the adjustment template until the VTA tower and the resting position of the Unity tonearm touch the adjustment template. Now screw the tonearm base tight.
 Pic. 14: Alignment of the tonearm base and tonearm
To precisely adjust the pivot point of the tonearm, we recommend the Clearaudio cartridge alignment gauge (Art. No. AC005/IEC, also available at www.analogshop.de)!
Make sure that the distance between the spindle and the pivot point of the tonearm must be exactly 238mm (see Pic. 10). You can adjust the distance by rotating the tonearm base.
Please screw the tonearm base back on and check the dimensions again.
To accurately check the distance from the spindle to the rest position holder, use a ruler.
The correct distance is 214mm. You can adjust this distance by turning the tonearm.
Now hand-tightened this position, using the set screw on the side of the tonearm base.
4.2 Tonearm height adjustment
The following settings require to mount the cartridge on the headshell.
Always follow the cartridge manufacturer’s instructions.
Leave the stylus protector on your cartridge to avoid any damages!
Now you can connect the respective signal cable with the matching color pins of the cartridge.
Please note the following colour coding:
| Red: | right channel / R+ |
| Green: | right channel / Rleft |
| White: | channel / L+ |
| Blue: | left channel / L- |
Connect the pins of your cartridge to the jacks of the headshell or tonearm cable, taking care not to use too much force.
Use suitable precision pliers or tweezers for assistance if necessary.
In addition, the counterweight must be roughly preset; for this purpose, a pair of counterweights included in the scope of delivery must be installed.
LOW = 2x 14g = 28g
MID = 2x 18g = 36g
HIGH = 2x 32g = 64g
The choice of counterweight pair depends on the weight of your cartridge.
For the next steps, we recommend installing the middle counterweight with a total of 36g at the beginning. If the counterweight does not keep the tonearm level, change the weight to the lighter/ heavier counterweight pair.
The counterweights are attached at the end of the tonearm tube using a magnetic mount.
 Pic. 15: Mounting the counterweights
Make sure the tonearm VTA setting is set to “0”.
Loosen the tonearm using the set screw on the side of the tonearm base.
Now place a record, the included alignment gauge or the Clearaudio cartridge alignment gauge
(Art. No. AC005/IEC, also available at www.analogshop.de) on the turntable and remove the needle guard of your cartridge.
Remove the tonearm anti-skating screw by unscrewing it (Pic. 16). This will be reinserted at a later date.
 Pic. 16: Anti-skating screw
Please exercise extreme caution during the following steps!
Never move the cartridge in the adjustment template while it is lowered.
Lower the tonearm using the lift and check that the tonearm tube is parallel to the record. To do this, you can use the alignment gauge provided and place it on the record behind the tonearm and use it to read the parallelism (Pic. 17).
The tonearm tube should not touch the lift bar, but the needle must rest on the record or IEC template.
If the tonearm tube is not parallel but shows a slight inclination, put the tonearm tube back into its rest position.
Now carefully raise/lower the entire tonearm in the base and check the parallelism again. In this position, the tonearm is now fixed hand-tight in the base.
After fixing, you can check the setting again and correct it if necessary.
If this is unchanged, you can put the tonearm back in the rest position holder and put the needle guard back on.
The tonearm can now be screwed into the tonearm base, using the set screw on the side.
 Pic 17: Parallelism of the tonearm tube
4.3 Correct alignment and adjustment of the cartridge
For the final adjustment of the tonearm and cartridge, you will need the alignment gauge that is also included in the scope of delivery. Place this directly on the turntable and align it so that the arrow points to the tonearm pivot point (Pic. 18).
 Pic. 18: Placement of the alignment gauge
Remove the tonearm from the rest position and align it in the area of the crosshairs. Lower the tonearm and check the alignment.
The cartridge body must be aligned in the grid of the template so that the needle tip is in the crosshairs and the side and front edges of the housing are parallel to the grid lines.
 Pic. 19: Correct alignment of the cartridge
To correct this, you have to loosen the screws on the cartridge a little, so that the cartridge can move in the headshell.
Check the setting again after you have fixed the screws!
4.4 Fine adjustment of the tracking force
As described under point 4.2, the choice of the counterweight pair depends on the cartridge‘s own weight.
The Unity tonearm comes with 3 pairs of counterweights, which can be easily attached and replaced, using a magnetic holder.
 Pic. 20: Mounting the counterweights
LOW = 2x 14g = 28g
MID = 2x 18g = 36g
HIGH = 2x 32g = 64g
Set the correct tracking force of your cartridge according to the manufacturer‘s instructions.
To check the correct tracking force, we recommend the digital pickup scale “Weight Watcher touch” from
Clearaudio (Art. No.: AC163; also available at www.analogshop.de).
Increase or decrease the cartridge weight by turning the adjustment wheel at the end of the tonearm.
![]() Pic. 21: Adjustment of the tracking force
Pic. 21: Adjustment of the tracking force
Green arrow = higher tracking force
Red arrow = weaker tracking force
If you cannot achieve the desired tracking force with the middle pair of counterweights, switch to the lighter/heavier pair.
4.5 Adjustment of the azimuth
The azimuth is the angle of the cartridge stylus to the record surface.
Viewed from the front, the cartridge needle have to be vertical to the record.
Please note:
The azimuth is already set at the factory.
If you still want to optimize the azimuth, proceed as follows:
 Pic 22: Adjustment of the azimuth
Please note:
Since it is a unit, the two screws (Pic. 22) should never be loosened individually!
When working, always hold the bearing block for safety. Using an hex wrench (#2.5), loosen the screws alternately with a minimum turn (max. 1/4 turn) until the tonearm can be turned easily.
After you have found the correct position, carefully tighten the two allen screws again, without changing the previously selected position.
Also proceed alternately and evenly with a minimum turn – max. 1/4 turn until the screws cannot be tightened any further.
4.6 Anti-skating adjustment
 Pic. 23: Anti-skating screw
In order to be able to make the next adjustment, the previously removed anti-skating screw is reinserted.
You can adjust the anti-skating setting by adjusting the antiskating screw.
This is determined depending on the tracking force of the cartridge.
Please note:
When the screw is removed, this corresponds to a “0” position of the anti-skating. This is increased by screwing in the screw.
4.6 Setting the VTA
 Pic. 24: Locking screw VTA adjustment
To adjust the height of the tonearm, first loosen the fixing unit on the tonearm base.
 Pic. 25: Adjustment of the VTA
Turning the VTA screw counterclockwise lowers the tonearm; the scale on the VTA becomes negative.
Turning the VTA screw clockwise raises the tonearm; the scale on the VTA becomes positive.
You can even adjust the height of your tonearm while playing!
After adjusting the height, tighten the locking screw on the tonearm base again.
The tonearm adjustment is now complete.
We recommend to re-check all settings again and correct them if necessary before connecting the tonearm to your phono pre-amplifier.
We wish you a lot of fun with your new Unity tonearm.
Your Clearaudio team
Troubleshooting
If you have a problem with your Unity tonearm, check the possible causes to rule out incorrect operation.
Please contact your dealer if the error persists!
Never try to open the unit and/or repair it yourself, this will void the warranty!
| Error | Cause | Measure |
| Needle bounces or slides across record | Is the record or the stylus dirty or damaged? | Clean the record / or the cartridge. Clearaudio offers many helpful accessories for care and cleaning. In the event of damage, we recommend an assessment by a specialist and, if necessary, an exchange. |
| Has the tracking force been set too high? | Adjust the tracking force. Use only a suitable gauge! For example Clearaudio „Weight Watcher touch” or „Smart Stylus Gauge”. |
|
| Is the record deformed or scratched? | Use a record clamp or replace the record. | |
| Is the turntable leveled? | Check the alignment of the turntable and adjust if necessary. | |
| Tonearm lift does not lower or lowers very slowly |
The tonearm has not been used for a long time, which means that the greas in the tonearm lift can harden and lower with difficulty. | Operate the lift about 4-5 times to loosen the grease in the tonearm lift and the lift bar will lower evenly again. |
Technical data
| Construction details: | Radial tonearm With magnetically stabilized single-point sapphire bearing. Available in 10 inches. |
| Material: | Aluminium (black/silver), stainless steel, carbon tonearm tube (black/silver) |
| Cartridge balance range: | 5.0 – 17.0g |
| Effective mass: | 16g |
| Overhang: | 16.22mm |
| Total length: | 370mm |
| Effective length: | 254mm |
| Mounting distance (tonearm pivot to spindle): | 238mm |
| Offset angle: | 21.59° |
| Wiring: | 1.1m Clearaudio Super Sixtream terminated with RCA Alternativ with DIN connector |
| Weight: | 790g |
| Manufacturer’s warranty: | 2 years* |
* Provided that the warranty card is correctly completed and returned to Clearaudio, or your product is registered online at https://clearaudio.de/en/service/registration.php, within 14 days of purchase.
The full, extended warranty period for the Unity tonearm is 2 years. To receive this full Clearaudio warranty, you must either complete and return the relevant section of the warranty registration card to Clearaudio, or register your product online at https://clearaudio.de/en/service/registration.php, within 14 days of purchase.
Otherwise only the legal warranty can be considered.
The full 2 year warranty can only be honoured if the product is returned in its original packing.
WARRANTY
For warranty information, contact your local Clearaudio distributor.
RETAIN YOUR PURCHASE RECEIPT
Your purchase receipt is your permanent record of a valuable purchase. It should be kept in a safe place to be referred to as necessary for insurance purposes or when corresponding with Clearaudio.
IMPORTANT
When seeking warranty service, it is the responsibility of the consumer to establish proof and date of purchase. Your purchase receipt or invoice is adequate for such proof.
FOR U.K. ONLY
This undertaking is in addition to a consumer‘s statutory rights and does not affect those rights in any way.
clearaudio electronic GmbH
Spardorfer Straße 150
91054 Erlangen
Germany
Phone /Tel.: +49 9131 40300 100
Fax: +49 9131 40300 119
www.clearaudio.de
www.analogshop.de
info@clearaudio.de

Handmade in Germany
Clearaudio Electronic accepts no liability for any misprints.
Technical specifications are subject to change or improvement without prior notice.
Product availability is as long as astock lasts.
Copies and reprints of this document, including extracts, require written consent from Clearaudio Electronic GmbH, Germany.
© clearaudio electronic GmbH, 2024-10
Made in Germany
Documents / Resources
 |
clearaudio Unity Tonearm [pdf] User Manual Unity Tonearm, Unity, Tonearm |