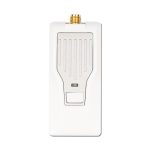
BETAFPV 868MHz Micro TX V2 Module

Product Specifications
- Frequency: 915MHz & 868MHz Version
- Packet Rate: 25Hz/50Hz/100Hz/100Hz Full/200Hz/D50
- RF Output Power: 10mW/25mW/50mW/100mW/250mW/500mW/1000mW/2000mW
- RF Output Power: 10V, 1A @ 2000mW, 200Hz, 1:128
- Antenna Port: SMA-KEchg
- Input Voltage: 7V~13V
- USB Port: Type-C
- XT30 Power Supply Range: 7-25V (2-6S)
- Built-in Fan Voltage: 5V
Product Usage Instructions
Assembly and Powering On
- Before powering on, ensure to assemble the antenna to prevent damage to the PA chip permanently.
- Avoid using a 6S or above battery to power up the TX module to prevent permanent damage to the power supply chip.
Indicator Status
The receiver indicator status is as follows:
| Indicator Color | Status |
|---|---|
| Rainbow | Fade Effect |
| Green | Slow Flash |
| Blue | Slow Flash |
| Red | Fast Flash |
| Orange | Slow Flash |
FAQ
What is Lua Script and how is it used?
Lua is a lightweight and compact script language that can be embedded in radio transmitters. It can be used to read and modify the parameter set of the TX module. To use Lua:
- Download elrsV3.lua on the BETAFPV official website or ExpressLRS configurator.
- Save the elrsV3.lua files onto the radio transmitter’s SD Card in the Scripts/Tools folder.
- Access the Tools interface on the EdgeTX system by pressing the SYS button or Menu button.
- Choose ExpressLRS and run it. The Lua script will allow users to configure parameters like Packet Rate, Telem Ratio, TX Power, etc.
Introduction
- ExpressLRS is a new generation of open-source wireless remote control system, dedicated to providing the best wireless link for FPV Racing. It is based on the fantastic Semtech SX127x/SX1280 LoRa hardware combined with Espressif or STM32 processor, with characteristics such as long remote control distance, stable connection, low latency, high refresh rate, and flexible configuration.
- BETAFPV Micro TX V2 Module is a high-performance wireless remote control product based on ExpressLRS V3.3, with strong anti-interference performance and stable signal link. It improves its RF transmission power to 2W based on the previous Micro RF TX Module and redesigns the heat dissipation structure. All the updates make the Micro TX V2 Module get better performance and more suitable for applications such as racing, long-range flights, and aerial photography, which require high signal stability and low latency.
- Github Project Link: https://github.com/ExpressLRS
Specifications
915MHz&868MHz Version
- Packet Rate: 25Hz/50Hz/100Hz/100Hz Full/200Hz/D50
- RF output Power: 10mW/25mW/50mW/100mW/250mW/500mW/1000mW/2000mW chg
- Frequency: 915MHz FCC/868MHz EU
- Power Consumption: 10V,1A@2000mW,200Hz,1:128
- Antenna Port: SMA-KEchg
- Input Voltage: 7V~13V
- USB Port: Type-C
- XT30 Power Supply Range: 7-25V(2-6S) chg
- Built-in Fan Voltage: 5V

Note: Please assemble the antenna before powering on. Otherwise, the PA chip will be damaged permanently.
Note: Please DO NOT use a 6S or above battery to power up the TX module. Otherwise, the power supply chip in the TX module will be damaged permanently.
BETAFPV Micro TX V2 Module is compatible with all the radio transmitter which has the Micro module bay (AKA JR bay, SLIM bay)
Indicator Status
Receiver Indicator Status Includes:
| Indicator Color | Status | Indicating |
| Rainbow | Fade Effect | Power On |
| Green | Slow Flash | WiFi Update Mode |
| Blue | Slow Flash | Bluetooth Joystick Mode |
| Red | Fast Flash | RF Chip Not Detected |
|
Orange |
Slow Flash | Waiting For Connection |
|
Solid On |
Connected And The Color Indicates Packet Rate | |
|
Slow Flash |
No Connection And The Color Indicates Packet Rate |
The packet rate corresponding to the RGB indicator color is shown below:

D50 is an exclusive mode under ELRS Team900. It will send the same packets four times repeatedly under 200Hz Lora mode, with a remote control distance equivalent to 200Hz.
100Hz Full is the mode that achieves 16-channel full resolution output at the 200Hz packet rates of Lora mode, with a remote control distance equivalent to 200Hz.
Transmitter Configuration
The Micro TX V2 Module defaults to receive signals in the Crossfire serial data protocol (CRSF), so the TX module interface of the remote control needs to support CRSF signal output. Taking the EdgeTX remote control system as an example, the following explains how to configure the remote control to output CRSF signals and control the TX module using Lua scripts.
CRSF Protocol
In the EdgeTX system, select “MODEL SEL” and enter the “SETUP” interface. In this interface, turn on Internal RF (set to “OFF”), turn on External RF, and set the mode to CRSF. Connect the module correctly and then the module will function properly.
Settings are shown below:

Lua Script
Lua is a lightweight and compact script language. It can be used by being embedded in radio transmitters and easily reading and modifying the parameter set of the TX module. The directions for using Lua are as below.
- Download the elrsV3.lua on the BETAFPV official website or ExpressLRS configurator.

- Save the elrsV3.lua files onto the radio transmitter’s SD Card in the Scripts/Tools folder;
- Press the “SYS” button or the “Menu” button on the EdgeTX system to access the “Tools” interface where you can choose “ExpressLRS” and run it;
- The below images show the Lua script if it runs successfully.

- With the Lua script, users could configure the set of parameters, such as Packet Rate, Telem Ratio, TX Power, and the like. The main functions of the Lua script are shown in the table below. All function introductions can be viewed on the technical support page of the official website.
Parameter Note BFPV Micro TX V2 Product Name, up to 15 characters. 0/200
Drop ratio of the communication between radio control and the TX module. i.e. the TX module received 200 packets and lost 0 packets.
C/-
C: Connected. -: Unconnected.
Packet Rate
Packet rate of communication between the TX module and receiver. The higher the frequency, the shorter the interval between remote control packets sent by the TX module, the more precise the control is. Telem Ratio
Receiver telemetry ratio. e.g.,1:64 means that the receiver will send one telemetry packet back for every 64 remote control packets it receives.
TX Power
Configure the RF transmission power of the TX module, dynamic power, and the threshold for the cooling fan. WiFi Connectivity Enable the WiFi of the TX module/receiver/backpack of VRX. Bind Enter the binding mode. 3.4.3 FCC915 xxxxxx Firmware version, frequency band, and serial number. The factory firmware version and serial number may vary. Note: Learn more details of ExpressLRS Lua here: https://www.expresslrs.org/quick-start/transmitters/lua-howto/.
There is a 5D button on the Micro TX V2 module. Below is the basic operation of the button and OLED.
- Long Press: Unlock and enter the menu page, or apply current settings on the menu page.
- Up/Down: Move to the last/next row.
- Left/Right: Change the value of this row.
- Short Press: Move to the Bind position and short-press the button. Then the RF module will enter binding status.


Note: When the RF TX module enters WiFi Upgrade status, the button will be invalid. Please re-power the RF TX module after the firmware update via WiFi.
Bind
The Micro TX V2 Module comes with offical major release ExpressLRS V3.4.3 protocol and no Binding Phrase included. So please make sure the receiver works on offical major release ExpressLRS V3.0.0 protocol. And no Binding Phrase set.
- Put the receiver into binding mode and wait for the connection;
- Using the button and OLED, move to the Bind position and short-press the button. Then the RF module will enter binding status. Or you can enter binding mode by clicking ‘Bind’ in the Lua script. If the Indicator of the receiver and the module turned solid. It indicates that they bound successfully.

Note: If the TX module has been reflashed firmware with a binding phrase, then using the above binding method will not be bound to other devices. Please set the same binding phrase for the receiver to perform automatic binding.
External Power
The power consumption of the Micro TX V2 Module when using a transmission power of 500mW or above is relatively high, which will shorten the usage time of the remote control. Users can connect an external battery to the TX module through the XT30 port. The usage method is shown in the following figure.

Note: Please check the battery level before inserting the TX module to ensure that the battery is fully charged. Otherwise, the TX module will be rebooted due to an insufficient power supply, resulting in disconnection and loss of control.
Q&A
- Unable to enter LUA script.

Possible reasons are as follows:- The TX module is not well connected to the remote control, need to check whether the JR pin of the remote control and the TX module socket are in good contact;
- The versionthe of ELRS LUA script is too low, nd needs to be upgraded to elrsV3.lua;
- If the baud rate of the remote control is too low, please set it to 400K or above (if there is no option to set the baud rate of the remote control, you need to upgrade the firmware of the remote control, e.g., the EdgeTX needs to be V2.8.0 or above).
More Information
As the ExpressLRS project is still frequently updated, please check BETAFPV Support (Technical Support -> ExpressLRS Radio Link) for more details and the latest manual. https://support.betafpv.com/hc/zh-cn
- Latest Manual
- How to upgrade the firmware
- FAQ
Documents / Resources
 |
BETAFPV 868MHz Micro TX V2 Module [pdf] User Manual 868MHz Micro TX V2 Module, Micro TX V2 Module, TX V2 Module, Module |