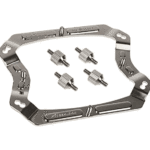
P1S Mako for Bambu Lab Upgrade Kit
 Slice Engineering
Mako™ for Bambu Lab Upgrade Kit Installation Instructions
How to Install the Mako™ for Bambu Lab Upgrade Kit
Compatibility
Bambu Lab P1P
Bambu Lab P1S
Bambu Lab X1
Bambu Lab X1C
Bambu Lab X1E
What You Need
2 mm Hex Key
Mako For Bambu Lab
Mako Hotend
Mako Silicone Boot
FIN Nozzle
Heater
Thermistor
Heater Adapter
Retaining Clip
Air Dam
Thermal Grease – 1 cc
Optional
Torque Wrench or 6 mm Wrench
Plastic Repellent Paint™
Before Starting
1. Unload any filament.
2. Go to the Temperature/Axis settings and make sure your hotend temperature is at 30°C or below, then turn the power OFF
3. Turn off and unplug the printer.
Don’t forget to optimize your printing performance! Access our custom material profiles for the Mako Hotend here to get the best results from your upgraded setup.
Some users may experience clogs when printing with PLA or other filaments with low melting temperatures. To avoid this, make sure to read these instructions.
Removal
Step 1: Open the magnetic cover and move it aside
Step 2: Disconnect the hot end fan and the heater connectors from the board and remove the wires by sliding them out of the clip.
Step 3: Use the 2mm hex key to unscrew the 2 screws that are near the top of the hot end’s heatsink
Step 4: Carefully and gently move the wires out of the plastic wire clip and remove the complete hot end assembly.
Prepare hot end
This is only if you have the stock electronics version
Step 1: Apply thermal grease provided onto the hotend where the heater will be placed.
Step 2: Insert the heater adapter by sliding the ears of it into the top of the hot block
Step 3: Insert your heater into the heater adapter
Step 4: Slide the retaining clip onto the bottom of the heater to hold it in place while you complete the next step.
Step 5: Apply grease to the thermistor and the thermistor hole. Then, insert the thermistor into the hole in the side of the hot end and slide the retaining clip over it all the way up.
Step 6: Route your wires through the designated slot of the heatsink and be sure to place the thermistor wires behind the heater wires and slide the air dam over the wires.
![]() Ensure your air-dam is flush with the bottom of the heatsink
Ensure your air-dam is flush with the bottom of the heatsink
Step 7: Slide the Mako boot over your hotblock

Step 8: Now screw your fan into the heatsink with a 2 mm hex key.
![]() Installation
Installation
Now that you have removed the stock hotend, you are ready to install your new Mako hotend.
Step 1: Position the complete hotend assembly so that the 2 screw holes will be behind the bracket

Step 2: Gently push the 2 screws in and then tighten them equally, be careful not to over-tighten

Step 3: Route all the loose cables through the plastic wire clip

https://support.sliceengineering.com/portal/en/kb/articles/mako-bambulab-upgrade-kit-installation-instructions
Step 4: Plug in the hotend fan and the heater connectors to the board

Step 5: Reattach your magnetic cover

https://support.sliceengineering.com/portal/en/kb/articles/mako-bambulab-upgrade-kit-installation-instructions

Step 6: Finally, plug in your printer, turn on the power, and start printing! Optionally, apply a coat of Plastic Repellent Paint to your hotend to improve the performance!

This is the end of the Mako for Bambu Lab Upgrade Kit Installation Instructions.
https://support.sliceengineering.com/portal/en/kb/articles/mako-bambulab-upgrade-kit-installation-instructions
Documents / Resources
 |
Slice Engineering P1S Mako for Bambu Lab Upgrade Kit [pdf] Installation Guide P1P, P1S, X1, X1C, X1E, P1S Mako for Bambu Lab Upgrade Kit, P1S, Mako for Bambu Lab Upgrade Kit, Bambu Lab Upgrade Kit, Upgrade Kit |


