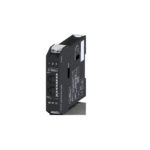
SENECA R-KEY-LT OPC UA Multiprotocol Key Gateways

CAUTION
SENECA does not guarantee that all specifications and/or aspects of the product and firmware, included in them, will meet the requirements of the actual final application even if the product referred to in this documentation is in compliance with the technological state of the art.
The user assumes full responsibility and/or risk with regard to the configuration of the product to achieve the intended results in relation to the specific installation and/or end application.
SENECA may, with prior agreement, provide consultancy services for the successful completion of the final application, but under no circumstances can it be held responsible for its proper functioning.
The SENECA product is an advanced product, the operation of which is specified in the technical documentation supplied with the product itself and/or can be downloaded, if desired prior to purchase, from the www.seneca.it website.
SENECA has a policy of continuous development and accordingly reserves the right to make and/or introduce – without prior notice – changes and/or improvements to any product described in this documentation.
The product described in this documentation may solely and exclusively be used by personnel qualified for the specific activity and in accordance with the relevant technical documentation, with particular attention being paid to the safety instructions.
Qualified personnel means personnel who, on the basis of their training, competence and experience, are able to identify risks and avoid potential hazards that could occur during the use of this product.
SENECA products may only be used for the applications and in the manner described in the technical documentation relating to the products themselves.
To ensure proper operation and prevent the occurrence of malfunctions, the transport, storage, installation, assembly, and maintenance of SENECA products must comply with the safety instructions and environmental conditions specified in this documentation.
SENECA’s liability in relation to its products is governed by the general conditions of sale, which can be downloaded from www.seneca.it.
Neither SENECA nor its employees, within the limits of applicable law, will, in any case, be liable for any lost profits and/or sales, loss of data and/or information, higher costs incurred for goods and/or replacement services, damage to property and/or persons, interruption of activities and/or provision of services, any direct, indirect, incidental, pecuniary and non-pecuniary, consequential damages in any way caused and/or caused, due to negligence, carelessness, incompetence and/or other liabilities arising from the installation, use and/or inability to use the product.
| CONTACT US | |
| Technical support | supporto@seneca.it |
| Product information | commerciale@seneca.it |
Document revisions
| DATE | REVISION | NOTES | AUTHOR |
| 02/10/2024 | 0 | First revision | MM |
|
24/10/2024 |
1 |
fix project name in title
Added only 1 client supported Fix various -I instead of -U Fix parameter STOP MODBUS READING WHEN NO OPC-UA CONNECTION Added Modbus TCP-IP server info |
MM |
| 11/11/2024 | 2 | Added max 50 TAG | MM |
|
22/11/2024 |
3 |
New limits from firmware rev 107: max 100 TAG, 3 remote server modbus tcp-ip, 1 remote client modbus tcp-ip.
New connection with User/Password authentication from fw rev 107 |
MM |
- This document is the property of SENECA srl.
- Copies and reproduction are prohibited unless authorized.
PRELIMINARY WARNINGS
 ATTENTION! This user manual extends the information from the installation manual to the configuration of the device. Use the installation manual for more information.
ATTENTION! In any case, SENECA s.r.l. or its suppliers will not be responsible for the loss of data/revenue or consequential or incidental damages due to negligence or bad/improper management of the device, even if SENECA is well aware of these possible damages.
SENECA, its subsidiaries, affiliates, group companies, suppliers and distributors do not guarantee that the functions fully meet the customer’s expectations or that the device, firmware and software should have no errors or operate continuously.
DESCRIPTION
The Z-KEY-U, R-KEY-LT-U, and Z-KEY-2ETH-U products allow to convert data coming from the Modbus serial bus or Modbus TCP-IP Ethernet into the OPC-UA server protocol.
OPC- UA PROTOCOL
OPC Unified Architecture (OPC UA) is a cross-platform, open-source IEC62541 standard for exchanging data from sensors to cloud and SCADA applications developed by the OPC Foundation.
| PROTOCOL | |
| Type of protocol | OPC- UA Protocol
OPC-UA server (IEC 62541 server) TLS 1.2 connection, X.509 certificate management 1 remote supported Client OPC- UA
Modbus protocols:
Modbus TCP-IP Modbus RTU Modbus ASCII Max 3 remote Modbus TCP- IP servers Max 128 serial Modbus slave devices (for serial port) Max 1 remote supported Client Modbus TCP- IP |
| MEMORY | |
| The memory size of variables | Max 100 Tag |
FEATURES OF THE “KEY” SERIES COMMUNICATION PORTS
| PRODUCT | ETHERNET PORTS | SERIAL PORT # 1 RS232/RS485
CONFIGURABLE |
RS485 SERIAL
PORT # 2 |
ISOLATED SERIAL PORTS |
| Z-KEY-U | 1 | 1 | 1 | Yes, both ports |
| R-KEY-LT-U | 1 | 1 | NO | NO |
| Z-KEY-2ETH-U | 2 | 1 | 1 | Yes, both ports |
DEVICE HARDWARE REVISION
With a view to continuous improvement, Seneca updates and makes the hardware of its devices increasingly more sophisticated. It is possible to know the hardware revision of a product via the label on the side of the device.
An example of an R-KEY-LT product label is the following:

The label also shows the firmware revision present in the device (in this case 2.0.1.0) at the time of sale, the hardware revision (in this case) is E00.
To improve performance or extend functionality, Seneca recommends updating the firmware to the latest available version (see the section dedicated to the product on www.seneca.it).
FLEX TECHNOLOGY FOR PROTOCOL CHANGE

Starting from the hardware revision indicated in the following table, the KEY series devices include Flex technology.
| GATEWAY | FLEX TECHNOLOGY SUPPORTED
BY HARDWARE REVISION |
| Z-KEY | “G00” |
| R-KEY-LT | “E00” |
| Z-KEY-2ETH | “C00” |
Flex allows you to change the combination of industrial communication protocols supported by the gateways at will from a list of available ones, the development is continuously updated, for a complete list refer to the page: https://www.seneca.it/flex/
Some examples of supported protocols are:

The gateway then becomes “universal” and compatible with Siemens or Rockwell or Schneider systems etc. without the need to purchase different hardware.
CHANGING PROTOCOLS WITH THE SENECA DISCOVERY DEVICE SOFTWARE
From revision 2.8 the Seneca Discovery Device software identifies the devices that support the “Flex” technology:

For example, in the case in the figure it is possible to press the “Change Protocol” button and select the destination protocol from those in the list:

At the end of the operation, bring (only at the first power-on) the dip switches 1 and 2 to “ON” to force the device to default (see also the chapter “RESETTING THE DEVICE TO ITS FACTORY CONFIGURATION”).
Always refer to the user manual of the communication protocol installed in the device by downloading it from the Seneca website.
ETHERNET PORT
The factory configuration of the Ethernet port is:
- STATIC IP: 192.168.90.101
- SUBNET MASK: 255.255.255.0
- GATEWAY: 192.168.90.1
Multiple devices must not be inserted on the same network with the same static IP.
ATTENTION! DO NOT CONNECT 2 OR MORE FACTORY-CONFIGURED DEVICES ON THE SAME NETWORK, OR THE DEVICE WILL NOT WORK
(CONFLICT OF IP ADDRESSES 192.168.90.101)
FIRMWARE UPDATE
In order to improve, add or optimize the functions of the product, Seneca releases firmware updates on the device section on the www.seneca.it website
The firmware update is performed using Seneca tools or the webserver.
ATTENTION!
NOT TO DAMAGE THE DEVICE DO NOT REMOVE THE POWER SUPPLY DURING THE FIRMWARE UPDATE OPERATION.
OPERATING MODE
The Gateway allows you to operate in the following mode:
OPC-UA SERVER / MODBUS SERIALE-ETHERNET MASTER/CLIENT
OPC-UA SERVER / MODBUS MASTER
This operating mode allows to connect an OPC-UA SCADA client with Modbus RTU/ASCII Slave and/or remote TCP Server I/O devices

The Gateway, on the field side, works as a Modbus master / Modbus Client device and on the other side as an IEC 61850 server via Ethernet.
The Modbus requests (read or write commands) are configured in the gateway device and an ICD file is automatically generated according to the SCL standard.
Once this file is imported into the SCADA (it is also possible to search for the node) all the configured IO will be accessible without any other configuration.
In addition to the serial devices, it is also possible to connect up to 3 remote Modbus TCP-IP servers.
OPC-UA SERVER / MODBUS MASTER / CLIENT MODBUS TCP-IP
In addition to the OPC-UA server, the Gateway also provides a Modbus TCP-IP server with the support for 1 remote client.
ATTENTION! IN ADDITION TO OPC-UA SERVER, THE DEVICE ALSO ACTIVATE A MODBUS TCP-IP SERVER
It is therefore possible to obtain connections of the type:

GATEWAY CONFIGURATION
CONFIGURATION OF THE UaEXPERT™ CLIENT FOR BASIC CONNECTION
To perform a test connection, use the UaExpert™ software.
UaExpert™ is a complete OPC UA client capable of supporting different OPC UA profiles and features.
The free version can be downloaded from the link:
https://www.unified-automation.com/downloads.html
First, we bring the device into WEB mode (see the relevant chapter of this manual) and configure the OPC-UA server parameters in the device’s web server (setup section):

Now we need to activate the OPC-UA protocol in the gateway, from the “Status” web page:

At this point, the web server is disabled and the OPC-UA server is enabled.
Now open the OPC-UA client and press the “+” icon to add an OPC-UA server:

At this point under “Custom directory” we enter the IP address of the Z-KEY-U device (192.168.90.101 in the example) and the configured port (4840 in the example):

By pressing OK the server is added to the list, select the desired encryption (None in this example):

Press OK
Now the server is added.
First select the server and then press the connection icon:

Now the connection is established and the configured list of variables appears:

Now you can drag the variables you want to view: 
It is also possible to write to read/write variables.
GATEWAY WEBSERVERS
“-U” GATEWAY WEBSERVER
WEBSERVER MODE AND OPC-UA MODE
To access the internal webserver, you must put the device in Webserver mode. To make the OPC-UA server work, you need to disable the webserver.
WEB/OPCUA WORKING STATUS
To know the current working state (OPC-UA or WEBSERVER):
LED SD/COM
If the device is in Webserver mode the SD/COM LEDs flash slowly.
If the device is in OPC-UA server mode the SD/COM LEDs are on.
SENECA DISCOVERY DEVICE
The gateway status can be read also by the Seneca Discovery Device software:

CHANGE OF WEB/OPC-UA OPERATING MODE
MANUAL PROCEDURE FOR SWITCHING FROM OPC-UA MODE TO WEBSERVER MODE AND VICE VERSA
To force webserver mode:
- Turn on the device
- Keep the PS1 button pressed until all LEDs turn off
- Release the button
- The device restarts and the LEDs
- On Z-KEY-U: PWR and SD/COM
- On Z-KEY-2ETH-U: PWR and COM
- On R-KEY-LT-U: PWR and COM
- flash slowly to show webserver mode
To force OPC-UA mode
- Turn on the device
- Keep the PS1 button pressed until all LEDs turn off
- Release the button
- The device restarts and the LEDs
- On Z-KEY-U: PWR and SD/COM
- On Z-KEY-2ETH-U: PWR and COM
- On R-KEY-LT-U: PWR and COM
- end flashing slowly to show OPC-UA mode.
SENECA DISCOVERY DEVICE
It is possible to change the Webserver/OPC-UA mode from the Seneca Discovery Device software

WEB SERVER
You can switch from Webserver only to OPC-UA mode via the Status web page:

STEP-BY-STEP GUIDE FOR THE FIRST ACCESS TO THE WEBSERVER
STEP 1: POWER THE DEVICE AND CONNECT THE ETHERNET PORT, PUT THE DEVICE IN WEBSERVER MODE SENECA DISCOVERY DEVICE SOFTWARE STEP 2
If you need to change the IP address of the device (default 192.168.90.101), launch the Seneca Discovery Device software and perform the SCAN, select the device and press the “Assign IP” button, set a configuration compatible with your PC, for example:

Confirm with OK. Now the device can be reached via Ethernet from your PC.
STEP 3 ACCESS TO THE CONFIGURATION WEBSERVER
Enter your access credentials:
user: admin
password: admin
ATTENTION! THE WEB BROWSERS WHICH HAVE BEEN TESTED FOR COMPATIBILITY WITH THE DEVICE WEBSERVER ARE:
MOZILLA FIREFOX AND GOOGLE CHROME.
THEREFORE, THE OPERATION WITH OTHER BROWSERS IS NOT GUARANTEED
WEBSERVER DEVICE CONFIGURATION
For further information on the access to the webserver of a new device, please refer to chapter 8.1.4.
ATTENTION!
THE WEB BROWSERS WHICH HAVE BEEN TESTED FOR COMPATIBILITY WITH THE DEVICE WEBSERVER ARE:
MOZILLA FIREFOX AND GOOGLE CHROME.
THEREFORE, THE OPERATION WITH OTHER BROWSERS IS NOT GUARANTEED
ATTENTION!
AFTER THE FIRST ACCESS CHANGE USER NAME AND PASSWORD IN ORDER TO PREVENT ACCESS TO THE DEVICE TO UNAUTHORIZED PEOPLE.
ATTENTION!
IF THE PARAMETERS TO ACCESS THE WEBSERVER HAVE BEEN LOST, TO ACCESS IT, IT IS NECESSARY TO GO THROUGH THE PROCEDURE TO RESET THE FACTORY-SET CONFIGURATION
WEBSERVER SECTIONS
The Webserver is divided into pages (sections) representing the various gateway functions:
Status
It is the section that displays the values of Modbus requests in real time.
Setup
This is the section that allows the basic configuration of the device, it also allows you to export or import a configuration.
Setup Tag
It is the section that allows you to add/modify the Modbus device TAGs connected to the gateway.
Firmware Update
This is the section that allows you to update the device firmware.
UTC Time Setup
This allows you to set the device date/time
Database Update
This allows you to update the TAG list of Seneca devices
Serial Traffic Monitor
It allows to analyse the Modbus frames of the serials.
The Status section displays the status of the values acquired from modbus:

It is also possible to force tag writing with the “CHANGE” button.
The START OPC-UA SERVER button allows you to restart the device by activating the OPC-UA server instead of the web server (see the relevant chapter in this manual).
The REBOOT button restarts the device.
“SETUP” SECTION
At the top of the web page you can load a configuration or save one with the buttons “Load conf file” and “Save conf file”.
A configuration includes the configured tags.

DHCP (ETH) (default: Disabled)
Sets the DHCP client to get an IP address automatically.
STATIC IP (default: 192.168.90.101)
Sets the device static address. Careful not to enter devices with the same IP address into the same network.
STATIC IP MASK (default: 255.255.255.0)
Sets the mask for the IP network.
STATIC GATEWAY (default: 192.168.90.1)
Sets the gateway address.
TCP-IP PORT (default: 502)
Sets the communication port for the Modbus TCP-IP client protocol.
TCP-IP TIMEOUT [ms] (default 512 ms)
Sets the waiting time for a request to be considered in timeout.
PORT #1 MODBUS PROTOCOL (default RTU)
Sets the protocol on the serial between Modbus RTU or Modbus ASCII
PORT #2 MODBUS PROTOCOL (default RTU)
Sets the protocol on the serial between Modbus RTU or Modbus ASCII
PORT #1 BAUDRATE (default: 38400 baud)
Selects the communication speed of the COM #1 serial port
PORT #1 DATA BITS (default: 38400 baud)
Selects the communication speed of the COM #1 serial port
PORT #1 PARITY (default: None)
Sets the parity for the COM #1 serial communication port.
PORT #1 STOP BIT (default: 1)
Sets the number of stop bits for the COM #1 serial communication port.
PORT #1 TIMEOUT [ms]
Sets the wait time before defining fail.
PORT #1 WRITING RETRIES (default: 3)
Selects the number of writing attempts to be made on a serial slave before returning an error.
PORT #1 MAX READ NUM
Sets the maximum number of simultaneous serial reading ModBUS registers, the firmware will use this value to optimize the ModBUS readings.
PORT #1 MAX WRITE NUM
Sets the maximum number of simultaneous writing ModBUS registers of the serial, the firmware will use this value to optimize the ModBUS writings.
PORT #2 BAUDRATE (default: 38400 baud) (only for Z-KEY-U and Z-KEY-2ETH-U)
Selects the communication speed of the COM #2 serial port
PORT #2 DATA BITS (default: 38400 baud) (only for Z-KEY-U and Z-KEY-2ETH-U)
Selects the communication speed of the COM #2 serial port
PORT #2 PARITY (default: None) (only for Z-KEY-U and Z-KEY-2ETH-U)
Sets the parity for the COM #2 serial communication port.
PORT #2 STOP BIT (default: 1) (only for Z-KEY-U and Z-KEY-2ETH-U)
Sets the number of stop bits for the COM #2 serial communication port.
PORT# 2 TIMEOUT [ms] (only for Z-KEY-U and Z-KEY-2ETH-U)
Sets the wait time before defining fail.
PORT #2 WRITING RETRIES (default: 3) (only for Z-KEY-U and Z-KEY-2ETH-U)
Selects the number of writing attempts to be made on a serial slave before returning an error.
PORT #2 MAX READ NUM (only for Z-KEY-U and Z-KEY-2ETH-U)
Sets the maximum number of simultaneous reading ModBUS registers of the remote TCP-IP Modbus server, the firmware will use this value to optimize the ModBUS readings.
PORT #2 MAX WRITE NUM (only for Z-KEY-U and Z-KEY-2ETH-U)
Sets the maximum number of simultaneous writing ModBUS registers of the serial, the firmware will use this value to optimize the ModBUS writings.
WEB SERVER PORT (default: 80)
Sets the communication port for the web server.
WEB SERVER AUTHENTICATION USER NAME (default: admin)
Sets the username to access the webserver.
WEB SERVER PASSWORD (default: admin)
Sets the password to access the webserver and to read/write the configuration (if enabled).
IP CHANGE FROM DISCOVERY (default: Enabled)
Selects whether or not the device accepts the IP address change from the Seneca Discovery Device software.
DIAGNOSTIC REGISTERS MAPPING
You can choose whether the diagnostic registers are placed on Holding registers or Input Registers.
DIAGNOSTIC REGISTERS START ADDRESS
It is the starting address of the diagnostic registers
PORT#1 TAGS QUARATINE [s]
Sets the number of quarantine seconds after a tag has been declared in fail (i.e. these tags are no longer considered) before being interrogated again.
PORT TAGS QUARANTINE [s] (only for Z-KEY-U and Z-KEY-2ETH-U)
Sets the number of quarantine seconds after a tag has been declared in fail (i.e. these tags are no longer considered) before being interrogated again.
MODBUS TCP-IP CLIENT
Enables or not the TCP-IP client Modbus
MODBUS TCP-IP SERVER#1…10 PORT
Sets the port for the max 10 remote TCP-IP Modbus servers
MODBUS TCP-IP SERVER#1…10 ADDRESS
Sets the IP address for the max 10 remote TCP-IP Modbus servers
MODBUS TCP-IP CLIENT TIMEOUT [ms]
Sets the timeout for remote TCP-IP Modbus servers
MODBUS TCP-IP CLIENT DELAY BETWEEN POLLS [ms]
Sets the time between requests for remote Modbus TCP-IP servers
MODBUS TCP-IP CLIENT WRITING RETRIES
Selects the number of writing attempts to be made on a remote TCP-IP Modbus server before returning an error and activating the quarantine.
MODBUS TCP-IP CLIENT MAX READ NUM
Sets the maximum number of simultaneous reading ModBUS registers of the remote TCP-IP Modbus server, the firmware will use this value to optimize the ModBUS readings.
MODBUS TCP-IP CLIENT MAX WRITE NUM
Sets the maximum number of simultaneous writing ModBUS registers of the remote TCP-IP Modbus server, the firmware will use this value to optimize the ModBUS writings.
STOP MODBUS READING WHEN NO OPC-UA CONNECTION
If active, it allows to stop the modbus communication when the communication with the OPC-UA client is lost. This allows to trigger any timeouts present in the modbus slave/server devices.
SYNC CLOCK WITH INTERNET TIME
Allows you to enable date/time updating via connection to NTP servers (RFC 5905).
ATTENTION! AT EACH SWITCHING OFF THE DEVICE MUST BE ABLE TO RETRIEVE THE DATE/TIME FROM AN NTP SERVER OTHERWISE THIS WILL BE SET TO 1/1/1970 0:00
ATTENTION! PLEASE REMEMBER THAT NTP SERVERS USE THE UDP 123 PORT (WHICH MUST THEREFORE ALWAYS BE OPEN IN THE CONFIGURATION OF THE NETWORK USED)
NTP SERVER 1 ADDRESS
This is the IP address of the first NTP server (for example 193.204.114.232 for INRIM’s NTP)
NTP SERVER 2 ADDRESS
This is the IP address of the second NTP server (in case the first one does not respond)
WATCHDOG
Enables or disables automatic device reboot with adjustable cycle time
WATCHDOG TIMEOUT [min]
Sets the device auto-reboot time
OPC-UA SERVER PORT
Sets the port for the OPC-UA server.
OPC-UA SERVER URI NAME
Sets the URI (Uniform Resource Identifier) of the OPC-UA server
OPC-UA SERVER SECURITY POLICY
Selects whether the connection should be secure (encrypted) or not. In this case, you can choose the crypto algorithm to use.
OPC-UA SERVER MESSAGE SECURITY MODE
OPC UA supports the selection of different security modes: “None”, “Sign”, “SignAndEncrypt”. The “None” security mode can only be used with the None security profile.
The choice of “Sign” or “SignAndEncrypt” depends on the CSMS (Cyber Security Management System), in some applications where data confidentiality is not required, “Sign” may be sufficient.
OPC-UA AUTHENTICATION
Sets whether the connection is to be ‘Anonymous’ or with ‘User/Password’
OPC-UA AUTHENTICATION. USER
If authentication is set to ‘User/Password’ this represents the user name
OPC-UA AUTHENTICATION. PASSWORD
If authentication is set to ‘User/Password’ this represents the password
In this section you can add, modify or delete a modbus TAG, a TAG represents a variable that will then be displayed on the OPC-UA server. A TAG consists of one or more modbus registers depending on the type.
It is also possible to compose and import the list of TAGs from the Excel template available on the Seneca website on the device page.
Using the ADD button you can add a new TAG.
Using the MODIFY button it is possible to modify an existing TAG.
Using the DEL button it is possible to delete an existing TAG.
GATEWAY TAG NAME
This is the identifying name of the TAG as it will appear in the OPC-UA server.
GATEWAY MODBUS START REGISTER ADDRESS
This is the register in which to store the value of the TAG, it must be a progressive number.
TARGET MODBUS DEVICE
It represents the Seneca Modbus device selected from those available in the database.
In the case of a non-Seneca device or for advanced configurations, select CUSTOM.
TARGET RESOURCE
It represents the Seneca device variable you want to add.
TARGET CONNECTED TO
It selects the serial or server to be used to acquire the specified TAG.
TARGET MODBUS STATION ADDRESS
It selects the station address to use for the TAG.
TARGET MODBUS START REGISTER
It represents the starting Modbus address of the command (in the case of a Seneca device it is filled in automatically).
TARGET MODBUS REQUEST TYPE
It represents the type of Modbus command to use (Read Holding Register, Coil etc.).
In the case of a Seneca device it is filled in automatically.
TARGET REGISTER DATA TYPE
It selects the type of data associated with the TAG, you can choose between:
various types of data from 1 to 64 bit with or without sign.
“FIRMWARE UPDATE” SECTION
In order to improve, add, optimize the functions of the product, Seneca releases firmware updates on the device section on the www.seneca.it website
ATTENTION!
NOT TO DAMAGE THE DEVICE DO NOT REMOVE THE POWER SUPPLY DURING THE FIRMWARE UPDATE OPERATION.
UTC TIME SETUP
It allows you to manually set the date/time in CUT (Coordinated Universal Time) format.
ATTENTION! IF AN NTP SERVER IS NOT SET, THE DEVICE WILL HAVE THE DATE/TIME 1/1/1970 0:00 WHEN IT RESTARTS
“DATABASE UPDATE” SECTION
This section allows you to send or delete a certificate and/or the private key of the device. The used format is PEM.
It is also possible to update the database with Seneca device registers.
SERIAL “SERIAL TRAFFIC MONITOR”
Allows you to view the serial packets that are in transit.
RESETTING THE DEVICE TO ITS FACTORY CONFIGURATION
The factory configuration resets all parameters to default.
To reset the device to the factory configuration it is necessary to follow the procedure below:
Z- KEY-U/ Z-KEY-2ETH-U:
- Remove power from the device
- Turn dip switches 1 and 2 to ON
- Power up the device and wait at least 10 seconds
- Remove power from the device
- Turn dip switches 1 and 2 to OFF
- At the next restart the device will have loaded the factory configuration
R- KEY-LT-U:
- Remove power from the device
- Set dip switches 1 and 2 of SW2 to ON
- Power up the device and wait at least 10 seconds
- Remove power from the device
- Turn 2 SW2 dip switches to OFF.
- At the next restart the device will have loaded the factory configuration
TEMPLATE EXCEL
The preparation of the Tag configuration can be a frustrating operation if done with the webserver, so a software and a Microsoft Excel™ Template are available to create a .bin file to import into the gateway. The model can be freely downloaded from the Seneca website.

SUPPORTED MODBUS COMMUNICATION PROTOCOLS
The Modbus communication protocols supported are:
- Modbus RTU/ASCII master (from #1 and #2 serial ports)
- Modbus TCP-IP Client (from the Ethernet port) up to 10 remote TCP-IP Modbus Servers
For more information on these protocols, see the website: http://www.modbus.org/specs.php.
SUPPORTED MODBUS FUNCTION CODES
The following Modbus functions are supported:
- Read Coils (function 1)
- Read Discrete Inputs (function 2)
- Read Holding Registers (function 3)
- Read Input Registers (function 4)
- Write Single Coil (function 5)
- Write Single Register (function 6)
- Write multiple Coils (function 15)
- Write Multiple Registers (function 16)
ATTENTION!
All 32-bit variables are contained in 2 consecutive Modbus registers All 64-bit variables are contained in 4 consecutive Modbus registers
SENECA DISCOVERY DEVICE
The Seneca Discovery Device Tool is available free of charge from the Seneca website.
With this software it is possible to search for Seneca devices via the Ethernet port and change the current IP configuration even if the PC has a different subnet.
INFORMATION ABOUT MODBUS REGISTER
The following abbreviations are used in the following chapter:
| MS | Most Significant |
| LS | Least Significant |
| MSBIT | Most Significant Bit |
| LSBIT | Least Significant Bit |
| MMSW | “Most” Most Significant Word (16bit) |
| MSW | Most Significant Word (16bit) |
| LSW | Least Significant Word (16bit) |
| LLSW | “Least” Least Significant Word (16bit) |
| RO | Read Only |
| RW* | Read-Write: REGISTERS CONTAINED IN FLASH MEMORY: WRITABLE ABOUT
10,000 TIMES MAXIMUM |
| RW** | Read-Write: REGISTERS THAT CAN BE WRITTEN ONLY AFTER WRITING THE
COMMAND “ENABLE WRITE CUSTOM ENERGIES = 49616” |
| UNSIGNED 16 BIT | Unsigned integer register that can assume values from 0 to 65535 |
| SIGNED 16 BIT | Signed integer register that can take values from -32768 to +32767 |
| UNSIGNED 32 BIT | Unsigned integer register that can assume values from 0 to 4294967296 |
| SIGNED 32 BIT | Signed integer register that can take values from -2147483648 to 2147483647 |
| UNSIGNED 64 BIT | Unsigned integer register that can assume values from 0 to 18446744073709551615 |
| SIGNED 64 BIT | Signed integer register that can assume values from -2^63 to 2^63-1 |
| FLOAT 32 BIT | 32-bit, single-precision floating-point register (IEEE 754) |
| BIT | Boolean register, which can take the values 0 (false) or 1 (true) |
NUMBERING OF “0-BASED” OR “1-BASED” MODBUS ADDRESSES
According to the Modbus standard the Holding Registers are addressable from 0 to 65535, there are 2 different conventions for numbering the addresses: “0-BASED” and “1-BASED”.
For greater clarity, Seneca shows its register tables in both conventions.
ATTENTION!
CAREFULLY READ THE DOCUMENTATION OF THE MODBUS MASTER DEVICE IN ORDER TO UNDERSTAND WHICH OF THE TWO CONVENTIONS THE MANUFACTURER HAS DECIDED TO USE SENECA USES THE “1 BASED” CONVENTION FOR ITS PRODUCTS
NUMBERING OF MODBUS ADDRESSES WITH “0-BASED” CONVENTION
The numbering is:
| HOLDING REGISTER MODBUS
ADDRESS (OFFSET) |
MEANING |
| 0 | FIRST REGISTER |
| 1 | SECOND REGISTER |
| 2 | THIRD REGISTER |
| 3 | FOURTH REGISTER |
| 4 | FIFTH REGISTER |
Therefore, the first register is at address 0.
In the following tables, this convention is indicated with “ADDRESS OFFSET”.
NUMBERING OF MODBUS ADDRESSES WITH “1 BASED” CONVENTION (STANDARD)
The numbering is that established by the Modbus consortium and is of the type:
| HOLDING REGISTER MODBUS
ADDRESS 4x |
MEANING |
| 40001 | FIRST REGISTER |
| 40002 | SECOND REGISTER |
| 40003 | THIRD REGISTER |
| 40004 | FOURTH REGISTER |
| 40005 | FIFTH REGISTER |
This convention is indicated with “ADDRESS 4x” since a 40000 is added to the address so that the first Modbus register is 40001.
A further convention is also possible where the number 4 is omitted in front of the register address:
| HOLDING MODBUS ADDRESS
WITHOUT 4x |
MEANING |
| 1 | FIRST REGISTER |
| 2 | SECOND REGISTER |
| 3 | THIRD REGISTER |
| 4 | FOURTH REGISTER |
| 5 | FIFTH REGISTER |
BIT CONVENTION WITHIN A MODBUS HOLDING REGISTER
A Modbus Holding Register consists of 16 bits with the following convention:
| BIT 15 | BIT 14 | BIT 13 | BIT 12 | BIT 11 | BIT 10 | BIT 9 | BIT 8 | BIT 7 | BIT 6 | BIT 5 | BIT 4 | BIT 3 | BIT 2 | BIT 1 | BIT 0 |
For instance, if the value of the register in decimal is 12300
the value 12300 in hexadecimal is: 0x300C
the hexadecimal 0x300C in binary value is: 11 0000 0000 1100
So, using the above convention, we get:
| BIT 15 | BIT 14 | BIT 13 | BIT 12 | BIT 11 | BIT 10 | BIT 9 | BIT 8 | BIT 7 | BIT 6 | BIT 5 | BIT 4 | BIT 3 | BIT 2 | BIT 1 | BIT 0 |
| 0 | 0 | 1 | 1 | 0 | 0 | 0 | 0 | 0 | 0 | 0 | 0 | 1 | 1 | 0 | 0 |
MSB and LSB BYTE CONVENTION WITHIN A MODBUS HOLDING REGISTER
A Modbus Holding Register consists of 16 bits with the following convention:
| BIT 15 | BIT 14 | BIT 13 | BIT 12 | BIT 11 | BIT 10 | BIT 9 | BIT 8 | BIT 7 | BIT 6 | BIT 5 | BIT 4 | BIT 3 | BIT 2 | BIT 1 | BIT 0 |
LSB Byte (Least Significant Byte) defines the 8 bits ranging from Bit 0 to Bit 7 included, we define MSB Byte (Most Significant Byte) the 8 bits ranging from Bit 8 to Bit 15 inclusive:
| BIT 15 | BIT 14 | BIT 13 | BIT 12 | BIT 11 | BIT 10 | BIT 9 | BIT 8 | BIT 7 | BIT 6 | BIT 5 | BIT 4 | BIT 3 | BIT 2 | BIT 1 | BIT 0 |
| BYTE MSB | BYTE LSB | ||||||||||||||
REPRESENTATION OF A 32-BIT VALUE IN TWO CONSECUTIVE MODBUS HOLDING REGISTERS
The representation of a 32-bit value in the Modbus Holding Registers is made using 2 consecutive Holding Registers (a Holding Register is a 16-bit register). To obtain the 32-bit value it is therefore necessary to read two consecutive registers:
For example, if register 40064 contains the 16 most significant bits (MSW) while register 40065 contains the least significant 16 bits (LSW), the 32-bit value is obtained by composing the 2 registers:
| BIT 15 | BIT 14 | BIT 13 | BIT 12 | BIT 11 | BIT 10 | BIT 9 | BIT 8 | BIT 7 | BIT 6 | BIT 5 | BIT 4 | BIT 3 | BIT 2 | BIT 1 | BIT 0 |
| 40064 MOST SIGNIFICANT WORD | |||||||||||||||
| BIT 15 | BIT 14 | BIT 13 | BIT 12 | BIT 11 | BIT 10 | BIT 9 | BIT 8 | BIT 7 | BIT 6 | BIT 5 | BIT 4 | BIT 3 | BIT 2 | BIT 1 | BIT 0 |
| 40065 LEAST SIGNIFICANT WORD | |||||||||||||||
?????32??? = ??????????? + (??????????? ∗ 65536)
In the reading registers it is possible to swap the most significant word with the least significant word, therefore it is possible to obtain 40064 as LSW and 40065 as MSW.
TYPE OF 32-BIT FLOATING POINT DATA (IEEE 754)
- The IEEE 754 standard (https://en.wikipedia.org/wiki/IEEE_754) defines the format for representing floating point numbers.
- As already mentioned, since it is a 32-bit data type, its representation occupies two 16-bit holding registers.
- To obtain a binary/hexadecimal conversion of a floating point value it is possible to refer to an online converter at this address:
- http://www.h-schmidt.net/FloatConverter/IEEE754.html

- Using the last representation the value 2.54 is represented at 32 bits as:
- 0x4022 8F5C
- Since we have 16-bit registers available, the value must be divided into MSW and LSW:
- 0x4022 (16418 decimal) are the 16 most significant bits (MSW) while 0x8F5C (36700 decimal) are the 16 least significant bits (LSW).
CONTACT
SENECA S.r.l.
Via Austria 26 – 35127 – Z.I. – PADOVA (PD) – ITALY Tel. +39.049.8705355 – 8705355 Fax +39 049.8706287
ALL RIGHTS RESERVED. NO PART OF THIS PUBLICATION MAY BE REPRODUCED WITHOUT PRIOR PERMISSION.
MI00706-3-EN
Documents / Resources
 |
SENECA R-KEY-LT OPC UA Multiprotocol Key Gateways [pdf] User Manual R-KEY-LT OPC UA Multiprotocol Key Gateways, R-KEY-LT OPC UA, Multiprotocol Key Gateways, Key Gateways, Gateways |