 User Manual Q&A
Answer

Oct 15, 2025 - 09:23 AM
To program the Geehy APM32F072VB Mini Board using the Keil MDK ARM development tool, follow these steps:
1. **Download and Install Keil MDK ARM:** Visit the Keil website and download the latest version of the MDK ARM development tool. Follow the installation instructions provided to set up the tool on your Windows OS (7/8/10) computer.
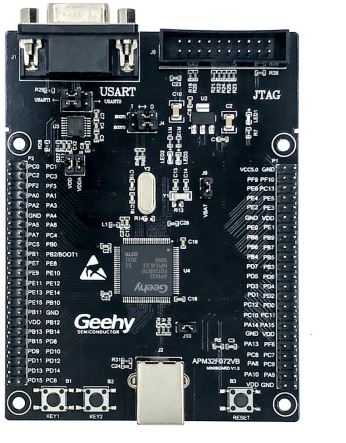
2. **Connect the Board:** Ensure that jumper J6, J8, J9, and J10 are securely connected on the Geehy APM32F072VB Mini Board. Connect the board to your computer using a USB Type B cable.
3. **Configure Keil MDK ARM:** Open Keil MDK ARM and create a new project for the Geehy APM32F072VB Mini Board. Select the appropriate Cortex-M0+ processor and specify the target device as APM32F072VB.
4. **Set Up Debugging:** Configure the debugger settings in Keil to use the SWD interface for MCU programming and debugging. Ensure that the debugger is connected to the board correctly.
5. **Write and Compile Code:** Write your code in the Keil MDK ARM IDE and compile it to generate the binary file.
6. **Program the Board:** Use the Keil MDK ARM IDE to program the Geehy APM32F072VB Mini Board with the compiled binary file. Make sure the programming process completes successfully.
7. **Debugging:** Utilize the debugging features in Keil MDK ARM to troubleshoot and debug your code running on the Geehy APM32F072VB Mini Board.
By following these steps and referring to the Geehy APM32F072VB Mini Board user manual for any specific details or configurations, you should be able to successfully program and debug your applications on the board using the Keil MDK ARM development tool.


Add New Comment