Pimoroni LCD Frame for Raspberry Pi 7”
Touchscreen User Manual

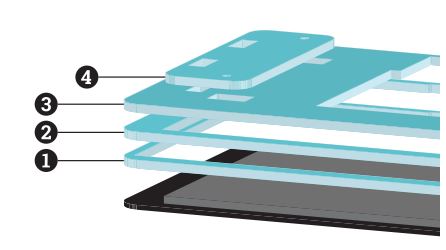
Place your Raspberry Pi 7″ Touchscreen Display face down on a soft non-scratch surface and lay frames (1, 2, and 3) on top of it.
Align the locking stand plates (4) over the rectangular cut-outs.
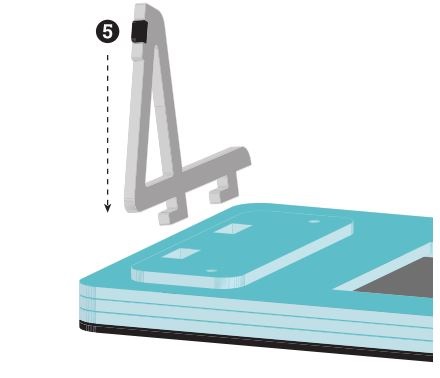
Insert the stands (5) into the rectangular cut-outs.

Slide the locking stand plate upwards which will align the screw holes through to the display’s metal bracket.
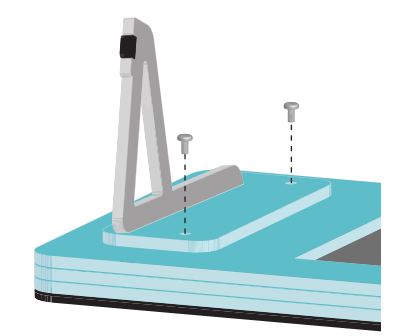
Screw in the four M3 nylon bolts until the stands are firmly secured. Don’t overtighten them!
Your frame is complete! Continue to assemble the Raspberry Pi 7″ Touchscreen Display, see http://learn.pimoroni.com/rpi-display for more details.
![]()
Documents / Resources
 |
Pimoroni LCD Frame for Raspberry Pi 7” Touchscreen [pdf] User Manual LCD Frame for Raspberry, LCD Frame, Raspberry, Pi 7 Touchscreen |


