
Casio PRW-1300 Watch
Module No. 3070
User Manual
Important Information
Read this important information before using your watch.
Battery
The battery installed at the factory may be depleted during shipping and storage. If you notice insufficient power (unclear display), replace the battery at an authorized CASIO service center or CASIO dealer.
Water Resistance
For all categories of watches, do not:
- Press buttons underwater.
- Change the time underwater.
- Unscrew the crown underwater.
If the watch is exposed to salt water, rinse it thoroughly and dry it.
Do not wear a watch with a leather strap while swimming. Avoid prolonged contact of leather straps with water.
For watches with plastic straps:
You may find a whitish powdery substance on the strap. This substance is harmless to your skin or clothing and can be easily removed by wiping with a cloth.
Sweat or moisture on a plastic strap, or storage in high humidity, can damage, tear, or crack the strap. To ensure a long service life for the plastic strap, wipe it clean of dirt and water with a soft cloth whenever possible.
For watches with fluorescent cases and straps:
Prolonged exposure to direct sunlight can cause gradual fading of the fluorescent color.
Prolonged contact with moisture can cause gradual fading of the fluorescent color. If any moisture gets on the watch surface, wipe it off as soon as possible.
Prolonged contact with any other wet surface can cause discoloration of the fluorescent color. Check that moisture is removed from the fluorescent surface and avoid contact with other surfaces.
Water Resistance Classification
Watches are classified into categories (from I to V) according to their water resistance. Check your watch's category using the table below to determine its correct use.
| Category | Case Marking | Splashes, Rain, Washing Car, etc. | Swimming, Splash-proof | Water Sports, Diving, etc. |
|---|---|---|---|---|
| I | None | Yes | No | No |
| II | WATER RESISTANT | Yes | No | No |
| III | 50 M WATER RESISTANT | Yes | Yes | No |
| IV | 100 M WATER RESISTANT | Yes | Yes | Yes |
| V | 200 M WATER RESISTANT | Yes | Yes | Yes |
| V | 300 M WATER RESISTANT | Yes | Yes | Yes |
Notes:
- Strong friction of a surface with applied fluorescent paint against another surface can cause the fluorescent paint to transfer to that surface.
- When using the product in conditions of rapid temperature changes, slight condensation may form on the inside of the glass. This phenomenon is due to physical laws and is not a defect.
- CASIO COMPUTER CO., LTD. is not responsible for any damage that may occur during the use of this watch and does not accept any claims from third parties.
- Category II (WR - Water Resistant) means the model is waterproof according to ISO 2281. Brief contact with water will not cause any problems.
- With water resistance of 5 Bar (50 meters), the watch can withstand water pressure of the indicated value and can be used while showering and brief swimming.
- Water resistance of 10 Bar (100 meters) means the watch can be used during normal swimming and snorkeling.
- Water resistance of 20 Bar (200 meters) means the watch can be used for scuba diving (except for depths requiring a helium-oxygen mixture).
Watch Care
- Never attempt to open the case or remove the back cover yourself.
- The rubber gasket protecting the watch from water and dust should be replaced every 2-3 years.
- If moisture gets inside the watch, have it checked immediately by your nearest dealer or CASIO distributor.
General Description of Operating Modes
The illustration shows the general appearance of the watch in the Current Time Mode. Pressing the button sequentially cycles through the modes in the following order: Current Time Mode ➔ Phone Book Mode ➔ World Time Mode ➔ Stopwatch Mode ➔ Countdown Timer Mode ➔ Alarm Mode ➔ Calibration Mode ➔ Current Time Mode. Pressing the button switches to Compass Mode, the button to Barometer/Thermometer Mode, and the button to Altimeter Mode.
- Press the button to turn on the backlight in any mode.
Diagram showing watch buttons and display elements (e.g., SAT 30, 10:58, C, B, A, L, D, EL indicators).
Calibration
This watch automatically corrects the time according to the calibration signal. However, you can also set the time manually.
Setting Current Location City
- In Current Time Mode, press and hold the button until the city code indicator appears, signifying the start of settings.
- Use the and buttons to change your current location's city code.
- Press the button when settings are complete.
Calibration Signal
- This watch receives calibration signals and updates the time accordingly.
- Signal transmission centers are located in Germany (25 km from Frankfurt), Rugby (England), Fort Collins (USA), and Fukuoka, Fukushima (Japan). The signal range is 1500 km. The signal may be weak at distances over 500 meters.
Viewing Last Signal Reception Data
When entering Signal Reception Mode, the display shows the last signal reception data.
- The "-:-" indicator means that recent signal reception attempts were unsuccessful.
- Press the button to return to Current Time Mode.
Signal Reception Indicator
This indicator shows the signal reception quality. Try to position the watch for optimal signal reception whenever possible. The watch requires about 10 seconds to set the signal reception quality shown on the indicator. If the calibration indicator is not present on the display, signal reception is not occurring. Perform calibration manually or check the watch settings.
Transmitted signals are also affected by natural conditions, atmospheric pressure, and temperature. The following factors can weaken the signal:
- Watch proximity to TVs, computers, or home appliances.
- Being in a subway or tunnel.
- Being at an airport, train station, or high-speed road.
- Proximity to radio or transmission stations.
- Electrostatic voltage.
Signal Auto-Calibration
With auto-calibration enabled, the watch automatically receives the signal five times daily and corrects the time. Auto-calibration only occurs when the watch is in Current Time Mode. Signal reception time lasts from 2 to 7 minutes. Be careful not to move the watch during signal reception.
Enabling/Disabling Auto-Calibration Signal
- In Calibration Mode, press the button to display the auto-calibration signal enable/disable indicator.
- Use the button to turn the auto-calibration signal reception ON or OFF.
- Press the button when settings are complete.
For selected cities (Moscow, Hong Kong, Honolulu, Beijing, Anchorage), auto-calibration is enabled by default.
Forcing Calibration Signal Reception
With forced calibration signal reception enabled, you manually press a button to receive the signal:
- Position your watch horizontally.
- In Current Time Mode, press and hold the button for 2 seconds until a beep sounds and the "RC" indicator appears, signifying the start of signal reception.
- Signal reception takes 2 to 7 minutes. Be careful not to move your watch during signal reception.
- When signal reception is complete, the watch display will show the last signal reception data and the "GET" indicator.
- Press the button to stop the signal reception process and return to Current Time Mode.
- If signal reception fails, the watch display will show "ERR" for 1-2 minutes. The watch will then automatically return to Current Time Mode.
- The "-:-" indicator means that none of the recent signal reception attempts were successful.
- You can return to Current Time Mode by pressing the button.
Compass Mode
The watch's built-in sensor detects magnetic north and determines one of the 16 cardinal directions based on it.
- Direction determination begins immediately upon entering Compass Mode (press ).
- After a few seconds, the display will show an indicator of the direction pointed to by the 12 o'clock position.
- Press the button to return to Current Time Mode.
Taking Measurements
- Place the watch on a horizontal surface or hold it horizontally. The 12 o'clock direction indicates the direction you want to determine.
- Press the button to start measurements.
- After a few seconds, the display will show an indicator of the direction pointed to by the 12 o'clock position.
The watch continues to measure every second for 20 seconds. During measurements, the display shows the cardinal direction indicator, the angle between your current location and magnetic north, and graphical representations of cardinal directions (North, South, East, West).
Cardinal Directions:
- N: North
- E: East
- S: South
- W: West
- NNE: North-Northeast
- ENE: East-Northeast
- ESE: East-Southeast
- SSE: South-Southeast
- SSW: South-Southwest
- WSW: West-Southwest
- WNW: West-Northwest
- NNW: North-Northwest
- NE: Northeast
- SE: Southeast
- SW: Southwest
- NW: Northwest
Magnetic Declination Calibration
If you believe the compass readings are incorrect, calibrate it. You can use three types of calibration: magnetic declination calibration, bidirectional calibration, or north calibration.
Magnetic Declination Calibration
When performing this calibration, you enter the magnetic declination angle (the difference between magnetic north and true north). You can use this calibration if the magnetic declination angle is shown on your map. Note that only whole numbers should be entered (e.g., if the angle is 7.4, enter 7).
- In Compass Mode, press and hold the button until the magnetic declination angle unit flashes.
- Use the and buttons to enter the magnetic declination angle.
- Press the button to proceed to magnetic declination calibration.
The magnetic north direction indicator will flash at the position indicating the start of watch calibration. Use the button to select calibration settings: "OFF" (calibration off), "E" (magnetic north points east, east calibration), "W" (magnetic north points west, west calibration). Press the button when settings are complete.
Bidirectional Calibration
Bidirectional calibration should be used if the watch has been exposed to magnetic radiation. When performing north calibration, you "orient" the watch to magnetic north. If you decide to perform both types of calibration, perform bidirectional calibration first, then north calibration.
- In Compass Mode, press and hold the button until the magnetic declination angle unit flashes.
- Press the button twice to proceed to bidirectional calibration.
The direction measurement may take up to 20 seconds. When measurements are complete, press the button to return to Compass Mode.
The magnetic north direction indicator will flash at the 12 o'clock position, indicating the start of watch calibration. Place the watch on a flat surface and press the button to calibrate the first direction. After calibration is complete, the display will show "OK", followed by "- 2 -". The magnetic north direction indicator will flash at the 6 o'clock position, indicating the watch is ready for the next direction calibration. Rotate the watch 180 degrees. Press the button to start the second direction calibration. After calibration is complete, the display will show "OK", and the watch will automatically enter Compass Mode. You can only use two directions located 180 degrees apart for bidirectional calibration. Do not move the watch during calibration, as this may cause an "ERR" indicator to appear on the display. If this happens, you must restart the calibration process.
North Calibration
- In Compass Mode, press and hold the button until the magnetic declination angle unit flashes.
- Press the button three times to proceed to north calibration. The display will show "- N -".
- Place the compass on a flat surface so that the 12 o'clock position corresponds to north. Press the button to start calibration. After calibration is complete, the display will show "OK", and after a short beep, the watch will automatically enter Compass Mode.
Do not move the watch during calibration, as this may cause an "ERR" indicator to appear on the display. If this happens, you must restart the calibration process. The "ERROR" indicator that appears during calibration may also indicate the close proximity of any magnetic radiation source. It is best to perform compass calibration in the location where you plan to use it.
Using the Compass to Determine Your Current Location on a Map
- Hold your wrist so that your arm is horizontal.
- In Current Time, Compass, Barometer/Thermometer, or Altimeter Mode, press the button to determine your current location's direction.
- Rotate the map (without rotating the watch!) so that the north direction on the map aligns with the north direction on the watch compass (marking on the circular case). If the watch compass is set to display magnetic north, the magnetic north direction should align with the magnetic north direction on the map. If the watch compass is set with a deviation from magnetic north, the north direction on the map should still align with the north direction on the watch compass.
- Determine your current location.
Finding the Direction of Travel Using a Map and the Watch Compass
- Orient the map so that the north direction on the map aligns with the north direction on the watch compass (marking on the outer case). Determine your current location.
- Rotate the map again so that your destination is directly in front of you.
- Hold your wrist so that your arm is horizontal.
- In Current Time, Compass, Barometer/Thermometer, or Altimeter Mode, press the button to determine your current location's direction.
- Holding the map in front of you, turn yourself so that the north indicated by the watch compass and the north direction on the map align. This way, the map will be oriented so that your destination shown on it will be ahead of you.
Determining the Direction Angle to Your Destination on a Map
- Orient the map so that the north direction on the map aligns with the north direction on the watch compass (marking on the outer case). Determine your current location.
- Turn yourself so that the 12 o'clock position (and you) points to the direction of your destination on the map, rotating the map accordingly so that the north directions align.
- In Current Time, Compass, Barometer/Thermometer, or Altimeter Mode, press the button to determine your current location's direction. The direction indication will appear on the display after 2 seconds. After this, pressing the button for subsequent measurements will cause the current readings to disappear from the display for approximately 20 seconds.
- After orienting the map (ensuring the north readings on the map and watch compass align), press the button to save the value in the watch's memory.
Phone Book Altimeter
The phone book function allows you to save a specific direction value in the watch's memory and compare it later.
- In Compass Mode, press the button to record the direction of your current location.
- Press the button to save this value in the watch's memory.
- Press the button again to record the subsequent direction (the direction pointed to by the 12 o'clock position). The previously saved value will be displayed at the top of the display.
Barometer/Thermometer Mode
This watch is equipped with a sensor for measuring ambient pressure and temperature. Body temperature, direct sunlight, or moisture can affect accurate temperature readings.
Monitoring Ambient Pressure/Temperature
Press the button to enter Barometer/Thermometer Mode and start pressure and temperature measurements, which take 4-5 seconds. The measured pressure value is displayed in the center of the display, and the temperature in the lower part. Pressure readings are displayed in 1 hPa (0.05 inHg). The pressure measurement range is from 260 hPa to 1,100 hPa (7.65 inHg to 32.45 inHg).
If the measured atmospheric pressure is outside the range, the display shows "---". Readings will recover once the pressure normalizes.
Temperature readings are displayed in 0.1°C (0.2°F). The temperature measurement range is from 10.0°C to 60.0°C (14.0°F to 140.0°F). If the measured temperature is outside the range, the display shows ".". Readings will recover once the temperature normalizes.
Atmospheric Pressure Measurement Graph
Measurements begin when entering Barometer Mode and are taken every 2 hours, starting from the even hour. All measured values are displayed on the watch's graph. The graph displays values for the last 24 hours. A flashing graph cursor indicates the last measurement. The graph rises or falls when the pressure value changes by 1 hPa (0.05 inHg).
Displaying Pressure Measurement Differences
In Barometer Mode, each subsequent measured pressure value is compared to the previous one – the difference is displayed. Difference readings are in the range of +/- 5 hPa in hectopascals. The difference value is not displayed if the measured pressure is outside the permissible range.
Calibrating the Barometer/Thermometer Sensor
The pressure/temperature sensor is calibrated by the manufacturer and does not require preliminary calibration before use. If there is a significant error in the readings, the sensor can be recalibrated.
- In Barometer/Thermometer Mode, press and hold the button until the "OFF" indicator or temperature value appears.
- Press the button to proceed to pressure sensor calibration.
- Use the button to increase and the button to decrease the sensor values.
- To reset the value to its original state, press the and buttons simultaneously.
- Press the button when settings are complete.
Changing Temperature, Pressure, and Altitude Units
- In Current Time Mode, press and hold the button until the city code indicator appears, signifying the start of settings.
- Press the button to cycle through the units settings for temperature, pressure, and altitude.
- Use the button to select the unit of measurement (Temperature: Celsius/Fahrenheit (°C/°F), Altitude: Meters/Feet (m/ft), Pressure: Hectopascals/Inches of Mercury (hPa/inHg)).
- Press the button when settings are complete.
Altimeter Mode
The built-in altimeter uses atmospheric pressure data to calculate the altitude of your current location. You can also enter relative altitude data (e.g., the lowest point of a mountain before ascent, the first floor of a building), based on which the altimeter will calculate the altitude. Be aware that all altimeter readings are not absolutely accurate. Measurement accuracy is affected by ambient temperature, temperature changes, proximity to electrostatic voltage devices and magnetic radiation, and being in an airplane.
Viewing Your Current Location's Altitude
- Press the button in Current Time Mode to enter Altimeter Mode. Measurement of the current altitude will begin automatically and readings will be displayed. Altitude measurement usually takes 45 seconds.
- If you want to track altitude changes and the altitude graph based on the measurement type (interval or continuous) you have set, leave the watch in Altimeter Mode for some time.
- Press the button to stop altitude measurements and exit Altimeter Mode.
Altitude data is presented in increments of 5 meters (20 feet). The measurable altitude range is 700 to 10,000 meters (2,300 to 32,800 feet). If data is outside the range, the display shows "---". You can select the altitude unit of measurement (meters or feet).
Selecting Altitude Measurement Type
- In Altimeter Mode, press and hold the button until the "OFF" indicator or the set altitude value appears.
- Press the button to proceed to altitude measurement type settings. The display will show "0'05" or "2'00".
- Use the button to select the measurement type: "0'05" (short) or "2'00" (long).
- "0'05": Measurements are taken at 5-second intervals for one hour.
- "2'00": Measurements are taken at 5-second intervals for the first three minutes, and then at 2-minute intervals for 9-10 hours.
- Press the button when settings are complete.
Selecting Altimeter Display Format
- In Altimeter Mode, press and hold the button until the "OFF" indicator or the set altitude value appears.
- Press the button twice to proceed to altitude measurement type settings. The display will show "1", "2", "3", or "4".
- Use the and buttons to select your preferred altimeter display:
- "1": Altitude graph (bottom display) / Altitude value (center display) / Current time (bottom display).
- "2": Altitude graph (top display) / Current time (center display) / Altitude value (bottom display).
- "3": Altitude difference value (top display) / Altitude value (center display) / Current time (bottom display).
- "4": Altitude difference value (top display) / Current time (center display) / Altitude value (bottom display).
- Press the button when settings are complete.
Entering Relative Altitude Value
Using entered data (e.g., the altitude of the first floor or the lowest point of a mountain climb) and atmospheric pressure data, the watch calculates your current location's altitude more accurately.
- In Altimeter Mode, press and hold the button until the "OFF" indicator or the set altitude value appears.
- Use the and buttons to enter the altitude value in 5-meter (20-foot) increments.
- Pressing the and buttons simultaneously turns off the set altitude value (the "OFF" indicator will appear on the display).
- Press the button when settings are complete.
Altitude Measurement Graph
You can view all measured altitude data on the altimeter graph: the horizontal axis represents the measurement time, and the vertical axis represents the altitude value in 10-meter (40-foot) increments.
Displaying Altitude Measurement Differences
In this watch, the difference between the current and previous measured altitude values is displayed on the left side. The difference value is presented in 5-meter increments. The difference measurement range is from -3,000 to 3,000 meters (-9,980 to 9,980 feet). If you selected display format 3 or 4, you need to perform altitude measurements separately.
Setting a Specific Altitude Value
- In Altimeter Mode, press and hold the button until the "SET" indicator appears.
- Release the button and wait 4-5 seconds for the "OFF" indicator or the set altitude value to appear.
- Press the button to proceed to altitude value settings.
- Use the and buttons to enter the altitude value in 5-meter (20-foot) increments.
- The permissible altitude value range is -10,000 to 10,000 meters (-32,800 to 32,800 feet).
- Pressing the and buttons simultaneously enters a zero altitude value as the set value.
- Press the button when settings are complete.
Saving Data
Using the data saving function in Altimeter Mode, you can create various types of data records: periodic, current, or historical.
- In Altimeter Mode, press and hold the button until the "REC" indicator appears, signifying the start of data saving.
- Press and hold the button again to stop the data saving process until the "REC" indicator disappears from the screen.
- The process is automatically interrupted after saving 40 periodic records.
- The watch updates the historical record during altimeter operation.
- You can view all saved data in the Phone Book Mode.
Periodic Recording
The watch can create up to 40 periodic records of measurements taken during one session. Periodic recording is created each time data saving begins. Periodic records include the month, day, measurement time, and altitude value. They are created every hour (under a sequential number) and include measurements at the beginning of the hour, and at 15, 30, and 45 minutes past the hour. After 40 periodic data records are saved or when measurements are stopped, the watch creates a final periodic record.
Current Recording
Current records contain the following data: maximum altitude value for the selected measurement record ("MAX"), minimum altitude value ("MIN"), total ascent for the selected measurement session ("ASC"), and total descent for the selected session ("DSC").
Historical Recording
Historical records contain the following data: maximum altitude value for all measurements taken ("MAX"), minimum altitude value for all measurements taken ("MIN"), total ascent for all measurement sessions ("ASC"), and total descent for all measurement sessions ("DSC").
Viewing Contents of Periodic and Current Records
- In Altimeter Phone Book Mode, use the and buttons to select the record whose data you wish to view: Periodic Records (REC(1) - REC(2)...REC(40)) - Current Records (MAX - MIN - ASC - DSC).
- Press the button to exit Altimeter Phone Book Mode after viewing the data.
- The "---" indicator shown instead of data means it was deleted or an error occurred during measurement.
- When the total ascent or descent value exceeds the permissible range of 99,995 meters (99,980 feet), measurement of that value starts from zero.
Viewing Contents of Historical Records
- In Altimeter Phone Book Mode, press the button to switch to viewing historical records ( "TTL REC" indicator).
- Press the and buttons to view the contents of the historical record: MAX – MIN – ASC – DSC.
- Press the button again to return to viewing historical or current records.
- Press the button to exit Altimeter Phone Book Mode after viewing the data.
Deleting Historical Records
You can delete historical records from the watch's memory and start all measurements anew.
- In Phone Book Mode, press the button to display the maximum value or the historical record display.
- Press and hold the button. The "CLEAR" indicator will appear on the display.
- Gradually release the button until the "CLEAR" indicator starts flashing. All saved data will be deleted.
World Time Mode
In this mode, you can view the local time in any of the 30 cities (29 time zones). World Time values are automatically set according to the current time values.
Viewing Current Time in Another City
In World Time Mode, press the and buttons to select the city whose value you want to view.
Daylight Saving Time (DST) Switching
- Use the and buttons to select the city whose daylight saving time value you want to change.
- Press the button to enable (DST ON) / disable (DST OFF) daylight saving time.
Stopwatch Mode
Stopwatch Mode allows you to record split times, lap times, and dual finish times. The operational range of the total measured time is limited to 23 hours, 59 minutes, 59.99 seconds.
Measuring Split Times
(Start) - (Stop) - (Restart) - (Stop) - (Reset).
Measuring Lap Times
(Start) - (Lap time. "SPL" indicator) - (Restart lap) - (Stop) - (Reset).
Dual Finish
(Start) - (Split. First finish. First finish result on display) - (Stop. Second finish) - (Cancel split. Second finish result on display) - (Reset).
Countdown Timer Mode
The countdown timer can be set in the range of one minute to 24 hours. When the countdown reaches zero, a long beep sounds.
Using the Timer
- Press the button in Timer Mode to start the countdown.
- Press the button again to stop the countdown. You can continue the countdown by pressing the button.
- After stopping the countdown, press the button to reset the countdown time to the starting value.
Setting Timer Modes
- In Timer Mode, when the starting time value is displayed, press and hold the button. The hour digits will flash, indicating the start of settings.
- Press the button to cycle through the settings: Hours - Minutes - Hours.
- Use the button to increase and the button to decrease the selected value.
- To set the time to 24 hours, enter "0:00:00".
- Press the button when settings are complete.
Alarm Mode
You can set five different alarms. When the set time is reached, the alarm will sound for 10 seconds. If the hourly chime is enabled, a short beep will sound at the beginning of each hour. You can stop the alarm by pressing any button.
Setting an Alarm
- In Alarm Mode, press the or buttons to select the alarm type: ALM-1, ALM-2, ALM-3, ALM-4, ALM-5, SIG (hourly chime).
- After selecting the alarm type, press and hold the button for 3 seconds. The hour digits will flash, as they are selected for setting. The alarm automatically turns on at this point.
- Press the button to cycle through the settings: Hours - Minutes.
- Use the and buttons to change the selected value.
- Press the button when settings are complete.
Checking Alarm Sound
In Alarm Mode, press the button to check the alarm sound.
Enabling/Disabling Alarm and Hourly Chime
- In Alarm Mode, press the or buttons to select the alarm type.
- Press the button to enable or disable it.
Illumination
Press the button in any mode to turn on the watch's backlight. The backlight automatically turns off when any alarm sounds.
- The backlight uses electroluminescent (EL) panels, whose power decreases after a certain period of use.
- The watch emits an audible sound when illuminated. This is because the backlight elements vibrate and is not an indication of malfunction.
- The backlight is difficult to see when direct sunlight falls on the watch.
- Frequent use of the backlight shortens the battery life.
Auto-Illumination
Auto-Illumination turns on automatically whenever your hand is tilted at an angle of 40° relative to the horizontal. Do not use the auto-illumination function when the light could cause harm or distraction, for example, while riding a motorcycle or bicycle. To enable the auto-illumination function in Current Time Mode, press and hold the button for 3 seconds. The "A.EL" indicator appears on the display when auto-illumination is enabled.
Enabling/Disabling Button Sound
In any mode, press and hold the button for several seconds to enable or disable button sound.
Power Source
This watch is equipped with a solar battery and a battery that is powered by energy received from the solar battery. If your watch is kept away from sunlight for a long time, the charge of the backup battery will decrease.
Power Indicator
The top of the display has a battery charge indicator.
| Level | Indicator | Watch Functions |
|---|---|---|
| 1 | H | Battery charge is sufficient for normal watch operation. |
| 2 | M | Battery charge is sufficient for normal watch operation. |
| 3 | LOW | Alarm, backlight, and electronic display of the watch do not operate. |
| 4 | C | The power source is completely discharged, but current time measurement continues. |
| 5 | The power source is completely discharged. |
If there is no indicator on the display, the battery is completely discharged. Place your watch on an illuminated surface.
Battery Charging
After a full charge, normal watch operation continues for 5 months under the following conditions:
- Watch is not exposed to sunlight.
- Backlight use: 1.5 sec./day.
- Alarm use: 10 sec./day.
- 1 hour of altitude measurement (using altimeter) per month.
- 2 hours of atmospheric pressure measurement per day.
- 6 minutes of calibration signal reception per day.
- 18 hours of operation, 6 hours (per day) in sleep mode.
By exposing the watch to sunlight daily, you ensure continuous battery charging:
| Light Intensity | Approximate Exposure Time |
|---|---|
| Direct Sunlight (50,000 lux) | 5 minutes |
| Sunlight through a window (10,000 lux) | 24 minutes |
| Daylight on a cloudy day (5,000 lux) | 48 minutes |
| Fluorescent lamp (500 lux) | 8 hours |
The following table shows the time required to charge the power source:
| Light Intensity | Level 4 | Level 3 | Level 2 | Level 1 |
|---|---|---|---|---|
| Direct Sunlight | 1 hour | 2 hours | 4 hours | |
| Sunlight through a window | 3 hours | 5 hours | 8 hours | 16 hours |
| Daylight on a cloudy day | 5 hours | 10 hours | 19 hours | 33 hours |
| Fluorescent lamp | 5 hours | 12 hours |
Watch Power Saving Mode
Sleep mode saves the watch's charge when it is in darkness. The following table shows the availability of watch functions in sleep mode:
| Duration in Sleep Mode | Functions |
|---|---|
| 6 to 70 minutes | Display is off. All functions are available. "PS" indicator is on the display. |
| 6 to 7 days | Display is off. Functions are unavailable. "PS" indicator is absent from the display. |
Enabling/Disabling Power Saving Mode
- In Current Time Mode, press and hold the button until the city code indicator flashes.
- Press the button 9 times to switch to Power Saving Mode.
- Use the button to turn power saving mode ON or OFF.
- Press the button when settings are complete.
When enabled, the "PS" indicator appears on the display. Your watch may also automatically enter sleep mode. To return the watch to normal operation, place it on a well-lit surface or press any button.
Current Time Mode
In Current Time Mode, pressing the button cycles through the display formats: day of the week, date, atmospheric pressure graph.
- In Current Time Mode, press and hold the button until the city code indicator appears, signifying the start of settings.
- Press the button to cycle through the settings: City Code, Daylight Saving Time (DST), 12/24 Hour Format, Seconds, Hours, Minutes, Year, Month, Day, Power Saving Mode, Temperature Unit, Altitude Unit, Pressure Unit, City Code.
- If you select seconds for correction (seconds display flashes), press the button to reset the seconds counter to 00. If you press the button when the seconds counter is between 30 and 59, the seconds counter will reset to 00 and 1 will be added to the minutes counter. If the seconds counter is between 00 and 29, the minutes counter will not change.
- To change the values for minutes, etc., use the button to increase and the button to decrease the selected value. The day of the week is set automatically according to the date. The date can be set from January 1, 2000, to December 31, 2099.
- Use the and buttons to select the city code.
- To switch daylight saving time formats, press the button: Auto-switching (AT), Daylight Saving Time Off (OFF), Daylight Saving Time On (ON).
- Press the button to switch between 12-hour and 24-hour time formats. In the 12-hour format, the "P" indicator signifies PM.
- Press the button when settings are complete.
| City Code | City | Difference from Greenwich (GMT) | Other Major Cities in the Same Time Zone |
|---|---|---|---|
| PPG | Pago Pago | -11.00 | |
| HNL | Honolulu | -10.00 | |
| ANC | Anchorage | -09.00 | |
| LAX | Los Angeles | -08.00 | Las Vegas, Seattle, Dawson City |
| DEN | Denver | -07.00 | El Paso, Edmonton |
| CHI | Chicago | -06.00 | Houston, Dallas, New Orleans, Winnipeg, Havana, Lima, Bogota |
| NYC | New York | -05.00 | Montreal, Detroit, Boston, Panama City |
| CCS | Caracas | -04.00 | Santiago |
| RIO | Rio de Janeiro | -03.00 | Sao Paulo, Buenos Aires, Brasilia, Montevideo |
| FEN | -02.00 | ||
| RAI | -01.00 | ||
| GMT | +00.00 | ||
| LON | London | +00.00 | Dublin, Lisbon, Casablanca, Abidjan |
| PAR | Paris | +01.00 | Milan, Amsterdam, Algiers, Hamburg, Frankfurt, Vienna, Rome, Berlin, Monte Carlo, Stockholm |
| City Code | City | Difference from Greenwich (GMT) | Other Major Cities in the Same Time Zone |
|---|---|---|---|
| HKG | Hong Kong | +08.00 | Kuala Lumpur, Manila, Ulaanbaatar |
| TYO | Tokyo | +09.00 | Pyongyang |
| ADL | Adelaide | +09.05 | Darwin |
| SYD | Sydney | +10.00 | Melbourne, Guam, Rabual |
| NOU | Noumea | +11.00 | Vila |
| WLG | Wellington | +12.00 | Nadi, Nauru, Christchurch |
By presidential decree of the Russian Federation, daylight saving time was abolished throughout Russia starting in June 2011. On July 21, 2014, Federal Law No. 207-FZ "On Amendments to the Federal Law 'On Time Calculation'" was adopted, according to which, as of October 26, 2014, Russia has 11 time zones, and most of them were shifted back by one hour. Please consider this information when setting your watch.
Technical Specifications
| Feature | Specification |
|---|---|
| Accuracy at normal temperature | +/- 15 seconds per month |
| Current Time Mode | Hour, minute, second, AM/PM (P), year, month, day, day of the week. Automatic calendar from 2000 to 2099. 12/24 hour format. |
| Barometer/Thermometer Mode | Atmospheric pressure measurement graph, pressure difference display, sensor calibration. |
| Altimeter Mode | Altitude measurement type selection, altitude difference display, entry of relative and specific altitude values. |
| Altimeter Phone Book Mode | Up to 40 records of measured altitude values can be entered. |
| Alarm Mode | 5 daily alarms, hourly chime indication. |
| Stopwatch Mode | Maximum measurement range: 23 hours 59 minutes 59.99 seconds. Measurement modes: split times, lap times, dual finish. |
| Timer Mode | Unit of measurement: 1 minute. Measurement range: 1 to 24 hours. Auto-repeat. |
| Other | Backlight (electroluminescent panel), auto-illumination, button sound on/off, power level indicator, power saving mode. |
Product Information
Name: Wrist electronic watch / electro-mechanical quartz watch (men's/women's)
Brand: CASIO
Manufacturer: CASIO COMPUTER Co., Ltd.
Manufacturer Address: 1-6-2, Hon-machi 1-chome, Shibuya-ku, Tokyo 151-8543, Japan
Importer: LLC "Casio", Russia, Moscow, Butyrskaya St., Bldg. 77, 127015
Warranty Period: 1 year
Address for authorized organizations to receive claims: Specified in the warranty card.
City Code Table (Continued)
| City Code | City | Difference from Greenwich (GMT) | Other Major Cities in the Same Time Zone |
|---|---|---|---|
| CAI | Cairo | +02.00 | Istanbul, Helsinki, Nicosia, Athens |
| JRS | Jerusalem | +02.00 | Beirut, Damascus, Cape Town |
| JED | Jeddah | +03.00 | Kuwait, Riyadh, Aden, Addis Ababa, Nairobi, Moscow |
| THR | Tehran | +03.05 | Shiraz |
| DXB | Dubai | +04.00 | Abu Dhabi, Muscat |
| KBL | Kabul | +04.05 | |
| KHI | Karachi | +05.00 | Male |
| DEL | Delhi | +05.50 | Mumbai, Kolkata |
| DAC | Dhaka | +06.00 | |
| RGN | Yangon | +06.50 | |
| BKK | Bangkok | +07.00 | Jakarta, Hanoi, Vientiane |
| HKG | Hong Kong | +08.00 | Kuala Lumpur, Manila, Ulaanbaatar |
| TYO | Tokyo | +09.00 | Pyongyang |
| ADL | Adelaide | +09.05 | Darwin |
| SYD | Sydney | +10.00 | Melbourne, Guam, Rabual |
| NOU | Noumea | +11.00 | Vila |
| WLG | Wellington | +12.00 | Nadi, Nauru, Christchurch |
Related Documents
 |
Casio Watch Module 5114/5214 User Manual Comprehensive user manual for Casio PRW-5000/5050/5100/S5100 watches, detailing all functions, modes, calibration, and maintenance procedures. |
 |
CASIO PRW-1200 Watch User Manual: Features, Operation, and Specifications Comprehensive user manual for the CASIO PRW-1200 watch (Module 3043), detailing its features, modes, operation, and technical specifications. Learn about timekeeping, world time, stopwatch, timer, alarm, compass, barometer, thermometer, altimeter, and power saving. |
 |
Casio PRW-5000/5100 Watch User Manual - Features and Operation Comprehensive user manual for Casio PRW-5000/5100 series watches (models 5114, 5214), detailing timekeeping, world time, stopwatch, alarms, barometer, altimeter, thermometer, and compass functions. |
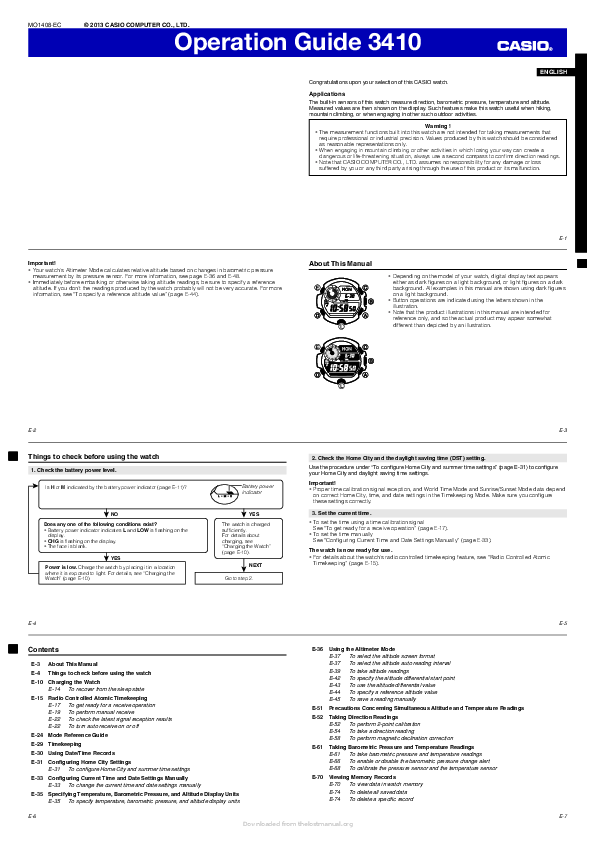 |
Casio Operation Guide 3410: Comprehensive Features and Usage Detailed operation guide for the Casio 3410 watch, covering its advanced features such as altimeter, barometer, thermometer, digital compass, radio-controlled atomic timekeeping, stopwatch, countdown timer, alarms, and illumination. Includes setup, usage instructions, troubleshooting, and specifications. |
 |
CASIO 3499 User's Guide: Comprehensive Operation Manual Detailed instructions for the CASIO 3499 watch, covering charging, mode navigation, time settings, compass, barometer, altimeter, stopwatch, and specifications. Learn how to use all features. |
 |
Casio Module 3135 PRG-130 User Manual - Features and Operation Comprehensive user manual for the Casio Module 3135 PRG-130 watch, detailing its features including compass, barometer, thermometer, altimeter, world time, stopwatch, timer, and alarms. Learn how to set up and use all functions. |
 |
Casio Watch Module 1170 User Manual Comprehensive user manual for the Casio watch, model module 1170, detailing functions like digital compass, altimeter, barometer, thermometer, stopwatch, and alarms. Includes setup, operation, and technical specifications. |
 |
CASIO 5594 Watch User Guide: Features, Specifications & Operation Comprehensive user guide for the CASIO 5594 watch, detailing its features including timekeeping, barometer, thermometer, compass, altimeter, stopwatch, mobile link, and specifications. Learn how to set time, navigate modes, and use all functions. |