Casio PRG-140 (Module 3144) User Manual
Model: PRG-140, Module: 3144, Case Number: АЯ46
Important Information
Battery
If the display becomes dim or the backlight fails to illuminate, the battery needs replacement. Please visit an authorized CASIO dealer or distributor. The battery included with your watch is for initial testing purposes and may have a shorter lifespan than a standard battery.
Water Resistance
Watches are classified into water resistance categories from I to V. Refer to the table below to understand the usage rules for your watch.
| Marking on Case | Splashes, Rain, Washing | Swimming, Light Diving | Scuba Diving |
|---|---|---|---|
| I | No | No | No |
| WATER RESISTANT (II) | Yes | No | No |
| 50M WATER RESISTANT (III) | Yes | Yes | No |
| 100M WATER RESISTANT (IV) | Yes | Yes | Yes |
| 200M WATER RESISTANT (V) | Yes | Yes | Yes |
| 300M WATER RESISTANT (V) | Yes | Yes | Yes |
Notes for specific categories:
- Category I: Not water resistant. Avoid all contact with water.
- Category III: If exposed to salt water, rinse thoroughly with fresh water and dry.
- Category IV: If exposed to salt water, rinse thoroughly with fresh water and dry.
- Category V: Can be used for scuba diving (excluding depths requiring a helium-oxygen mixture).
❗ For all watch categories, do NOT:
- Press buttons underwater.
- Set the time underwater.
- Unscrew the crown underwater.
⚠️ IMPORTANT!
Some water-resistant watches have leather straps. Do not wear these watches while swimming or engaging in any other activity where the strap may be submerged in water.
Care for Your Watch
- Replace the gasket (which protects against water and dust) every 2-3 years.
- If water enters the watch, have it checked immediately by a CASIO dealer or distributor.
- Avoid exposing the watch to extreme high or low temperatures.
- While designed for normal use, avoid rough handling and dropping the watch.
- Do not fasten the strap too tightly. A finger should fit between your wrist and the strap.
- Clean the watch and strap with a dry, soft cloth, or a soft cloth dampened with a mild neutral detergent solution. Never use volatile solvents (e.g., gasoline, thinners, aerosol cleaners).
- Store the watch in a dry place when not in use.
- Avoid contact with gasoline, cleaning solvents, aerosol sprays, adhesives, paint, etc. Chemical reactions with these materials can damage gaskets, the case, and the finish.
- Some models feature silk-screened designs on the strap. Clean these carefully to avoid damaging the graphics.
For Watches with Resin Straps...
- A white powdery substance may appear on the strap. This is harmless and can be easily removed by wiping with a soft cloth.
- Sweat or moisture, or storage in high humidity, can damage, tear, or crack the resin strap. To ensure a long service life, wipe the strap frequently with a soft cloth to remove dirt and moisture.
For Watches with Fluorescent Cases and Straps...
- Prolonged exposure to direct sunlight can cause the fluorescent color to gradually fade. If the watch surface gets wet, wipe it dry as soon as possible.
- Prolonged contact with a wet surface can cause discoloration of the fluorescent color. Keep the fluorescent surface dry and avoid contact with other surfaces.
- Rubbing a surface with fluorescent paint against another surface can transfer the paint.
General Description of Modes
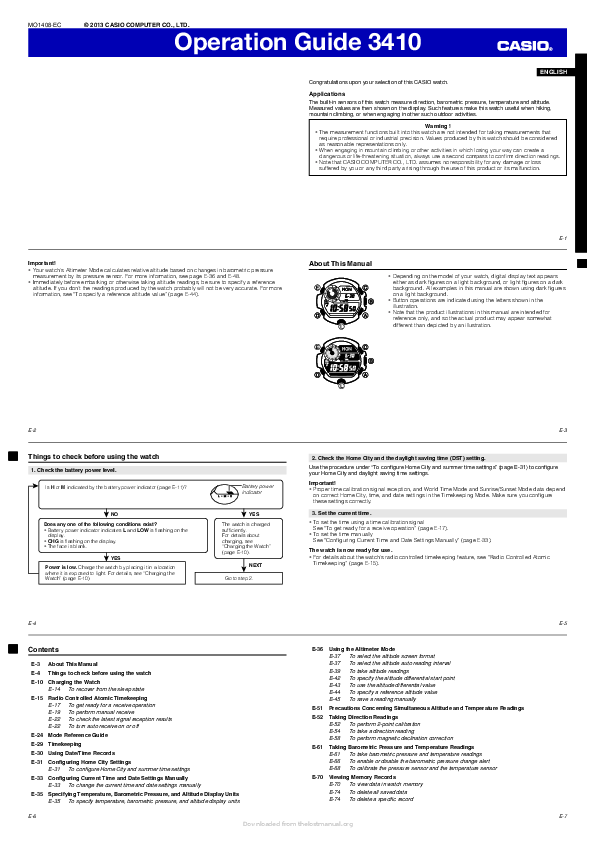
The illustration shows the watch in the Current Time Mode.
The watch face displays the current time (e.g., 10:58), day (MON), date (30), and other indicators like battery level (PS), and mode indicators (H/M/L for light, MUTE/ALM for sound). Buttons are labeled A, B, C, D, and L (for light).
Pressing the "C" button sequentially cycles through the following modes:
- Current Time Mode
- Card File Mode
- World Time Mode
- Stopwatch Mode
- Countdown Timer Mode
- Alarm Mode
- Current Time Mode
To enter Barometer/Thermometer Mode from Current Time Mode, press button "B". To return to Current Time Mode, press button "C".
To enter Altimeter Mode from Current Time Mode, press button "D". To return to Current Time Mode, press button "C".
Press button "L" to turn on the backlight in any mode.
Current Time Mode
In Current Time Mode, pressing button "A" allows you to cycle through displays for the current day of the week/date, atmospheric pressure/graph.
Setting the Time
- In Current Time Mode, press and hold button "A" until the city code flashes, indicating the start of settings.
- Press button "C" to cycle through the following settings: City Code – Daylight Saving Time (DST) – 12/24 Hour Format – Seconds – Hours – Minutes – Year – Month – Day – Power Saving System – Temperature Unit – Altitude Unit – Pressure Unit – City Code.
- To set seconds: If seconds are flashing, press button "D" to reset to 00. If seconds are between 30-59, pressing "D" resets to 00 and advances the minutes by one. If seconds are between 00-29, the minutes remain unchanged.
- To set minutes, hours, etc.: Use button "D" to increase and button "B" to decrease the selected value.
- The day of the week is set automatically based on the date.
- The date can be set from January 1, 2001, to December 31, 2099.
- Use buttons "D" and "B" to select the city code.
- Press button "D" to turn Daylight Saving Time (DST) ON or OFF.
- Press button "D" to switch between 12-hour and 24-hour time formats. The "P" indicator shows PM in 12-hour format.
- Press button "A" to exit settings.
Backlight
Press button "L" in any mode to turn on the watch backlight.
- The backlight uses electroluminescent panels (EL) whose brightness decreases over time.
- A faint audible signal may be heard when the backlight is on; this is normal and indicates the EL elements are vibrating.
- The backlight may be difficult to see in direct sunlight.
- Frequent use of the backlight reduces battery life.
Auto-Backlight
The auto-backlight activates automatically when your hand is angled approximately 40° from horizontal. Do not use auto-backlight if it could impair your vision or distract you (e.g., while driving).
To enable/disable auto-backlight in Current Time Mode, press and hold button "L" for 3 seconds. The "A.EL" indicator will appear on the display when it is enabled.
Button Sound On/Off
In any mode, press and hold button "C" for several seconds to turn button sounds ON ("MUTE") or OFF.
Barometer/Thermometer Mode
This watch is equipped with a sensor for measuring atmospheric pressure and ambient temperature. Body heat, direct sunlight, or moisture can affect temperature readings.
Atmospheric Pressure/Temperature Monitoring
Press button "B" to enter Barometer/Thermometer Mode. Measurements take approximately 4-5 seconds.
- Measured pressure is displayed in the center; temperature is displayed at the bottom.
- Pressure readings are in hPa (hectopascals) or inHg (inches of mercury). The measurement range is 260 hPa to 1,100 hPa (7.65 inHg to 32.45 inHg). If pressure is outside this range, "- - - -" is displayed. Readings resume when pressure normalizes.
- Temperature readings are in Celsius (°C) or Fahrenheit (°F). The measurement range is -10.0°C to 60.0°C (14°F to 140.0°F). If temperature is outside this range, "- - - -" is displayed. Readings resume when temperature normalizes.
Atmospheric Pressure Graph
Measurements are taken every 2 hours, starting from the top of the hour. All measured values are displayed on the watch's graph.
- The graph shows the last 24 hours of measurements.
- A flashing cursor indicates the most recent measurement.
- The graph increases or decreases with a pressure change of 1 hPa (0.05 inHg).
- Some graph segments may disappear if temperature changes sharply; they will reappear when the temperature stabilizes.
The graph display may be affected by:
- Measurements falling outside the allowable range.
- Sensor malfunctions.
Atmospheric Pressure Difference Graph
In Barometer Mode, each new pressure measurement is compared to the previous one, and the difference is displayed.
- Difference readings are shown in +/- 5 hPa increments.
- The difference is not displayed if the measured pressure is outside the allowable range.
Barometer/Temperature Sensor Calibration
The sensor is factory calibrated and does not require user calibration for normal use. If significant inaccuracies occur, recalibration may be performed.
- In Barometer/Thermometer Mode, press and hold button "A" until "OFF" or the temperature value is displayed.
- Press button "C" to proceed to sensor calibration.
- Use buttons "D" (increase) and "B" (decrease) to adjust sensor values.
- Press buttons "D" and "B" simultaneously to reset to original values.
- Press button "A" to exit calibration.
Changing Temperature, Pressure, and Altitude Units
- In Current Time Mode, press and hold button "A" until the city code flashes.
- Press button "C" to cycle through unit settings for temperature, pressure, and altitude.
- Use button "D" to select units: Temperature (°C – °F), Altitude (meters – feet), Pressure (hPa – inHg).
- Press button "A" to exit settings.
Altimeter Mode
The built-in altimeter calculates your current location's altitude based on atmospheric pressure. You can also input relative altitude data (e.g., base camp elevation) for more accurate readings. Note that altimeter readings are not absolute and can be affected by ambient temperature, temperature changes, proximity to electronic devices, magnetic fields, and air travel.
Viewing Current Altitude
- Press button "D" in Current Time Mode to enter Altimeter Mode.
- The watch will automatically start measuring and displaying your current altitude. Measurement takes approximately 4-5 seconds.
Altitude Measurement Data
If you want to track altitude changes and graphs based on interval or continuous measurements, leave the watch in Altimeter Mode for a period.
- Press button "D" to stop altitude measurements and start anew.
- Altitude data is displayed in 5-meter (20-foot) increments.
- The measurement range is -700 to 10,000 meters (-2,300 to 32,800 feet). Readings outside this range will show "- - - -".
- You can select altitude units (meters or feet).
❗ To exit Altimeter Mode, press button "C".
Altitude Measurement Type Selection
- In Altimeter Mode, press and hold button "A" until "OFF" or a set altitude value is displayed.
- Press button "C" twice to access measurement type settings. The display will show "0'05" or "2'00".
- Press button "D" to select "0'05" (short interval) or "2'00" (long interval).
- "0'05": Measurements are taken every 5 seconds for one hour.
- "2'00": Measurements are taken every 5 seconds for the first three minutes, then every 2 minutes for 9-10 hours.
- Press button "A" to exit settings.
Altimeter Display Format Selection
- In Altimeter Mode, press and hold button "A" until "OFF" or a set altitude value is displayed.
- Press button "C" twice to access display format settings. The display will show "1", "2", "3", or "4".
- Use buttons "D" and "B" to select your preferred display:
- "1": Altitude graph (top) / Altitude value (center) / Current time (bottom)
- "2": Altitude graph (top) / Current time (center) / Altitude value (bottom)
- "3": Altitude difference (top) / Altitude value (center) / Current time (bottom)
- "4": Altitude difference (top) / Current time (center) / Altitude value (bottom)
- Press button "A" to exit settings.
Saving Altitude Measurement Data
To start saving data, press and hold button "D" until the "REC" indicator appears. All measured data (year, month, day) is automatically saved to the watch's memory. The "REC" indicator will stop flashing, and the watch will return to Altimeter Mode. The watch can store up to 40 data entries. If the memory is full, older data is automatically deleted to make space for new entries.
❗ To stop data saving, press button "D". The "REC" indicator will disappear.
Periodic Records
The watch can store up to 40 periodic records for a single session.
- Periodic records are created every time data saving begins.
- Each record includes the month, day, measurement time, and altitude value.
- Records are created hourly (by number) and include measurements at the start of the hour, and at 15, 30, and 45 minutes past the hour.
- After 40 periodic records are saved or when measurements stop, a final periodic record is created.
Current Records
Current records contain the following data: Maximum altitude ("MAX"), Minimum altitude ("MIN"), Total ascent for the current session ("ASC"), Total descent for the current session ("DSC").
- Maximum ascent or descent is 99,995 meters (99,980 feet).
- Current record data is created automatically when measurements begin, overwriting the previous current record.
- Data measurement and saving depend on whether the watch is in Altimeter Mode or not.
When the watch is in Altimeter Mode:
- Short interval (0'05): Data updates every 5 seconds.
- Long interval (2'00): Data updates every 2 minutes and at the start of the hour, plus 15, 30, and 45 minutes past the hour.
When the watch is NOT in Altimeter Mode:
- Data updates every 2 minutes and at the start of the hour, plus 15, 30, and 45 minutes past the hour.
Inputting Relative Altitude
By inputting data such as the elevation of the first floor or a base camp, and using atmospheric pressure data, the watch can calculate your current altitude more accurately.
Viewing Periodic and Current Records
In the Altimeter Logbook Mode, use buttons "D" and "B" to select records: Periodic records (REC 1 – REC 40) or Current records (MAX – MIN – ASC – DSC). Press button "C" to exit Logbook Mode.
- If the record data is missing or an error occurred during measurement, "- - - -" will be displayed.
- If the total ascent or descent exceeds the allowable range (99,995 meters / 99,980 feet), the measurement restarts from zero.
Altitude Graph
You can view all measured altitude data on the altimeter graph. The horizontal axis represents measurement time, and the vertical axis represents altitude in 10-meter (40-foot) increments.
Altitude Difference Graph
On the right side of the display, the difference between the relative altitude and the current altitude is shown.
- Difference is displayed in 5-meter increments.
- The difference range is -3,000 to 3,000 meters (-9,980 to 9,980 feet).
- If you selected display format 3 or 4, altitude measurements must be taken separately.
Resetting Altitude Difference to Zero
In Altimeter Mode, press button "A". After a short time, "0" will appear instead of the difference value.
Using Altitude Difference
After resetting the relative altitude to zero, you can calculate the difference between your current location and a subsequent ascent/climb point.
- In Altimeter Mode, ensure the altitude difference is displayed.
- Use contour lines on a map to estimate the difference between your current location and the ascent point.
- Press button "A" to measure the altitude.
- The display will show the difference between your current location and the ascent point.
Altimeter Logbook Mode
In this mode, you can view all saved data from Altimeter Mode. When periodic data is saved, and the watch displays maximum or minimum ascent/descent values, the current time and date alternate at the bottom of the display.
Periodic Records
You can view up to 40 periodic records from the last measurement session.
Current Records
Current records contain: Maximum altitude ("MAX"), Minimum altitude ("MIN"), Total ascent ("ASC"), Total descent ("DSC") for the selected record.
World Time Mode
This mode allows you to view the local time in any of 30 cities (29 time zones). World Time is synchronized automatically with the current time settings.
Viewing Current Time in Another City
In World Time Mode, use buttons "D" and "B" to select the city whose time you wish to view.
Daylight Saving Time
- Use buttons "D" and "B" to select the city for which you want to change DST settings.
- Press button "A" to turn DST ON or OFF for that city.
World Time City Codes Table
| City Code | City | GMT Difference | Major Cities in Time Zone |
|---|---|---|---|
| HNL | Honolulu | -11.0 | Pago Pago |
| ANC | Anchorage | -09.00 | Nome |
| LAX | Los Angeles | -08.00 | Las Vegas, Seattle, Dawson City |
| DEN | Denver | -07.00 | El Paso, Edmonton |
| CHI | Chicago | -06.00 | Houston, Dallas, New Orleans |
| NYC | New York | -05.00 | Montreal, Detroit, Boston, Panama City, Havana, Lima, Bogota |
| CCS | Caracas | -04.00 | Santiago |
| RIO | Rio de Janeiro | -03.00 | Sao Paulo, Buenos Aires, Brasilia, Montevideo |
| -02 | -02.00 | Prai | |
| -01 | -01.00 | ||
| GMT | +00.00 | ||
| LON | London | +00.0 | |
| PAR | Paris | +01.00 | Amsterdam, Algiers |
| BER | Berlin | +01.00 | |
| ATH | Athens | +02.00 | |
| CAI | Cairo | +02.00 | |
| JRS | Jerusalem | +02.00 | |
| JED | Jeddah | +03.00 | Kuwait, Er-Riyadh, Aden, Addis Ababa, Nairobi, Shiraz |
| THR | Tehran | +03.05 | |
| DXB | Dubai | +04.00 | Abu Dhabi, Muscat |
| KBL | Kabul | +04.05 | |
| KHI | Karachi | +05.00 | |
| DEL | Delhi | +05.50 | Mumbai, Kolkata |
| DAC | Dhaka | +06.00 | Colombo |
| RGN | Yangon | +06.50 | |
| BKK | Bangkok | +07.00 | Hanoi, Vientiane |
| HKG | Hong Kong | +08.00 | Kuala Lumpur, Manila, Perth, Ulan Bator |
| SEL | +09.00 | Seoul | |
| TYO | Tokyo | +09.00 | Pyongyang |
| ADL | Adelaide | +09.05 | Darwin |
| SYD | Sydney | +10.00 | Melbourne, Raboul |
| NOU | Noumea | +11.00 | Vila |
| WLG | Wellington | +12.00 | Nadi, Nauru, Christchurch |
Stopwatch Mode
The Stopwatch Mode allows you to record elapsed time, split times, and dual-finish times. The maximum measurement time is 23 hours, 59 minutes, and 59.99 seconds.
Measuring Split Times
D (Start) – D (Stop) – D (Restart) – D (Stop) – B (Reset).
Measuring Time with Split Results
D (Start) – B (Split time. SPL indicator appears) – B (Restart) – D (Stop) – B (Reset).
Dual Finish
D (Start) – B (Lap. First finisher's time displayed) – D (Stop. Second finisher's time displayed) – B (Cancel Lap. Second finisher's time displayed) – D (Reset).
Countdown Timer Mode
The Countdown Timer can be set from one minute to 24 hours. When the countdown reaches zero, a long alarm sounds.
Setting the Timer
- Press button "C" to cycle through Hours – Minutes – Hours.
- Use buttons "D" (increase) and "B" (decrease) to set the desired value.
- To set a 24-hour countdown, enter "0H 00'00".
- Press button "A" to exit settings.
Using the Timer
- In Timer Mode, press and hold button "A" to start setting the time. The hour digits will flash.
- Press button "D" in Timer Mode to start the countdown.
- Press button "D" again to pause the countdown.
- You can resume the countdown by pressing "D".
- After pausing, press button "B" to reset the timer to its starting value.
Alarm Mode
You can set up to five different alarms. When a set alarm time is reached, it will sound for 10 seconds. If the hourly chime is enabled, a short beep will sound at the top of each hour.
You can stop the alarm sound by pressing any button.
Setting an Alarm
- In Alarm Mode, use buttons "D" or "B" to select the alarm type: ALM1 – ALM2 – ALM3 – ALM4 – ALM5 – SIG (hourly chime).
- After selecting the alarm type, press and hold button "A" for 3 seconds. The hour digits will flash, indicating they are ready for setting. The alarm automatically turns ON at this point.
- Press button "C" to cycle through Hours – Minutes.
- Use buttons "D" and "B" to adjust the selected value.
- Press button "A" to exit settings.
Checking Alarm Sound
In Alarm Mode, press button "D" to test the alarm sound.
Alarm/Hourly Chime On/Off
- In Alarm Mode, use buttons "D" or "B" to select the alarm type.
- Press button "A" to turn the alarm/chime ON or OFF.
- The "ALM" indicator appears on the display for regular alarms.
- The "SIG" indicator appears for the hourly chime.
Power Supply
This watch is powered by a solar-rechargeable battery and a backup battery. If the watch is kept in darkness for extended periods, the backup battery charge will deplete.
Battery Charge Indicator
The battery charge indicator is located at the bottom of the display. If the indicator is not shown, the battery is fully discharged. Place your watch in a well-lit area.
- Be careful not to expose your watch to direct sunlight for extended periods, as this may cause malfunctions.
- If you frequently use the backlight or alarms, the "LOW" indicator may appear, signaling that the battery needs recharging.
Battery Charging
After a full charge, the watch will operate normally for approximately 7 months under the following conditions:
- Watch is not exposed to direct sunlight.
- Backlight used for 1.5 seconds/day.
- Alarm used for 10 seconds/day.
- Altitude measurement for 1 hour/month.
- Barometric pressure measurement for 2 hours/day.
- 6 hours of operation per day, with 6 hours in sleep mode.
Exposing the watch to sunlight daily ensures continuous recharging:
| Light Brightness | Approximate Charging Time |
|---|---|
| Direct Sunlight (50,000 lux) | 5 minutes |
| Sunlight through a window (10,000 lux) | 24 minutes |
| Daylight on a cloudy day (5,000 lux) | 48 minutes |
| Fluorescent Lamp (500 lux) | 8 hours |
Power Saving Mode
Sleep mode conserves battery power when the watch is in darkness. The following table shows the availability of watch functions when in sleep mode:
| Duration in Sleep Mode | Functions |
|---|---|
| 60 – 70 minutes |
|
| 6 – 7 days |
|
Enabling/Disabling Power Saving Mode
- In Current Time Mode, press and hold button "A" until the city code flashes.
- Press button "D" 9 times to access Power Saving Mode.
- Press button "D" to turn the power saving mode ON ("ON") or OFF ("OFF").
- Press button "A" to exit settings.
- When the mode is ON, the "PS" indicator appears on the display.
Your watch may also enter sleep mode automatically. To return the watch to normal operation, place it in a well-lit area or press any button.
Technical Specifications
| Specification | Details |
|---|---|
| Accuracy (at normal temperature) | +/- 15 seconds per month |
| Current Time Mode | Hours, minutes, seconds, AM/PM indicator (P), year, month, day, day of the week. |
| Calendar System | Auto calendar from 2001 to 2099. |
| World Time Mode | 12/24 hour format, current time in 30 cities (29 time zones). |
| Barometer/Thermometer Mode | Atmospheric pressure graph, pressure difference, sensor calibration. |
| Altimeter Mode | Measurement type selection, display of measured values, relative altitude input. |
| Altimeter Logbook Mode | Storage of up to 40 measured altitude records. |
| Alarm Mode | 5 daily alarms, hourly chime. |
| Stopwatch Mode | Maximum measurement: 23 hours, 59 minutes, 59.99 seconds. Split times, lap times, dual finish. |
| Countdown Timer Mode | Unit of measurement: 1 minute. Range: 1 – 24 hours. |
| Other | Backlight (electroluminescent panel), auto-backlight, button sound on/off, battery charge indicator, power saving mode. |
Product Information
| Name: | Electronic / Electro-mechanical Quartz Wristwatch (Men's/Women's) |
| Brand: | CASIO |
| Manufacturer: | CASIO COMPUTER Co.,Ltd. (CASIO Computer Co., Ltd.) |
| Manufacturer Address: | 6-2, Hon-machi 1-chome, Shibuya-ku, Tokyo 151-8543, Japan |
| Importer: | OOO "Kasio", 127055, Moscow, ul. Sushchevskaya, d.27, str. 1, Russia |
| Country of Origin: | Japan |
| Warranty Period: | 1 year |
| Address for Authorized Organization for Claims: | Specified in the warranty certificate |
Product complies with GOST 26270-98 (p.4.35)
Certificate of Conformity No. РОСС JP. АЯ46.Д42228 / РОСС JP. АЯ46.Д42071 / POCC JP. АЯ46.Д42230