PCE INSTRUMENTS PCE-AQD 10 CO2 Data Logger

Specifications
- Measurement range
- Temperature: 10°C to 90°C
- Relative humidity: 10% to 90% RH
- CO2: 0 to 4000 ppm
- Resolution
- Temperature: 0.1°C
- Relative humidity: 1% RH
- CO2: 1 ppm
- Accuracy
- Temperature: N/A
- Relative humidity: N/A
- CO2: N/A
Product Usage Instructions
Usage Steps
- Insert an SD card into the device.
- Power on the data logger using the designated button.
- Select the desired recording parameters (CO2, temperature, humidity).
- Place the device in the desired location for monitoring.
- Allow the data logger to record data over the desired period.
- To access recorded data, remove the SD card and transfer data to a PC for analysis
Data Backup from SD Card to PC
To back up data from the SD card to a PC:
- Remove the SD card from the data logger.
- Insert the SD card into a card reader on your PC.
- Locate the data files on the SD card and copy them to a folder on your PC.
Settings
To adjust settings on the PCE-AQD 10:
- Access the settings menu on the device.
- Modify parameters such as recording intervals or alarm thresholds as needed.
- Save changes before exiting the settings menu.
FAQ
Q: What is the maximum SD card capacity supported by the PCE-AQD 10
A: The PCE-AQD 10 supports SD cards up to 16 GB (SDHC).
Safety notes
Please read this manual carefully and completely before you use the device for the first time. The device may only be used by qualified personnel and repaired by PCE Instruments personnel. Damage or injuries caused by non-observance of the manual are excluded from our liability and not covered by our warranty.
- The device must only be used as described in this instruction manual. If used otherwise, this can cause dangerous situations for the user and damage to the meter.
- The instrument may only be used if the environmental conditions (temperature, relative humidity, …) are within the ranges stated in the technical specifications. Do not expose the device to extreme temperatures, direct sunlight, extreme humidity or moisture.
- Do not expose the device to shocks or strong vibrations.
- The case should only be opened by qualified PCE Instruments personnel.
- Never use the instrument when your hands are wet.
- You must not make any technical changes to the device.
- The appliance should only be cleaned with a damp cloth. Use only pH-neutral cleaner, no abrasives or solvents.
- The device must only be used with accessories from PCE Instruments or equivalent.
- Before each use, inspect the case for visible damage. If any damage is visible, do not use the device.
- Do not use the instrument in explosive atmospheres.
- The measurement range as stated in the specifications must not be exceeded under any circumstances.
- Non-observance of the safety notes can cause damage to the device and injuries to the user.
We do not assume liability for printing errors or any other mistakes in this manual.
We expressly point to our general guarantee terms which can be found in our general terms of business.
Introduction
The PCE-AQD 10 is a data logger which records and saves the CO2 content, air temperature and relative humidity. The data is stored on an SD card (up to max. 16 GB SDHC). The device is mainly used for long-term recording in the food sector (refrigerated counters in department stores, refrigerated transport, warehouses) as well as for measurement and recording indoors (meeting rooms, offices, etc.)
- measures temperature, humidity, CO2
- flexible internal real-time data storage via SD memory card (1 … 16 GB)
- the saved data is saved directly to the SD card as an Excel file
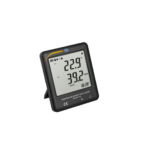
- large LCD
Specifications
Measurement range
|
|
Resolution
|
|
Accuracy
|
|
| Measuring rate | 5, 10, 30, 60, 120, 300 or 600 s or automatic (if the value is changed by ±1 °C, ±1 % RH, or ±50 ppm, the data set is automatically saved to the memory) |
| Data memory | flexible via SD card memory 1 … 16 GB (2 GB SD card included) |
| Display | LCD, 60 x 50 mm |
| Ambient temperature | 0 … +50 °C, <90 % RH |
| Power supply | 6 x 1.5 V AAA battery (for time backup only) / 9 V mains adaptor |
| Dimensions | 132 x 80 x 32 mm |
| Weight
(incl. battery) |
285 g |
Delivery scope
CO2 data logger, 2 GB SD memory card, wall mounting kit, 6 x battery, mains adaptor and user manual
Available accessories
ISO calibration certificates (for temperature, humidity and CO2)
Control panel
 Display
- Logger key, enter key
 key, time key
 key
key- SET key
- Humidity, temperature sensor
- Suspension brackets
- Table stand
- Battery compartment cover
- Safety screw for battery compartment cover
- RESET key
- RS-232 output
- SD card slot
- 9 V DC connection
- CO2 sensor connection
- CO2 sensor
- CO2 sensor plug
- Suspension mounts sensor
- suspension mounts data logger
- Suspension device CO2 sensor
Preparation
Inserting the batteries (see also Chapter 9)
- Insert batteries into the battery compartment by first loosening the screw (3-10) and removing the battery compartment cover (3-9).
- Insert the 6 x AAA batteries into the compartment. Pay attention to the correct polarity.
- Place the battery cover back on and secure it with the screw.
Note: The batteries only serve to supply the internal clock. For operation and display, the meter must be used with the mains adaptor.
Data logger
Preparation
- Insert the SD card (1 GB to 16 GB) into the SD card slot (3-13). Ensure that the card is oriented correctly.
- When you use the card for the first time, it must be formatted. Refer to chapter 8.1 for more information.
Note: Please do not use an SD card formatted in another device (e. g digital camera) In this case, you have to format the SD card again in the data logger. If there are any problems during formatting, please try to format the card in your PC. This procedure may solve the problem. - Set the time: When you use the meter for the first time, the time must be set. See chapter 8.2 for more information.
- Format of decimal point: The format on the SD card uses a “dot” as the decimal point, e. g. “20.6” or “1000.53”. You can also choose a comma as decimal point, see chapter 8.5.
- Information that can appear on the display:
This indicates a problem with the SD card. It is also displayed when the SD memory card is full. In this case, replace the memory card.
This indicates that the battery voltage is too low. In this case, please replace the batteries.
This indicates that there is no memory card in the device.
 Data logger function
- Press the logger key (3-2) for more than 2 seconds until the display shows “DATALOGGER”. Now the data logger starts to save measured values.
- If you want to switch off the data logger function, you must press the logger key (3-2) again for more than 2 seconds. The “DATALOGGER” indicator then disappears from the display.
- in chapter 8.3, it is described how to set the recording interval; in chapter 8.4, it is described how to set the beeper.
- Note: Before removing the SD card, make sure that the data logger function is stopped. Otherwise, you may lose data from the SD card.
Time information
If you press and hold down the time key (3-3) for more than 2 seconds, the following data appears in the display: year/month/day, hour/minute/second and the recording interval.
SD card data structure
- When you first insert the card into the meter, it generates a folder on the memory card: HBA01
- When you start the data logger function for the first time, the meter generates a file under the HBA01\ folder with the name HBA01001.xls. The data is then saved to this file. As soon as there are 30,000 data records in this file, a new file is created. This file then has the name HBA01002.xls.
- When 99 files are stored in the HBA01 folder, the machine creates a new folder with the name: HBA02\…
- This results in the following structure:
- HBA01
- HBA01001.xls
- HBA01002.xls
- HBA01099.xls
- HBA02
- HBA02001.xls
- HBA02002.xls
- HBA02099.xls
- HBAXX
Data backup from SD card to PC
- After you have saved data from the meter to the SD card, remove the memory card from its compartment (3-13).
- Insert the SD card into the reader of your computer.
- Turn on the computer and start Microsoft Excel. Now you can open the files on the memory card. Excel then allows further processing (e. g .creating graphics) of the data.
 Settings
While the data logger function is NOT activated in the tester, press the SET key (3-5) for more than 2 seconds. This takes you to the setting menu and you can navigate through the menu with each further press of the SET key.
- Sd F. Format SD card
- dAtE… Setting date/time (year/month/day/hour/minute/second)
- SP-t… Setting the recording interval
- bEEP.. Setting the beeper (ON or OFF)
- dEC… Setting the decimal point format (dot or comma)
- t-CF… Setting the temperature unit (°C or °F)
- rS232… Setting the RS-232 interface (ON or OFF)
- High… Setting the height above sea level in metres
- HighF… Setting the height above sea level in feet
Note: If you do not press any key for 5 seconds, the device automatically exits the setting menu.
SD card format
- If the display shows “Sd F”, you can use the key (3-3) and the key (3-4) to select “yES” or “no”, where “yES” means to format the memory card and “no” means not to format the memory card.
- If you have selected “yES”, you must confirm this with the Enter key (3-2). The display then shows “yES Enter”. You must confirm this again with the Enter key (3- 2). The SD card is now formatted and all existing data on the card is deleted.
Setting the time
- When the display shows “dAtE”, you can set the value with the key (3-3) and the key (3-4) (starting with the year setting). When you have set the value, press the enter key (3-2). Now you can move to the next value. The sequence then is month, day, hour, minute, second.
Note: The value to be set flashes. - When you have set all the values and confirmed with the Enter key (3-2), all the settings are saved. Now you automatically enter the menu “SP-t” to set the recording interval.
Note: The date and time always run in the meter. Therefore, you only need to make the setting once, unless you replace the batteries.
Setting the recording interval
- If the display shows “SP-t”, you can set the value with the key (3-3) and the key (3-4). The sequence is: 5 seconds, 10 seconds, 30 seconds, 60 seconds, 120 seconds, 300 seconds, 600 seconds and Auto.
- After you have selected the desired interval, confirm this with the Enter key (3-2).
Note: “Auto” means that a data record is always saved if the temperature or humidity changes by ±1 °C or ±1 % RH.
Setting the beeper
- When the display shows “bEEP”, you can use the key (3-3) and the key(3- 4) to select “yES” or “no”, where “yES” means that the beeper is ON and each time a value is stored, an acoustic signal sounds; “no” means that the beeper is OFF.
- You can confirm and save your settings with the Enter key (3-2).
Setting the decimal point
The decimal point can be formatted as “dot” or “comma”. Since in the USA the decimal point is a “dot” (e. g. 523.25) and in Europe the decimal point is usually a “comma” (e. g. 523,25), the abbreviations in the display are “USA” for “dot” and “EURO” for “comma”.
- If the display shows “dEC”, you can select “USA” or “EURO” with the key(3-3)and the key (3-4).
- You can confirm and save your settings with the Enter key (3-2).
Setting the temperature unit
- If the display shows “t-CF”, you can use the key (3-3) and the key (3-4) to select “C” or “F”, where “C” stands for degrees Celsius and “F” for degrees Fahrenheit.
- You can confirm and save your settings with the Enter key (3-2).
Setting the RS-232 interface
- If the display shows “rS232”, you can use the key (3-3) and the key (3-4) to select “yES” or “no”, where “yES” means that the RS-232 interface (3-12) is activated and “no” means that the interface (3-12) is deactivated.
- You can confirm and save your settings with the Enter key (3-2).
Setting the elevation in metres (sea level)
For a precise CO2 measurement, it is recommended to enter the ambient elevation, also called “altitude above sea level”.
- When the display shows “High”, you can change the value with the key (3-3) and the key (3-4) .
- You can confirm and save your settings with the Enter key (3-2).
Setting the elevation in feet (sea level)
For a precise CO2 measurement, it is recommended to enter the ambient elevation, also called “altitude above sea level”.
- When the display shows “HighF”, you can change the value with the -key (3-3) and the key (3-4).
- You can confirm and save your settings with the Enter key (3-2).
Power supply
The measuring device must be operated with the 9 V DC plug-in mains adaptor. The connection for the external power supply is located at the bottom of the instrument (3-14). The batteries only serve the purpose of keeping the internal clock and the individual settings.
Battery replacement
When the battery icon appears in the right-hand corner of the display, the batteries should be replaced (see also chapter 14 Disposal).
- Loosen the screw (3-10) of the battery compartment cover (3-9) at the back of the unit.
- Remove the batteries and insert 6 new AAA batteries. Make sure the polarity is correct when inserting the batteries.
- Replace the battery cover (3-9) and secure it with the screw (3-10).
Resetting the system
If you have a problem operating the machine, for example, if the machine stops responding to a keystroke, you can reset the machine to its original state. This is done as follows:
While the machine is switched on, press the RESET key (3-11) gently with a pointed object. The machine is now reset to its original state.
RS-232 PC interface
The device has an RS-232 interface. The data are sent via a 3.5 mm jack plug socket (3-12) when the data interface is set to “ON”. See also chapter 8.7.
The data is a 16-digit data stream.
D15 D14 D13 D12 D11 D10 D9 D8 D7 D6 D5 D4 D3 D2 D1 D0
| D0 | End word |
| D1 & D8 | Display, D1 = LSD, D8 = MSD
Example: If the display shows 1234, D8 is to D1: 00001234 |
| D9 | Decimal point (DP), position from right to left 0 = no DP, 1 = 1 DP, 2 = 2 DP, 3 = 3 DP |
| D10 | Polarity
0 = Positive, 1 = Negative |
| D11 & D12 | Element shown in the display
°C = 01, °F = 02, % RH = 04, ppm=19 |
| D13 | Selection of displays
|
| D14 | 4 |
| D15 | Start word |
RS232 format, 9600, N 8, 1
| Baud rate | 9600 |
| Parity | No |
| Start bit | 8 |
| Stop bit | 1 |
Contact
If you have any questions, suggestions or technical problems, please do not hesitate to contact us. You will find the relevant contact information at the end of this user manual.
Disposal
- For the disposal of batteries in the EU, the 2006/66/EC directive of the European Parliament applies. Due to the contained pollutants, batteries must not be disposed of as household waste. They must be given to collection points designed for that purpose.
- In order to comply with the EU directive 2012/19/EU we take our devices back. We either re-use them or give them to a recycling company which disposes of the devices in line with law.
- For countries outside the EU, batteries and devices should be disposed of in accordance with your local waste regulations.
- If you have any questions, please contact PCE Instruments.
 PCE Instruments’ contact information
Germany
PCE Deutschland GmbH
Im Langel 26
D-59872 Meschede
Deutschland
Tel.: +49 (0) 2903 976 99 0
Fax: +49 (0) 2903 976 99 29 info@pce-instruments.com
www.pce-instruments.com/deutsch
Documents / Resources
 |
PCE INSTRUMENTS PCE-AQD 10 CO2 Data Logger [pdf] User Manual PCE-AQD 10 CO2 Data Logger, PCE-AQD 10, CO2 Data Logger, Data Logger, Logger |